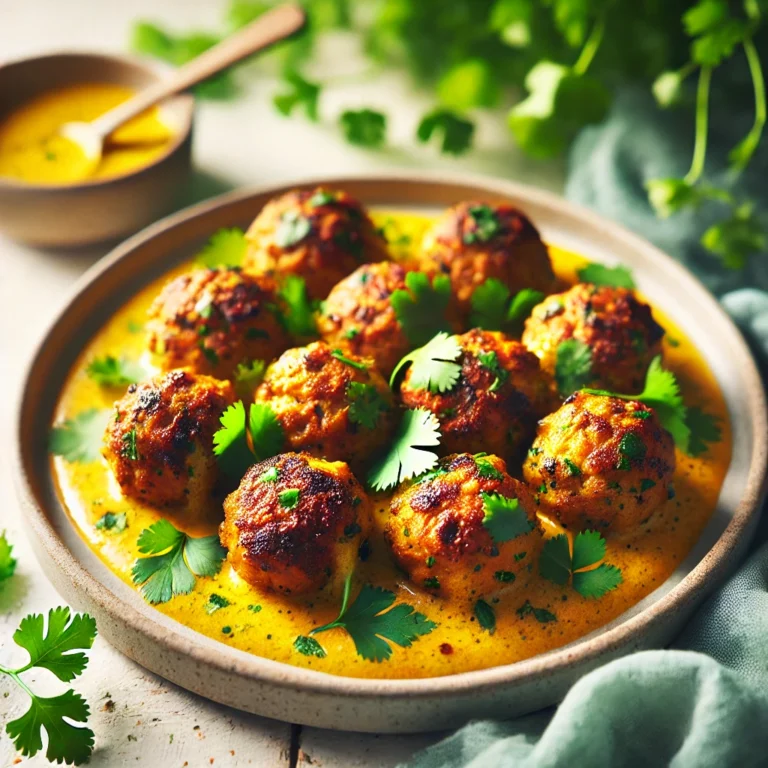
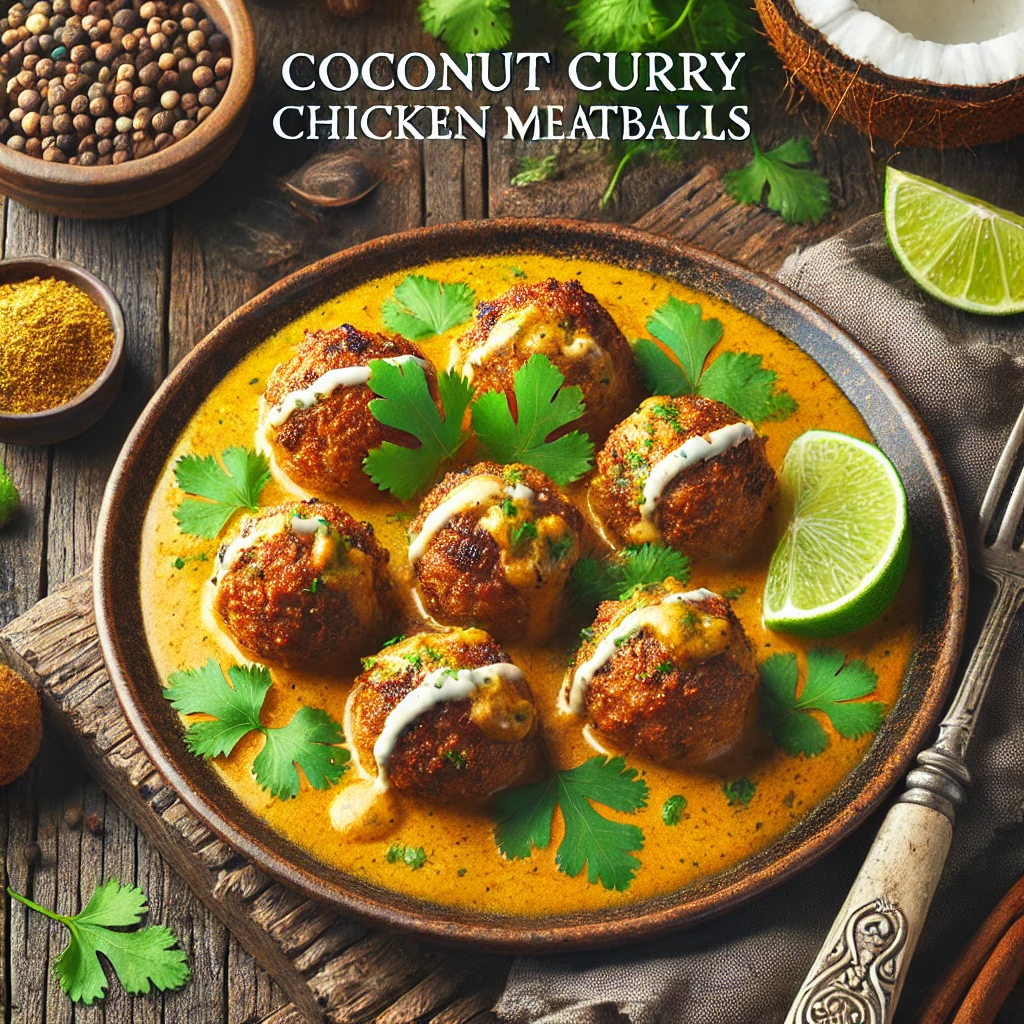
Chicken meatballs are a versatile and delicious protein option that can be used in a variety of dishes. But when you combine the rich flavors of coconut and curry, you elevate the humble meatball to a whole new level. This Coconut Curry Chicken Meatballs Recipe features tender chicken meatballs cooked in a creamy, aromatic coconut curry sauce that’s infused with bold spices. This dish is perfect for a weeknight dinner, served with rice, or even as an appetizer for a gathering. The combination of spices, coconut milk, and chicken creates a comforting, hearty, and flavorful meal that’s both exotic and comforting.
Table of Contents:
The Story Behind Coconut Curry Chicken Meatballs
Coconut Curry Chicken Meatballs bring together the comforting flavors of tender chicken meatballs with the rich, creamy essence of coconut curry. This dish, inspired by Southeast Asian cuisine, is a testament to the beauty of blending spices like turmeric, ginger, and cumin to create a symphony of taste. Perfect for weeknight dinners or special occasions, these meatballs are both flavorful and versatile. Packed with protein and infused with a delightful hint of sweetness from coconut milk, this recipe showcases how simple ingredients can transform into a globally inspired dish.
The Benefits of Making Your Own Coconut Curry Chicken Meatballs
Customization: You can control the spice level by adjusting the amount of curry paste and chili.
Fresh Ingredients: By making the dish from scratch, you ensure that the ingredients are fresh and free from preservatives or additives often found in pre-made sauces.
Control over Fat and Salt Content: You can adjust the amount of oil, coconut milk, and seasoning to suit your dietary preferences.
Versatility: These meatballs are perfect for a variety of occasions. You can serve them as a main course, appetizer, or even as a filling for sandwiches.
Essential Ingredients for the Perfect Coconut Curry Chicken Meatballs
Ground Chicken: The main protein for the meatballs. Ground chicken is lean and holds up well in the curry sauce.
Coconut Milk: The base for the curry sauce, providing a creamy texture and slightly sweet flavor.
Curry Powder or Paste: Curry powder or curry paste adds the rich, aromatic flavors typical of curry dishes. Yellow curry powder is commonly used, but feel free to experiment with red curry paste for an extra kick.
Garlic and Ginger: These aromatic ingredients add depth of flavor to the meatballs and the curry sauce.
Breadcrumbs: To help bind the meatballs together and create the perfect texture.
Egg: Helps to bind the meatball mixture.
Spices: Salt, pepper, cumin, and coriander are typical in curry dishes, adding warmth and complexity.
Fresh Herbs (Optional): Cilantro or mint can be used as a garnish for added flavor and color.
Lime Juice: A squeeze of lime at the end balances the rich coconut curry flavor.
Cultural History of Ingredients
Curry Powder: While curry is most famously associated with Indian cuisine, the spice blend known as curry powder was developed by the British in the 18th century. It is a mixture of turmeric, cumin, coriander, and other spices.
Coconut Milk: Coconut milk is widely used in Southeast Asian and South Asian cooking. It’s made by grating coconut meat and extracting the milk, and it’s used in soups, stews, and curries.
Ground Chicken: Ground poultry, particularly chicken, is often used in meatballs due to its lean nature, allowing it to absorb the flavors of the sauce it’s cooked in.
Equipment You’ll Need
Large mixing bowl for combining meatball ingredients.
Baking sheet or skillet for cooking the meatballs.
Medium saucepan for simmering the curry sauce.
Wooden spoon or spatula for stirring.
Measuring spoons and cups for accuracy.
Meatball scooper or spoon for uniform meatballs.
Step-by-Step Instructions for Coconut Curry Chicken Meatballs
Ingredients for Meatballs:
1 lb (450g) ground chicken
1/2 cup breadcrumbs (preferably panko)
1 large egg
2 cloves garlic, minced
1 teaspoon ginger, grated
1 teaspoon ground cumin
1 teaspoon ground coriander
Salt and pepper to taste
1 tablespoon fresh cilantro, chopped (optional)
Ingredients for Coconut Curry Sauce:
1 can (13.5 oz) coconut milk
2 tablespoons curry powder or curry paste
1 tablespoon olive oil or vegetable oil
1 onion, finely chopped
2 cloves garlic, minced
1 teaspoon fresh ginger, grated
1 cup chicken broth (or vegetable broth)
Salt and pepper to taste
1 tablespoon lime juice (optional)
Fresh cilantro for garnish
Ingredients for Meatballs:
- Preheat the Oven:
Preheat the oven to 400°F (200°C). Line a baking sheet with parchment paper for easy cleanup. - Prepare the Meatballs:
In a large mixing bowl, combine the ground chicken, breadcrumbs, egg, garlic, ginger, cumin, coriander, salt, and pepper. Mix everything together until fully combined, but be careful not to overwork the mixture, as it can make the meatballs tough.
Use a spoon or a meatball scooper to form the mixture into small, bite-sized meatballs (about 1 inch in diameter). Place the meatballs on the prepared baking sheet. - Cook the Meatballs:
Bake the meatballs in the preheated oven for about 15–20 minutes, or until they are golden brown and cooked through. You can also sauté them in a skillet with a little oil if you prefer a crispier texture on the outside. - Make the Coconut Curry Sauce:
While the meatballs are baking, heat the oil in a medium saucepan over medium heat. Add the chopped onion and sauté for 3-4 minutes until softened.
Add the minced garlic and grated ginger to the onions and sauté for another 1–2 minutes until fragrant.
Stir in the curry powder or curry paste, letting it cook for about 30 seconds to release its aromatic oils.
Pour in the coconut milk and chicken broth, stirring to combine. Bring to a simmer and cook for 5-7 minutes, allowing the sauce to thicken slightly. Taste the sauce and adjust the seasoning with salt and pepper. For a little acidity, you can add lime juice. - Combine the Meatballs with the Sauce:
Once the meatballs are cooked, add them to the simmering curry sauce. Gently stir to coat the meatballs with the sauce, and simmer for an additional 5 minutes so the meatballs can absorb some of the flavors. - Serve:
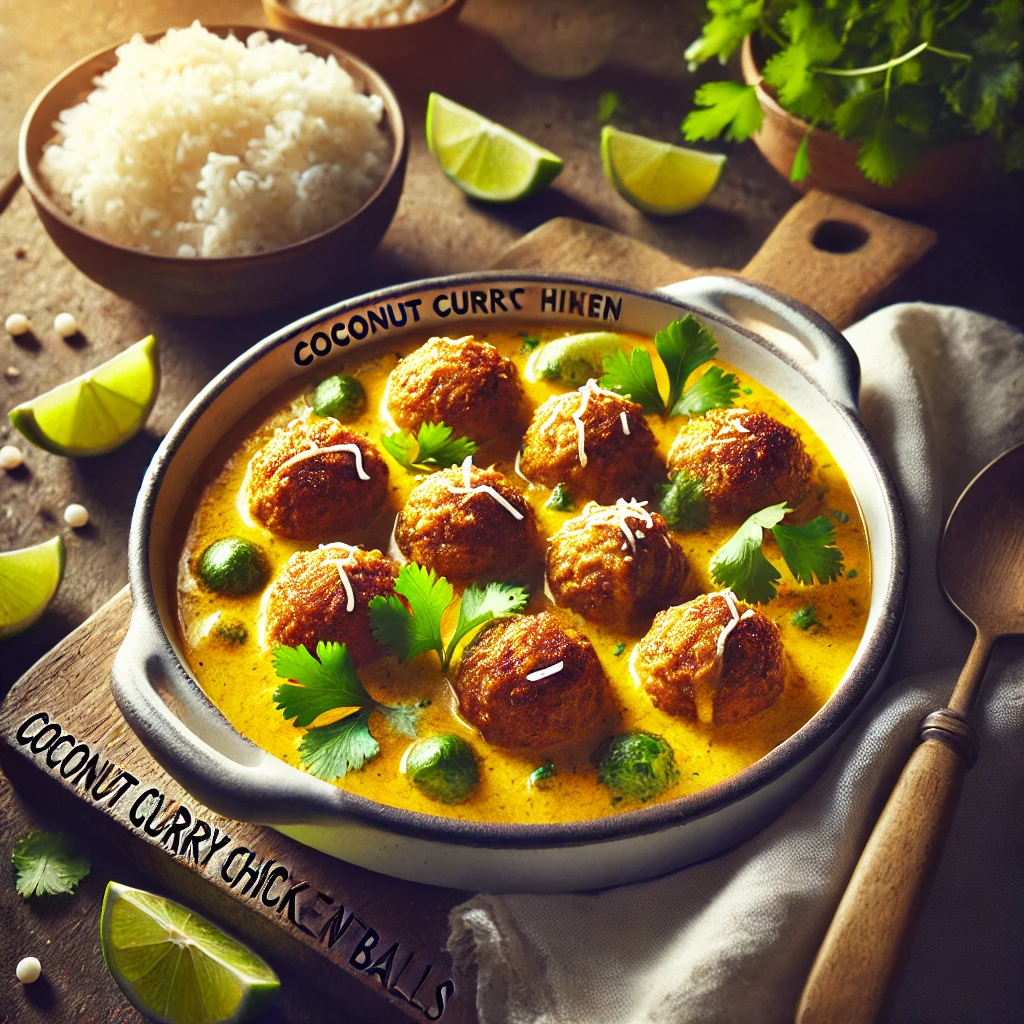
Serve the meatballs over rice or with naan for a full meal. Garnish with fresh cilantro and a squeeze of lime juice for added brightness.
Suggestions for Serving and Storing
Serving: Serve these coconut curry chicken meatballs over steamed jasmine rice or brown rice for a more wholesome meal. You can also pair them with naan bread to soak up the delicious curry sauce.
Storing: Leftovers can be stored in an airtight container in the refrigerator for up to 3 days. Reheat gently on the stovetop with a splash of water or broth to bring back the creaminess of the curry sauce.
Chef Simon’s Tips for Coconut Curry Chicken Meatballs
Spice Level: Adjust the spice level by using mild or spicy curry paste. If you prefer a milder flavor, use curry powder instead.
Coconut Milk Thickness: If you prefer a thinner sauce, add a little more chicken broth or water. For a richer sauce, use full-fat coconut milk.
Crispier Meatballs: If you like crispy meatballs, sear them in a hot skillet before adding them to the sauce.
Emotional and Psychological Impact of Food
This coconut curry chicken meatballs recipe offers both comfort and excitement. The warm, aromatic spices evoke feelings of contentment, while the creamy sauce provides an indulgent experience. The process of making the meatballs and simmering the sauce creates a soothing atmosphere, making this dish not only nourishing but also emotionally satisfying.
Mindful Cooking Techniques
Engage Your Senses: Pay attention to the colors and aromas as you cook the ingredients. The fragrance of garlic, ginger, and curry is a sign that you’re creating something flavorful.
Patience in Simmering: Allow the curry sauce to simmer gently, which will deepen the flavors and make the dish even more comforting.
Tips for Keeping the Recipe Fresh Longer
Freezing: This recipe freezes well. To freeze, place the cooked meatballs in a freezer-safe container, covering them with the curry sauce. Freeze for up to 2 months. Reheat on the stovetop over low heat.
Refrigerating: Store leftovers in an airtight container for up to 3 days. Reheat gently to prevent the meatballs from drying out.
Advanced Culinary Terms and Techniques
Sautéing: A technique where food is cooked quickly in a small amount of fat over high heat, such as when cooking the onions, garlic, and ginger for the sauce. This method brings out the natural sugars in the ingredients, giving them a caramelized depth of flavor.
Simmering: A cooking method where food is cooked gently at a temperature just below boiling. Simmering the curry sauce allows the flavors to meld and the sauce to thicken.
Braising: While not technically used in this recipe, braising is similar to simmering and involves cooking meat in liquid for a longer time to develop tenderness and flavor. This technique is often used in stews and braised dishes.
Healthy Ingredient Alternatives
Ground Turkey: If you want to reduce the fat content, you can substitute ground turkey for ground chicken.
Light Coconut Milk: For a lighter version, use light coconut milk or a combination of coconut milk and vegetable broth.
Gluten-Free Breadcrumbs: For those with gluten sensitivities, substitute regular breadcrumbs with gluten-free breadcrumbs or use crushed rice cakes.
More Serving Ideas
Vegetable Pairings: Serve these meatballs with a side of roasted vegetables like bell peppers, zucchini, or sweet potatoes to make the meal even more nutritious.
Salads: A fresh, crisp salad with a citrusy dressing balances the richness of the curry. Consider a cucumber or mango salad for an extra burst of flavor.
Common Issues and Solutions
Meatballs Falling Apart: If your meatballs fall apart while cooking, try adding a little more breadcrumbs or an extra egg to bind the mixture. You can also chill the meatballs for 20-30 minutes before cooking to help them hold together.
Too Spicy: If your curry is too spicy, balance it out by adding more coconut milk or a dollop of yogurt to tone down the heat.
Too Thick Sauce: If the sauce becomes too thick, simply add more chicken broth or water to reach the desired consistency.
Variations to Try
Vegetarian Version: Replace the chicken with lentils or chickpeas for a vegetarian take on this dish. You can still form the mixture into balls, and they’ll soak up the curry sauce just as well.
Add Vegetables: Consider adding vegetables like spinach, bell peppers, or peas to the curry sauce for additional flavor and texture.
Thai Influence: Use Thai red curry paste, fish sauce, and kaffir lime leaves for a distinctly Thai flavor.
Nutritional Information and Health Benefits
High Protein: Chicken provides a lean source of protein that supports muscle growth and repair.
Rich in Healthy Fats: Coconut milk contains medium-chain triglycerides (MCTs), which are easily digested and provide an energy boost.
Vitamins and Minerals: Ingredients like garlic, ginger, and cilantro offer antioxidant and anti-inflammatory properties that contribute to overall health.
Low Carb: This dish is naturally low in carbohydrates, making it suitable for low-carb and ketogenic diets.
The Art of Pairing Coconut Curry Chicken Meatballs
Wine Pairing: A crisp white wine, such as Sauvignon Blanc or a dry Riesling, complements the creamy richness of the coconut curry. If you prefer red wine, a light Pinot Noir works well.
Beer Pairing: A light lager or an IPA can also balance the spices and creaminess of the dish.
Weather and Recipe Outcome
This dish is perfect for cooler weather when you’re craving something hearty and comforting. The warmth of the curry, combined with the creamy coconut sauce, provides both nourishment and satisfaction. On a chilly evening, this dish will leave you feeling cozy and content.
Other Recipes to Explore
If you loved these coconut curry chicken meatballs, you might enjoy these other exciting recipes:
Spicy Chicken Tikka Meatballs
Lemongrass Chicken Skewers
Thai Green Curry Shrimp
Indian Butter Chicken Meatballs
Focus on Tools and Equipment
Meatball Scooper: Using a meatball scooper helps to ensure uniform meatballs, making them cook evenly and look professional.
Non-stick Skillet: Ideal for browning the meatballs before adding them to the sauce to prevent them from sticking and breaking apart.
Immersion Blender: If you prefer a smoother curry sauce, an immersion blender can be used to purée the sauce.
Frequently Asked Questions
Q1: Can I make the meatballs ahead of time?
A1: Yes, you can form and freeze the meatballs ahead of time. Just place them on a baking sheet, freeze, then transfer to a freezer-safe bag. When ready to cook, bake or pan-fry them from frozen, then add them to the sauce.
Q2: Can I make the coconut curry sauce without coconut milk?
A2: You can substitute coconut milk with heavy cream, but this will change the flavor and texture. Coconut milk gives the curry a distinct creamy and slightly sweet flavor that’s difficult to replicate with other dairy products.
Q3: How do I know when the meatballs are cooked through?
A3: The meatballs should be golden brown on the outside and have an internal temperature of 165°F (74°C). If you don’t have a meat thermometer, you can cut one open to ensure it’s no longer pink inside.
Conclusion
The Coconut Curry Chicken Meatballs are an exciting and flavorful fusion dish that’s easy to make and even easier to enjoy. With tender, flavorful meatballs and a rich, creamy coconut curry sauce, this recipe is perfect for a cozy meal with a bit of an exotic flair. Whether you’re cooking for your family or entertaining guests, this dish is sure to impress and satisfy. With Chef Simon’s tips, you can easily customize the flavors to your liking, making it a truly versatile recipe for any occasion.
Thank you for visiting SqueezyRecipes! We’re dedicated to making cooking enjoyable and accessible for everyone, regardless of your skill level. Chef Simon is always ready to share the best recipes that bring a creative touch to your daily meals. With each visit, you’ll discover new recipes and innovative ideas that cater to every occasion. Don’t miss out on exploring SqueezyRecipes for the latest delicious dishes, and feel free to leave your feedback and share your experiences with the recipes you’ve tried. Cooking together makes everything better!