Discover Easy and Flavorful Recipes for Every Meal!

Cuisinart Vanilla Ice Cream Recipe: Creamy, Smooth, and Delicious

Vanilla ice cream

Introduction
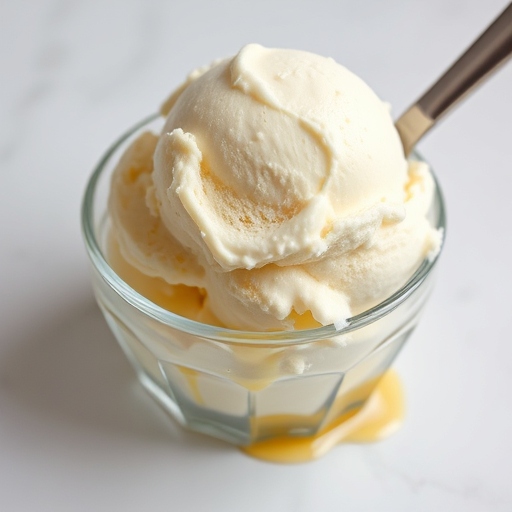
There’s something magical about the simplicity of vanilla ice cream. Smooth, creamy, and bursting with natural flavor, it’s the ultimate comfort dessert. With a Cuisinart ice cream maker, you can skip store-bought options and whip up a batch of this timeless treat right in your kitchen. Not only is it fresher and more flavorful, but it also allows you to customize ingredients to suit your taste.


The Story Behind Vanilla Ice Cream

Vanilla ice cream traces its roots back to the royal courts of Europe, where it was served as a luxury treat for the elite. The simplicity of its ingredients—cream, sugar, and vanilla—belies its depth of flavor. Today, it’s a dessert that transcends cultures and occasions, pairing perfectly with everything from warm pie to fresh berries. Homemade vanilla ice cream brings back the nostalgia of summer days, family gatherings, and pure indulgence.


The Benefits of Making Your Own Vanilla Ice Cream

  1. Superior Flavor: Freshly churned ice cream boasts a richness unmatched by commercial brands.
  2. Control Over Ingredients: Avoid artificial additives and tailor sweetness to your preference.
  3. Customizable Base: Use it as a canvas for endless mix-ins or flavor variations.
  4. Family Activity: Making ice cream is a fun project that everyone can enjoy.

Essential Ingredients for the Perfect Vanilla Ice Cream

  • 2 cups heavy cream
  • 1 cup whole milk
  • ¾ cup granulated sugar
  • 1 tablespoon pure vanilla extract
  • Pinch of salt

Cultural History of Ingredients

  • Vanilla: Originating from the orchid plant, vanilla was first cultivated by the Totonac people of Mexico and later prized by Europeans.
  • Heavy Cream: Known for its luxurious texture, cream has been a key ingredient in desserts since ancient times.
  • Sugar: A universally loved sweetener, sugar enhances the natural flavors in ice cream.

Equipment You’ll Need

  • Cuisinart ice cream maker
  • Mixing bowl
  • Whisk
  • Measuring cups and spoons
  • Spatula

Step-by-Step Instructions for Cuisinart Vanilla Ice Cream

Step 1: Prepare the Ice Cream Base

  1. In a mixing bowl, whisk together heavy cream, whole milk, sugar, vanilla extract, and a pinch of salt until the sugar dissolves.
  2. Cover the mixture and refrigerate for 1–2 hours or until thoroughly chilled.

Step 2: Assemble Your Cuisinart Ice Cream Maker

  1. Ensure the freezer bowl has been frozen for at least 24 hours.
  2. Set up the ice cream maker according to the manufacturer’s instructions.

Step 3: Churn the Ice Cream

  1. Pour the chilled mixture into the frozen bowl of the Cuisinart ice cream maker.
  2. Turn on the machine and churn for 15–20 minutes, or until the mixture reaches a soft-serve consistency.

Step 4: Freeze for Firmer Texture

  1. For a firmer texture, transfer the churned ice cream to an airtight container.
  2. Freeze for 2–4 hours before serving.

Suggestions for Serving and Storing

  • Serving Ideas:
    • Top with fresh fruit, hot fudge, or crushed cookies.
    • Use as a filling for ice cream sandwiches.
  • Storage Tips:
    • Store in an airtight container in the freezer for up to 2 weeks.
    • Cover with plastic wrap to prevent ice crystals from forming.

Chef Simon’s Tips for Vanilla Ice Cream

  1. Chill Thoroughly: Ensure the base is well-chilled before churning for the best texture.
  2. Use Quality Vanilla: Pure vanilla extract or vanilla bean paste enhances flavor.
  3. Don’t Overfill: Avoid overloading the ice cream maker, as this affects churning efficiency.

Emotional and Psychological Impact of Food

Vanilla ice cream is often associated with comfort and joy. Its creamy texture and familiar flavor bring a sense of nostalgia and happiness, making it the perfect treat for celebrations or a simple pick-me-up.


Mindful Cooking Techniques

  • Taste the Base: Before chilling, taste the mixture to ensure it’s perfectly balanced.
  • Savor the Process: Appreciate each step, from whisking the base to watching it transform in the ice cream maker.

Tips for Keeping the Recipe Fresh Longer

  • Always use fresh cream and milk for the best flavor and texture.
  • Store in a tightly sealed container to prevent freezer burn.

Advanced Culinary Terms and Techniques

  • Churn: The process of incorporating air into the mixture while freezing to create a smooth texture.
  • Overrun: The amount of air incorporated into ice cream during churning, affecting creaminess.

Healthy Ingredient Alternatives

  1. Low-Fat Option: Use half-and-half instead of heavy cream.
  2. Sugar Substitutes: Replace sugar with honey or a low-calorie sweetener like erythritol.
  3. Dairy-Free: Swap milk and cream with coconut milk or almond milk for a vegan version.

More Serving Ideas

  • Pair with apple pie or brownies for a classic dessert.
  • Serve in waffle cones for a fun, nostalgic treat.

Common Issues and Solutions

  • Icy Texture: Ensure the base is chilled thoroughly before churning.
  • Too Soft: Freeze longer after churning for a firmer consistency.
  • Weak Flavor: Use high-quality vanilla extract or fresh vanilla beans.

Variations to Try

  1. Vanilla Bean Ice Cream: Add the seeds from one vanilla bean for an elevated flavor.
  2. Chocolate Chip Vanilla: Mix in mini chocolate chips during the last 5 minutes of churning.
  3. Caramel Swirl: Add a swirl of caramel sauce after churning.

Nutritional Information and Health Benefits

  • Calories: ~200 per ½ cup serving
  • Fats: Provides energy and enhances flavor absorption.
  • Calcium: Supports bone health.

The Art of Pairing Vanilla Ice Cream

  • With Desserts: Pairs beautifully with warm cobblers, chocolate cake, or fresh fruit.
  • With Beverages: Float a scoop in root beer or cold brew coffee for a refreshing treat.

Weather and Recipe Outcome

Warm weather can speed up the melting process, so serve immediately for the best texture. During colder months, allow the ice cream to soften slightly before scooping.


Other Ice Cream Recipes to Explore

  • Chocolate Fudge Ice Cream
  • Strawberry Basil Sorbet
  • Coffee Toffee Ice Cream

Focus on Tools and Equipment

  • Freezer Bowl: Ensure it’s fully frozen before use for optimal results.
  • Airtight Container: Essential for storing homemade ice cream to maintain freshness.

Frequently Asked Questions (with answers)

Q: Can I double the recipe?
A: It’s best to make one batch at a time, as overfilling the machine can affect consistency.

Q: How do I achieve a richer flavor?
A: Replace some of the milk with additional cream or add an extra teaspoon of vanilla extract.

Q: Can I use a different brand of ice cream maker?
A: Yes, this recipe works with most ice cream makers, but follow the manufacturer’s instructions.


Conclusion

With a Cuisinart ice cream maker, crafting homemade vanilla ice cream is a breeze. This recipe delivers the perfect balance of creaminess and sweetness, making it an ideal base for endless flavor experiments. Treat yourself and your loved ones to a bowl of this classic dessert, and savor the joy of homemade indulgence!

Homemade Sandwich Bread Recipe: Soft, Fluffy, and Easy

Sandwich Bread

Introduction
Few things in life compare to the aroma of freshly baked sandwich bread wafting through your kitchen. Soft, fluffy, and versatile, homemade sandwich bread is the ultimate staple for countless meals, from classic PB&J to gourmet deli creations. This recipe is designed to deliver a tender crumb and a perfect crust, making it a go-to choice for both novice and seasoned bakers.


The Story Behind Sandwich Bread

The humble sandwich bread has been a cornerstone of human sustenance for centuries, evolving from ancient flatbreads to the modern loaves we know today. Its rise in popularity during the 20th century coincided with industrial advancements in bread slicing, forever changing how we consume this beloved staple. Baking your own sandwich bread is a nod to tradition, offering superior flavor and texture compared to store-bought options.


The Benefits of Making Your Own Sandwich Bread

  1. Healthier Ingredients: Control over what goes into your bread, avoiding preservatives and unnecessary additives.
  2. Superior Flavor: Freshly baked bread has a rich, unparalleled taste.
  3. Cost-Effective: Homemade bread is often more economical than store-bought varieties.
  4. Customizable: Adjust sweetness, whole grains, or add seeds and spices for variety.

Essential Ingredients for the Perfect Sandwich Bread

  • 3 ½ cups all-purpose or bread flour
  • 2 tablespoons sugar
  • 1 ½ teaspoons salt
  • 1 packet (2 ¼ teaspoons) instant yeast
  • 1 cup warm water (110°F/43°C)
  • ½ cup warm milk (110°F/43°C)
  • 2 tablespoons unsalted butter, softened

Cultural History of Ingredients

  • Flour: A global staple, flour has been milled for thousands of years to sustain civilizations.
  • Yeast: One of the oldest microorganisms used in baking, yeast has transformed bread into a soft, leavened marvel.
  • Milk: Adds richness and tenderness to bread, a technique mastered in European baking traditions.

Equipment You’ll Need

  • Mixing bowls
  • Measuring cups and spoons
  • Stand mixer with a dough hook (optional)
  • 9×5-inch loaf pan
  • Kitchen thermometer
  • Plastic wrap or clean kitchen towel

Step-by-Step Instructions for Sandwich Bread

Step 1: Activate the Yeast

  1. In a small bowl, combine warm water, warm milk, sugar, and yeast.
  2. Let it sit for 5–10 minutes until frothy, signaling that the yeast is active.

Step 2: Mix the Dough

  1. In a large mixing bowl, combine flour and salt.
  2. Add the yeast mixture and softened butter.
  3. Mix until a shaggy dough forms.

Step 3: Knead the Dough

  1. Transfer the dough to a floured surface or use a stand mixer with a dough hook.
  2. Knead for 8–10 minutes until the dough is smooth and elastic.

Step 4: First Rise

  1. Place the dough in a greased bowl, cover with plastic wrap or a towel, and let it rise in a warm place for 1–1.5 hours, or until doubled in size.

Step 5: Shape the Dough

  1. Punch down the dough to release air.
  2. Shape it into a loaf and place it into a greased 9×5-inch loaf pan.

Step 6: Second Rise

  1. Cover the pan and let the dough rise again for 30–45 minutes, or until it crowns about 1 inch above the pan.

Step 7: Bake the Bread

  1. Preheat your oven to 375°F (190°C).
  2. Bake the bread for 30–35 minutes, or until golden brown and the internal temperature reaches 190°F (88°C).

Step 8: Cool and Slice

  1. Remove the bread from the pan and let it cool completely on a wire rack before slicing.

Suggestions for Serving and Storing

  • Serving Ideas:
    • Use it for sandwiches, toast, or French toast.
    • Pair it with soups or salads for a complete meal.
  • Storage Tips:
    • Store in an airtight container at room temperature for up to 4 days.
    • Freeze slices in a zip-top bag for up to 3 months.

Chef Simon’s Tips for Sandwich Bread

  1. Check Your Yeast: Ensure your yeast is active by testing it with warm water and sugar.
  2. Measure Accurately: Weigh flour for precision, as too much can lead to dense bread.
  3. Keep Dough Moist: Cover with a damp towel during rising to prevent a dry crust.

Emotional and Psychological Impact of Food

Baking bread at home fosters a sense of accomplishment and connection to tradition. The process of kneading and shaping dough can be meditative, while the scent of freshly baked bread evokes feelings of warmth and comfort.


Mindful Cooking Techniques

  • Focus on Texture: Pay attention to the dough’s elasticity during kneading.
  • Savor the Process: Enjoy the tactile nature of working with dough and the transformation it undergoes.

Tips for Keeping the Recipe Fresh Longer

  • Wrap the cooled loaf in plastic wrap and store it in a bread box.
  • Avoid refrigerating, as it can dry out the bread.

Advanced Culinary Terms and Techniques

  • Autolyse: Allowing the flour and water to rest before kneading for improved gluten development.
  • Windowpane Test: Stretching a piece of dough to check for proper gluten formation.

Healthy Ingredient Alternatives

  1. Whole Grain: Swap half the flour for whole wheat flour.
  2. Low Sugar: Reduce sugar for a less sweet loaf.
  3. Vegan Option: Replace milk with plant-based milk and butter with coconut oil or margarine.

More Serving Ideas

  • Make garlic bread by brushing slices with butter and garlic before toasting.
  • Create gourmet sandwiches with avocado, smoked turkey, and sprouts.

Common Issues and Solutions

  • Dense Bread: Knead longer to develop gluten or use fresh yeast.
  • Crust Too Hard: Cover with foil halfway through baking.
  • Uneven Rising: Ensure dough rises in a draft-free, warm environment.

Variations to Try

  1. Herb Bread: Add dried rosemary and thyme for a savory twist.
  2. Sweet Bread: Incorporate raisins and cinnamon for a breakfast loaf.
  3. Seeded Loaf: Sprinkle sesame, sunflower, or flax seeds on top before baking.

Nutritional Information and Health Benefits

  • Calories: ~120 per slice (varies with ingredients)
  • Carbs: Excellent source of energy for daily activities.
  • Fiber: Whole grain versions enhance fiber content, aiding digestion.

The Art of Pairing Sandwich Bread

  • With Beverages: Coffee, tea, or a glass of milk complement this bread beautifully.
  • With Toppings: Butter, jam, or hummus elevate its natural flavors.

Weather and Recipe Outcome

Humidity and temperature can affect dough rising times. Adjust by finding a warm, stable environment or extending proofing times on cooler days.


Other Bread Recipes to Explore

  • Sourdough Loaf
  • Focaccia
  • Brioche

Focus on Tools and Equipment

  • Thermometer: Ensures liquid is at the right temperature for yeast activation.
  • Loaf Pan: Shapes the dough into a perfect rectangle for sandwiches.

Frequently Asked Questions (with answers)

Q: Can I use bread flour instead of all-purpose flour?
A: Yes! Bread flour enhances elasticity and structure, making it ideal for sandwich bread.

Q: Can I make this recipe gluten-free?
A: Substitute with gluten-free flour blends, but results may vary in texture.

Q: How can I make the crust softer?
A: Brush the loaf with melted butter immediately after baking.


Conclusion

Homemade Sandwich Bread is a versatile, wholesome recipe that brings joy and nourishment to your table. Whether you’re a seasoned baker or trying your hand for the first time, this recipe promises a satisfying experience and delicious results. Bake a loaf today, and rediscover the simple pleasure of fresh, homemade bread!

Easy Rotel Dip Recipe: Creamy, Spicy, and Crowd-Pleasing

Rotel dip

Introduction
Rotel Dip is a creamy, cheesy, and slightly spicy dish perfect for parties, game days, or casual get-togethers. Made with just a handful of ingredients, including Rotel tomatoes, cheese, and ground meat, this crowd-pleaser is quick to whip up and endlessly versatile. Whether served with tortilla chips, crackers, or veggies, Rotel Dip guarantees smiles all around.


The Story Behind Rotel Dip

Rotel Dip is a Southern classic born from the beloved Rotel brand of diced tomatoes and green chilies. First popularized in the mid-20th century, this recipe became a hit due to its simplicity and bold flavor. Over the years, it has cemented its place at potlucks and tailgate parties, offering a creamy, zesty experience that complements almost any snack.


The Benefits of Making Your Own Rotel Dip

  1. Quick and Easy: With minimal prep and cook time, it’s perfect for last-minute gatherings.
  2. Customizable: Adjust the spice level, meat choice, or cheese variety to suit your taste.
  3. Affordable: Made with budget-friendly ingredients, it’s an economical crowd-feeder.
  4. Homemade Freshness: Skip preservatives by using fresh ingredients.

Essential Ingredients for the Perfect Rotel Dip

  • 1 pound ground beef, sausage, or turkey (your choice of protein)
  • 1 (10-ounce) can Rotel diced tomatoes with green chilies
  • 16 ounces Velveeta cheese, cubed
  • Optional spices: ½ teaspoon garlic powder, ½ teaspoon onion powder
  • Optional add-ins: Black beans, corn, or jalapeños

Cultural History of Ingredients

  • Rotel Tomatoes: Introduced in the 1940s, these diced tomatoes with green chilies have become a pantry staple in Tex-Mex cooking.
  • Velveeta Cheese: A product of the 1920s, Velveeta is prized for its creamy, meltable consistency.
  • Ground Meat: A versatile protein option, it adds heartiness to the dip and absorbs the spices beautifully.

Equipment You’ll Need

  • Large skillet or saucepan
  • Wooden spoon or spatula
  • Slow cooker (optional, for keeping the dip warm)
  • Serving bowl

Step-by-Step Instructions for Rotel Dip

Step 1: Cook the Protein

  1. Heat a large skillet over medium heat.
  2. Add ground meat and cook until browned, breaking it up with a wooden spoon.
  3. Drain excess fat and set aside.

Step 2: Combine Ingredients

  1. In the same skillet, add the Velveeta cheese cubes and the can of Rotel tomatoes (including juices).
  2. Stir continuously over low heat until the cheese melts and combines with the tomatoes.

Step 3: Add Meat and Seasoning

  1. Return the cooked meat to the skillet.
  2. Mix in garlic powder, onion powder, or any additional spices you like.

Step 4: Serve Hot

  1. Transfer the dip to a serving bowl or slow cooker set on “warm.”
  2. Serve with tortilla chips, crackers, or veggie sticks.

Suggestions for Serving and Storing

  • Serving Ideas:
    • Pair with tortilla chips for a classic combination.
    • Use as a topping for baked potatoes or nachos.
    • Add to tacos or burritos for extra creaminess.
  • Storage Tips:
    • Store leftovers in an airtight container in the refrigerator for up to 3 days.
    • Reheat in the microwave or on the stove, adding a splash of milk to maintain the creamy texture.

Chef Simon’s Tips for Rotel Dip

  1. Use Fresh Spices: Freshly ground black pepper or crushed garlic elevates the flavors.
  2. Double the Recipe: For larger gatherings, this dip is always a hit, so make extra!
  3. Slow Cooker Hack: Keep your dip warm throughout the event by transferring it to a slow cooker.

Emotional and Psychological Impact of Food

There’s something comforting about a warm, cheesy dip shared with friends and family. Rotel Dip not only satisfies cravings but also creates an inviting atmosphere that brings people together.


Mindful Cooking Techniques

  • Focus on the melting process to avoid burning the cheese.
  • Taste and adjust seasonings as you cook for the perfect balance.
  • Enjoy the aromas of cheese and spices blending into a comforting dish.

Tips for Keeping the Recipe Fresh Longer

  • Store any leftover dip in a sealed container to lock in freshness.
  • Add a splash of milk when reheating to restore creaminess.
  • Freeze extra portions for up to one month in freezer-safe bags.

Advanced Culinary Terms and Techniques

  • Emulsification: The process of melting cheese and blending it with Rotel tomatoes ensures a smooth, creamy dip.
  • Layering Flavors: Cooking the ground meat with spices before adding to the cheese mixture creates depth.

Healthy Ingredient Alternatives

  1. Low-Fat Option: Use reduced-fat cheese and ground turkey for a lighter version.
  2. Dairy-Free Version: Substitute Velveeta with a plant-based cheese alternative.
  3. Vegetarian-Friendly: Replace meat with black beans or roasted vegetables.

More Serving Ideas

  • Top with fresh jalapeños, diced onions, or cilantro for added flavor.
  • Serve alongside guacamole and salsa for a Tex-Mex dip trio.
  • Add a dollop of sour cream on top for a cool contrast to the heat.

Common Issues and Solutions

  • Dip Too Thick: Add a splash of milk or chicken broth to thin it out.
  • Cheese Clumps: Ensure the heat is low and stir consistently to avoid uneven melting.
  • Too Spicy: Balance the heat by adding more cheese or a splash of cream.

Variations to Try

  1. Chili Rotel Dip: Add chili seasoning and beans for a heartier version.
  2. Spicy Bacon Rotel Dip: Mix in cooked, crumbled bacon and extra jalapeños.
  3. Veggie Rotel Dip: Include sautéed mushrooms, bell peppers, or zucchini for added texture.

Nutritional Information and Health Benefits

  • Calories: Approximately 200 per serving
  • Protein: High due to ground meat and cheese
  • Calcium: Cheese provides a good source of calcium

The Art of Pairing Rotel Dip

  • With Drinks: Serve alongside margaritas, beer, or iced tea.
  • With Snacks: Pair with crunchy chips or soft pretzels.
  • With Meals: Use as a sauce for enchiladas or a topping for burgers.

Weather and Recipe Outcome

Rotel Dip shines at gatherings regardless of the season, but its warm, gooey texture makes it particularly comforting during colder months.


Other Dips to Explore

  • Spinach Artichoke Dip
  • Buffalo Chicken Dip
  • Queso Blanco
  • Seven-Layer Dip

Focus on Tools and Equipment

  • Skillet: For cooking meat and melting cheese evenly.
  • Slow Cooker: Keeps the dip warm and ready to serve.
  • Mixing Spoon: Ensures the ingredients combine thoroughly.

Frequently Asked Questions (with answers)

Q: Can I make Rotel Dip ahead of time?
A: Yes, prepare the dip and refrigerate. Reheat before serving.

Q: How do I prevent the cheese from burning?
A: Cook on low heat and stir frequently to prevent sticking.

Q: Can I freeze Rotel Dip?
A: Yes, freeze in an airtight container for up to a month. Thaw and reheat gently.


Conclusion

Rotel Dip is a simple yet irresistible dish that combines cheesy, spicy, and savory flavors into one bowl of deliciousness. Perfect for parties, movie nights, or casual snacking, this recipe is a must-try for any occasion. Once you’ve mastered this classic dip, you’ll find yourself reaching for it time and time again!

Delicious Coffee Loophole Recipe

Coffee Loophole

Introduction
The Coffee Loophole is a whimsical, energizing recipe that feels like a cross between dessert and a caffeine fix. Imagine a rich, creamy coffee drink layered with unexpected ingredients that enhance the flavor and give your day a delicious boost. This recipe is perfect for coffee enthusiasts looking to elevate their daily cup or surprise guests with a creative twist on the classic brew.


The Story Behind the Coffee Loophole

The Coffee Loophole was born out of a desire to combine comfort and innovation. While traditional coffee is straightforward, this recipe takes inspiration from café culture and the art of crafting drinks with depth and character. The name “Loophole” playfully suggests finding a sneaky, indulgent way to enjoy coffee as both a drink and a treat.


The Benefits of Making Your Own Coffee Loophole

  1. Creative Freedom: Customize ingredients to match your mood or dietary preferences.
  2. Cost-Effective: Skip expensive coffee shop drinks by making this at home.
  3. Energizing and Satisfying: Combines caffeine with creamy textures for a fulfilling experience.
  4. Perfect for Sharing: Impress friends and family with your barista-level skills.

Essential Ingredients for the Perfect Coffee Loophole

  • 1 cup freshly brewed coffee (medium roast for balance)
  • ¼ cup heavy cream or plant-based alternative
  • 2 tablespoons sweetened condensed milk
  • 1 teaspoon vanilla extract
  • Optional toppings: Whipped cream, caramel drizzle, chocolate shavings, or cinnamon

Cultural History of Ingredients

  • Coffee: Originating in Ethiopia, coffee has become a global staple for its rich aroma and energizing properties.
  • Sweetened Condensed Milk: A key ingredient in many international desserts, it adds a creamy sweetness to beverages.
  • Vanilla: Harvested from orchids, vanilla’s warm flavor elevates the drink to gourmet status.

Equipment You’ll Need

  • Coffee maker or French press
  • Small saucepan (for heating ingredients)
  • Whisk or frother
  • Serving glass or mug

Step-by-Step Instructions for the Coffee Loophole

Step 1: Brew the Coffee

  1. Use your preferred method to brew a cup of medium-roast coffee.
  2. Set aside while preparing the creamy base.

Step 2: Create the Creamy Base

  1. In a small saucepan, combine the heavy cream, sweetened condensed milk, and vanilla extract.
  2. Heat on low, whisking gently, until warmed and slightly frothy.

Step 3: Assemble the Drink

  1. Pour the brewed coffee into a serving glass or mug.
  2. Slowly add the creamy mixture, stirring gently to combine.

Step 4: Add Toppings

  1. Top with whipped cream, a drizzle of caramel, or a sprinkle of cinnamon for extra flair.
  2. Serve immediately and enjoy!

Suggestions for Serving and Storing

  • Serving Ideas:
    • Pair with buttery pastries or chocolate desserts.
    • Serve in a clear glass to showcase the beautiful layers.
  • Storage Tips:
    • The creamy base can be prepared ahead of time and stored in the refrigerator for up to 3 days.
    • Reheat gently before combining with coffee.

Chef Simon’s Tips for the Coffee Loophole

  1. Experiment with Flavors: Add a dash of hazelnut or almond extract for a nutty twist.
  2. Use Cold Brew: For a refreshing summer version, swap hot coffee for cold brew.
  3. Spice It Up: Sprinkle nutmeg or cardamom for an aromatic kick.

Emotional and Psychological Impact of Food

The Coffee Loophole embodies indulgence and creativity, offering a comforting ritual that energizes your mind and uplifts your spirit. The blend of creamy textures and robust coffee provides both a physical and emotional pick-me-up.


Mindful Cooking Techniques

  • Savor the aroma of freshly brewed coffee as you prepare the drink.
  • Focus on whisking the cream mixture gently to achieve the perfect frothy texture.
  • Serve with intention, appreciating the visual appeal of the finished product.

Tips for Keeping the Recipe Fresh Longer

  • Store unused cream mixture in an airtight container in the fridge.
  • Reheat over low heat, avoiding a boil to preserve the creamy texture.
  • Brew fresh coffee each time for the best flavor.

Advanced Culinary Terms and Techniques

  • Frothing: Incorporating air into the cream mixture creates a light, foamy texture.
  • Layering: Pouring the creamy base slowly over coffee preserves distinct layers for visual appeal.

Healthy Ingredient Alternatives

  1. Lower-Calorie Option: Use skim milk or almond milk instead of heavy cream.
  2. Sugar-Free Version: Replace sweetened condensed milk with a sugar-free alternative.
  3. Dairy-Free: Opt for coconut cream or oat milk for a plant-based version.

More Serving Ideas

  • Garnish with edible flowers for a sophisticated touch.
  • Serve in a bowl with a side of biscotti for a European café vibe.
  • Add a shot of espresso for a stronger kick.

Common Issues and Solutions

  • Drink Too Sweet: Adjust by reducing the amount of condensed milk.
  • Cream Separation: Whisk continuously while heating to prevent curdling.
  • Overpowering Coffee: Choose a medium roast for a balanced flavor profile.

Variations to Try

  1. Mocha Loophole: Add a tablespoon of cocoa powder to the creamy base.
  2. Pumpkin Spice Loophole: Incorporate pumpkin spice seasoning for a fall twist.
  3. Iced Loophole: Chill the coffee and serve over ice with the creamy base.

Nutritional Information and Health Benefits

  • Calories: Approximately 200 per serving
  • Caffeine: Provides a natural energy boost
  • Calcium: Derived from the creamy ingredients, supporting bone health

The Art of Pairing the Coffee Loophole

  • With Breakfast: Pair with buttery croissants or oatmeal cookies.
  • With Snacks: Complement with salted caramel popcorn or chocolate-covered almonds.
  • With Desserts: Serve alongside fruit tarts or cheesecakes.

Weather and Recipe Outcome

The Coffee Loophole adapts beautifully to any season—served hot in winter for coziness or iced in summer for refreshment.


Other Coffee Recipes to Explore

  • Affogato
  • Vietnamese Egg Coffee
  • Irish Coffee
  • Café au Lait

Focus on Tools and Equipment

  • Whisk: For frothing and blending the creamy base.
  • Clear Glass: Showcases the drink’s aesthetic layers.
  • Measuring Spoons: Ensures precise flavor balance.

Frequently Asked Questions (with answers)

Q: Can I make this recipe caffeine-free?
A: Yes, use decaffeinated coffee without compromising flavor.

Q: How can I make it less sweet?
A: Reduce the condensed milk or replace it with unsweetened cream.

Q: What’s the best coffee to use?
A: A medium roast balances well with the creamy base, but feel free to experiment.


Conclusion

The Coffee Loophole is a delightful escape from routine, merging creativity with comfort in every sip. Whether you’re indulging solo or sharing with loved ones, this recipe adds a touch of elegance to your coffee ritual. Give it a try and let your taste buds explore the magic!

Easy Homemade Smoked Salmon Recipe

Smoked salmon

Introduction
Making your own smoked salmon at home is an artful way to create a luxurious dish that rivals store-bought varieties. With its rich, smoky flavor and delicate texture, this recipe transforms a simple fish fillet into an impressive centerpiece for brunches, appetizers, or gourmet meals.

Whether you’re a seasoned home chef or a beginner looking to try something new, this homemade smoked salmon recipe will guide you through the process step-by-step.


The Story Behind Homemade Smoked Salmon

Smoked salmon has been a staple in culinary traditions worldwide, from the Nordic regions to North America. Historically, smoking was used to preserve fish for longer periods, especially in colder climates. Over time, it evolved into a delicacy enjoyed for its distinctive flavor. This recipe allows you to recreate the essence of traditional methods with a modern twist, offering a satisfying experience from preparation to the first bite.


The Benefits of Making Your Own Smoked Salmon

  1. Customization: Adjust flavors to your liking with different wood chips, seasonings, and brining methods.
  2. Freshness Guaranteed: Homemade smoked salmon is free from preservatives and artificial flavors.
  3. Cost-Effective: High-quality smoked salmon can be expensive; making it at home is more economical.
  4. Satisfaction: There’s a unique joy in crafting this luxurious dish yourself.

Essential Ingredients for the Perfect Smoked Salmon

  • 1 lb fresh salmon fillet (skin-on)
  • ¼ cup kosher salt
  • ¼ cup brown sugar
  • 1 teaspoon black pepper
  • 1 teaspoon smoked paprika (optional)
  • Wood chips for smoking (hickory, applewood, or cherrywood)

Cultural History of Ingredients

  • Salmon: A prized fish in Scandinavian, Native American, and Japanese cuisines for centuries.
  • Salt and Sugar: Essential for curing, these ingredients draw out moisture while enhancing flavor.
  • Wood Chips: Different woods impart unique smoky profiles; hickory adds a robust flavor, while applewood lends a subtle sweetness.

Equipment You’ll Need

  • Smoker or grill with a lid
  • Aluminum foil or smoking tray
  • Meat thermometer
  • Sharp knife
  • Plastic wrap

Step-by-Step Instructions for Homemade Smoked Salmon

Step 1: Prepare the Salmon

  1. Rinse the salmon fillet under cold water and pat dry with paper towels.
  2. Check for pin bones and remove them using tweezers.

Step 2: Create the Cure

  1. In a bowl, mix kosher salt, brown sugar, black pepper, and smoked paprika.
  2. Rub the mixture evenly over both sides of the salmon.

Step 3: Cure the Salmon

  1. Place the salmon in a shallow dish or on a tray, skin-side down.
  2. Cover tightly with plastic wrap and refrigerate for 12–24 hours to cure.

Step 4: Rinse and Dry

  1. Rinse the cured salmon under cold water to remove excess salt and sugar.
  2. Pat dry and place on a wire rack to air-dry for 1–2 hours. This forms a pellicle, a sticky surface that helps absorb smoke.

Step 5: Smoke the Salmon

  1. Preheat your smoker or grill to 150–180°F.
  2. Add your chosen wood chips to the smoker.
  3. Place the salmon on the smoker grate, skin-side down. Smoke for 2–4 hours, or until the internal temperature reaches 145°F.

Step 6: Cool and Store

  1. Allow the smoked salmon to cool completely.
  2. Store in an airtight container in the refrigerator for up to one week.

Suggestions for Serving and Storing

  • Serving Ideas:
    • Serve on bagels with cream cheese and capers.
    • Pair with scrambled eggs for a gourmet breakfast.
    • Add to salads, pasta, or sushi rolls.
  • Storage Tips:
    • Wrap tightly in plastic wrap and store in the fridge.
    • Freeze portions for up to 3 months.

Chef Simon’s Tips for Smoked Salmon

  1. Experiment with Woods: Try mesquite for bold flavors or alder for a milder taste.
  2. Add Herbs: Mix fresh dill or thyme into the curing mixture for an herbal note.
  3. Don’t Rush: Let the salmon cure and air-dry fully for the best results.

Emotional and Psychological Impact of Food

Homemade smoked salmon offers a sense of achievement and pride. Its rich aroma and flavor evoke memories of shared meals and celebrations, creating a lasting impression on those you serve it to.


Mindful Cooking Techniques

  • Take time to rub the cure evenly, appreciating the transformation of raw ingredients.
  • Focus on the scent of the wood chips as they smoke, connecting with the tradition of slow cooking.

Tips for Keeping the Recipe Fresh Longer

  • Store smoked salmon in vacuum-sealed bags for extended freshness.
  • Avoid exposure to air, which can cause the fish to dry out or spoil.

Advanced Culinary Terms and Techniques

  • Pellicle Formation: The tacky surface that forms during air-drying, essential for holding smoke flavor.
  • Cold Smoking vs. Hot Smoking: This recipe uses hot smoking for safe, easy home preparation.

Healthy Ingredient Alternatives

  1. Low-Sodium Version: Reduce the salt in the cure and extend curing time.
  2. Sugar-Free Option: Substitute brown sugar with stevia or leave it out entirely.
  3. Omega-3 Boost: Use wild-caught salmon for higher nutritional benefits.

More Serving Ideas

  • Use as a topping for avocado toast.
  • Incorporate into a creamy smoked salmon dip.
  • Make gourmet wraps with smoked salmon, arugula, and lemon aioli.

Common Issues and Solutions

  • Salmon Too Salty: Reduce cure time or rinse thoroughly before smoking.
  • Dry Texture: Avoid overcooking; monitor internal temperature closely.
  • Inconsistent Smoke Flavor: Ensure even airflow in the smoker.

Variations to Try

  1. Maple-Glazed Smoked Salmon: Add maple syrup to the curing mix for a sweet twist.
  2. Spicy Smoked Salmon: Include cayenne pepper or chili flakes in the rub.
  3. Cold-Smoked Salmon: Requires specialized equipment but delivers silky, lox-like results.

Nutritional Information and Health Benefits

  • Calories: ~120 per serving
  • Protein: Packed with high-quality protein for muscle repair
  • Omega-3 Fatty Acids: Promote heart and brain health

The Art of Pairing Smoked Salmon

  • With Drinks: Pair with sparkling wine, a crisp Sauvignon Blanc, or iced green tea.
  • With Cheese: Serve alongside creamy cheeses like brie or mascarpone.
  • With Breads: Complement with crusty baguettes or soft brioche.

Weather and Recipe Outcome

Smoking salmon is a year-round activity, but the cozy, smoky flavors feel especially satisfying during cooler months or festive occasions.


Other Fish Recipes to Explore

  • Baked Herb-Crusted Salmon
  • Grilled Tuna Steaks
  • Classic Fish Tacos
  • Lemon Butter Cod

Focus on Tools and Equipment

  • Smoker: A quality smoker ensures consistent temperatures and even smoke distribution.
  • Digital Thermometer: Essential for accurate internal temperature readings.
  • Curing Tray: Keeps juices contained during the curing process.

Frequently Asked Questions (with answers)

Q: Can I use frozen salmon for this recipe?
A: Yes, but thaw it completely and pat dry before curing.

Q: How long should I smoke the salmon?
A: 2–4 hours, depending on the thickness of the fillet.

Q: What’s the best wood for smoking salmon?
A: Applewood, cherrywood, or alder are great choices for a mild, sweet flavor.


Conclusion

Crafting homemade smoked salmon is an adventure in flavor, texture, and tradition. With a balance of curing, drying, and smoking, this recipe allows you to create a dish that’s as rewarding to prepare as it is to eat. Give it a try and savor the rich, smoky satisfaction of your own culinary masterpiece!

Homemade Cottage Cheese Recipe: Fresh, Creamy, and Simple

cottage cheese

https://www.thekitchn.com/cottage-cheese-pancakes-263223Introduction
Cottage cheese is a creamy, protein-rich, and versatile dairy product that’s surprisingly simple to make at home. Unlike store-bought versions, homemade cottage cheese lets you control the texture, flavor, and freshness. This recipe is perfect for anyone looking to embrace traditional food-making methods while enjoying a healthier and tastier alternative to commercial varieties.


The Story Behind Homemade Cottage Cheese

Cottage cheese has a long history, with roots in ancient civilizations where dairy was a primary source of sustenance. The term “cottage cheese” is believed to have originated in the 19th century when farmers made it in small cottages using leftover milk. Making cottage cheese at home brings you closer to this simple, wholesome tradition, offering a sense of connection to its rich culinary history.


The Benefits of Making Your Own Cottage Cheese

  1. Freshness: You can enjoy cottage cheese at its peak flavor without additives or preservatives.
  2. Customization: Adjust the creaminess, saltiness, and curd size to suit your taste.
  3. Economical: Making your own cottage cheese is cost-effective compared to store-bought versions.
  4. Healthy: Homemade versions are free from stabilizers or artificial ingredients, ensuring a clean and nutritious product.

Essential Ingredients for the Perfect Cottage Cheese

  • 4 cups whole milk (preferably non-homogenized)
  • 2 tablespoons white vinegar or lemon juice
  • ¼ teaspoon salt (optional, to taste)
  • 2–3 tablespoons cream or milk (for added creaminess, optional)

Cultural History of Ingredients

  • Milk: Revered across cultures, milk has been a cornerstone of diets, from ancient Egyptian to Indian cuisines.
  • Vinegar/Lemon Juice: Traditional acidic agents used in cheese-making for centuries.
  • Salt: A timeless preservative and flavor enhancer in dairy products.

Equipment You’ll Need

  • Heavy-bottomed pot
  • Wooden spoon
  • Cheesecloth or fine-mesh strainer
  • Large bowl
  • Thermometer (optional but recommended)

Step-by-Step Instructions for Homemade Cottage Cheese

Step 1: Heat the Milk

  1. Pour the milk into a heavy-bottomed pot and heat gently over medium heat.
  2. Stir occasionally to prevent scorching, and bring the milk to about 190°F (just before boiling).

Step 2: Add Acid

  1. Remove the pot from heat and stir in the vinegar or lemon juice gradually.
  2. Watch as curds form and separate from the whey. Let it sit for 5–10 minutes.

Step 3: Strain the Curds

  1. Line a colander with cheesecloth and place it over a large bowl.
  2. Pour the curds and whey into the colander, allowing the liquid to drain.

Step 4: Rinse and Season

  1. Rinse the curds under cold water to remove any vinegar or lemon juice flavor.
  2. Gently squeeze the cheesecloth to remove excess liquid.

Step 5: Add Creaminess

  1. Transfer the curds to a bowl and stir in a few tablespoons of cream or milk, if desired.
  2. Season with salt to taste and serve fresh.

Suggestions for Serving and Storing

  • Serving Ideas:
    • Enjoy as a topping for fresh fruits or salads.
    • Use in lasagnas, casseroles, or pancakes.
    • Spread on toast with a drizzle of honey.
  • Storage Tips:
    • Keep in an airtight container in the fridge for up to 5 days.
    • Avoid freezing, as it may alter the texture.

Chef Simon’s Tips for Cottage Cheese

  1. Use Fresh Milk: The fresher the milk, the better the flavor. Avoid ultra-pasteurized milk for best results.
  2. Experiment with Acids: Lemon juice gives a tangy flavor, while vinegar offers a neutral taste.
  3. Adjust the Curds: For larger curds, stir gently during the curdling process. For smaller curds, stir more vigorously.

Emotional and Psychological Impact of Food

Making cottage cheese at home brings a sense of accomplishment and connection to nature. The process is therapeutic, fostering mindfulness and pride as you create something nourishing from scratch.


Mindful Cooking Techniques

  • Be Present: Pay attention to the milk as it heats and curdles, appreciating the transformation.
  • Take Your Time: Enjoy the tactile experience of straining and mixing the cheese.

Tips for Keeping the Recipe Fresh Longer

  • Store in a sealed container to retain moisture and freshness.
  • Consume within 3–5 days for the best flavor and texture.

Advanced Culinary Terms and Techniques

  • Curdling: The process of separating milk solids (curds) from liquid (whey) using acid or heat.
  • Whey: The liquid byproduct of cheese-making, rich in protein and often used in smoothies or baking.

Healthy Ingredient Alternatives

  1. Low-Fat Option: Use skim or low-fat milk, but note that the curds may be less creamy.
  2. Salt-Free Version: Skip the salt for a naturally mild flavor.
  3. Vegan Alternative: Substitute dairy milk with soy or almond milk and use a coagulant like calcium sulfate.

More Serving Ideas

  • Mix with herbs and garlic for a savory spread.
  • Add to scrambled eggs for a protein boost.
  • Use as a filling for stuffed peppers or pasta shells.

Common Issues and Solutions

  • Curds Won’t Form: Ensure the milk is hot enough before adding the acid.
  • Cottage Cheese Too Dry: Add more cream or milk to achieve the desired texture.
  • Bland Flavor: Don’t skip the salt, or experiment with seasonings like paprika or dill.

Variations to Try

  1. Herbed Cottage Cheese: Add chopped parsley, dill, or chives for a fresh twist.
  2. Spicy Cottage Cheese: Mix in chili flakes or jalapeños for a kick.
  3. Sweet Cottage Cheese: Stir in honey or maple syrup with a handful of dried fruits.

Nutritional Information and Health Benefits

  • Calories: ~100 per half-cup
  • Protein: ~14g per serving, great for muscle repair
  • Calcium: Supports bone health

The Art of Pairing Cottage Cheese

  • With Drinks: Pair with a glass of fresh orange juice or iced tea.
  • With Breads: Spread on whole-grain bread or pair with a warm croissant.
  • With Fruits: Serve alongside berries, pineapple, or melon for a refreshing snack.

Weather and Recipe Outcome

Homemade cottage cheese is a light and refreshing option perfect for any season. It’s especially delightful in the summer when paired with fresh produce or served chilled.


Other Cheese Recipes to Explore

  • Homemade Ricotta Cheese
  • Classic Mozzarella
  • Creamy Mascarpone
  • Tangy Feta Cheese

Focus on Tools and Equipment

  • Thermometer: Ensures milk reaches the optimal temperature for curdling.
  • Cheesecloth: Essential for straining curds effectively.
  • Stainless Steel Pot: Distributes heat evenly without scorching.

Frequently Asked Questions (with answers)

Q: Can I use non-dairy milk for this recipe?
A: Yes, but you’ll need a different coagulant like calcium chloride or agar agar.

Q: What can I do with the leftover whey?
A: Use it in smoothies, soups, or as a substitute for water in bread recipes.

Q: How do I make my cottage cheese creamier?
A: Stir in more cream or milk after rinsing and draining the curds.


Conclusion

Homemade cottage cheese is a simple yet rewarding recipe that brings the charm of traditional dairy-making to your kitchen. With minimal ingredients and equipment, you can create a versatile, healthy, and delicious product tailored to your taste. Try it today and discover the joy of crafting your own cottage cheese!