Discover Easy and Flavorful Recipes for Every Meal!

Easy Grape Salad Recipe

Grape Salad Recipe

Introduction

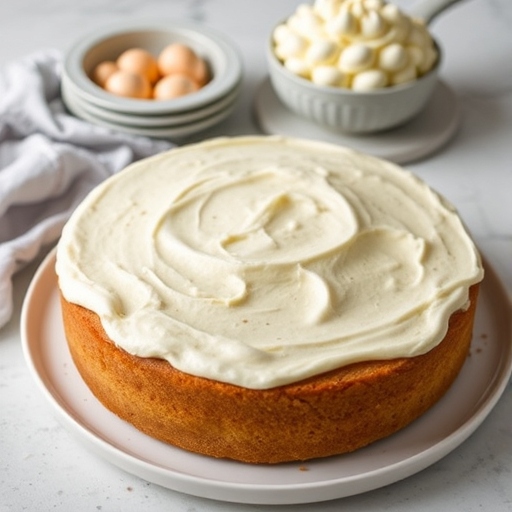
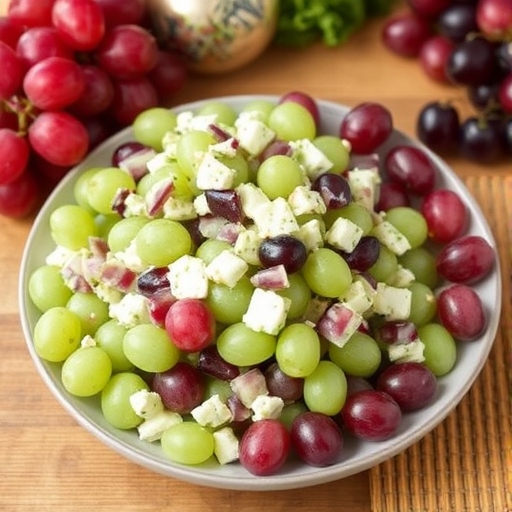
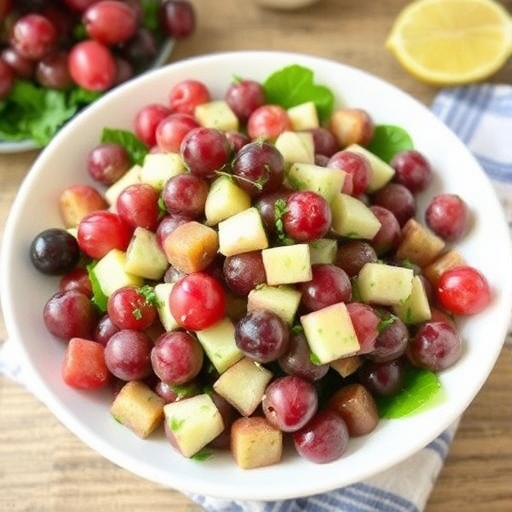
Grape salad is a refreshing and sweet treat that’s perfect for potlucks, picnics, or as a light dessert. This creamy salad blends the crispness of fresh grapes with a luscious cream cheese dressing, topped with crunchy brown sugar and pecans. It’s an effortless recipe that balances textures and flavors, offering a delightful experience in every bite.


The Story Behind Grape Salad

Though grape salad feels like a classic Southern dish, its origins are somewhat mysterious. Some believe it originated in the Midwest and gained popularity across the U.S. thanks to its simplicity and universal appeal. Over the years, it has become a go-to recipe for gatherings, loved for its sweet and tangy flavor profile.


The Benefits of Making Your Own Grape Salad

  • Customizable Sweetness: Adjust the sugar level to match your taste preferences.
  • Healthier Ingredients: Use low-fat cream cheese or Greek yogurt for a lighter version.
  • Crowd-Pleasing: A guaranteed hit for any event or celebration.
  • Quick Preparation: Only a few minutes to assemble, making it ideal for last-minute needs.

Essential Ingredients for the Perfect Grape Salad

  • Grapes: A mix of red and green seedless grapes for a vibrant, sweet, and tangy combo.
  • Cream Cheese: Full-fat or low-fat, softened for easy blending.
  • Sour Cream: Adds tanginess to balance the sweetness.
  • Sugar: Granulated sugar for sweetness in the dressing.
  • Vanilla Extract: A hint of warmth and depth.
  • Brown Sugar: Sprinkled on top for a caramel-like flavor.
  • Pecans: Chopped for crunch and nuttiness.

Cultural History of Ingredients

  • Grapes: Domesticated over 6,000 years ago in the Middle East, grapes are now a global fruit staple.
  • Cream Cheese: Originating in the U.S. in the 19th century, it has become a beloved ingredient for both sweet and savory dishes.
  • Pecans: Native to North America, pecans have been a symbol of Southern cooking and hospitality.

Equipment You’ll Need

  • Mixing Bowls: To prepare the dressing and toss the salad.
  • Hand Mixer: For whipping the cream cheese and sour cream to a smooth consistency.
  • Spatula: For gently folding the grapes into the dressing.
  • Serving Dish: A large bowl or casserole dish for presentation.

Step-by-Step Instructions for Grape Salad

  1. Prepare the Grapes:
    • Wash and dry the grapes thoroughly. Halve them if desired, especially for easier eating.
  2. Make the Dressing:
    • In a mixing bowl, beat softened cream cheese, sour cream, granulated sugar, and vanilla extract until smooth and creamy.
  3. Combine Grapes and Dressing:
    • Gently fold the grapes into the dressing until evenly coated.
  4. Add Toppings:
    • Transfer the mixture to a serving dish. Sprinkle brown sugar and chopped pecans on top for a sweet crunch.
  5. Chill and Serve:
    • Refrigerate for at least 1 hour before serving to let the flavors meld. Serve cold.

Suggestions for Serving and Storing

  • Serving Suggestions:
    • Pair with savory dishes like BBQ ribs or grilled chicken for a balanced meal.
    • Serve as a dessert or side dish for festive occasions.
  • Storing:
    • Store leftovers in an airtight container in the refrigerator for up to 3 days. Avoid freezing, as the texture of the grapes will change.

Chef Simon’s Tips for Grape Salad

  • Variety of Grapes: Use a mix of black, red, and green grapes for a stunning visual presentation.
  • Nut Alternatives: Swap pecans for walnuts, almonds, or even crushed pretzels for a salty twist.
  • Healthier Dressing: Substitute Greek yogurt for sour cream to add protein and reduce fat content.

Emotional and Psychological Impact of Food

The bright colors and creamy sweetness of grape salad evoke feelings of joy and nostalgia, making it a comforting addition to family meals or special gatherings. Its light yet indulgent taste is perfect for creating positive associations with shared experiences.


Mindful Cooking Techniques

  • Engage Your Senses: Notice the vibrant colors of the grapes and the smooth texture of the dressing as you prepare the salad.
  • Be Present: Take your time folding the dressing into the grapes, ensuring each one is evenly coated.

Tips for Keeping the Recipe Fresh Longer

  • Store Separately: Keep the dressing and toppings separate from the grapes if preparing ahead of time. Combine just before serving for maximum freshness.
  • Use Fresh Grapes: Ensure your grapes are firm and fresh to maintain the best texture.

Advanced Culinary Terms and Techniques

  • Folding: Gently mixing ingredients to maintain their structure, used here to avoid crushing the grapes.
  • Caramelization: The brown sugar topping lightly caramelizes over time, adding depth to the dish.

Healthy Ingredient Alternatives

  • Low-Calorie Sweetener: Replace granulated sugar with stevia or monk fruit sweetener.
  • Non-Dairy Option: Use plant-based cream cheese and coconut yogurt for a vegan version.
  • Nut-Free: Omit nuts or replace with granola for a crunch without allergens.

More Serving Ideas

  • Breakfast Parfait: Layer grape salad with granola and yogurt for a nutritious morning treat.
  • Fruit Salad Mix: Add sliced apples, strawberries, or pineapple chunks for more variety.
  • On Toast: Spread over a slice of whole-grain bread for a quick snack.

Common Issues and Solutions

  • Watery Salad: Ensure grapes are fully dried before mixing to prevent excess liquid.
  • Overly Sweet: Adjust sugar levels in the dressing to suit your taste.
  • Soggy Topping: Add the brown sugar and pecans just before serving to keep them crisp.

Variations to Try

  • Tropical Grape Salad: Add shredded coconut and a drizzle of honey for a tropical twist.
  • Savory Grape Salad: Incorporate crumbled blue cheese and a touch of balsamic glaze.
  • Berry Medley Salad: Mix grapes with blueberries, raspberries, and blackberries for added flavor and color.

Nutritional Information and Health Benefits

Per Serving (approx. 1 cup):

  • Calories: 210
  • Protein: 3g
  • Fat: 10g
  • Carbohydrates: 29g
  • Fiber: 2g

Health Benefits:

  • Grapes are rich in antioxidants and vitamin C, promoting overall health.
  • Pecans provide healthy fats and essential nutrients.
  • Yogurt-based dressing options add probiotics for gut health.

The Art of Pairing Grape Salad

  • Main Course: Serve alongside roasted turkey or ham for a harmonious blend of sweet and savory.
  • Beverage: Pair with a crisp white wine like Riesling or a sparkling cider.
  • Dessert: Follow with a light lemon sorbet for a refreshing end to the meal.

Frequently Asked Questions (with answers)

Q: Can I make grape salad ahead of time?
A: Yes, prepare it up to 24 hours in advance, but add the toppings just before serving.

Q: Can I use frozen grapes?
A: While fresh grapes are ideal, frozen grapes can work in a pinch but may alter the texture.

Q: What’s a good nut-free topping?
A: Try granola, crushed graham crackers, or sunflower seeds for crunch.


Conclusion

Grape salad is a versatile, crowd-pleasing dish that’s as easy to make as it is to enjoy. Its creamy texture, vibrant colors, and sweet-tangy flavors make it a standout addition to any table. Whether you’re hosting a potluck or craving a unique dessert, this recipe is guaranteed to impress. Give it a try and see how quickly it becomes a favorite in your home!


Thank you for visiting SqueezyRecipes! We’re dedicated to making cooking enjoyable and accessible for everyone, regardless of your skill level. Chef Simon is always ready to share the best recipes that bring a creative touch to your daily meals. With each visit, you’ll discover new recipes and innovative ideas that cater to every occasion. Don’t miss out on exploring SqueezyRecipes for the latest delicious dishes, and feel free to leave your feedback and share your experiences with the recipes you’ve tried. Cooking together makes everything better!

Delicious Pig Pickin’ Cake

Pig Pickin’ Cake Recipe

Introduction

Pig Pickin’ Cake is a classic Southern dessert that’s as fun to eat as its name suggests. This vibrant, citrusy delight combines moist yellow cake with juicy mandarin oranges and a creamy pineapple-infused topping. Whether you’re hosting a backyard BBQ, celebrating a holiday, or just indulging in sweet nostalgia, this cake never fails to impress.


The Story Behind Pig Pickin’ Cake

The name “Pig Pickin’ Cake” originates from traditional Southern pig pickin’ gatherings—large barbecue events featuring whole hog roasts. This cake was a staple dessert at these events, as its light, fruity flavors perfectly complemented the rich, smoky meats. Over time, it became a cherished family recipe, evoking memories of Southern hospitality and celebrations.


The Benefits of Making Your Own Pig Pickin’ Cake

  • Freshness Guaranteed: Homemade means no artificial preservatives or pre-packaged shortcuts.
  • Customizable: Tailor the sweetness and toppings to your taste.
  • Budget-Friendly: Simple ingredients that won’t break the bank.
  • Crowd-Pleaser: A hit at any gathering with its unique flavor and irresistible charm.

Essential Ingredients for the Perfect Pig Pickin’ Cake

Cake Base:

  • 1 box of yellow cake mix
  • 4 large eggs
  • ½ cup vegetable oil
  • 1 (11-ounce) can mandarin oranges, drained

Topping:

  • 1 (8-ounce) container whipped topping (Cool Whip or homemade)
  • 1 (3.4-ounce) box instant vanilla pudding mix
  • 1 (20-ounce) can crushed pineapple, with juice

Cultural History of Ingredients

  • Mandarin Oranges: Introduced to the U.S. in the late 19th century, these sweet citrus fruits symbolize luck and prosperity in many cultures.
  • Pineapple: A long-standing emblem of hospitality in the South, pineapple’s tropical sweetness shines in desserts.
  • Cake Mix: A mid-20th-century convenience, cake mix made baking accessible to households across America.

Equipment You’ll Need

  • Mixing Bowls: For combining cake and topping ingredients.
  • Electric Mixer: Ensures a smooth batter and creamy topping.
  • Cake Pan: Use a 9×13-inch pan for the traditional rectangular shape.
  • Spatula: For spreading the topping evenly.

Step-by-Step Instructions for Pig Pickin’ Cake

  1. Prepare the Cake Batter:
    • Preheat your oven to 350°F (175°C).
    • In a large mixing bowl, combine yellow cake mix, eggs, vegetable oil, and mandarin oranges. Mix with an electric mixer until well blended.
  2. Bake the Cake:
    • Pour the batter into a greased 9×13-inch pan.
    • Bake for 25–30 minutes, or until a toothpick inserted in the center comes out clean.
    • Allow the cake to cool completely before adding the topping.
  3. Prepare the Topping:
    • In a medium bowl, mix the whipped topping, vanilla pudding mix, and crushed pineapple (with juice) until smooth.
  4. Assemble the Cake:
    • Spread the topping evenly over the cooled cake.
  5. Chill and Serve:
    • Refrigerate the cake for at least 1–2 hours before serving. This allows the flavors to meld.

Suggestions for Serving and Storing

  • Serving Suggestions:
    • Garnish with extra mandarin orange slices or shredded coconut for a decorative touch.
    • Serve with a scoop of vanilla ice cream for added indulgence.
  • Storing:
    • Cover and store in the refrigerator for up to 3 days. This cake tastes even better the next day!

Chef Simon’s Tips for Pig Pickin’ Cake

  • Homemade Whipped Topping: For a richer taste, whip heavy cream with powdered sugar and vanilla instead of using Cool Whip.
  • Pudding Variation: Swap vanilla pudding for coconut cream or lemon pudding for a flavor twist.
  • Extra Citrus Kick: Add a teaspoon of orange zest to the cake batter for enhanced citrus notes.

Emotional and Psychological Impact of Food

Pig Pickin’ Cake is a celebration in dessert form. Its bright flavors evoke sunny days, family gatherings, and warm memories of laughter and togetherness. Making and sharing this cake can bring people closer, sparking joy and connection.


Mindful Cooking Techniques

  • Slow Mixing: Blend ingredients gradually to ensure the batter is light and airy.
  • Focus on Presentation: Take time to spread the topping evenly and arrange garnishes thoughtfully.

Tips for Keeping the Recipe Fresh Longer

  • Refrigerate Promptly: Always store in the fridge to maintain the whipped topping’s texture.
  • Separate Storage: Keep garnishes separate until ready to serve to preserve their freshness.

Advanced Culinary Terms and Techniques

  • Emulsification: Combining oil and eggs creates a smooth batter with a stable structure.
  • Hydration: Allowing the pudding mix to sit enhances its texture and flavor absorption.

Healthy Ingredient Alternatives

  • Sugar-Free Option: Use sugar-free pudding mix and mandarin oranges in light syrup.
  • Low-Fat Version: Replace oil with unsweetened applesauce and use low-fat whipped topping.
  • Gluten-Free: Substitute the yellow cake mix with a gluten-free alternative.

More Serving Ideas

  • Layered Cake: Bake in two round pans and layer with topping in between.
  • Trifle: Cube the cake and layer with the topping in a trifle dish for an elegant presentation.
  • Mini Desserts: Bake in muffin tins for individual servings.

Common Issues and Solutions

  • Runny Topping: Ensure the cake is completely cool before adding the topping to prevent melting.
  • Dense Cake: Mix the batter just until combined; overmixing can make the cake dense.
  • Too Sweet: Adjust the sugar content in the topping to suit your taste.

Variations to Try

  • Tropical Pig Pickin’ Cake: Add shredded coconut and a splash of rum extract to the topping.
  • Berry Delight: Replace mandarin oranges with mixed berries for a tangy twist.
  • Chocolate Orange: Add cocoa powder to the cake mix and garnish with chocolate shavings.

Nutritional Information and Health Benefits

Per Serving (approx. 1 slice):

  • Calories: 300
  • Protein: 3g
  • Fat: 10g
  • Carbohydrates: 45g
  • Fiber: 1g

Health Benefits:

  • Oranges and pineapple are rich in vitamin C, supporting immune health.
  • Using lighter ingredients can reduce calorie intake while maintaining flavor.

The Art of Pairing Pig Pickin’ Cake

  • Main Course: Pair with pulled pork or smoked chicken to complement its Southern roots.
  • Beverage: Serve with sweet tea or a light citrus cocktail.
  • Dessert Spread: Include alongside pies and cobblers for a dessert buffet.

Frequently Asked Questions (with answers)

Q: Can I use fresh mandarin oranges?
A: Yes, but you’ll need to peel and segment them thoroughly to avoid excess juice.

Q: Can I make this cake a day ahead?
A: Absolutely! The flavors improve as it sits, making it ideal for pre-preparation.

Q: Can I freeze Pig Pickin’ Cake?
A: It’s not recommended, as the whipped topping can separate when thawed.


Conclusion

Pig Pickin’ Cake is a delightful dessert that embodies the joy and warmth of Southern cooking. Its fruity flavors, creamy topping, and ease of preparation make it a favorite for any occasion. Try this recipe, and bring a slice of sunshine to your table—your friends and family will thank you!


Thank you for visiting SqueezyRecipes! We’re dedicated to making cooking enjoyable and accessible for everyone, regardless of your skill level. Chef Simon is always ready to share the best recipes that bring a creative touch to your daily meals. With each visit, you’ll discover new recipes and innovative ideas that cater to every occasion. Don’t miss out on exploring SqueezyRecipes for the latest delicious dishes, and feel free to leave your feedback and share your experiences with the recipes you’ve tried. Cooking together makes everything better!

Easy Jambalaya Recipe

Jambalaya Recipe

Introduction

Jambalaya, a one-pot dish bursting with bold flavors, is the epitome of Southern comfort food. This Louisiana classic combines rice, meat, seafood, and vegetables simmered in a fragrant, spiced broth. Whether you’re hosting a festive gathering or craving a hearty meal, jambalaya delivers a delightful taste of Cajun and Creole cuisine.


The Story Behind Jambalaya

Jambalaya’s history is as rich as its flavor. Originating in Louisiana, this dish draws influences from French, Spanish, and African cuisines. Often compared to Spanish paella, it’s said that jambalaya was created by Spanish settlers who adapted paella recipes using local ingredients. Over time, it evolved into a signature dish, symbolizing the melting pot of cultures in Louisiana.


The Benefits of Making Your Own Jambalaya

  • Tailored to Your Taste: Adjust spice levels and customize proteins to your liking.
  • Nutritious and Balanced: A mix of carbs, proteins, and vegetables in one dish.
  • Cost-Effective: A large batch can feed a crowd, making it ideal for gatherings.
  • Authentic Homemade Flavor: Fresh ingredients elevate this dish to a new level.

Essential Ingredients for the Perfect Jambalaya

Proteins:

  • 1 pound smoked sausage (like andouille), sliced
  • 1 pound chicken thighs, diced
  • 1 pound shrimp, peeled and deveined

Vegetables:

  • 1 onion, diced
  • 1 green bell pepper, diced
  • 2 celery stalks, chopped
  • 3 garlic cloves, minced

Seasonings and Broth:

  • 2 cups long-grain rice
  • 4 cups chicken broth
  • 1 (14-ounce) can diced tomatoes
  • 1 tablespoon Cajun seasoning
  • 1 teaspoon paprika
  • 1 teaspoon thyme
  • Salt and pepper to taste

Optional Add-Ins:

  • Hot sauce for extra heat
  • Fresh parsley for garnish

Cultural History of Ingredients

  • Andouille Sausage: A staple in Cajun cuisine, adding a smoky, spicy depth.
  • Rice: Introduced to Louisiana through African influences, rice is the heart of jambalaya.
  • Cajun Seasoning: A blend of spices that reflects the bold flavors of Southern cooking.

Equipment You’ll Need

  • Large Dutch Oven or Skillet: For even cooking and heat distribution.
  • Wooden Spoon: To stir and prevent sticking.
  • Sharp Knife and Cutting Board: For prepping meats and vegetables.

Step-by-Step Instructions for Jambalaya

  1. Brown the Proteins:
    • Heat oil in a large skillet or Dutch oven over medium heat. Brown sausage and chicken until golden. Remove and set aside.
  2. Sauté the Vegetables:
    • In the same pan, sauté onion, bell pepper, and celery until softened. Add garlic and cook for 1–2 minutes.
  3. Add Rice and Seasonings:
    • Stir in rice, Cajun seasoning, paprika, and thyme. Toast the rice lightly for extra flavor.
  4. Combine Ingredients:
    • Return sausage and chicken to the pan. Add diced tomatoes and chicken broth. Bring to a boil, then reduce heat to low. Cover and simmer for 20–25 minutes, stirring occasionally.
  5. Cook the Shrimp:
    • Add shrimp during the last 5 minutes of cooking, allowing them to cook until pink and tender.
  6. Adjust and Serve:
    • Taste and adjust seasoning with salt, pepper, or hot sauce. Garnish with fresh parsley.

Suggestions for Serving and Storing

  • Serving Suggestions:
    • Serve jambalaya with cornbread or a side salad for a complete meal.
    • Pair with a crisp white wine or iced tea for a refreshing contrast.
  • Storing:
    • Store leftovers in an airtight container in the fridge for up to 3 days. Reheat gently to avoid overcooking the shrimp.

Chef Simon’s Tips for Jambalaya

  • Layer the Flavors: Brown the sausage and chicken first to build a flavorful base.
  • Use Fresh Shrimp: Fresh seafood enhances the dish’s authenticity.
  • Experiment with Heat: Adjust Cajun seasoning or add cayenne for more spice.

Emotional and Psychological Impact of Food

Jambalaya’s hearty and communal nature evokes warmth and togetherness. Sharing this dish with loved ones fosters connection, joy, and a sense of Southern hospitality.


Mindful Cooking Techniques

  • Prepare in Stages: Brown each ingredient separately to layer flavors.
  • Stay Present: Enjoy the process of chopping, stirring, and tasting as you cook.

Tips for Keeping the Recipe Fresh Longer

  • Separate Storage: Store the rice and protein components separately to prevent sogginess.
  • Freeze for Later: Jambalaya freezes well; portion into airtight containers and reheat as needed.

Advanced Culinary Terms and Techniques

  • Deglazing: Scrape browned bits from the pan with broth or tomatoes for added flavor.
  • Simmering: A low, gentle boil that allows flavors to meld together perfectly.

Healthy Ingredient Alternatives

  • Lean Meats: Use turkey sausage and skinless chicken breast for a lighter version.
  • Brown Rice: Swap white rice for brown to increase fiber and nutrients.
  • Vegetarian Option: Replace meat with kidney beans or tofu and use vegetable broth.

More Serving Ideas

  • Jambalaya Pasta: Replace rice with pasta for a Creole-inspired twist.
  • Seafood Jambalaya: Use crab, crawfish, or scallops for a coastal variation.
  • Vegetable-Forward Jambalaya: Add zucchini, okra, or mushrooms for extra texture.

Common Issues and Solutions

  • Rice Too Crunchy: Add more broth and cook longer, stirring occasionally.
  • Overcooked Shrimp: Add shrimp only in the final minutes to prevent toughness.
  • Burned Bottom: Stir occasionally to prevent rice from sticking to the pan.

Variations to Try

  • Creole Jambalaya: Add more tomatoes and spices for a tomato-forward flavor.
  • Cajun Jambalaya: Skip tomatoes for a smokier, spicier version.
  • Quick Jambalaya: Use precooked rice and rotisserie chicken to save time.

Nutritional Information and Health Benefits

Per Serving (Approx. 1 Cup):

  • Calories: 380
  • Protein: 28g
  • Fat: 12g
  • Carbohydrates: 36g
  • Fiber: 3g

Health Benefits:

  • High in protein for muscle repair.
  • Rich in vitamins from fresh vegetables.

The Art of Pairing Jambalaya

  • Main Course: Serve as a standalone dish or pair with gumbo for a Southern feast.
  • Beverage: Pair with a bold red wine or a cold craft beer.
  • Dessert: End the meal with a slice of pecan pie or banana pudding.

Frequently Asked Questions (with answers)

Q: Can I make jambalaya in a slow cooker?
A: Yes, cook on low for 6–8 hours, adding shrimp in the last 30 minutes.

Q: What’s the difference between Creole and Cajun jambalaya?
A: Creole uses tomatoes, while Cajun omits them for a smokier flavor.

Q: Can I make it spicier?
A: Add cayenne or extra hot sauce for more heat.


Conclusion

Jambalaya is a culinary celebration of Louisiana’s rich cultural heritage. Its bold flavors, hearty ingredients, and easy adaptability make it a favorite for any occasion. Gather your ingredients, embrace the vibrant cooking process, and savor the Southern charm of this iconic dish.


Thank you for visiting SqueezyRecipes! We’re dedicated to making cooking enjoyable and accessible for everyone, regardless of your skill level. Chef Simon is always ready to share the best recipes that bring a creative touch to your daily meals. With each visit, you’ll discover new recipes and innovative ideas that cater to every occasion. Don’t miss out on exploring SqueezyRecipes for the latest delicious dishes, and feel free to leave your feedback and share your experiences with the recipes you’ve tried. Cooking together makes everything better

Perfectly Fluffy Key Lime Pie Recipe: Tangy and Irresistible

Fluffy Key Lime Pie Recipe

Introduction

Dive into a dessert that captures the essence of summer with every bite—the Fluffy Key Lime Pie. This classic treat combines the tartness of key limes with a velvety, cloud-like texture, all nestled in a buttery graham cracker crust. It’s the perfect way to bring a slice of tropical paradise to your table, no matter the season.


The Story Behind Key Lime Pie

Key lime pie originated in the Florida Keys during the 19th century, where key limes were abundant, and refrigeration was a luxury. Sailors and locals used canned milk to create this simple yet delectable dessert. Over time, this pie has become an iconic American dessert, celebrated for its tangy flavor and creamy texture.


The Benefits of Making Your Own Key Lime Pie

  • Authentic Taste: Homemade ensures the freshest, most vibrant lime flavor.
  • Customizable Sweetness: Balance the tartness and sweetness to your preference.
  • Perfect for Any Occasion: Whether for parties or a quiet evening dessert, it’s always a crowd-pleaser.
  • Cost-Effective: Store-bought pies can be pricey; making your own is budget-friendly.

Essential Ingredients for the Perfect Key Lime Pie

For the Crust:

  • 1 ½ cups graham cracker crumbs
  • ⅓ cup granulated sugar
  • 6 tablespoons unsalted butter, melted

For the Filling:

  • 1 can (14 ounces) sweetened condensed milk
  • 4 large egg yolks
  • ½ cup fresh key lime juice (from about 20 key limes)
  • 1 teaspoon key lime zest

For the Topping:

  • 1 cup heavy whipping cream
  • 2 tablespoons powdered sugar
  • ½ teaspoon vanilla extract

Cultural History of Ingredients

  • Key Limes: Smaller and more aromatic than regular limes, these are the star of the dish and were once a staple in the Florida Keys.
  • Condensed Milk: Introduced in the mid-1800s, it became a key ingredient in desserts when refrigeration was limited.
  • Graham Crackers: Named after Sylvester Graham, these crackers are a popular crust base for pies.

Equipment You’ll Need

  • 9-Inch Pie Dish: For an even bake.
  • Hand Mixer or Stand Mixer: To whip the topping to perfection.
  • Citrus Juicer: For efficient key lime juice extraction.
  • Microplane Grater: For zesting the key limes.

Step-by-Step Instructions for Key Lime Pie

Step 1: Prepare the Crust

  1. Preheat your oven to 350°F (175°C).
  2. Mix graham cracker crumbs, sugar, and melted butter in a bowl until evenly combined.
  3. Press the mixture into the pie dish, covering the bottom and sides evenly.
  4. Bake for 8–10 minutes, then cool completely.

Step 2: Make the Filling

  1. Whisk egg yolks in a medium bowl until smooth.
  2. Add condensed milk, key lime juice, and zest. Mix until fully combined.
  3. Pour the filling into the cooled crust and spread evenly.

Step 3: Bake and Cool

  1. Bake the pie at 350°F (175°C) for 15 minutes.
  2. Allow the pie to cool to room temperature, then refrigerate for at least 3 hours.

Step 4: Whip the Cream Topping

  1. Beat heavy cream, powdered sugar, and vanilla until soft peaks form.
  2. Spread or pipe the whipped cream over the chilled pie.

Step 5: Garnish and Serve

  • Garnish with extra lime zest or thin lime slices for a decorative touch.

Suggestions for Serving and Storing

  • Serving Suggestions:
    • Serve chilled with a side of fresh berries.
    • Pair with a glass of iced tea or a tropical cocktail for a refreshing combo.
  • Storing:
    • Store in the refrigerator for up to 3 days.
    • For longer storage, freeze the pie (without whipped cream topping) for up to a month.

Chef Simon’s Tips for Key Lime Pie

  • Fresh Key Limes Are Best: If unavailable, bottled key lime juice works as a substitute, but fresh juice offers a more vibrant flavor.
  • Even Crust: Use the bottom of a measuring cup to press the crust evenly.
  • Perfect Whipping: Chill your bowl and whisk before whipping the cream for best results.

Emotional and Psychological Impact of Food

The bright, zesty flavor of key lime pie uplifts your mood and evokes memories of sun-soaked vacations. Sharing this pie fosters joy and a sense of togetherness.


Mindful Cooking Techniques

  • Focus on Freshness: Enjoy the process of juicing limes and whipping cream, connecting with each step.
  • Balance the Flavors: Taste-test as you mix to ensure the perfect balance of tart and sweet.

Tips for Keeping the Recipe Fresh Longer

  • Use Airtight Storage: Store slices in an airtight container to retain freshness.
  • Refrigerate Quickly: Always keep the pie chilled to prevent the filling from softening.

Advanced Culinary Terms and Techniques

  • Blind Baking: Baking the crust before adding the filling ensures it stays crisp.
  • Soft Peaks: Whipping cream until it holds shape but still has a soft, droopy tip.

Healthy Ingredient Alternatives

  • Low-Fat Condensed Milk: Reduces calories without sacrificing flavor.
  • Greek Yogurt Topping: A lighter alternative to whipped cream.
  • Sugar Substitutes: Use stevia or monk fruit sweetener in the crust and filling.

More Serving Ideas

  • Mini Key Lime Pies: Make individual servings using muffin tins.
  • Key Lime Bars: Pour the filling over a graham cracker crust in a square pan and cut into bars.
  • Frozen Treats: Transform the filling into a creamy popsicle.

Common Issues and Solutions

  • Runny Filling: Ensure proper baking and cooling time to set the pie.
  • Crumbly Crust: Add more butter to the crust mixture if it doesn’t hold together.
  • Overbeaten Cream: Whip cream slowly and stop as soon as soft peaks form.

Variations to Try

  • Chocolate Key Lime Pie: Add a layer of melted chocolate to the crust.
  • Coconut Lime Pie: Mix shredded coconut into the crust for a tropical twist.
  • Gluten-Free Version: Use gluten-free graham crackers for the crust.

Nutritional Information and Health Benefits

Per Slice (1/8 of Pie):

  • Calories: 310
  • Protein: 5g
  • Fat: 15g
  • Carbohydrates: 42g
  • Fiber: 1g

Health Benefits:

  • Rich in vitamin C from the limes, which boosts immunity.
  • Provides calcium from condensed milk for bone health.

The Art of Pairing Key Lime Pie

  • Main Course: Serve after a light seafood or grilled chicken meal.
  • Beverage: Pair with a sparkling wine or mojito for a harmonious flavor blend.
  • Dessert Duo: Complement with a berry sorbet or tropical fruit salad.

Frequently Asked Questions (with answers)

Q: Can I use regular limes instead of key limes?
A: Yes, but the flavor will be slightly less tart and aromatic.

Q: How do I prevent a soggy crust?
A: Bake the crust thoroughly before adding the filling.

Q: Can I make it ahead of time?
A: Absolutely! Key lime pie tastes even better after chilling overnight.


Conclusion

The Fluffy Key Lime Pie is a timeless dessert that brings vibrant flavors and a sense of indulgence to your table. Whether for a special occasion or a casual treat, its light texture and bold citrus notes will leave everyone craving more.


Thank you for visiting SqueezyRecipes! We’re dedicated to making cooking enjoyable and accessible for everyone, regardless of your skill level. Chef Simon is always ready to share the best recipes that bring a creative touch to your daily meals. With each visit, you’ll discover new recipes and innovative ideas that cater to every occasion. Don’t miss out on exploring SqueezyRecipes for the latest delicious dishes, and feel free to leave your feedback and share your experiences with the recipes you’ve tried. Cooking together makes everything better

Creamy Cauliflower Soup Recipe: Healthy and Delicious

Cauliflower Soup Recipe

Introduction

Velvety, comforting, and wholesome, cauliflower soup is the ultimate recipe for a cozy evening or a health-conscious meal. Packed with nutrients, this creamy soup is deceptively rich without the heavy use of cream. Its versatility and simplicity make it a must-have in your recipe collection.


The Story Behind Cauliflower Soup

Cauliflower soup traces its roots to European kitchens, where it was cherished as a rustic, cost-effective dish. With cauliflower’s popularity soaring in recent years, this soup has transformed into a modern favorite, celebrated for its adaptability to various diets and cuisines.


The Benefits of Making Your Own Cauliflower Soup

  • Healthier Options: Control the salt, fat, and ingredients for a wholesome dish.
  • Customizable Flavor: Add your favorite spices or toppings to suit your palate.
  • Economical: Cauliflower is budget-friendly and widely available.
  • Diet-Friendly: Naturally low-carb, gluten-free, and easily made vegan.

Essential Ingredients for the Perfect Cauliflower Soup

Base Ingredients:

  • 1 medium head of cauliflower, chopped
  • 1 medium onion, diced
  • 2 garlic cloves, minced
  • 4 cups vegetable or chicken broth
  • 1 cup milk or heavy cream (optional for extra creaminess)

Flavor Enhancers:

  • 2 tablespoons olive oil or butter
  • ½ teaspoon ground nutmeg
  • Salt and pepper to taste

Optional Toppings:

  • Chopped parsley
  • Croutons
  • Shredded cheese
  • Crispy bacon bits

Cultural History of Ingredients

  • Cauliflower: A staple of Mediterranean diets for centuries, cauliflower became a beloved ingredient in Europe and beyond for its adaptability.
  • Garlic: Revered for its health benefits and flavor, garlic has been a cornerstone of culinary traditions worldwide.
  • Nutmeg: Originally from Indonesia, nutmeg adds a warm, subtle spice to soups and stews.

Equipment You’ll Need

  • Large Soup Pot: For sautéing and simmering.
  • Blender or Immersion Blender: To achieve the creamy texture.
  • Cutting Board and Knife: For chopping cauliflower and aromatics.

Step-by-Step Instructions for Cauliflower Soup

Step 1: Prepare the Ingredients

  1. Wash and chop the cauliflower into florets.
  2. Dice the onion and mince the garlic.

Step 2: Sauté the Aromatics

  1. Heat olive oil or butter in a large pot over medium heat.
  2. Add the onion and garlic, cooking until fragrant and translucent (about 3–4 minutes).

Step 3: Cook the Cauliflower

  1. Add the cauliflower florets to the pot and stir to combine.
  2. Pour in the broth, ensuring the cauliflower is mostly submerged.
  3. Bring to a boil, then reduce to a simmer. Cover and cook for 15–20 minutes until the cauliflower is tender.

Step 4: Blend to Perfection

  1. Remove the pot from heat. Use an immersion blender to puree the soup directly in the pot until smooth. Alternatively, transfer the mixture in batches to a blender.
  2. Stir in milk or cream if desired, and season with nutmeg, salt, and pepper.

Step 5: Serve and Garnish

  1. Ladle the soup into bowls.
  2. Top with parsley, croutons, cheese, or crispy bacon for added texture and flavor.

Suggestions for Serving and Storing

  • Serving Suggestions:
    • Pair with a side of crusty bread or a green salad.
    • Serve as a starter for a larger meal or a light main course.
  • Storing:
    • Refrigerate in an airtight container for up to 4 days.
    • Freeze for up to 3 months; reheat gently to retain creaminess.

Chef Simon’s Tips for Cauliflower Soup

  • Roast for Extra Flavor: Roast the cauliflower with olive oil and seasonings before adding it to the soup for a deeper flavor.
  • Adjust Thickness: Add more broth for a thinner soup or let it simmer longer to thicken.
  • Boost Nutrition: Add carrots, celery, or leeks for extra vegetables and flavor.

Emotional and Psychological Impact of Food

A warm bowl of cauliflower soup provides comfort, nourishment, and a sense of relaxation. Sharing it with loved ones creates an inviting atmosphere and strengthens connections.


Mindful Cooking Techniques

  • Be Present: Focus on the textures and aromas as you chop and sauté.
  • Taste as You Go: Adjust seasoning to ensure a balanced, flavorful result.

Tips for Keeping the Recipe Fresh Longer

  • Cool Before Storing: Let the soup cool completely before refrigerating to prevent condensation.
  • Reheat Gently: Warm over low heat to avoid separating the cream.

Advanced Culinary Terms and Techniques

  • Sweating Aromatics: Cooking onions and garlic gently to release their flavors without browning.
  • Pureeing: Using a blender to achieve a smooth and silky soup consistency.

Healthy Ingredient Alternatives

  • Dairy-Free Option: Replace milk or cream with coconut milk or almond milk.
  • Low-Calorie Option: Use only broth and skip the cream for a lighter version.
  • Gluten-Free Toppings: Choose gluten-free croutons or skip them entirely.

More Serving Ideas

  • Spicy Variation: Add red pepper flakes or a dash of hot sauce for heat.
  • Herb-Infused: Blend in fresh basil or thyme for added freshness.
  • Cheesy Delight: Stir in Parmesan or sharp cheddar for extra indulgence.

Common Issues and Solutions

  • Grainy Texture: Blend longer or strain the soup for a smoother consistency.
  • Too Thick: Add more broth or water to thin it out.
  • Overly Bland: Adjust with additional seasoning or a squeeze of lemon juice.

Variations to Try

  • Loaded Cauliflower Soup: Add cooked potatoes, shredded cheese, and crispy bacon for a heartier dish.
  • Curried Cauliflower Soup: Incorporate curry powder and coconut milk for an exotic twist.
  • Vegan Cauliflower Soup: Use vegetable broth and skip the cream for a plant-based option.

Nutritional Information and Health Benefits

Per Serving (1 cup):

  • Calories: 120
  • Protein: 4g
  • Fat: 5g
  • Carbohydrates: 16g
  • Fiber: 4g

Health Benefits:

  • High in vitamin C, supporting immune health.
  • Rich in fiber, promoting digestive wellness.
  • Low in calories, ideal for weight management.

The Art of Pairing Cauliflower Soup

  • Main Course: Pair with grilled chicken or roasted fish.
  • Beverage: Serve alongside a crisp white wine or sparkling water.
  • Complementary Sides: Accompany with a slice of garlic bread or a mixed greens salad.

Frequently Asked Questions (with answers)

Q: Can I use frozen cauliflower?
A: Yes, frozen cauliflower works well and doesn’t compromise the texture or flavor.

Q: How do I avoid a watery soup?
A: Simmer uncovered to let excess liquid evaporate and intensify the flavor.

Q: Can I make it ahead of time?
A: Absolutely! The flavors deepen after a day in the fridge.


Conclusion

Creamy cauliflower soup is a versatile, nutritious dish that satisfies the soul and delights the palate. Whether you’re seeking comfort food or a healthy meal, this recipe is a winner. With endless variations and toppings, it’s a recipe you’ll return to time and time again.


Thank you for visiting SqueezyRecipes! We’re dedicated to making cooking enjoyable and accessible for everyone, regardless of your skill level. Chef Simon is always ready to share the best recipes that bring a creative touch to your daily meals. With each visit, you’ll discover new recipes and innovative ideas that cater to every occasion. Don’t miss out on exploring SqueezyRecipes for the latest delicious dishes, and feel free to leave your feedback and share your experiences with the recipes you’ve tried. Cooking together makes everything better!

Bold Enchilada Casser-Ole! Recipe: Flavorful and Crowd-Pleasing

Enchilada Casser-Ole! Recipe

Introduction

A delightful twist on classic enchiladas, the Enchilada Casser-Ole! combines bold Mexican-inspired flavors in a layered casserole that’s easy to prepare and perfect for sharing. It’s hearty, cheesy, and packed with seasoned meat, beans, and vibrant spices. Whether you’re hosting a party or looking for a comforting weeknight dinner, this dish will quickly become a favorite.


The Story Behind Enchilada Casser-Ole!

Enchiladas have deep roots in Mexican cuisine, traditionally made by rolling tortillas around fillings and covering them in sauce. The casserole version simplifies the process by layering the ingredients, making it a practical yet flavorful adaptation. The playful name “Casser-Ole!” hints at its festive and comforting nature, celebrating the joy of family-style meals.


The Benefits of Making Your Own Enchilada Casser-Ole!

  • Quick and Convenient: No need to roll individual enchiladas.
  • Customizable: Adjust the spice level, proteins, or toppings to your liking.
  • Feeds a Crowd: Perfect for gatherings or meal prepping.
  • Budget-Friendly: Uses pantry staples like beans, corn, and tortillas.

Essential Ingredients for the Perfect Casser-Ole!

Base Ingredients:

  • 1 lb ground beef (or ground turkey for a lighter option)
  • 1 medium onion, diced
  • 2 cups enchilada sauce (store-bought or homemade)
  • 1 can (15 oz) black beans, rinsed and drained
  • 1 cup frozen corn, thawed
  • 1 can (10 oz) diced tomatoes with green chilies, drained
  • 1 teaspoon chili powder
  • ½ teaspoon cumin
  • ½ teaspoon garlic powder
  • Salt and pepper to taste

Casserole Layers:

  • 6 small corn tortillas, halved
  • 2 cups shredded Mexican cheese blend

Toppings (Optional):

  • Sliced black olives
  • Diced avocado
  • Chopped fresh cilantro
  • Sour cream
  • Sliced jalapeños

Cultural History of Ingredients

  • Tortillas: A staple of Mesoamerican cuisine, tortillas have been a dietary foundation for centuries.
  • Beans: Black beans are a key protein source in Mexican and Latin American diets.
  • Chilies: Used for flavor and heat, chilies are integral to traditional Mexican cooking.

Equipment You’ll Need

  • Large Skillet: For cooking the meat mixture.
  • 9×13-Inch Baking Dish: For layering the casserole.
  • Mixing Bowls: To combine ingredients.
  • Spatula or Wooden Spoon: For stirring.

Step-by-Step Instructions for Enchilada Casser-Ole!

Step 1: Prepare the Meat Mixture

  1. Preheat your oven to 375°F (190°C).
  2. In a large skillet over medium heat, cook the ground beef and diced onion until the meat is browned and fully cooked.
  3. Stir in enchilada sauce, black beans, corn, diced tomatoes with green chilies, and seasonings (chili powder, cumin, garlic powder, salt, and pepper). Simmer for 5–7 minutes, allowing the flavors to meld.

Step 2: Assemble the Casserole

  1. Grease a 9×13-inch baking dish with cooking spray.
  2. Spread a thin layer of the meat mixture on the bottom of the dish.
  3. Arrange a layer of tortilla halves to cover the meat mixture.
  4. Sprinkle a layer of shredded cheese over the tortillas.
  5. Repeat layers until all ingredients are used, finishing with a generous layer of cheese on top.

Step 3: Bake the Casserole

  1. Cover the dish with aluminum foil and bake for 20 minutes.
  2. Remove the foil and bake for an additional 10–15 minutes, or until the cheese is bubbly and golden.
  3. Let the casserole cool for 5–10 minutes before serving.

Suggestions for Serving and Storing

  • Serving Suggestions:
    • Top each portion with sour cream, sliced avocado, or chopped cilantro.
    • Pair with a simple side salad or Spanish rice for a complete meal.
  • Storing:
    • Refrigerate leftovers in an airtight container for up to 4 days.
    • Freeze for up to 3 months; reheat in the oven at 350°F until warmed through.

Chef Simon’s Tips for Enchilada Casser-Ole!

  • Add Depth: Roast your corn before adding it to the meat mixture for a smoky flavor.
  • Spice It Up: Use hot enchilada sauce or add extra jalapeños for a fiery kick.
  • Prevent Sogginess: Lightly toast tortillas before layering to keep them from getting overly soft.

Emotional and Psychological Impact of Food

This casserole brings warmth and happiness to the table. The layered flavors evoke feelings of comfort and nostalgia, making it the ultimate crowd-pleaser.


Mindful Cooking Techniques

  • Layer with Intention: Take care to evenly distribute ingredients for balanced bites.
  • Focus on Freshness: Use fresh herbs and high-quality cheese to enhance the dish.

Tips for Keeping the Recipe Fresh Longer

  • Wrap Tightly: Store leftovers in tightly sealed containers to prevent moisture loss.
  • Reheat Gently: Warm in the oven or microwave with a damp paper towel to keep layers moist.

Advanced Culinary Terms and Techniques

  • Deglaze: Use a splash of chicken stock or water to scrape up browned bits from the skillet for added flavor.
  • Emulsify: Blend the enchilada sauce with a bit of oil to create a smooth, rich texture.

Healthy Ingredient Alternatives

  • Protein Swap: Use ground chicken or turkey for a leaner option.
  • Low-Carb Version: Replace tortillas with thin slices of zucchini or eggplant.
  • Cheese Alternatives: Opt for dairy-free cheese for a vegan-friendly version.

More Serving Ideas

  • Tex-Mex Fusion: Add a drizzle of queso on top for extra creaminess.
  • Breakfast Twist: Layer with scrambled eggs for a breakfast-style casserole.
  • Extra Crunch: Top with crushed tortilla chips or fried onions before baking.

Common Issues and Solutions

  • Soggy Layers: Avoid using too much sauce between layers.
  • Uneven Cooking: Cover with foil during baking to ensure even heat distribution.
  • Overly Spicy: Balance heat by adding a dollop of sour cream or avocado slices.

Variations to Try

  • Vegetarian Version: Substitute the meat with sautéed vegetables or extra beans.
  • Green Enchilada Casserole: Use green enchilada sauce for a tangy twist.
  • Seafood Casser-Ole!: Add cooked shrimp or crab for a coastal flavor.

Nutritional Information and Health Benefits

Per Serving (1 slice):

  • Calories: 380
  • Protein: 22g
  • Fat: 18g
  • Carbohydrates: 30g
  • Fiber: 6g

Health Benefits:

  • Rich in protein from beef and beans.
  • High in fiber from beans and corn.
  • Provides essential vitamins like B12 and iron.

The Art of Pairing Enchilada Casserole

  • Sides: Serve with guacamole, salsa, or refried beans.
  • Beverages: Pair with a cold Mexican lager or a refreshing margarita.
  • Dessert: End the meal with churros or tres leches cake.

Frequently Asked Questions (with answers)

Q: Can I make this casserole ahead of time?
A: Yes, assemble the casserole, cover it tightly, and refrigerate for up to 24 hours before baking.

Q: Can I use flour tortillas instead of corn?
A: Absolutely, but corn tortillas hold up better during baking.

Q: How do I make it spicier?
A: Add diced jalapeños or use a spicier enchilada sauce.


Conclusion

The Enchilada Casser-Ole! is a delightful dish that brings people together over its comforting flavors. Easy to prepare and endlessly versatile, this recipe is a must-try for Mexican food lovers. Share it with your loved ones and let the fiesta begin!


Thank you for visiting SqueezyRecipes! We’re dedicated to making cooking enjoyable and accessible for everyone, regardless of your skill level. Chef Simon is always ready to share the best recipes that bring a creative touch to your daily meals. With each visit, you’ll discover new recipes and innovative ideas that cater to every occasion. Don’t miss out on exploring SqueezyRecipes for the latest delicious dishes, and feel free to leave your feedback and share your experiences with the recipes you’ve tried. Cooking together makes everything better