Introduction
Imagine this: a sizzling tray of golden, cheesy pasta fresh from the oven, with all the savory aromas spiraling in the kitchen. That is what it feels like to be experiencing the magic of Baked Ziti-a dish that warms up hearts and fills cravings like no other. This classic Italian-American casserole is a celebration of rich flavors, simple ingredients, and the joy of sharing food with loved ones. Whether you’re hosting a family dinner, bringing a dish to a potluck, or simply craving comfort food, Baked Ziti never fails to deliver.
This guide dives into everything you need to know to make Baked Ziti unforgettable. From its historical roots to advanced culinary tips, you’ll find inspiration and practical advice for mastering this classic dish.
Table of Contents
- The Story Behind Baked Ziti
The origins of Baked Ziti trace back to southern Italy, where baked pasta dishes, or “pasta al forno,” were staples of special occasions. Ziti itself-a tube-shaped pasta similar to penne-gets its name from the Italian word “zita,” meaning bride. Traditionally, ziti was served at Italian wedding feasts as a symbol of new beginnings and prosperity.
When these Italian immigrants came to America, they had to adjust their culinary traditions in a country full of new, different foods. Over time, Baked Ziti would come to be the cheesy, tomatoey comfort food it is today. It was a staple of Italian-American cuisine and praised for three important reasons: it was cheap, it was simple to make, and it fed an army.
- Why You Should Make Your Own Baked Ziti
Why make Baked Ziti from scratch? The reason may just be that it’s an option for customization and the pleasure of creating something unique in your kitchen, for instance:
Flavor Control: Homemade lets you play with the seasoning, spice level, and quality of ingredients.
Healthier Choices: You’ll be able to use fresh, organic ingredients and make many modifications for dietary needs.
Customization: From vegetarian options to gluten-free pasta, you can tailor Baked Ziti to anyone’s preference.
Family Connection: Preparing the Baked Ziti with your loved ones creates a shared experience that one always remembers.
Making your own Baked Ziti isn’t about the food itself; it’s about the love put into a meal to be prepared for yourself or others.
Ingredients that are a must to make the perfect Baked Ziti
That’s the beauty of Baked Ziti, however-so simple-yet the quality of ingredients will make or break this dish. Here is what you will need for a basic recipe:
Core Ingredients
Ziti Pasta: Hollow, short pasta that holds both sauce and cheese in every bite.
Tomato Sauce: Marinara, ragu, or a mix of both will be perfect for a rich base.
Ground Meat or Sausage: Provides richness and protein; can be omitted for vegetarians.
Cheese Trio: Ricotta for creaminess, mozzarella for meltiness, and Parmesan for a salty, nutty finish.
Garlic and Onions: Aromatics that add depth to your sauce.
Fresh Herbs: Basil and parsley, giving the dish freshness and vibrancy.
Optional Additions
Leafy vegetables such as spinach, mushrooms, or zucchini will add vitamins to your dish.
Red pepper flakes add a touch of heat without overwhelming.
A splash of wine added will deglaze the pan and give more depth to your sauce.
- Cultural History of Ingredients
Every ingredient in the Baked Ziti has its exciting tale to tell.
Pasta: Italy’s love affair with pasta dates back to ancient Rome. Ziti became a regional favorite in Naples, known for being hefty and filling.
Tomatoes: Brought to Europe from the Americas during the 16th century, tomatoes transformed Italian cuisine. The acid element necessary in sauces had been found.
Cheese: Italy’s cheesemaking traditions go back thousands of years, with mozzarella and Parmesan earning global acclaim for their texture and flavor.
- Equipment You’ll Need
Cooking Baked Ziti is straightforward, but having the right tools can make all the difference:
Large Pot: For boiling pasta.
Skillet: To cook the sauce and any meat.
Mixing Bowls: For combining cheeses and other ingredients.
Baking Dish: A 9×13 inch dish is ideal for even cooking.
Aluminum Foil: This prevents the top layer from browning too much while it bakes.
Colander: To drain the pasta.
- Baked Ziti Step-by-Step Instructions
Ingredients
1 lb ziti pasta
1 jar marinara sauce, 24 oz
1 lb ground beef or sausage
2 cups ricotta cheese
2 cups shredded mozzarella cheese
½ cup grated Parmesan cheese
2 cloves garlic minced
1 onion diced
1 tsp dried oregano
1 tsp dried basil
Salt and pepper to taste
Instructions
- Preheat Oven: Heat oven to 375°F (190°C).
- Cook Pasta: Boil ziti until al dente, following package instructions. Drain and set aside.
- Prepare Sauce: In a skillet, sauté garlic and onion until fragrant. Add ground meat and cook until browned. Stir in marinara sauce, oregano, and basil. Simmer for 10 minutes.
- Mix Cheeses: In a bowl, combine ricotta, half of the mozzarella, and Parmesan. Add a pinch of salt and pepper.
- Layer Ingredients: In a greased baking dish, layer half of the pasta, sauce, and cheese mixture. Repeat layers, ending with mozzarella.
- Bake: Cover with foil and bake for 25 minutes. Remove foil and bake additional 10 minutes until cheese is golden and bubbly.
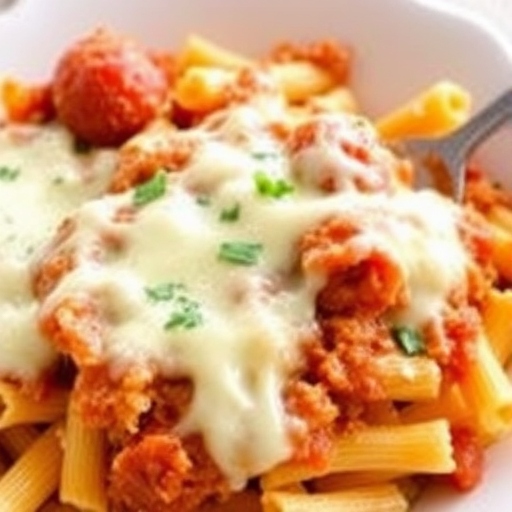
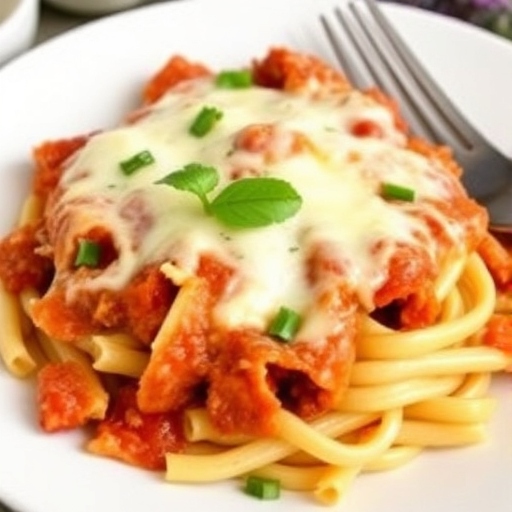
- Serve: Garnish with fresh basil and enjoy!
- Serving Suggestions and Storage
Serving Ideas
Serve with garlic bread and a nice crisp Caesar salad for a well-rounded meal.
For those who like a little heat, add some red pepper flakes on top.
Storing
Let leftovers cool, then refrigerate in an airtight container for up to 4 days.
Freeze individual portions for up to 2 months. Reheat in oven for best results.
- Chef Simon’s Tips for Baked Ziti
Use freshly grated cheese for best texture and flavor.
Add a layer of béchamel sauce for extra creaminess.
Let the dish rest for 5-10 minutes before serving to allow flavors to meld.
- Food and Its Emotional and Psychological Impact
Food can comfort, connect, and even cure. Baked Ziti lets the warm, cheesy embrace of food provide nostalgia and happiness, even going so far as to fill a growling stomach. This recipe will remind you of family gatherings or soothe you after a bad day; it speaks to that deep part of human nature regarding comfort food.
Sharing Baked Ziti with others can strengthen bonds, create memories, and show love in a tangible, heartfelt way.
- Mindful Cooking Techniques
Cooking Baked Ziti mindfully means focusing on each step and savoring the process:
Engage Your Senses: Smell the sauce simmering, feel the textures of the cheese, and appreciate the visual transformation of the dish in the oven.
Practice gratitude: Take a minute to appreciate all the ingredients and where they come from, whose hands touched these before reaching your kitchen.
Be present: Enjoy this process without haste, maybe as an opportunity to relax and recharge yourself.
The above
- How to keep this recipe fresh for longer
Refrigerate: Always keep it away in an airtight container to keep them moist and not dry up like pasta.
Layering Sauce: Make sure to coat all pasta with sauce so that it doesn’t harden over time.
Freezing: If freezing, use freezer-safe containers and thaw overnight in the refrigerator before reheating.
formData
- Advanced Culinary Terms and Techniques
Al Dente: This is a technique where one cooks the pasta until it is firm to the bite to avoid mushiness when baked.
Deglazing: Wine or broth is used to scrape up pan brownings at the bottom for a richer sauce.
Bechamel Sauce: the traditional white sauce, used in layering into Baked Ziti for extra creaminess.
- Healthier Ingredients
Pasta: Choose whole-grain or gluten-free pasta for a healthier base.
Cheese: Using low-fat ricotta and mozzarella keeps the calories lower.
Meat: Replace with ground turkey or chicken for a leaner protein option; omit the meat altogether for a vegetarian option.
Sauce: Choose a no-sugar-added marinara to decrease hidden sugars.
- Additional Serving Suggestions
Combine with a full-bodied red wine such as Chianti or Zinfandel for the quintessential Italian meal.
Serve with roasted vegetables, such as asparagus or Brussels sprouts, for a well-rounded meal.
Make sure to add a small bowl of refreshing balsamic-glazed Caprese salad as an antipasto.
- Common Issues and Solutions
Dry Ziti: This is easily fixed by adding a little more sauce or mixing a bit of reserved pasta water into the layers.
Overcooked Pasta: Always cook pasta al dente, as it will soften further in the oven.
Poor Cheese Melt: Use freshly shredded mozzarella for the best melt.
- Variations to Try
Vegetarian: Add layers of roasted eggplant, zucchini, or spinach.
Seafood: Replace meat with shrimp or crab for a coastal twist.
Spicy: Add diced jalapeños or hot Italian sausage for an extra kick.
- Nutritional Information and Health Benefits
Per Serving (based on traditional recipe)
Calories: ~450
Protein: 20g
Carbohydrates: 35g
Fat: 20g
Health Benefits
Protein-Rich: The cheese and meat provide essential amino acids.
Calcium: Rich in calcium for strong bones and teeth.
Comforting Carbs: Pasta offers a quick energy boost.
- The Art of Pairing Baked Ziti
Pairing Baked Ziti with complementing dishes helps to elevate the meal experience, such as:
Wine: For a balanced acidity of the tomato sauce, Merlot-a medium-bodied red wine-would do just fine.
Side dishes can consist of garlic knots or focaccia bread with herbs to really tie everything together in savory flavors.
Dessert: End with a light tiramisu or panna cotta for a touch of sweetness.
- Weather and Recipe Outcome
Baked Ziti is best prepared during cooler months because its warmth and heartiness will be more comforting then, but it’s a versatile dish to prepare all year round, especially in summer, when you are going to serve it with seasonal salads or lighter sides.
- Other Pasta Recipes to Explore
If you enjoyed making Baked Ziti, try these next:
Classic Lasagna
Penne Arrabbiata
Creamy Alfredo Casserole
Spinach and Ricotta Stuffed Shells
- Tools and Equipment Focus
Invest in good-quality tools to enhance your cooking experience:
Heavy-Duty Skillet: Even heat retention for sauce preparation.
Ceramic Baking Dish: Even cooking and easy cleanup.
Silicone Spatula: For easy mixing of cheeses and spreading layers without any waste.
- Questions/Comments
Q: Can I make Baked Ziti ahead of time?
Yes! Prepare it up to a day ahead of time, cover it, and refrigerate. Bake when ready to serve.
Q: What’s the best way to reheat Baked Ziti?
Cover with foil and heat in the oven at 350°F until warmed through.
Q: Can I use a different type of pasta?
Absolutely! Penne, rigatoni, or fusilli work well as substitutes.
Conclusion
More than a simple dish, Baked Ziti is a testament to the joy of home-cooked meals and sharing meals. It’s more versatile and comforting for any dinner occasion: for a holiday dinner, for a special treat on a weekday, or a potluck hit.
Now that you’ve mastered this recipe, it’s time to don your apron and create your masterpiece. Remember, cooking is an art, and with every tray of Baked Ziti, you’re painting a canvas of warmth, love, and satisfaction.
Bon appétit!