Discover Easy and Flavorful Recipes for Every Meal!

Authentic Curry Stand Chicken Tikka Masala Sauce Recipe: Rich and Flavorful

Curry Stand Chicken Tikka Masala Sauce

Introduction

Chicken Tikka Masala is one of the most beloved dishes in Indian cuisine, celebrated for its vibrant spices and creamy texture. The sauce is rich, flavorful, and aromatic, making it the perfect accompaniment for grilled chicken. This recipe is inspired by the popular Curry Stand’s Chicken Tikka Masala Sauce, known for its balance of spices and smooth, comforting base. It’s ideal for those who want to recreate this iconic dish at home, offering an explosion of flavor in every bite.


The Story Behind Curry Stand Chicken Tikka Masala

While the origins of Chicken Tikka Masala are often debated, many believe the dish was created in the United Kingdom by Indian chefs to cater to British tastes. It became so popular that it’s considered one of the UK’s national dishes. Curry Stand, a renowned restaurant chain, brought its own take on the sauce, known for its perfectly spiced blend and creamy texture. Recreating this sauce allows home cooks to enjoy a taste of the curry stand experience at home.


The Benefits of Making Your Own Chicken Tikka Masala Sauce

  • Control Over Ingredients: You can adjust the level of heat, sweetness, and creaminess to your preference.
  • Freshness: Homemade sauce allows you to enjoy a more aromatic and flavorful experience compared to store-bought versions.
  • Customization: Tailor the sauce to suit dietary restrictions by adjusting the cream, spices, or adding vegetables for extra nutrition.
  • Cost-Effective: Homemade sauce allows you to make enough for multiple meals, saving money in the long run.

Essential Ingredients for the Perfect Chicken Tikka Masala Sauce

Ingredients

  • Chicken Breast or Thighs: 2 lbs, boneless, skinless, cut into bite-sized pieces
  • Vegetable Oil: 2 tbsp
  • Onion: 1 large, finely chopped
  • Garlic: 4 cloves, minced
  • Ginger: 1 tbsp, grated
  • Tomato Puree: 1 can (14 oz)
  • Heavy Cream: 1 cup
  • Greek Yogurt: ½ cup
  • Cilantro: 1 tbsp, chopped (for garnish)
  • Lemon Juice: 1 tbsp
  • Spices:
    • Garam Masala: 2 tbsp
    • Ground Turmeric: 1 tsp
    • Ground Cumin: 1 tsp
    • Ground Coriander: 1 tsp
    • Ground Paprika: 1 tsp
    • Ground Cinnamon: ½ tsp
    • Ground Cardamom: ½ tsp
    • Red Chili Powder (optional): ½ tsp for added heat
    • Salt: to taste
  • Water or Chicken Broth: 1 cup

Cultural History of Ingredients

  • Garam Masala: A key ingredient in Indian cooking, this spice blend includes cinnamon, cardamom, and cloves, providing warmth and depth to dishes.
  • Yogurt: Often used in Indian cooking for its creaminess and ability to tenderize meat.
  • Tomatoes: A staple in many curry recipes, adding a tangy base that balances the richness of the sauce.

Equipment You’ll Need

  • Large saucepan or Dutch oven
  • Stirring spoon
  • Knife and chopping board
  • Measuring cups and spoons
  • Blender or immersion blender (optional)

Step-by-Step Instructions for Chicken Tikka Masala Sauce

  1. Cook the Chicken:
    • In a large skillet, heat 1 tbsp of vegetable oil over medium heat. Add the chicken pieces and cook until browned and cooked through, about 6-7 minutes. Set aside.
  2. Prepare the Sauce:
    • In the same pan, add another tbsp of oil.
    • Add chopped onions and sauté for 4-5 minutes, or until softened and golden.
    • Add minced garlic and grated ginger, cooking for another 1-2 minutes until fragrant.
  3. Add Spices:
    • Stir in the garam masala, turmeric, cumin, coriander, paprika, cinnamon, cardamom, and red chili powder. Cook for 1-2 minutes to bloom the spices and enhance their aroma.
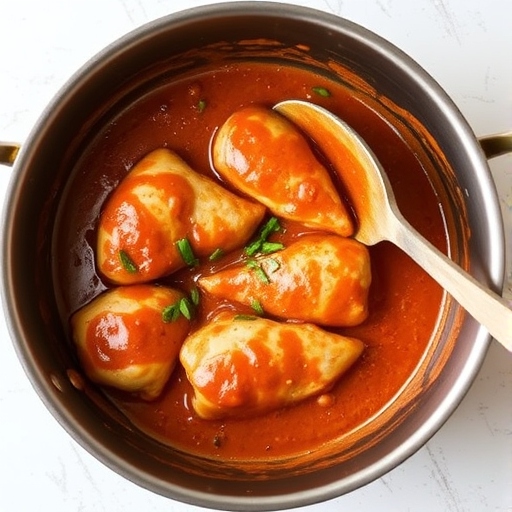
  4. Simmer the Tomato Puree:
    • Add the tomato puree to the pan and mix well. Allow it to simmer on low heat for 10 minutes, stirring occasionally. This will help to cook out the raw tomato flavor.
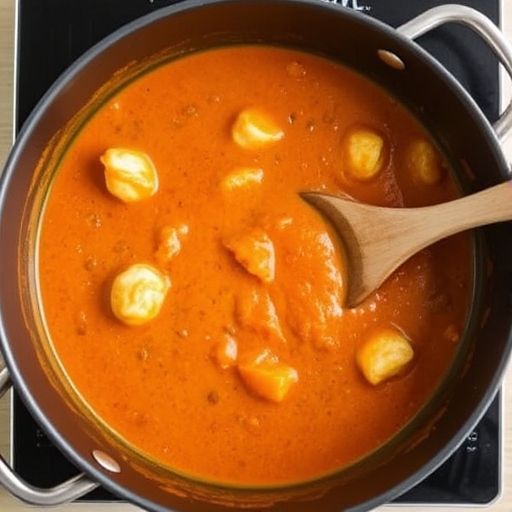
  5. Add Cream and Yogurt:
    • Stir in the heavy cream and Greek yogurt, mixing thoroughly until the sauce is smooth and creamy.
    • Add salt to taste and adjust the heat level with more chili powder if desired.
  6. Blend the Sauce (Optional):
    • For a smoother sauce, use a blender or immersion blender to puree the mixture until it reaches a silky consistency.
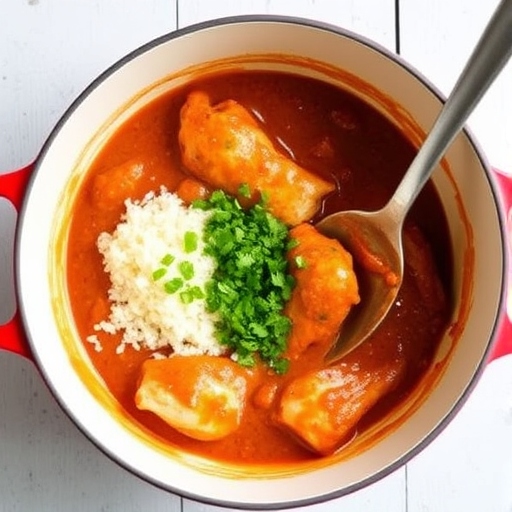
  7. Combine with Chicken:
    • Return the cooked chicken to the sauce and stir to coat the pieces. Simmer for another 10-15 minutes, allowing the chicken to absorb the flavors of the sauce.
  8. Finish with Lemon and Cilantro:
    • Stir in the lemon juice to brighten the sauce and sprinkle with chopped cilantro for a fresh garnish.

Suggestions for Serving and Storing

  • Serve With: Warm naan bread, basmati rice, or steamed vegetables.
  • Store: Refrigerate leftovers in an airtight container for up to 4 days. This dish can also be frozen for up to 3 months. Reheat on the stovetop, adding water or broth if needed to loosen the sauce.

Chef Simon’s Tips for Chicken Tikka Masala Sauce

  • Balance the Spices: Adjust the spice levels to your preference, adding more chili powder for heat or more yogurt for creaminess.
  • Use Bone-In Chicken: For more flavor, consider using bone-in chicken thighs, though boneless chicken is quicker to cook.
  • Simmer Slowly: Allow the sauce to simmer gently to develop the deep flavors—don’t rush this process.

Emotional and Psychological Impact of Food

Indian curries like Chicken Tikka Masala evoke feelings of warmth, comfort, and satisfaction. The rich, creamy sauce can provide a sense of indulgence while also being nourishing, offering both emotional and physical comfort after a long day. Sharing this dish with family and friends can enhance the social and emotional experience of a meal.


Mindful Cooking Techniques

  • Take time to appreciate the transformation of simple ingredients into a rich and complex sauce.
  • Smell the spices as they bloom, and listen to the sizzle of the pan—cooking is an opportunity for mindfulness.

Tips for Keeping the Recipe Fresh Longer

  • Store Separately: Store the chicken and sauce separately if you plan on freezing. This helps preserve the texture of the chicken.
  • Reheat Gently: Reheat over low heat, adding a little extra cream or broth to maintain the sauce’s creamy consistency.

Advanced Culinary Terms and Techniques

  • Blooming Spices: Cooking spices in oil or fat allows their essential oils to release, intensifying their flavor.
  • Deglaze: After cooking the chicken, deglaze the pan with a bit of water or chicken broth to loosen the flavorful browned bits before adding the tomato puree.

Healthy Ingredient Alternatives

  • Low-fat Dairy: Use low-fat yogurt and milk or a plant-based cream alternative for a lighter version of the sauce.
  • Reduce Oil: Use less oil for sautéing to reduce the fat content.
  • Extra Veggies: Add vegetables like bell peppers or spinach to increase the nutritional value of the dish.

More Serving Ideas

  • Vegetarian Version: Substitute chicken with tofu, paneer, or cauliflower for a vegetarian option.
  • Wraps: Serve the chicken tikka masala in a wrap or flatbread for a convenient meal.
  • Curry Bowls: Serve the curry over rice with a side of roasted vegetables or a green salad for a balanced meal.

Common Issues and Solutions

  • Too Spicy: Add a bit of extra yogurt or cream to mellow out the heat.
  • Too Thin: Simmer the sauce longer to thicken it. You can also add a bit of ground cashew or almond flour for a thicker consistency.
  • Lumpy Sauce: If using yogurt, make sure to temper it by mixing it with a little hot sauce before adding it to avoid curdling.

Variations to Try

  • Coconut Chicken Tikka Masala: Substitute the heavy cream with coconut milk for a dairy-free option.
  • Mango Chicken Tikka Masala: Stir in a little mango puree to add a sweet touch to the sauce.
  • Spicy Butter Chicken: Increase the heat and add a little butter for a richer, spicier version.

Nutritional Information and Health Benefits

(Per Serving, 4 Servings)

  • Calories: ~350
  • Protein: ~30g
  • Carbs: ~12g
  • Fat: ~22g

Chicken Tikka Masala provides a good source of protein from the chicken and healthy fats from the cream and yogurt. The dish also offers essential vitamins and minerals, including vitamin C, calcium, and iron, from the spices and chicken. When served with a side of rice or vegetables, it can contribute to a balanced and satisfying meal. For those looking for a lower-calorie version, using less cream and opting for lean cuts of chicken can reduce the overall calorie count without sacrificing flavor.


The Art of Pairing Chicken Tikka Masala Sauce

Chicken Tikka Masala pairs beautifully with a variety of sides that complement its rich, aromatic flavors. Here are a few pairing ideas:

  • Naan Bread: Soft, pillowy naan is perfect for scooping up the creamy sauce and makes for an authentic dining experience.
  • Basmati Rice: Fragrant basmati rice soaks up the sauce wonderfully, creating a fulfilling dish.
  • Saag Paneer: A creamy spinach curry like saag paneer offers a delicious contrast to the richness of the Tikka Masala.
  • Raita: A cool yogurt-based cucumber dip helps balance the heat of the dish while offering a refreshing contrast.
  • Cucumber Salad: A tangy cucumber salad with lime and cilantro can brighten up the flavors and add some crunch.

Weather and Recipe Outcome

The warmth and depth of Chicken Tikka Masala make it ideal for colder weather, especially in the winter months when comfort food is most appreciated. The spices can help warm the body and soothe the soul during chilly evenings. However, it can also be enjoyed year-round, with its bold flavors making it perfect for any season.


Other Curry Recipes to Explore

  • Butter Chicken: Another rich and creamy curry that’s similar to Chicken Tikka Masala but with a more buttery, milder flavor.
  • Lamb Rogan Josh: A hearty and flavorful curry made with tender lamb, this dish is spiced but not too hot, offering a rich and luxurious sauce.
  • Chana Masala: A vegetarian chickpea curry that’s packed with protein and flavor, perfect for those looking to enjoy a meatless curry.
  • Chicken Korma: A milder curry made with ground nuts and cream, offering a softer, slightly sweet flavor.

Focus on Tools and Equipment

To make the perfect Chicken Tikka Masala Sauce, the right equipment can make a big difference in the process:

  • Blender or Immersion Blender: To achieve a smooth, velvety sauce, blending the ingredients is essential. An immersion blender allows you to blend the sauce directly in the pot, saving time and cleanup.
  • Heavy-Bottomed Pan: A Dutch oven or a thick-bottomed pan ensures even heat distribution, helping you avoid burning the spices or sauce.
  • Spice Grinder: For freshly ground spices, a spice grinder ensures maximum flavor, especially for whole spices like cardamom or cumin.

Frequently Asked Questions (with Answers)

Q1: Can I make this dish ahead of time?
A1: Yes, Chicken Tikka Masala actually tastes better the next day after the flavors have had time to meld together. You can prepare the sauce and chicken ahead of time, then refrigerate it for up to 4 days. Reheat it gently on the stovetop before serving.

Q2: Can I substitute yogurt for something else?
A2: If you’re lactose intolerant or prefer not to use dairy, you can substitute the yogurt with coconut yogurt or a plant-based cream. Both alternatives work well and will maintain the creamy texture of the sauce.

Q3: Can I make this recipe spicy?
A3: Absolutely! If you like your Tikka Masala on the spicier side, add more chili powder or use fresh green chilies. You can also add a dash of cayenne pepper for extra heat.

Q4: Can I freeze Chicken Tikka Masala?
A4: Yes, this dish freezes well. Allow it to cool completely before transferring it to an airtight container. It can be frozen for up to 3 months. Reheat gently on the stovetop, adding a little water or cream to thin the sauce if needed.

Q5: What can I serve this dish with?
A5: Chicken Tikka Masala pairs well with naan bread, basmati rice, or even quinoa for a lighter option. A side of sautéed vegetables or a fresh cucumber salad can also balance the richness of the curry.


Conclusion

Chicken Tikka Masala Sauce is a versatile, flavorful dish that can be easily customized to your preferences. Whether you’re serving it with tender grilled chicken, tofu, or cauliflower, this recipe brings the delicious, aromatic flavors of Indian cuisine right to your home. With a perfect balance of spices, creaminess, and savory goodness, this dish is sure to become a favorite for family dinners or special occasions. Follow this recipe to experience the warmth and depth of Chicken Tikka Masala, and don’t forget to share with loved ones for an unforgettable meal.

Spicy Blackened Tuna Steaks with Mango Salsa Recipe: Bold and Refreshing

Blackened Tuna Steaks with Mango Salsa Recipe

1. Introduction

Blackened Tuna Steaks with Mango Salsa is a vibrant, flavorful dish that blends the richness of seared tuna with the sweet, zesty kick of fresh mango salsa. This recipe is perfect for those who appreciate bold flavors and a fresh twist on a classic seafood dish. Whether you’re grilling on a warm summer evening or preparing a light, satisfying meal, this dish delivers a punch of flavor and a visually stunning plate.


2. The Story Behind Blackened Tuna Steaks with Mango Salsa

The “blackening” technique, originally popularized by Chef Paul Prudhomme in the 1980s, involves seasoning fish or meat with a mix of spices and then searing it in a hot pan to form a flavorful, crispy crust. Paired with a tangy, tropical mango salsa, this recipe marries the deep, smoky flavors of the blackened tuna with the bright, refreshing taste of the salsa. It’s a fusion of Southern Cajun cooking and tropical flavors that creates an unforgettable dish.


3. The Benefits of Making Your Own Blackened Tuna Steaks with Mango Salsa

Making this dish at home gives you full control over the seasoning and freshness of the ingredients. By preparing the salsa from scratch, you can adjust the sweetness and heat levels to your preference, while ensuring that the tuna remains tender and flavorful. The homemade approach also means no preservatives or hidden sugars, just pure, delicious, and healthy ingredients.

  • Tuna: High in lean protein, omega-3 fatty acids, and vitamin D, tuna is a heart-healthy choice.
  • Mango Salsa: Packed with vitamins A and C, mangoes boost immunity, improve skin health, and aid digestion.

4. Essential Ingredients for the Perfect Blackened Tuna Steaks with Mango Salsa

For the Tuna Steaks:

  • 4 fresh tuna steaks (about 6 oz each)
  • 2 tablespoons olive oil (for searing)
  • 2 teaspoons paprika
  • 1 teaspoon cayenne pepper
  • 1 teaspoon garlic powder
  • 1 teaspoon onion powder
  • 1/2 teaspoon thyme
  • 1/2 teaspoon oregano
  • Salt and pepper to taste

For the Mango Salsa:

  • 1 ripe mango, peeled and diced
  • 1/2 red bell pepper, finely chopped
  • 1/4 red onion, finely chopped
  • 1 small jalapeño, seeds removed and finely chopped (optional for heat)
  • 1 tablespoon fresh cilantro, chopped
  • Juice of 1 lime
  • Salt and pepper to taste

5. Cultural History of Ingredients

  • Tuna: Widely enjoyed around the world, tuna has been a staple of various cuisines, from Japanese sushi to Mediterranean seafood dishes. It’s a symbol of rich, healthy eating, with cultures around the globe appreciating its versatility and nutritional benefits.
  • Mango: Often referred to as the “king of fruits,” mangoes are native to South Asia but have become a staple in tropical and subtropical regions around the world. They are a vital ingredient in many tropical salsas and chutneys, offering a perfect balance of sweetness and tartness.

6. Equipment You’ll Need

  • Cast iron skillet or heavy pan: Ideal for creating a blackened crust on the tuna steaks.
  • Knife and cutting board: For chopping the mango, bell pepper, onion, and other salsa ingredients.
  • Small bowl: For mixing the seasoning for the tuna steaks.
  • Lime squeezer: To easily extract lime juice for the salsa.

7. Step-by-Step Instructions for Blackened Tuna Steaks with Mango Salsa

Step 1: Prepare the Mango Salsa

  1. Start by preparing the salsa. In a medium-sized bowl, combine the diced mango, chopped red bell pepper, red onion, jalapeño (if using), and cilantro.
  2. Squeeze the lime juice over the mixture and stir to combine.
  3. Season the salsa with salt and pepper to taste. Set aside to allow the flavors to meld.

Step 2: Prepare the Blackened Tuna Steaks

  1. In a small bowl, mix together the paprika, cayenne pepper, garlic powder, onion powder, thyme, oregano, salt, and pepper.
  2. Pat the tuna steaks dry with paper towels and rub the spice mixture evenly on both sides of each steak.
  3. Heat a cast-iron skillet or heavy pan over medium-high heat and add olive oil. Once the oil is shimmering, place the tuna steaks in the skillet.
  4. Sear the tuna steaks for 2-3 minutes on each side, or until a crispy blackened crust forms. The tuna should still be rare in the center, as overcooking will result in a dry steak.
  5. Remove the tuna steaks from the skillet and let them rest for a couple of minutes before serving.

Step 3: Serve

  1. Place the tuna steaks on plates and top each with a generous spoonful of mango salsa.
  2. Serve immediately, perhaps alongside a fresh salad or roasted vegetables.

8. Suggestions for Serving and Storing

  • Serving: This dish pairs well with a simple side of sautéed greens, quinoa, or a light salad. You can also serve it with a chilled glass of white wine or a crisp, cold beer.
  • Storing: If you have leftovers, store the tuna steaks and salsa separately in airtight containers in the refrigerator for up to 2 days. The salsa will keep its freshness, but the tuna may lose its crispness. Reheat the tuna briefly in a pan to maintain its flavor.

9. Chef Simon’s Tips for Blackened Tuna Steaks with Mango Salsa

  • Don’t Overcook the Tuna: Tuna is best served rare to medium-rare, so keep a close eye on the cooking time. Searing it for too long will result in a tough, dry steak.
  • Adjust the Spice Level: If you prefer a milder flavor, reduce the amount of cayenne pepper in the blackening seasoning, or omit the jalapeño from the salsa.

10. Emotional and Psychological Impact of Food

Food is often more than just sustenance; it’s a way to connect with others and celebrate experiences. The combination of the bold blackened tuna and refreshing mango salsa invokes feelings of excitement and satisfaction. The tropical sweetness of mango reminds us of warm, sunny days, while the savory tuna brings a sense of grounding comfort. Enjoying this dish can be a reminder to savor life’s simple pleasures and nourish both body and soul.


11. Mindful Cooking Techniques

  • Focus on Freshness: When preparing the salsa, try to use the freshest ingredients possible. Ripe mangoes will add sweetness and depth to the dish, while freshly squeezed lime juice enhances the overall flavor.
  • Pay Attention to Heat: When blackening the tuna, keep an eye on the heat of the pan. Too hot, and you risk burning the seasoning; too cool, and you won’t get that signature crispy crust.

12. Tips for Keeping the Recipe Fresh Longer

To keep the leftover tuna fresh, store it in an airtight container in the refrigerator. Since the salsa is made with fresh ingredients, it’s best consumed within 1-2 days to retain its vibrant flavor. For the best results, do not freeze the salsa as it may lose its texture.


13. Advanced Culinary Terms and Techniques

  • Blackening: This is a cooking technique where a protein, such as fish or chicken, is coated with a mixture of spices and then cooked in a very hot pan, creating a dark, crispy crust while sealing in the juices.
  • Searing: The process of cooking meat at high heat to form a caramelized crust while keeping the inside tender and juicy.

14. Healthy Ingredient Alternatives

  • Tuna: If you’re looking for an alternative to tuna, you can use other firm fish like swordfish, salmon, or even a plant-based protein like tofu for a vegetarian option.
  • Mango Salsa: You can substitute mango with pineapple, peaches, or papaya for a different tropical flair.

15. More Serving Ideas

  • Taco Style: Use the blackened tuna and mango salsa as a filling for soft corn tortillas for a delicious fish taco.
  • Bowls: Serve the tuna and salsa over a bed of rice, quinoa, or couscous for a light and wholesome bowl meal.

16. Common Issues and Solutions

  • Issue: Tuna Overcooked
    Solution: Keep an eye on the cooking time. Tuna cooks very quickly, and overcooking it can lead to a dry steak. Aim for a sear of 2-3 minutes per side.
  • Issue: Salsa Too Sour
    Solution: Adjust the lime juice or add a pinch of sugar to balance the tartness.

17. Variations to Try

  • Citrus Twist: Add orange or grapefruit segments to the mango salsa for an extra burst of citrus.
  • Spicy Kick: Mix in a few dashes of hot sauce or a pinch of red pepper flakes to the blackening seasoning or salsa for added heat.

18. Nutritional Information and Health Benefits

  • Calories: 350 per serving (with salsa)
  • Protein: 28g
  • Fat: 22g (healthy fats from tuna and olive oil)
  • Carbohydrates: 15g (from mango and vegetables)
  • Fiber: 3g
  • Vitamin C: 60% of daily recommended intake (from mango and lime)
  • Omega-3 Fatty Acids: 1000 mg (from tuna)

This dish is packed with lean protein, healthy fats, and plenty of fiber and vitamins, making it not only delicious but also nourishing for your body. The omega-3 fatty acids found in tuna are particularly beneficial for heart health and brain function, while the vitamin C in the mango salsa supports the immune system.


19. The Art of Pairing Blackened Tuna Steaks with Mango Salsa

The natural richness of the tuna pairs beautifully with the tropical sweetness of the mango salsa. This combination creates a contrast of flavors that excite the palate. To elevate the dish even further, pair it with a light, crisp white wine like Sauvignon Blanc or Pinot Grigio. The acidity in these wines balances the richness of the tuna and complements the tangy lime in the salsa. Alternatively, a cold, citrus-infused beer like a wheat beer or pale ale would also be a refreshing pairing.


20. Weather and Recipe Outcome

The outcome of this recipe can be affected by the weather in a few ways:

  • Warm Weather: This dish is perfect for hot summer days when you want something light and refreshing but still packed with flavor. The coolness of the mango salsa is particularly satisfying in warm weather.
  • Cold Weather: While this recipe is typically served as a light meal, it can also be enjoyed in colder weather with a warm side like roasted potatoes or a soup starter. The blackened tuna’s smoky flavor contrasts nicely with a more substantial side dish in the winter.

21. Other Recipes to Explore

If you love the flavors of this dish, here are a few other recipes you might enjoy:

  • Grilled Salmon with Avocado Salsa: A fresh take on grilled fish with a creamy, zesty salsa.
  • Mango Chicken Salad: A light salad featuring grilled chicken and a mango-lime dressing.
  • Shrimp Tacos with Pineapple Salsa: Another tropical dish with bold flavors and a satisfying crunch.

22. Focus on Tools and Equipment

The right equipment can make all the difference in this recipe. Here’s a closer look at the tools you’ll need:

  • Cast Iron Skillet: Ideal for blackening, as it can withstand high heat and provides even cooking.
  • Sharp Knife: Ensures clean cuts when preparing the salsa ingredients and the tuna steaks.
  • Lime Squeezer: A handy tool for extracting maximum juice from your limes, ensuring a fresh and vibrant flavor in your salsa.

23. Frequently Asked Questions (with answers)

  • Q: Can I use frozen tuna for this recipe? A: While fresh tuna yields the best results, you can use frozen tuna steaks as long as they are fully thawed before cooking. Just be sure to pat them dry before seasoning.
  • Q: Can I make the salsa in advance? A: Yes, you can prepare the mango salsa a few hours ahead of time. Just store it in the refrigerator in an airtight container. The salsa will keep for about 1-2 days, but it’s best enjoyed fresh.
  • Q: Can I substitute the tuna with another type of fish? A: Yes, other firm fish such as swordfish, halibut, or salmon can work well as a substitute. Just adjust the cooking time depending on the thickness of the fish.

Conclusion

Blackened Tuna Steaks with Mango Salsa is a dish that offers a harmonious blend of flavors, textures, and colors. From the savory blackened crust on the tuna to the sweet and tangy freshness of the mango salsa, every bite is a burst of excitement. This recipe is not only a feast for the senses but also a healthy, vibrant meal that’s perfect for any occasion. Whether you’re cooking for a special event or just looking to treat yourself to something flavorful, this dish is sure to impress. So go ahead, fire up the skillet, and enjoy this tropical, zesty dish that will leave you craving more!

Easy Black Pepper Beef and Cabbage Stir Fry Recipe

Black Pepper Beef and Cabbage Stir Fry

Introduction

A quick and delicious stir fry, Black Pepper Beef and Cabbage combines tender strips of beef with crisp cabbage in a savory, peppery sauce. This dish is the perfect blend of flavors and textures, offering a satisfying, healthy meal that can be whipped up in under 30 minutes. With its bold flavors and vibrant ingredients, it’s a great choice for busy weeknights or when you’re looking for a hearty yet light dinner.


1. The Story Behind Black Pepper Beef and Cabbage Stir Fry

This stir fry is an inspired fusion dish that brings together the classic pairing of beef and cabbage, a combination that dates back to various Asian cuisines. The dish is influenced by the Chinese stir-fry tradition, where high-heat cooking retains the vegetables’ crispness and enhances the natural flavors. The addition of black pepper adds a sharp, spicy kick that elevates the dish and balances the richness of the beef. It’s a perfect example of how simple ingredients can be transformed into a flavorful meal with just the right seasonings.


2. The Benefits of Making Your Own Black Pepper Beef and Cabbage Stir Fry

  • Healthy & Nutritious: This dish is packed with protein from the beef and fiber from the cabbage, making it a balanced and nourishing meal.
  • Quick & Easy: Ready in less than 30 minutes, it’s a fast meal for busy weeknights.
  • Customizable: Add or remove vegetables to suit your preferences or dietary needs.
  • Low-Carb: With minimal use of starch, it’s a great choice for those on low-carb diets.

3. Essential Ingredients for the Perfect Black Pepper Beef and Cabbage Stir Fry

  • Beef: 1 lb (450g) of flank steak or sirloin, thinly sliced against the grain.
  • Cabbage: ½ small head of cabbage, thinly sliced.
  • Bell Pepper: 1 medium bell pepper, thinly sliced.
  • Onion: 1 medium onion, sliced.
  • Garlic: 3 cloves garlic, minced.
  • Ginger: 1-inch piece of fresh ginger, grated.
  • Soy Sauce: 3 tablespoons (low-sodium is recommended).
  • Black Pepper: 1-2 teaspoons freshly ground, or to taste.
  • Sesame Oil: 2 tablespoons for cooking.
  • Vegetable Oil: 1 tablespoon.
  • Rice Vinegar: 1 tablespoon for a touch of acidity.
  • Cornstarch: 1 teaspoon, to thicken the sauce.
  • Red Pepper Flakes (Optional): A pinch, for some extra heat.

4. Cultural History of Ingredients

  • Beef: A staple in many cuisines worldwide, beef is rich in protein and iron. It’s especially popular in Asian stir fry dishes, where it’s quickly cooked to maintain tenderness.
  • Cabbage: Cabbage is a key ingredient in Eastern European, Mediterranean, and Asian cuisines. It’s cheap, nutritious, and easy to grow, making it a food staple throughout history.
  • Black Pepper: Known as the “king of spices,” black pepper has been traded for centuries and is a prominent seasoning in both Asian and Western cooking. It adds a pungent, spicy flavor that pairs perfectly with beef.

5. Equipment You’ll Need

  • Wok or Skillet: A large skillet or wok for stir-frying.
  • Cutting Board and Knife: For slicing the beef and vegetables.
  • Measuring Spoons: To measure the soy sauce, rice vinegar, and black pepper.
  • Grater or Microplane: To grate the ginger.
  • Wooden Spoon or Tongs: For stirring the ingredients while cooking.

6. Step-by-Step Instructions for Black Pepper Beef and Cabbage Stir Fry

Preparation:

  1. Prep the Ingredients:
    • Slice the beef thinly against the grain.
    • Slice the cabbage, onion, and bell pepper.
    • Mince the garlic and grate the ginger.
  2. Make the Sauce:
    • In a small bowl, mix the soy sauce, rice vinegar, and cornstarch. Stir until the cornstarch dissolves. Add the freshly ground black pepper and set aside.

Stir-Fry:

  1. Heat the Pan:
    • Heat 1 tablespoon of vegetable oil and 1 tablespoon of sesame oil in a wok or large skillet over medium-high heat.
  2. Cook the Beef:
    • Add the sliced beef to the pan and stir-fry for 2-3 minutes until browned. Remove the beef and set aside.
  3. Cook the Vegetables:
    • In the same pan, add the remaining sesame oil. Stir-fry the garlic, ginger, onion, and bell pepper for about 2 minutes until fragrant and the vegetables begin to soften.
  4. Add the Cabbage:
    • Add the sliced cabbage to the pan and cook for another 3-4 minutes, stirring occasionally until it’s just tender but still has a slight crunch.
  5. Combine Beef and Sauce:
    • Return the beef to the pan and pour the sauce over the mixture. Stir everything together to coat evenly, cooking for an additional 2-3 minutes to allow the sauce to thicken and the flavors to combine.

Serving:

  1. Serve:
    • Serve the Black Pepper Beef and Cabbage stir fry hot, over a bed of steamed rice or noodles. Garnish with additional black pepper if desired.

7. Suggestions for Serving and Storing

  • Serving:
    • This stir fry pairs wonderfully with steamed white or brown rice. You can also serve it with noodles or over cauliflower rice for a low-carb option. For extra flavor, top with freshly chopped cilantro or green onions.
  • Storing:
    • Store any leftovers in an airtight container in the refrigerator for up to 3 days. Reheat in a skillet over medium heat for the best texture.

8. Chef Simon’s Tips for Black Pepper Beef and Cabbage Stir Fry

  • Tenderizing Beef:
    • To ensure the beef stays tender, slice it thinly against the grain and avoid overcooking. If you have time, marinate the beef in soy sauce and a dash of cornstarch for 10-15 minutes before cooking to enhance its tenderness.
  • Peppery Kick:
    • For extra heat, increase the amount of black pepper or add a pinch of red pepper flakes to the stir fry. The black pepper should be freshly ground to maximize flavor.
  • Cabbage Tip:
    • If you prefer a softer cabbage texture, cook it for a few minutes longer, but remember to keep it slightly crunchy for the best contrast with the beef.

9. Emotional and Psychological Impact of Food

The savory richness of beef paired with the slight crunch of cabbage offers a satisfying sensory experience. The peppery heat awakens the palate, making this stir fry both comforting and invigorating. It’s a great dish to enjoy after a long day, offering both comfort and a burst of flavor to lift your mood.


10. Mindful Cooking Techniques

Focus on the sizzling sounds as you cook, the aroma of garlic and ginger filling the air, and the vibrant colors of the vegetables. Stir-frying at high heat requires your full attention to avoid burning the ingredients and to ensure the perfect texture. Take your time and appreciate the process.


11. Tips for Keeping the Recipe Fresh Longer

  • Store Properly: Make sure to refrigerate any leftovers in an airtight container to keep the vegetables and beef fresh.
  • Reheat Gently: When reheating, do so on low heat to preserve the texture of the cabbage and beef.

12. Advanced Culinary Terms and Techniques

  • Stir-Frying: A high-heat cooking method, commonly used in Asian cuisine, where ingredients are quickly cooked in a small amount of oil while constantly being stirred.
  • Deglazing: This technique involves adding liquid (like soy sauce) to a pan to loosen browned bits from the bottom, which adds rich flavor to the dish.

13. Healthy Ingredient Alternatives

  • Beef Substitutes: Use lean ground turkey or chicken breast for a lighter protein option.
  • Vegetable Substitutes: Swap cabbage for bok choy, napa cabbage, or spinach for variety.
  • Low-Sodium Soy Sauce: Opt for low-sodium soy sauce to reduce the salt content in the dish.

14. More Serving Ideas

  • Pair with a side of sautéed greens like spinach or bok choy.
  • For a more filling meal, add a side of roasted potatoes or sweet potatoes.

15. Common Issues and Solutions

  • Overcooked Beef: Make sure the beef is thinly sliced and doesn’t sit in the pan too long. Stir-fry quickly to keep it tender.
  • Soggy Cabbage: If the cabbage releases too much water, cook it over higher heat to evaporate excess moisture.

16. Variations to Try

  • Vegetarian Version: Replace the beef with tofu or tempeh for a plant-based version of this stir fry.
  • Spicy Sichuan Style: Add Sichuan peppercorns or chili paste for a more intense flavor profile.

17. Nutritional Information and Health Benefits

  • Calories: Approximately 300-350 calories per serving.
  • Protein: 28g, primarily from the beef, making it a great source of lean protein.
  • Fiber: 5g, from the cabbage and other vegetables, which aids in digestion.
  • Fat: 18g, primarily from the sesame oil and beef, providing essential fatty acids.
  • Vitamins & Minerals: Rich in vitamin C from cabbage and bell peppers, iron from the beef, and antioxidants from the black pepper.

Health Benefits:

  • Cabbage: High in antioxidants, vitamin C, and fiber, cabbage can support immune health, reduce inflammation, and improve digestion.
  • Beef: A great source of iron, zinc, and vitamin B12, which are important for energy production and maintaining a healthy immune system.
  • Black Pepper: Contains piperine, which enhances the absorption of nutrients like turmeric, and can help improve digestion and metabolism.

18. The Art of Pairing Black Pepper Beef and Cabbage Stir Fry

Pair this flavorful stir fry with simple sides that won’t overpower the dish but complement its bold, savory profile.

  • Rice: Steamed jasmine or basmati rice is the ideal choice. The light fluffiness of the rice balances the intensity of the stir fry.
  • Noodles: For a different twist, serve the stir fry over rice noodles or soba for added texture and flavor.
  • Vegetables: Steamed or sautéed vegetables like broccoli, snap peas, or carrots add a fresh, crunchy contrast.

19. Weather and Recipe Outcome

This stir fry is perfect for both warm and cooler weather. During the summer, it makes a quick, satisfying meal when you want something light and flavorful without heating up the kitchen too much. In the winter, the richness of the beef and the warmth of the black pepper can provide a comforting dish on a cold night.


20. Other Stir Fry Recipes to Explore

If you love this Black Pepper Beef and Cabbage Stir Fry, you might also enjoy these other stir fry variations:

  • Ginger Chicken Stir Fry: A fragrant, fresh dish with the sharp flavor of ginger and tender chicken.
  • Vegetable Stir Fry: A vibrant, colorful option with mixed vegetables and a tangy stir-fry sauce.
  • Sweet and Sour Pork Stir Fry: A classic with pork, bell peppers, and a tangy-sweet sauce.

21. Focus on Tools and Equipment

When preparing a stir fry, using the right tools can make a big difference in the cooking process.

  • Wok or Large Skillet: A wok is ideal for stir frying because its sloped sides allow for even cooking and tossing of ingredients, but a large skillet will work well too.
  • Sharp Knife: A sharp knife is essential for slicing the beef thinly and chopping the vegetables evenly, ensuring a perfect cook.
  • Spatula or Tongs: Use a spatula or tongs to stir and toss the ingredients quickly in the hot pan without breaking them up.

22. Frequently Asked Questions (with answers)

Q1: Can I make this dish ahead of time?
Yes, this stir fry can be made ahead and stored in the fridge for up to 3 days. However, the cabbage may lose some of its crispness over time.

Q2: Can I substitute beef with another protein?
Yes! You can substitute beef with chicken, shrimp, or tofu for a different flavor or to meet dietary preferences.

Q3: Can I make it spicier?
Absolutely! You can add more black pepper or incorporate chili flakes or even fresh chili peppers for an extra spicy kick.

Q4: Is this recipe gluten-free?
The recipe is gluten-free as long as you use gluten-free soy sauce. Be sure to double-check the label to ensure it is certified gluten-free.


Conclusion

Black Pepper Beef and Cabbage Stir Fry is a versatile, delicious, and nutritious meal that packs a punch of flavor while remaining quick and simple to prepare. Whether you’re looking for a satisfying weeknight dinner or a dish to impress guests, this stir fry offers the perfect balance of savory beef, crisp cabbage, and the sharp spice of black pepper. It’s a dish that can be customized to suit your preferences and dietary needs, making it an excellent addition to any meal rotation. So gather your ingredients, fire up the stove, and treat yourself to this flavorful stir fry!


This recipe is a perfect example of how simple, fresh ingredients can come together to create a dish that’s not only satisfying but also packed with nutritional benefits. By following the step-by-step instructions and using Chef Simon’s expert tips, you’ll be able to recreate this meal in no time. Whether you’re a beginner or a seasoned cook, this Black Pepper Beef and Cabbage Stir Fry will quickly become one of your favorite go-to recipes.

Easy Zucchini Slice Recipe: Healthy and Delicious

Zucchini slice Recipe

Introduction

Zucchini slice is a delightful, versatile dish that blends wholesome ingredients into a savory slice of comfort. Whether enjoyed as a breakfast, snack, or light lunch, this recipe is a perfect way to use up garden zucchinis while creating a dish that’s both healthy and satisfying. Its simple preparation and incredible flavor make it a go-to for busy households.


1. The Story Behind Zucchini Slice

The zucchini slice has roots in Australian kitchens, where it gained popularity as a convenient, nutritious dish for families. It evolved from traditional frittata recipes, using zucchini as a star ingredient due to its abundance in local gardens. Over time, it became a staple for picnics, school lunches, and quick meals, celebrated for its simplicity and adaptability.


2. The Benefits of Making Your Own Zucchini Slice

  • Customizable: Add or omit ingredients to suit dietary needs or preferences.
  • Nutritious: Packed with vegetables and protein, making it a balanced meal or snack.
  • Cost-effective: Uses affordable, readily available ingredients.
  • Kid-friendly: A great way to sneak vegetables into meals for picky eaters.

3. Essential Ingredients for the Perfect Zucchini Slice

  • Zucchini: 2 medium-sized, grated.
  • Eggs: 5 large, beaten.
  • Cheese: 1 cup grated cheddar or your preferred cheese.
  • Flour: 1 cup self-raising flour.
  • Carrot (optional): 1, grated.
  • Onion: 1 small, finely chopped.
  • Olive Oil: ¼ cup.
  • Salt and Pepper: To taste.
  • Bacon (optional): ½ cup diced (or substitute with turkey or chicken).

4. Cultural History of Ingredients

  • Zucchini: A summer squash native to the Americas, introduced to Europe by explorers.
  • Cheese: A beloved dairy product with a rich history in European and Mediterranean cuisines.
  • Eggs: An ancient ingredient, symbolizing nourishment and versatility across cultures.

5. Equipment You’ll Need

  • Mixing Bowl: For combining ingredients.
  • Grater: To shred zucchini and optional vegetables.
  • Baking Dish: A medium-sized pan for baking.
  • Oven: Preheated to 350°F (175°C).

6. Step-by-Step Instructions for Zucchini Slice

Preparation:

  1. Preheat Oven: Set to 350°F (175°C). Grease or line a baking dish.
  2. Grate Zucchini: Use a grater to shred zucchini into fine pieces. Squeeze out excess moisture.

Mixing Ingredients:

  1. Combine Wet Ingredients: In a large bowl, mix eggs, olive oil, and seasoning.
  2. Add Vegetables: Fold in grated zucchini, onion, carrot, and bacon (if using).
  3. Incorporate Dry Ingredients: Gradually stir in flour and cheese until well combined.

Baking:

  1. Transfer to Dish: Pour mixture into the prepared baking dish.
  2. Bake: Place in the oven and bake for 30-40 minutes or until golden and set.

Serving:

  1. Cool and Slice: Allow to cool slightly before slicing into squares or wedges.

7. Suggestions for Serving and Storing

  • Serving: Serve warm with a side salad or enjoy cold as a snack.
  • Storing: Refrigerate in an airtight container for up to 3 days. It can also be frozen for up to a month.

8. Chef Simon’s Tips for Zucchini Slice

  • Opt for fresh, firm zucchinis for the best texture and flavor.
  • Add herbs like parsley or thyme for extra flavor.
  • Experiment with different cheeses like feta or Parmesan.

9. Emotional and Psychological Impact of Food

Zucchini slice offers comfort through its warm, homey flavors. Its simplicity and versatility make it a dish that brings families together, offering nourishment for both body and soul.


10. Mindful Cooking Techniques

Focus on each step, from grating the zucchini to mixing the batter, appreciating the textures and aromas as you go. This mindfulness enhances the cooking experience and the dish’s quality.


11. Tips for Keeping the Recipe Fresh Longer

  • Use freshly grated zucchini and avoid pre-shredded options to maintain freshness.
  • Store leftovers in a sealed container to retain moisture and prevent drying.

12. Advanced Culinary Terms and Techniques

  • Blanching (Optional): Lightly cook zucchini before mixing for a softer texture.
  • Folding: Gently incorporate ingredients to maintain lightness.

13. Healthy Ingredient Alternatives

  • Replace self-raising flour with whole-wheat flour and baking powder for extra fiber.
  • Use low-fat cheese or nutritional yeast for a lighter option.
  • Substitute bacon with diced mushrooms for a vegetarian twist.

14. More Serving Ideas

  • Pair with a dollop of Greek yogurt or sour cream.
  • Serve as a side to roasted chicken or grilled fish for a complete meal.

15. Common Issues and Solutions

  • Watery Slice: Squeeze zucchini thoroughly to remove excess moisture.
  • Dense Texture: Avoid overmixing the batter to keep it light.
  • Uneven Cooking: Use a consistent oven temperature and ensure the batter is evenly spread.

16. Variations to Try

  • Mediterranean Style: Add olives, sun-dried tomatoes, and feta cheese.
  • Spicy Version: Include chili flakes or diced jalapeños for a kick.
  • Gluten-Free Option: Use almond or coconut flour instead of regular flour.

17. Nutritional Information and Health Benefits

  • Calories: ~200 per slice (depending on ingredients).
  • Rich in Fiber: From zucchini and vegetables.
  • High in Protein: Eggs and cheese contribute to protein content.

18. The Art of Pairing Zucchini Slice

  • Beverages: Pair with a fresh citrus juice or herbal iced tea.
  • Side Dishes: Serve with a crisp cucumber salad or roasted cherry tomatoes.

19. Weather and Recipe Outcome

  • Enjoy warm zucchini slice on cool, rainy days for comfort.
  • Serve chilled on sunny days as a refreshing, light meal.

20. Other Savory Recipes to Explore

  • Spinach and Feta Pie
  • Quiche Lorraine
  • Vegetable Frittata

21. Focus on Tools and Equipment

Invest in a high-quality grater and a reliable non-stick baking dish for hassle-free preparation.


22. Frequently Asked Questions (with answers)

Q: Can I make zucchini slice without flour?
A: Yes, you can use almond flour or oat flour for a gluten-free alternative.

Q: Can I prepare the batter ahead of time?
A: It’s best to prepare it fresh, as zucchini releases water when left to sit.

Q: How do I know when it’s done?
A: The top should be golden brown, and a skewer inserted in the center should come out clean.


Conclusion

Zucchini slice is a wholesome, versatile dish that adapts to any occasion. Whether you’re enjoying it warm or cold, as a snack or a meal, its delightful flavors and nourishing ingredients will leave you satisfied. Try this recipe today and add a touch of homemade comfort to your dining table!

Quick And Easy Paella Recipe

Paella recipe

Introduction

Paella, the jewel of Spanish cuisine, is more than just a dish—it’s an experience. Originating from Valencia, this saffron-infused rice dish is a harmonious blend of flavors, textures, and traditions. Whether you’re crafting the classic seafood version, a meaty variant, or a vegetarian delight, paella promises to bring people together over its vibrant and aromatic presentation.


1. The Story Behind Paella

Paella has humble beginnings as a rural dish cooked by farmers and laborers over open flames. Traditionally, it combined local ingredients like rice, tomatoes, green beans, rabbit, and sometimes snails, flavored with saffron and olive oil. Over time, it evolved into various regional versions, such as the seafood paella popular along the coast and the mixed paella that includes both meat and seafood. Its versatility and rich cultural significance have made it a global favorite.


2. The Benefits of Making Your Own Paella

  • Customization: Tailor the dish to your preferences, whether you love seafood, poultry, or vegetarian options.
  • Freshness: Control the quality of ingredients, ensuring the best flavors and nutritional value.
  • Cost-effective: Homemade paella is often more economical than restaurant versions.
  • Cultural Appreciation: Enjoy a hands-on way to connect with Spanish culinary traditions.

3. Essential Ingredients for the Perfect Paella

Here’s what you’ll need for a classic mixed paella:

  • Rice: 2 cups of Spanish bomba rice (or arborio as an alternative).
  • Saffron: A pinch for authentic flavor and vibrant yellow color.
  • Chicken: 1 pound, cut into pieces.
  • Shrimp: 1 pound, deveined.
  • Mussels: 12, cleaned.
  • Chorizo (optional): ½ pound, sliced.
  • Green Beans: 1 cup, trimmed.
  • Tomatoes: 2, grated.
  • Garlic: 3 cloves, minced.
  • Paprika: 1 teaspoon, for smoky depth.
  • Olive Oil: 4 tablespoons.
  • Chicken Stock: 4 cups, warmed.
  • Lemon Wedges: For garnish.

4. Cultural History of Ingredients

  • Rice: Introduced by the Moors to Spain, rice became a staple in Valencia’s wetlands.
  • Saffron: Harvested from the crocus flower, it was a prized Moorish import.
  • Seafood: Coastal Valencia’s abundant seafood shaped many paella recipes.
  • Paprika: A gift from the Americas, paprika adds depth to Spanish dishes.

5. Equipment You’ll Need

  • Paella Pan: A wide, shallow pan ensures even cooking.
  • Wooden Spoon: For stirring without damaging the pan.
  • Heat Source: Traditional paella is cooked over an open flame, but a stovetop or oven works too.

6. Step-by-Step Instructions for Paella

Preparation:

  1. Preheat Pan: Heat olive oil in a paella pan over medium heat.
  2. Cook Proteins: Sear chicken and chorizo until browned, then set aside.
  3. Sauté Aromatics: Add garlic and tomatoes, cooking until fragrant.
  4. Add Vegetables: Toss in green beans and paprika.

Cooking:

  1. Toast Rice: Stir rice into the mixture for 2 minutes to coat it with flavors.
  2. Add Stock: Pour in warm chicken stock and sprinkle saffron. Do not stir.
  3. Layer Proteins: Arrange shrimp, mussels, chicken, and chorizo on top.

Simmer:

  1. Cook Evenly: Simmer without stirring until liquid is absorbed, about 20 minutes. Adjust heat as needed to avoid burning.

Finishing Touches:

  1. Rest and Garnish: Cover with a clean cloth for 5 minutes to rest. Serve with lemon wedges.

7. Suggestions for Serving and Storing

  • Serving: Serve straight from the paella pan for authenticity. Pair with a fresh salad and crusty bread.
  • Storing: Refrigerate leftovers in an airtight container for up to 2 days. Reheat gently to avoid drying out the rice.

8. Chef Simon’s Tips for Paella

  • Use high-quality saffron for authentic flavor and color.
  • Avoid over-stirring to achieve the prized socarrat—a caramelized rice crust at the bottom.
  • Experiment with seasonal ingredients for a unique twist.

9. Emotional and Psychological Impact of Food

Paella is a communal dish that fosters connection and joy. Sharing it with family and friends creates lasting memories and a sense of togetherness.


10. Mindful Cooking Techniques

Focus on each step, from sautéing to simmering. Mindfulness in preparation enhances the overall experience and results in a better dish.


11. Tips for Keeping the Recipe Fresh Longer

  • Store saffron in an airtight container in a cool, dark place.
  • Use fresh seafood, and cook it on the same day if possible.

12. Advanced Culinary Terms and Techniques

  • Socarrat: The golden crust of rice at the bottom of the pan, achieved by controlled heat.
  • Deglazing: Scraping up browned bits with stock for extra flavor.

13. Healthy Ingredient Alternatives

  • Use turkey instead of chicken for a leaner option.
  • Replace chorizo with smoked paprika for similar flavor without added fat.

14. More Serving Ideas

  • Pair with a crisp white wine or non-alcoholic sparkling beverage.
  • Serve alongside tapas like patatas bravas or Spanish olives.

15. Common Issues and Solutions

  • Burned Rice: Adjust heat to medium-low and monitor closely.
  • Undercooked Mussels: Steam them separately before adding to the paella.

16. Variations to Try

  • Vegetarian Paella: Use artichokes, bell peppers, and peas.
  • Black Rice Paella: Add squid ink for a dramatic color and briny flavor.

17. Nutritional Information and Health Benefits

  • Calories: ~400 per serving (depending on ingredients).
  • Rich in Protein: From chicken and seafood.
  • High in Fiber: Thanks to vegetables and rice.

18. The Art of Pairing Paella

  • Wines: A dry Spanish white wine or rosé complements the flavors.
  • Side Dishes: A fresh citrus salad or roasted red peppers works beautifully.

19. Weather and Recipe Outcome

  • In cooler weather, enjoy paella indoors with warming ingredients like chorizo.
  • On warm days, seafood paella served outdoors evokes Mediterranean vibes.

20. Other Rice Recipes to Explore

  • Risotto: Creamy Italian comfort food.
  • Biryani: Spiced Indian rice dish with meat or vegetables.

21. Focus on Tools and Equipment

Invest in a sturdy paella pan for even cooking and authentic presentation.


22. Frequently Asked Questions (with answers)

Q: Can I use regular rice?
A: It’s best to use short-grain rice like bomba or arborio for proper texture.

Q: Can I make paella without saffron?
A: You can substitute turmeric for color, but saffron provides unmatched flavor.

Q: How do I know if mussels are fresh?
A: Fresh mussels should close tightly when tapped. Discard any that remain open.


Conclusion

Paella is a celebration of flavors, culture, and togetherness. By mastering this recipe, you not only recreate a beloved Spanish tradition but also bring the warmth and joy of communal dining into your home. Ready your pan, gather fresh ingredients, and let the magic of paella transport you to the sun-soaked coasts of Valencia.

Indulgent Giant Nutella Crackle Cake Recipe: Rich, Decadent, and Irresistible

Giant Nutella crackle cake

Introduction

The Giant Nutella Crackle Cake is a decadent, indulgent dessert that’s sure to please any chocolate lover. Imagine a cake with layers of soft, moist sponge and a rich, gooey Nutella filling, all topped off with a crackling sugar crust. This cake is perfect for special occasions, family gatherings, or simply as a treat when you’re in the mood for something irresistible. Whether you’re an experienced baker or a beginner, this recipe will guide you through creating a cake that’s as beautiful as it is delicious.


The Story Behind Giant Nutella Crackle Cake

Nutella has always been a beloved spread, enjoyed by many for its creamy, hazelnut-infused chocolate flavor. The idea for the Giant Nutella Crackle Cake comes from the irresistible combination of Nutella’s creamy texture and the joy of a traditional cake with a twist. By adding a crackling sugar crust, this cake transforms Nutella into a beautiful, indulgent dessert, creating a contrast between the cake’s softness and the delightful crunch of the sugar coating.


The Benefits of Making Your Own Giant Nutella Crackle Cake

Making your own Nutella Crackle Cake means you have complete control over the ingredients, allowing you to choose high-quality chocolate and Nutella, ensuring an even richer flavor. Homemade cakes also offer the flexibility to modify the recipe to suit your tastes, whether you prefer more Nutella filling or a thicker sugar crust. Baking at home brings a sense of accomplishment and the ability to share a made-with-love dessert with friends and family, making it even more special.


Essential Ingredients for the Perfect Giant Nutella Crackle Cake

To create the perfect Nutella Crackle Cake, here are the ingredients you’ll need:

  • For the Cake:
    • 1 ½ cups all-purpose flour
    • 1 cup granulated sugar
    • ½ cup cocoa powder
    • 1 tsp baking powder
    • ½ tsp baking soda
    • ¼ tsp salt
    • 2 large eggs
    • 1 cup milk
    • ½ cup vegetable oil
    • 1 tsp vanilla extract
    • 1 cup boiling water
  • For the Nutella Filling:
    • 1 cup Nutella spread
    • ½ cup heavy cream
  • For the Crackle Sugar Crust:
    • ½ cup granulated sugar
    • ¼ cup water

Cultural History of Ingredients

  • Nutella: Nutella was first created in Italy in the 1940s by Pietro Ferrero. It started as a hazelnut paste, but it quickly evolved into the creamy chocolate-hazelnut spread that we know and love today. Nutella has become a staple in many kitchens worldwide, transcending its Italian roots and inspiring countless recipes, including this cake.
  • Cocoa Powder: Cocoa powder has been used in baking for centuries, dating back to the 18th century when chocolate was first introduced in Europe. It’s a key ingredient in many rich desserts, adding deep, earthy flavor to cakes, brownies, and cookies.
  • Sugar: Sugar, derived from sugar cane or sugar beets, has been an essential ingredient in baking since the 19th century. It’s responsible for sweetening cakes and creating that delightful crackle effect in this recipe.

Equipment You’ll Need

  • Mixing Bowls: For preparing the dry ingredients, wet ingredients, and Nutella filling.
  • Whisk: To combine ingredients smoothly.
  • Electric Mixer: Ideal for achieving a light, airy cake batter.
  • 9-inch Round Cake Pan: To bake the cake.
  • Spatula: For spreading the Nutella filling and smoothing the batter.
  • Saucepan: To prepare the crackle sugar crust.
  • Cooling Rack: To let the cake cool after baking.

Step-by-Step Instructions for Giant Nutella Crackle Cake

  1. Preheat the Oven: Preheat your oven to 350°F (175°C) and grease and line a 9-inch round cake pan with parchment paper.
  2. Prepare the Cake Batter: In a large bowl, sift together the flour, cocoa powder, baking powder, baking soda, and salt. In another bowl, whisk together the eggs, milk, vegetable oil, and vanilla extract. Gradually add the wet ingredients to the dry ingredients and mix until smooth. Stir in the boiling water until the batter is well combined (the batter will be thin).
  3. Bake the Cake: Pour the batter into the prepared cake pan and bake for 30–35 minutes, or until a toothpick inserted into the center of the cake comes out clean. Remove from the oven and let the cake cool completely in the pan.
  4. Prepare the Nutella Filling: In a small saucepan, heat the heavy cream over medium heat until it just begins to simmer. Remove from heat and whisk in the Nutella until smooth and fully combined. Let it cool slightly.
  5. Assemble the Cake: Once the cake has cooled, carefully slice it in half horizontally. Spread the Nutella filling evenly on the bottom layer, then place the top layer of the cake back on.
  6. Make the Crackle Sugar Crust: In a saucepan, combine the granulated sugar and water. Heat over medium heat until the sugar dissolves and the mixture starts to bubble. Let it cook for 3-4 minutes until it thickens slightly. Drizzle the syrup over the top of the cake, letting it spread and form a crackling texture as it cools.
  7. Cool and Serve: Allow the cake to cool completely so the crackle sugar crust forms properly. Slice and serve!

Suggestions for Serving and Storing

  • Serving Suggestions: Serve this cake with a scoop of vanilla ice cream or a dollop of whipped cream for an extra indulgence.
  • Storing: This cake can be stored in an airtight container at room temperature for up to 3 days. If you need to keep it longer, refrigerate it and allow it to come to room temperature before serving.

Chef Simon’s Tips for Giant Nutella Crackle Cake

  • Tip 1: Be sure to use high-quality cocoa powder and Nutella for the best flavor.
  • Tip 2: For an extra touch, you can sprinkle chopped hazelnuts on top of the cake before serving.
  • Tip 3: To prevent the cake from sticking to the pan, be sure to grease and line it with parchment paper.
  • Tip 4: If you want the crackle to be even more pronounced, let the sugar syrup cool for a few minutes before drizzling it over the cake.

Emotional and Psychological Impact of Food

The Nutella Crackle Cake not only satisfies the sweet tooth but also evokes feelings of nostalgia and comfort. Nutella is a beloved treat for many, and its rich, creamy texture can bring joy and satisfaction. Sharing this cake with loved ones during a gathering can create happy memories, reinforcing bonds and creating a sense of connection.


Mindful Cooking Techniques

While preparing the Giant Nutella Crackle Cake, take your time to enjoy the process. Sift the dry ingredients carefully, and whisk the batter gently to avoid overmixing. When creating the crackle sugar crust, focus on the transformation of the syrup as it hardens. These moments of mindfulness can enhance your connection to the food and create a more satisfying cooking experience.


Tips for Keeping the Recipe Fresh Longer

To preserve the freshness of the cake, wrap it tightly in plastic wrap and store it in an airtight container. The cake will remain moist for up to 3 days. If you plan on freezing it, wrap the cake well in plastic wrap and foil, and it can be frozen for up to a month.


Advanced Culinary Terms and Techniques

  • Crackling Sugar Crust: The process of creating a hardened sugar topping that adds texture and visual appeal to the cake.
  • Sifting: The act of passing dry ingredients through a fine mesh to remove lumps and aerate the mixture.
  • Whisking: The technique used to incorporate air into ingredients, making the batter light and fluffy.

Healthy Ingredient Alternatives

  • Lower Sugar Option: To reduce the sugar content, you can substitute some of the granulated sugar with stevia or another sugar substitute.
  • Dairy-Free Option: Use a dairy-free chocolate spread and substitute the heavy cream with coconut cream or almond milk to make this cake dairy-free.
  • Whole Wheat Flour: For a slightly healthier option, you can swap the all-purpose flour for whole wheat flour, though this will alter the texture slightly.

More Serving Ideas

  • Chocolate Sauce: Serve the cake with a drizzle of rich chocolate sauce for extra indulgence.
  • Berries: Pair the cake with fresh berries like strawberries or raspberries for a fresh, tangy contrast to the sweetness.
  • Whipped Cream: A dollop of freshly whipped cream on top adds a creamy and light contrast to the rich cake.

Common Issues and Solutions

  • Problem 1: The cake is too dry.
    • Solution: Be sure not to overbake the cake. Check for doneness by inserting a toothpick and removing it when it comes out with a few moist crumbs.
  • Problem 2: The sugar crust isn’t forming properly.
  • Solution: Make sure the sugar syrup is cooked long enough to thicken slightly. If the syrup is too runny, it won’t form the signature crackling texture. Let it cool for a few minutes before drizzling over the cake for better results.

Variations to Try

  • Nutella and Peanut Butter: Add a layer of creamy peanut butter to the Nutella filling for a sweet and salty twist.
  • Fruit Filling: Incorporate a layer of fresh berries, such as raspberries or strawberries, along with the Nutella for a fruity contrast.
  • Nutella and Banana: Slice bananas and layer them in between the Nutella and cake layers for a delicious combination of flavors.

Nutritional Information and Health Benefits

While the Giant Nutella Crackle Cake is undeniably a treat, it’s important to be mindful of its rich ingredients. Here’s an approximate nutritional breakdown per serving:

  • Calories: 450–500 per slice
  • Fat: 25g
  • Carbohydrates: 50g
  • Protein: 6g
  • Sugar: 35g

Though it’s not a health food, you can enjoy this cake in moderation as part of a balanced diet. The Nutella provides hazelnuts, which are a good source of healthy fats, and the cake offers a dose of carbohydrates to fuel you through the day.


The Art of Pairing Giant Nutella Crackle Cake

This cake pairs wonderfully with a cup of rich coffee or a glass of dessert wine, such as a sweet Riesling or Port. The bitterness of the coffee and the sweetness of the wine contrast beautifully with the cake’s richness, enhancing the overall flavor experience. For a lighter pairing, try it with some freshly brewed herbal tea or a chilled glass of milk.


Weather and Recipe Outcome

The outcome of this cake is not greatly affected by the weather, but it’s always better to bake in a cool, dry environment for more consistent results. Humidity can cause the sugar syrup to behave unpredictably, so if it’s particularly humid, you may need to adjust the cooking time for the syrup or the cake. Baking on a dry, sunny day often yields the best results for a crisp, crackling sugar crust.


Other Cake Recipes to Explore

If you’re a fan of rich, decadent cakes like the Giant Nutella Crackle Cake, here are a few other cake recipes you might enjoy:

  • Chocolate Lava Cake: A warm, gooey chocolate dessert with a molten center.
  • Red Velvet Cake: A moist, velvety cake with a hint of cocoa and cream cheese frosting.
  • Lemon Drizzle Cake: A zesty and fresh cake with a sweet, tangy lemon glaze.

Focus on Tools and Equipment

To achieve the best results for this recipe, you’ll need the right equipment. A high-quality electric mixer is ideal for whipping the cake batter and ensuring it’s light and fluffy. A good saucepan is crucial for creating the crackling sugar syrup, while a reliable 9-inch round cake pan ensures even baking. Don’t forget a cooling rack to help the cake cool evenly and prevent sogginess.


Frequently Asked Questions (with answers)

Q1: Can I use a different type of nut spread?
A1: Yes, you can substitute Nutella with other nut spreads like almond butter or cashew butter, but keep in mind that the flavor will differ from the original.

Q2: Can I freeze this cake?
A2: Yes, this cake can be frozen! Just wrap it tightly in plastic wrap and foil, and it will stay fresh for up to a month. Let it thaw at room temperature before serving.

Q3: Can I make the cake gluten-free?
A3: Yes, you can use a gluten-free all-purpose flour blend to make this cake gluten-free. Just be sure the other ingredients are also gluten-free.

Q4: How can I make the sugar crust more pronounced?
A4: Allow the sugar syrup to cool for a minute or two before drizzling it over the cake. This will help it form a thicker, more defined crackle.


Conclusion

The Giant Nutella Crackle Cake is a show-stopping dessert that’s as visually stunning as it is delicious. With its soft, rich layers of cake and Nutella filling, complemented by the crackling sugar crust, it’s a treat that will delight all of your senses. Whether you’re baking for a special occasion or just indulging in a sweet craving, this cake is sure to satisfy. Follow the steps, and with Chef Simon’s tips, you’ll have a dessert that’s guaranteed to impress. Enjoy the process, share with loved ones, and savor each delicious bite!