Introduction
A delightful twist on classic enchiladas, the Enchilada Casser-Ole! combines bold Mexican-inspired flavors in a layered casserole that’s easy to prepare and perfect for sharing. It’s hearty, cheesy, and packed with seasoned meat, beans, and vibrant spices. Whether you’re hosting a party or looking for a comforting weeknight dinner, this dish will quickly become a favorite.
Table of Contents
The Story Behind Enchilada Casser-Ole!
Enchiladas have deep roots in Mexican cuisine, traditionally made by rolling tortillas around fillings and covering them in sauce. The casserole version simplifies the process by layering the ingredients, making it a practical yet flavorful adaptation. The playful name “Casser-Ole!” hints at its festive and comforting nature, celebrating the joy of family-style meals.
The Benefits of Making Your Own Enchilada Casser-Ole!
- Quick and Convenient: No need to roll individual enchiladas.
- Customizable: Adjust the spice level, proteins, or toppings to your liking.
- Feeds a Crowd: Perfect for gatherings or meal prepping.
- Budget-Friendly: Uses pantry staples like beans, corn, and tortillas.
Essential Ingredients for the Perfect Casser-Ole!
Base Ingredients:
- 1 lb ground beef (or ground turkey for a lighter option)
- 1 medium onion, diced
- 2 cups enchilada sauce (store-bought or homemade)
- 1 can (15 oz) black beans, rinsed and drained
- 1 cup frozen corn, thawed
- 1 can (10 oz) diced tomatoes with green chilies, drained
- 1 teaspoon chili powder
- ½ teaspoon cumin
- ½ teaspoon garlic powder
- Salt and pepper to taste
Casserole Layers:
- 6 small corn tortillas, halved
- 2 cups shredded Mexican cheese blend
Toppings (Optional):
- Sliced black olives
- Diced avocado
- Chopped fresh cilantro
- Sour cream
- Sliced jalapeños
Cultural History of Ingredients
- Tortillas: A staple of Mesoamerican cuisine, tortillas have been a dietary foundation for centuries.
- Beans: Black beans are a key protein source in Mexican and Latin American diets.
- Chilies: Used for flavor and heat, chilies are integral to traditional Mexican cooking.
Equipment You’ll Need
- Large Skillet: For cooking the meat mixture.
- 9×13-Inch Baking Dish: For layering the casserole.
- Mixing Bowls: To combine ingredients.
- Spatula or Wooden Spoon: For stirring.
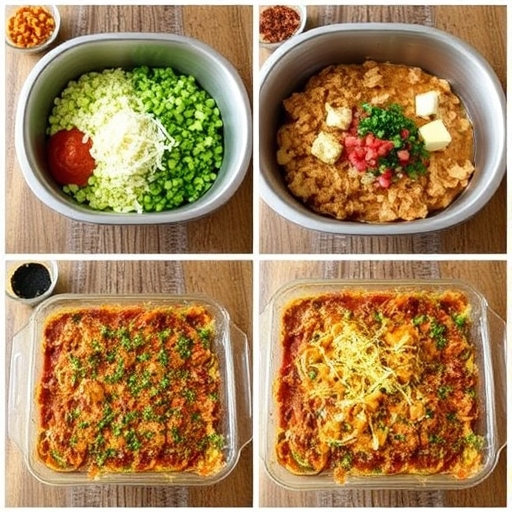
Step-by-Step Instructions for Enchilada Casser-Ole!
Step 1: Prepare the Meat Mixture
- Preheat your oven to 375°F (190°C).
- In a large skillet over medium heat, cook the ground beef and diced onion until the meat is browned and fully cooked.
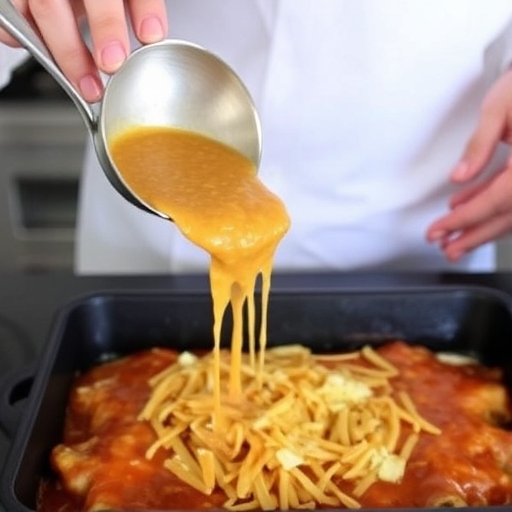
- Stir in enchilada sauce, black beans, corn, diced tomatoes with green chilies, and seasonings (chili powder, cumin, garlic powder, salt, and pepper). Simmer for 5–7 minutes, allowing the flavors to meld.
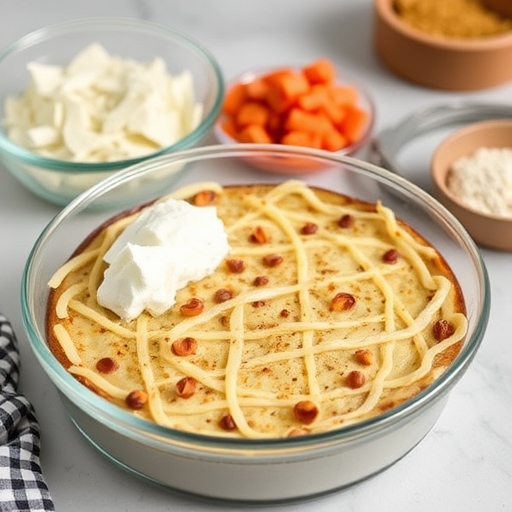
Step 2: Assemble the Casserole
- Grease a 9×13-inch baking dish with cooking spray.
- Spread a thin layer of the meat mixture on the bottom of the dish.
- Arrange a layer of tortilla halves to cover the meat mixture.
- Sprinkle a layer of shredded cheese over the tortillas.
- Repeat layers until all ingredients are used, finishing with a generous layer of cheese on top.
Step 3: Bake the Casserole
- Cover the dish with aluminum foil and bake for 20 minutes.
- Remove the foil and bake for an additional 10–15 minutes, or until the cheese is bubbly and golden.
- Let the casserole cool for 5–10 minutes before serving.
Suggestions for Serving and Storing
- Serving Suggestions:
- Top each portion with sour cream, sliced avocado, or chopped cilantro.
- Pair with a simple side salad or Spanish rice for a complete meal.
- Storing:
- Refrigerate leftovers in an airtight container for up to 4 days.
- Freeze for up to 3 months; reheat in the oven at 350°F until warmed through.
Chef Simon’s Tips for Enchilada Casser-Ole!
- Add Depth: Roast your corn before adding it to the meat mixture for a smoky flavor.
- Spice It Up: Use hot enchilada sauce or add extra jalapeños for a fiery kick.
- Prevent Sogginess: Lightly toast tortillas before layering to keep them from getting overly soft.
Emotional and Psychological Impact of Food
This casserole brings warmth and happiness to the table. The layered flavors evoke feelings of comfort and nostalgia, making it the ultimate crowd-pleaser.
Mindful Cooking Techniques
- Layer with Intention: Take care to evenly distribute ingredients for balanced bites.
- Focus on Freshness: Use fresh herbs and high-quality cheese to enhance the dish.
Tips for Keeping the Recipe Fresh Longer
- Wrap Tightly: Store leftovers in tightly sealed containers to prevent moisture loss.
- Reheat Gently: Warm in the oven or microwave with a damp paper towel to keep layers moist.
Advanced Culinary Terms and Techniques
- Deglaze: Use a splash of chicken stock or water to scrape up browned bits from the skillet for added flavor.
- Emulsify: Blend the enchilada sauce with a bit of oil to create a smooth, rich texture.
Healthy Ingredient Alternatives
- Protein Swap: Use ground chicken or turkey for a leaner option.
- Low-Carb Version: Replace tortillas with thin slices of zucchini or eggplant.
- Cheese Alternatives: Opt for dairy-free cheese for a vegan-friendly version.
More Serving Ideas
- Tex-Mex Fusion: Add a drizzle of queso on top for extra creaminess.
- Breakfast Twist: Layer with scrambled eggs for a breakfast-style casserole.
- Extra Crunch: Top with crushed tortilla chips or fried onions before baking.
Common Issues and Solutions
- Soggy Layers: Avoid using too much sauce between layers.
- Uneven Cooking: Cover with foil during baking to ensure even heat distribution.
- Overly Spicy: Balance heat by adding a dollop of sour cream or avocado slices.
Variations to Try
- Vegetarian Version: Substitute the meat with sautéed vegetables or extra beans.
- Green Enchilada Casserole: Use green enchilada sauce for a tangy twist.
- Seafood Casser-Ole!: Add cooked shrimp or crab for a coastal flavor.
Nutritional Information and Health Benefits
Per Serving (1 slice):
- Calories: 380
- Protein: 22g
- Fat: 18g
- Carbohydrates: 30g
- Fiber: 6g
Health Benefits:
- Rich in protein from beef and beans.
- High in fiber from beans and corn.
- Provides essential vitamins like B12 and iron.
The Art of Pairing Enchilada Casserole
- Sides: Serve with guacamole, salsa, or refried beans.
- Beverages: Pair with a cold Mexican lager or a refreshing margarita.
- Dessert: End the meal with churros or tres leches cake.
Frequently Asked Questions (with answers)
Q: Can I make this casserole ahead of time?
A: Yes, assemble the casserole, cover it tightly, and refrigerate for up to 24 hours before baking.
Q: Can I use flour tortillas instead of corn?
A: Absolutely, but corn tortillas hold up better during baking.
Q: How do I make it spicier?
A: Add diced jalapeños or use a spicier enchilada sauce.
Conclusion
The Enchilada Casser-Ole! is a delightful dish that brings people together over its comforting flavors. Easy to prepare and endlessly versatile, this recipe is a must-try for Mexican food lovers. Share it with your loved ones and let the fiesta begin!
Thank you for visiting SqueezyRecipes! We’re dedicated to making cooking enjoyable and accessible for everyone, regardless of your skill level. Chef Simon is always ready to share the best recipes that bring a creative touch to your daily meals. With each visit, you’ll discover new recipes and innovative ideas that cater to every occasion. Don’t miss out on exploring SqueezyRecipes for the latest delicious dishes, and feel free to leave your feedback and share your experiences with the recipes you’ve tried. Cooking together makes everything better