Pickled Walnut and Cheese Rolls offer an irresistible blend of tangy, savory, and creamy flavors, wrapped in a delicate pastry. This sophisticated yet simple appetizer or snack combines the earthy complexity of pickled walnuts with the smooth richness of cheese, creating a unique dish perfect for special occasions or everyday indulgence.
Pickled walnuts, a traditional British delicacy dating back to the 18th century, bring an earthy, tangy depth to many dishes. When paired with cheese, they create an extraordinary harmony of flavors. These rolls are inspired by classic English tea-time snacks, offering a modern twist on a timeless pairing.
Creativity: Experiment with shapes, fillings, and presentations.
Cost-Effective: Prepare this gourmet treat at home for a fraction of the cost.
3. Essential Ingredients for the Perfect Pickled Walnut and Cheese Rolls
For the Dough
2 1/2 cups all-purpose flour
1 tsp salt
1/2 cup unsalted butter, cold and cubed
1/3 cup cold water
For the Filling
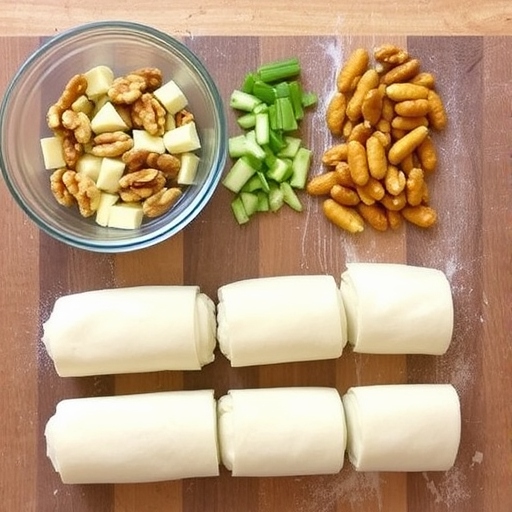
1/2 cup pickled walnuts, finely chopped
1 cup shredded aged cheddar cheese (or Gruyère for a nuttier flavor)
1/4 cup cream cheese, softened
1 tsp Dijon mustard (optional)
1/4 tsp black pepper
For Assembly
1 egg, beaten (for egg wash)
Fresh thyme leaves (optional garnish)
4. Cultural History of Ingredients
Pickled walnuts are a staple in English cuisine, traditionally served with meats and cheeses. The use of aged cheese and buttery pastry evokes classic European culinary traditions, showcasing the richness of these timeless ingredients.
5. Equipment You’ll Need
Mixing bowls
Rolling pin
Baking sheet lined with parchment paper
Pastry brush
Sharp knife or pizza cutter
6. Step-by-Step Instructions for Pickled Walnut and Cheese Rolls
Step 1: Prepare the Dough
In a large mixing bowl, combine flour and salt.
Add cold butter and work it into the flour using a pastry cutter or your fingers until the mixture resembles coarse crumbs.
Gradually add cold water, mixing until the dough comes together. Shape into a disc, wrap in plastic, and refrigerate for at least 30 minutes.
Step 2: Make the Filling
In a medium bowl, mix shredded cheese, cream cheese, chopped pickled walnuts, Dijon mustard (if using), and black pepper until well combined.
Step 3: Roll and Assemble
Preheat the oven to 375°F (190°C).
Roll out the chilled dough on a floured surface into a rectangle, approximately 1/8-inch thick.
Spread the filling evenly over the dough, leaving a 1-inch border on one long side.
Starting from the opposite long edge, roll the dough tightly into a log. Seal the edge by pinching the dough together.
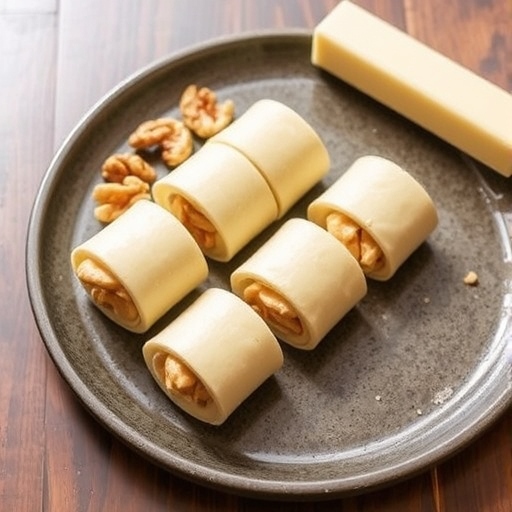
Slice the log into 1-inch pieces and place them cut-side up on the prepared baking sheet.
Step 4: Bake
Brush the rolls with the beaten egg and sprinkle with fresh thyme leaves, if desired.
Bake for 20-25 minutes, or until golden brown and crisp.
7. Suggestions for Serving and Storing
Serving: Serve warm or at room temperature as an appetizer, snack, or alongside a charcuterie board.
Storing: Store in an airtight container in the refrigerator for up to 3 days.
Reheating: Warm in a 350°F (175°C) oven for 5-7 minutes to restore crispness.
8. Chef Simon’s Tips for Pickled Walnut and Cheese Rolls
Use high-quality pickled walnuts for the best flavor.
Experiment with cheeses like blue cheese or goat cheese for a different flavor profile.
For extra crunch, sprinkle chopped nuts or seeds over the rolls before baking.
9. Emotional and Psychological Impact of Food
The rich, tangy, and nutty flavors of these rolls evoke comfort and sophistication. They’re perfect for sharing, bringing people together to create lasting memories around the table.
10. Mindful Cooking Techniques
Enjoy the tactile process of making the dough, focusing on its texture and transformation.
Savor the aromas of baking pastry and melting cheese for a sensory experience.
11. Tips for Keeping the Recipe Fresh Longer
Store leftovers in the fridge and reheat only the portions you plan to eat.
Wrap unbaked rolls in plastic and freeze for up to 1 month. Bake directly from frozen, adding a few extra minutes to the baking time.
12. Advanced Culinary Terms and Techniques
Lamination: Rolling out and folding butter into dough creates flakiness.
Blind Baking: Partially baking the dough before adding filling prevents sogginess.
Chiffonade: Thinly slicing herbs like thyme can enhance the garnish presentation.
13. Healthy Ingredient Alternatives
Substitute whole-wheat flour for a nuttier, fiber-rich pastry.
Use low-fat cream cheese and reduced-fat cheddar for a lighter version.
Replace butter with a plant-based alternative for a vegan-friendly dough.
14. More Serving Ideas
Pair with a side of fig jam or cranberry sauce for a sweet contrast.
Serve alongside a light salad with vinaigrette to balance the richness.
Use as a topping for creamy soups for added texture and flavor.
15. Common Issues and Solutions
Dough Tears: Patch with a small piece of dough and smooth with your fingers.
Overbaked Rolls: Reduce oven temperature slightly or check for doneness earlier.
Runny Filling: Ensure the cream cheese is not overly softened before mixing.
16. Variations to Try
Spicy Rolls: Add chili flakes or smoked paprika to the filling for heat.
Sweet Rolls: Swap pickled walnuts for candied nuts and add a touch of honey.
Mediterranean Twist: Use feta cheese and olives instead of pickled walnuts.
17. Nutritional Information and Health Benefits
Pickled walnuts are rich in antioxidants, while cheese provides protein and calcium. Moderation allows you to enjoy this treat as part of a balanced diet.
18. The Art of Pairing Pickled Walnut and Cheese Rolls
Pair with a crisp white wine, such as Sauvignon Blanc.
Enjoy with a robust ale or porter for a classic British-inspired meal.
19. Weather and Recipe Outcome
These rolls are ideal for cool, breezy weather when warm, savory snacks are especially comforting.
20. Other Appetizer Recipes to Explore
Spinach and Feta Phyllo Rolls
Sundried Tomato and Olive Palmiers
Cheese-Stuffed Pretzel Bites
21. Focus on Tools and Equipment
A sharp knife ensures clean, even slices of the rolled dough.
A silicone baking mat prevents sticking and promotes even browning.
22. Frequently Asked Questions (with answers)
Q: Can I use store-bought pastry dough?
A: Yes, puff pastry or pre-made pie crust works well for convenience.
Q: Can I make these rolls ahead of time?
A: Absolutely! Prepare the rolls and refrigerate unbaked for up to 24 hours.
Q: What’s a substitute for pickled walnuts?
A: Use finely chopped caramelized onions or sun-dried tomatoes for a similar tangy depth.
Conclusion
Pickled Walnut and Cheese Rolls are a gourmet delight that showcase the magic of combining bold flavors and flaky pastry. Perfect for any occasion, this recipe promises to impress and delight, turning a few simple ingredients into a culinary masterpiece.
Thank you for visiting SqueezyRecipes! We’re dedicated to making cooking enjoyable and accessible for everyone, regardless of your skill level. Chef Simon is always ready to share the best recipes that bring a creative touch to your daily meals. With each visit, you’ll discover new recipes and innovative ideas that cater to every occasion. Don’t miss out on exploring SqueezyRecipes for the latest delicious dishes, and feel free to leave your feedback and share your experiences with the recipes you’ve tried. Cooking together makes everything better!
Introduce the dish, its popularity, and its versatility in Indian cuisine. Highlight how Chana Masala is a beloved comfort food, full of flavor and health benefits. Mention how this recipe fits into the modern kitchen, being both easy to prepare and hearty enough to serve at any time of the day.
Table of Contents
1. The Story Behind Chana Masala:
Origins of Chana Masala: Discuss how this dish has deep roots in Indian cuisine and its variation across regions.
Cultural Significance: Share how Chana Masala is a staple in both Indian homes and Indian restaurants worldwide. It’s not just a meal, but a part of cultural gatherings and celebrations.
Popularity: Mention the dish’s global popularity, especially among those who follow vegetarian or plant-based diets.
2. The Benefits of Making Your Own Chana Masala:
Fresh Ingredients: When you make it at home, you control the quality and freshness of the ingredients.
Customization: Tailor the level of spice, the choice of tomatoes, or the use of fresh or canned chickpeas based on personal preference.
Health Benefits: Chana Masala is a protein-packed dish, full of fiber, and rich in essential vitamins and minerals, especially when made from scratch.
3. Essential Ingredients for the Perfect Chana Masala:
Chickpeas (Chana): The star ingredient, providing protein and a creamy texture.
Onions: Key for creating the flavorful base of the dish.
Tomatoes: Fresh or canned, they provide the acidity and balance to the spices.
Garlic and Ginger: Essential for depth of flavor.
Spices: Cumin, coriander, turmeric, garam masala, and red chili powder are key to achieving the signature flavor of Chana Masala.
Cilantro: Used as a garnish for color and fresh flavor.
Lemon: A squeeze at the end to brighten the dish.
4. Cultural History of Ingredients:
Chickpeas: Native to the Middle East and popular in the Indian subcontinent for millennia. Chickpeas are a staple in vegetarian diets across the world, especially in the Middle East and India.
Spices: These spices (turmeric, cumin, garam masala) are staples of Indian cuisine and are part of the broader South Asian culinary tradition.
Tomatoes: Introduced to Indian cuisine by the Portuguese in the 17th century, tomatoes are now a cornerstone of many Indian dishes.
5. Equipment You’ll Need:
Large Skillet or Dutch Oven: Perfect for sautéing the base ingredients and simmering the chickpeas.
Can Opener: If you’re using canned chickpeas or tomatoes.
Blender or Food Processor: If you’re opting to blend the tomatoes or make a smoother base.
Ladle or Spoon: For stirring and serving the dish.
Knife and Cutting Board: Essential for chopping onions, garlic, ginger, and tomatoes.
Rinse and drain chickpeas (if using canned) or soak dried chickpeas overnight.
Dice onions, garlic, and ginger finely.
If using fresh tomatoes, chop them or blend into a smooth puree.
Sautéing the Base:
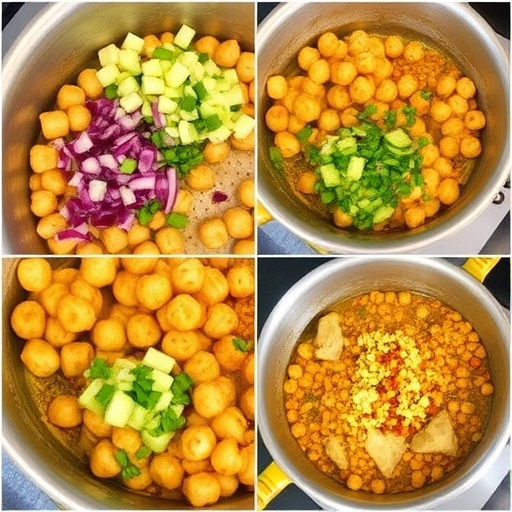
In a large pan, heat oil and sauté onions until golden brown.
Add minced garlic and ginger, cooking until fragrant.
Stir in tomatoes (fresh or canned) and cook until they break down and release their juices.
Spices:
Add ground cumin, coriander, turmeric, and red chili powder.
Stir well to toast the spices and release their fragrance.
Simmering:
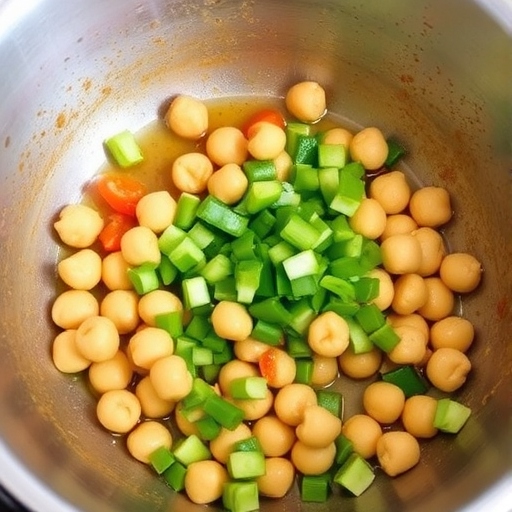
Add the chickpeas and water (or vegetable broth) to the pot.
Let the mixture simmer for 20-30 minutes, allowing the chickpeas to absorb the flavors.
Finishing Touches:
Stir in garam masala and cook for a few more minutes.
Garnish with fresh cilantro and a squeeze of lemon juice.
7. Suggestions for Serving and Storing:
Serving: Serve hot with basmati rice, naan, or paratha. You can also serve with a side of yogurt or chutney for added flavor.
Storing: Leftovers can be stored in an airtight container in the fridge for 3-4 days. Chana Masala also freezes well for up to 3 months.
Reheating: Reheat in a saucepan with a splash of water to bring back its original consistency.
8. Chef Simon’s Tips for Chana Masala:
Use Fresh Spices: Fresh spices will always give you a more vibrant flavor. If possible, buy whole spices and grind them yourself.
Customize the Spice Level: Adjust the level of chili powder to suit your heat preference.
Let it Rest: Let the Chana Masala sit for a few hours or overnight if possible. This allows the flavors to meld together more deeply.
9. Emotional and Psychological Impact of Food:
Comfort Food: Chana Masala is warm, hearty, and satisfying, making it the perfect dish to lift your mood on cold evenings.
Connection to Culture: Preparing and enjoying Chana Masala connects you to the rich culinary traditions of India, offering a sense of comfort and belonging.
10. Mindful Cooking Techniques:
Focus on the Process: Engage all your senses while cooking—smell the spices, listen to the sizzle of the onions, and feel the textures of the chickpeas.
Slow Down and Enjoy: Take time with each step, from sautéing to simmering. The process itself is as fulfilling as the dish.
11. Tips for Keeping the Recipe Fresh Longer:
Store Properly: Ensure the dish is cooled to room temperature before storing it in an airtight container.
Freezing: For long-term storage, freeze in individual portions so you can defrost just the amount you need.
12. Advanced Culinary Terms and Techniques:
Tempering Spices: When sautéing the spices in hot oil at the beginning, you’re “tempering” them to bring out their essential oils and aromas.
Simmering: Cooking the chickpeas slowly in liquid ensures they absorb the full range of spices and flavors.
13. Healthy Ingredient Alternatives:
Low-Sodium Chickpeas: Opt for low-sodium canned chickpeas if you want to reduce your sodium intake.
Coconut Oil: For a healthier fat, substitute ghee or butter with coconut oil.
14. More Serving Ideas:
Chana Masala Wraps: Serve the dish in whole wheat tortillas for a quick wrap.
Add a Protein: For added protein, add boiled eggs, grilled chicken, or paneer to the dish.
Chana Masala Salad: Serve it as a salad with fresh greens and a drizzle of yogurt.
15. Common Issues and Solutions:
Too Spicy: If your Chana Masala turns out too spicy, add a dollop of yogurt or a teaspoon of sugar to balance it out.
Too Dry: If it’s too thick or dry, add more water or vegetable broth to loosen it up.
16. Variations to Try:
Chana Saag: Add spinach or kale to your Chana Masala for extra nutrients and a different flavor profile.
Chana with Potato: Add diced potatoes to your Chana Masala for a heartier version.
17. Nutritional Information and Health Benefits:
Protein: Chickpeas are an excellent source of plant-based protein.
Fiber: This dish is high in fiber, which aids in digestion and keeps you feeling full longer.
Vitamins and Minerals: Rich in iron, folate, and magnesium, Chana Masala supports overall health.
18. The Art of Pairing Chana Masala:
Rice and Naan: Chana Masala pairs wonderfully with basmati rice or soft naan bread.
Yogurt and Chutney: For a refreshing contrast, serve with cool yogurt or a tangy chutney.
19. Weather and Recipe Outcome:
Cold Weather: Chana Masala is especially satisfying on chilly days, warming you from the inside out.
Hot Weather: Though typically served hot, you can also enjoy Chana Masala cold in a salad.
20. Other Indian Recipes to Explore:
Palak Paneer: A creamy spinach dish with paneer.
Aloo Gobi: A flavorful cauliflower and potato dish spiced with turmeric and cumin.
21. Focus on Tools and Equipment:
Pressure Cooker: A great option for cooking dried chickpeas quickly if you don’t have canned ones.
Spice Grinder: To grind fresh spices for better flavor.
22. Frequently Asked Questions (with Answers):
peas instead of canned?**
A: Yes, you can use dried chickpeas. Simply soak them overnight, drain, and then cook them in a pressure cooker or on the stovetop until tender before adding them to the curry.
Q: Can I make Chana Masala in advance?
A: Absolutely! In fact, Chana Masala often tastes even better the next day as the flavors have had more time to meld. Just store it in an airtight container in the fridge and reheat when ready to serve.
Q: How can I adjust the spice level of Chana Masala?
A: If you prefer a milder dish, reduce the amount of red chili powder or omit it entirely. You can also add more yogurt or a bit of cream to tone down the heat.
Q: Can I freeze Chana Masala?
A: Yes, Chana Masala freezes well. Just allow it to cool to room temperature before transferring it to a freezer-safe container. When you’re ready to eat it, reheat it in a pot or microwave.
Conclusion:
Chana Masala is more than just a dish; it’s a vibrant expression of Indian culture, rich in flavor and packed with nutrition. By making it at home, you not only gain control over the ingredients, but you also get the chance to connect with the culinary traditions of India. Whether you enjoy it with rice, naan, or as a hearty meal on its own, Chana Masala is sure to be a crowd-pleaser. With Chef Simon’s tips and mindful cooking techniques, this recipe will be an easy, healthy, and delicious addition to your weekly meal plan. Plus, with its numerous variations and customizable spice levels, you can enjoy Chana Masala in a way that’s perfectly suited to your taste.
Enjoy your Chana Masala, and don’t forget to share the love and flavors with your friends and family!
Thank you for visiting SqueezyRecipes! We’re dedicated to making cooking enjoyable and accessible for everyone, regardless of your skill level. Chef Simon is always ready to share the best recipes that bring a creative touch to your daily meals. With each visit, you’ll discover new recipes and innovative ideas that cater to every occasion. Don’t miss out on exploring SqueezyRecipes for the latest delicious dishes, and feel free to leave your feedback and share your experiences with the recipes you’ve tried. Cooking together makes everything better!
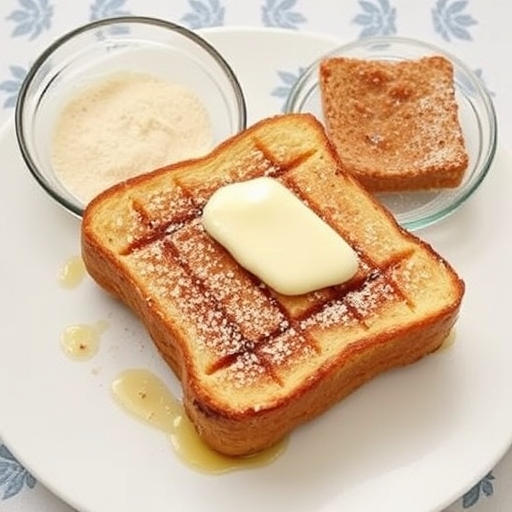
French toast is a timeless breakfast favorite, celebrated for its versatility, simplicity, and satisfying flavors. Whether you like it sweet, savory, or somewhere in between, French toast has the ability to transform even the most ordinary bread into a delightful morning treat. This recipe is the perfect balance of crispy golden edges, a soft, custard-like center, and endless topping possibilities. It’s a dish that appeals to people of all ages and can be customized to suit various dietary preferences, making it a great choice for brunch or breakfast.
Today, we’ll guide you through the process of making this delicious treat from scratch, offering tips, tricks, and serving suggestions that will take your French toast to the next level.
French toast, known by various names around the world such as “eggy bread,” “Arme Ritter” in Germany, and “pain perdu” in France, is a dish that has been enjoyed for centuries. The origins of French toast date back to ancient Rome, where a similar recipe called pan dulcis was made by soaking bread in a mixture of milk and eggs before frying it. This early form of French toast was a way to reuse stale bread, making it more palatable while conserving food.
The dish evolved over time and made its way through Europe, each culture adding its unique twist. The name “French toast” became popular in the United States in the 17th century, likely because French cuisine was highly regarded during this period. Though the dish itself is not uniquely French, the name stuck. In essence, French toast is a simple, resourceful dish that transforms humble ingredients into something extraordinary.
2. The Benefits of Making Your Own French Toast:
Making French toast at home offers numerous benefits, especially when it comes to controlling the quality of ingredients and personalizing the flavor profile. Here are a few reasons why homemade French toast stands out:
Customization: You can adjust the sweetness, spice level, and toppings to match your personal preferences.
Healthier Ingredients: When you make French toast yourself, you can choose healthier options like whole grain or gluten-free bread, organic eggs, or a dairy-free milk substitute.
Cost-Effective: Homemade French toast is an affordable breakfast option, especially if you already have the necessary ingredients on hand.
Freshness: The aroma of freshly made French toast, hot off the pan, is incomparable. Making it yourself ensures that it’s fresh and tailored to your tastes.
3. Essential Ingredients for the Perfect French Toast:
To make perfect French toast, you don’t need much—just a few simple ingredients that come together to create a crispy, custardy breakfast delight:
Bread: The bread is the base of your French toast. Thick slices of sturdy bread, such as brioche, challah, or sourdough, work best for soaking up the egg mixture while still holding their shape. Avoid using too-soft bread, as it may fall apart when you cook it.
Eggs: Eggs are the heart of the custard base, helping to bind the bread and create that creamy interior. Fresh, large eggs are ideal for this recipe.
Milk or Cream: Milk (whole or skim) adds creaminess, but you can also use heavy cream for a richer result. Alternatively, dairy-free options like almond milk or oat milk work well for those with dietary restrictions.
Sugar: A small amount of sugar sweetens the custard, but the sweetness can also come from the toppings you choose.
Vanilla Extract: Vanilla extract adds a warm, aromatic flavor that enhances the overall taste of the French toast.
Cinnamon: Ground cinnamon is a must for that signature, comforting flavor.
Salt: A pinch of salt balances out the sweetness and enhances the flavors.
4. Cultural History of Ingredients:
The ingredients used in French toast have rich histories of their own. Bread, as a staple food, has been around for millennia and was used by ancient civilizations. Eggs, too, have been a part of human diets for thousands of years, symbolizing fertility and abundance in many cultures.
Vanilla, native to Mexico, was first cultivated by the Totonac people before it spread to Europe in the 16th century, where it became a popular flavoring in desserts. Cinnamon, with its warm, sweet-spicy flavor, has been prized in cooking for over 4,000 years, often used in ancient Egypt for both culinary and medicinal purposes.
Together, these ingredients come together in French toast, a dish that has evolved over centuries to become a favorite breakfast around the world.
5. Equipment You’ll Need:
To make French toast, you’ll need only a few basic pieces of equipment:
Frying Pan or Skillet: A non-stick skillet or cast-iron pan is ideal for making French toast. These pans provide even heat distribution and help achieve that perfect crispy golden crust.
Whisk or Fork: To beat the eggs and blend the custard mixture, a whisk or a fork works well.
Measuring Cups and Spoons: Accurate measurements ensure the right balance of ingredients, leading to the perfect French toast.
Spatula: A spatula will help flip the French toast without breaking it, ensuring even cooking on both sides.
6. Step-by-Step Instructions for French Toast:
Now, let’s dive into the process of making delicious French toast!
Ingredients:
4 slices of thick bread (such as brioche or challah)
2 large eggs
½ cup milk or heavy cream
1 tbsp sugar
1 tsp vanilla extract
½ tsp ground cinnamon
Pinch of salt
2 tbsp butter or oil for frying
Instructions:
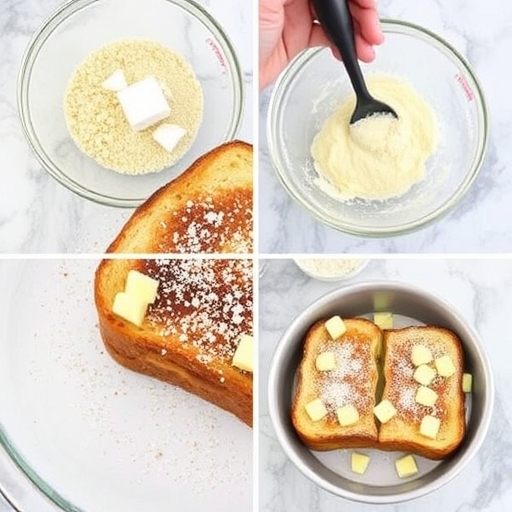
Prepare the Custard Mixture: In a large bowl, whisk together the eggs, milk, sugar, vanilla extract, cinnamon, and salt until smooth and well combined. Make sure the mixture is thoroughly mixed, with no egg streaks visible.
Preheat the Pan: Heat a skillet or frying pan over medium heat. Add 1 tablespoon of butter or oil to the pan and allow it to melt, ensuring the surface is evenly coated.
Soak the Bread: Dip each slice of bread into the custard mixture, making sure both sides are evenly soaked. Avoid soaking for too long to prevent the bread from becoming too soggy.
Cook the French Toast: Place the soaked bread slices into the heated skillet. Cook each slice for 2-3 minutes on one side, until it turns golden brown and crispy. Flip the bread and cook for another 2-3 minutes on the other side. You can add more butter or oil between batches if necessary.
Serve and Enjoy: Remove the French toast from the pan and place it on a plate. Serve immediately with your favorite toppings, such as maple syrup, fresh fruit, powdered sugar, or whipped cream.
7. Suggestions for Serving and Storing:
French toast is versatile when it comes to toppings and serving ideas. Here are some options:
Classic Toppings: Serve with a drizzle of maple syrup, a dusting of powdered sugar, and a handful of fresh berries.
Savory Toppings: Top with crispy bacon, scrambled eggs, or sautéed mushrooms for a savory twist.
Sweet Toppings: Try adding whipped cream, Nutella, or fresh fruit such as bananas, strawberries, or blueberries.
Storing: French toast is best served fresh, but you can store leftovers in an airtight container in the fridge for up to 2 days. Reheat in a toaster or oven for best results.
8. Chef Simon’s Tips for Perfect French Toast:
Use Day-Old Bread: Slightly stale bread soaks up the custard mixture better and helps maintain the bread’s structure while cooking.
Don’t Over-soak: Briefly dip the bread into the custard to avoid soggy French toast.
Adjust Heat: If your French toast is browning too quickly, reduce the heat slightly. The goal is a crispy exterior and soft interior.
Add Flavor Variations: Experiment with different spices like nutmeg or allspice for added flavor.
9. Emotional and Psychological Impact of Food:
Food is not just about nutrition; it’s about experience. French toast, in particular, has a comforting, nostalgic quality for many people. The act of making French toast from scratch can bring back memories of childhood, family breakfasts, or cozy mornings. The aroma of cinnamon and vanilla filling the kitchen creates a sense of warmth and relaxation, contributing to the overall emotional experience of eating.
10.Mindful Cooking Techniques
When preparing French toast, take a moment to connect with the ingredients and the process. Pay attention to the texture of the bread as it soaks in the custard and the sound of it sizzling in the pan. Cooking with mindfulness can enhance the enjoyment of the meal, and the slow, intentional process can elevate the experience from a routine task to a moment of joy.
11. Tips for Keeping the Recipe Fresh Longer
French toast is best enjoyed immediately after cooking, but if you need to store it, here are some tips to keep it fresh:
Cool Completely Before Storing: Allow the French toast to cool to room temperature before wrapping it in plastic wrap or aluminum foil. This helps prevent condensation, which can make the toast soggy.
Store in an Airtight Container: To preserve freshness, store leftovers in an airtight container or wrap each slice individually. This will help keep the texture intact for a longer period.
Reheat Properly: When reheating, avoid microwaving it directly, as it may result in soggy French toast. Instead, reheat it on a griddle or in the oven to restore its crispy exterior. If you’re reheating in the oven, set it to 350°F (175°C) and bake for about 5–10 minutes, depending on the thickness of the slices.
12. Advanced Culinary Terms and Techniques
While French toast is a relatively simple dish, there are a few advanced culinary techniques and terms that can elevate your cooking:
Custard: A mixture of eggs, milk or cream, and flavorings like vanilla and cinnamon that forms the base of the dish. It’s the key to giving French toast its creamy interior and golden-brown exterior.
Browning: This refers to the process of cooking French toast on medium heat until it turns golden and crispy. It’s important to achieve the perfect level of browning to avoid a soggy or overcooked texture.
Maillard Reaction: A chemical reaction that occurs when heat is applied to proteins and sugars in food, resulting in a browned and flavorful crust. This is essential for achieving the crispy texture of French toast.
13. Healthy Ingredient Alternatives
If you’re looking to make a healthier version of French toast, here are some ingredient substitutions that won’t compromise on flavor:
Bread: Choose whole-grain or sprouted wheat bread instead of white bread to add more fiber and nutrients.
Eggs: You can use egg substitutes like flax eggs or aquafaba (the liquid from a can of chickpeas) for a plant-based version.
Milk: Swap whole milk for almond milk, oat milk, or soy milk to make the dish dairy-free.
Sugar: Use natural sweeteners like honey, maple syrup, or coconut sugar instead of refined white sugar.
These substitutions allow you to enjoy French toast with fewer calories and more nutrients, while still maintaining a rich flavor and texture.
14. More Serving Ideas
French toast is incredibly versatile, and here are some creative ways to serve it:
Savory French Toast: Add toppings like poached eggs, avocado, smoked salmon, or sautéed mushrooms for a savory breakfast option.
Fruit-Filled French Toast: Layer your French toast with fresh fruit or even make stuffed French toast by adding a cream cheese filling, fruit preserves, or Nutella.
French Toast Casserole: For a crowd-pleasing breakfast, bake your French toast in a casserole dish with a custard mixture and your favorite toppings. This makes for an easy-to-serve dish that’s perfect for gatherings.
15. Common Issues and Solutions
While making French toast is relatively straightforward, there are a few common issues you might encounter. Here’s how to solve them:
Soggy French Toast: If your French toast turns out soggy, try using thicker slices of bread, and avoid soaking them too long. Day-old bread also works better because it’s drier and absorbs the custard mixture more evenly.
Burnt or Undercooked French Toast: If your French toast burns on the outside but remains uncooked inside, reduce the heat slightly and cook it longer on a lower setting. This will allow the inside to cook without burning the outside.
Not Crispy Enough: For extra crispiness, make sure your pan is preheated before adding the bread, and use enough butter or oil to coat the pan. You can also finish cooking the French toast in the oven for a few minutes to ensure it’s crispy all over.
16. Variations to Try
French toast is a wonderfully adaptable dish. Here are a few variations to experiment with:
Cinnamon Swirl French Toast: Use cinnamon swirl bread for a flavorful twist on the classic recipe. The sweet swirls of cinnamon will infuse every bite with extra warmth and spice.
Banana Bread French Toast: Use slices of banana bread for a sweet, moist base that pairs perfectly with a maple syrup drizzle and sliced bananas.
Stuffed French Toast: Create a filling with cream cheese, Nutella, or even peanut butter, and stuff the bread slices before dipping them in the custard mixture. This adds a creamy, indulgent center.
17. Nutritional Information and Health Benefits
While French toast is often considered a comfort food, there are ways to make it more nutritious. Here’s a breakdown of what you can expect in terms of nutritional information for a typical French toast serving (using whole-grain bread, egg, milk, and a light drizzle of maple syrup):
Calories: Approximately 250–300 calories per serving.
Carbohydrates: 30–40 grams (depending on the type of bread used).
Protein: 8–10 grams (from the eggs and milk).
Fat: 10–15 grams (mostly from butter or oil used for frying).
Fiber: 2–5 grams (with whole-grain bread).
French toast offers a balanced mix of carbohydrates, protein, and healthy fats when made with wholesome ingredients. By swapping out refined sugars for natural sweeteners, using whole-grain bread, and opting for plant-based milks, you can make French toast even healthier while still keeping it delicious.
18. The Art of Pairing French Toast
French toast pairs beautifully with a wide range of sides and beverages. Here are some ideas to complement the dish:
Beverages: Pair French toast with fresh coffee, orange juice, or a berry smoothie for a refreshing contrast to the sweetness of the toast.
Fruit: Fresh fruit like strawberries, bananas, blueberries, or even grilled peaches can add a fresh, tangy balance to the richness of the French toast.
Sides: Bacon, sausage, or scrambled eggs are classic savory sides that work well with French toast, providing a satisfying balance of flavors.
19. Weather and Recipe Outcome
The weather can have a subtle impact on how your French toast turns out. On hot, humid days, you might find that the bread absorbs the custard mixture more quickly, so be sure not to over-soak the bread. On colder days, the bread may soak up more of the custard, resulting in a richer, denser texture. Additionally, in colder weather, cooking your French toast on a higher heat may be helpful to achieve that crisp exterior, while maintaining the soft interior.
20. Other Recipes to Explore
If you love French toast, you might also enjoy these related recipes:
Cinnamon Rolls: Sweet, soft rolls with a spiced filling, perfect for breakfast or brunch.
Waffles: Light, crisp waffles with endless topping possibilities.
Pancakes: Fluffy pancakes served with butter and syrup, another classic breakfast option.
Eggs Benedict: A savory breakfast dish with poached eggs, English muffins, Canadian bacon, and hollandaise sauce.
21. Focus on Tools and Equipment
The right tools can make the process of making French toast easier and more enjoyable:
Non-stick skillet or griddle: Ensures that the toast won’t stick and helps in achieving a crisp exterior.
Whisk: Helps you combine the egg mixture thoroughly, ensuring a smooth custard.
Spatula or tongs: Essential for flipping the French toast without breaking it.
22. Frequently Asked Questions (with Answers)
Q: Can I make French toast without eggs? A: Yes, you can substitute eggs with a mixture of plant-based ingredients like flax meal and water, or use silken tofu for a creamy custard.
Q: Can I make French toast ahead of time? A: Yes, you can prepare French toast ahead of time and store it in the fridge or freezer. Reheat it on the stovetop or in the oven for the best results.
Q: Can I make French toast with gluten-free bread? A: Absolutely! Gluten-free bread works just as well for French toast. Just be sure to select a sturdy, thicker bread to ensure the texture holds up.
Conclusion
French toast is more than just a breakfast dish; it’s a comforting and customizable creation that brings joy to the table. Whether you prefer it sweet or savory, simple or decadent, French toast offers endless possibilities for creativity. By following this detailed guide, you can master the art of French toast and enjoy a delicious, satisfying meal that will become a beloved staple in your kitchen.
Now, go ahead and try this recipe — enjoy the warmth, the crunch, and the satisfaction of a perfect French toast breakfast. Happy cooking!
Thank you for visiting SqueezyRecipes! We’re dedicated to making cooking enjoyable and accessible for everyone, regardless of your skill level. Chef Simon is always ready to share the best recipes that bring a creative touch to your daily meals. With each visit, you’ll discover new recipes and innovative ideas that cater to every occasion. Don’t miss out on exploring SqueezyRecipes for the latest delicious dishes, and feel free to leave your feedback and share your experiences with the recipes you’ve tried. Cooking together makes everything better!
Introduction:Chocolate chip cookies are an iconic American treat loved by generations. Whether it’s a warm afternoon snack or a dessert to share with family and friends, this recipe will help you achieve the perfect chocolate chip cookies—crispy on the edges and soft and chewy in the center.
Table of Contents
1. The Story Behind the Recipe
Chocolate chip cookies have a legendary backstory. It all started in the 1930s when Ruth Wakefield, the inventor of the Toll House chocolate chip cookie, was making cookies at her Massachusetts inn. She decided to chop up a Nestlé chocolate bar and add it to her cookie dough, expecting it to melt. Instead, the chocolate held its shape, creating chunks that gave the cookie its signature texture. Since then, chocolate chip cookies have become a staple in American baking and remain a favorite for cookie lovers worldwide.
Making chocolate chip cookies from scratch is not only a fun and rewarding experience but also offers several benefits:
Freshness: Homemade cookies are fresher and can be enjoyed warm, straight from the oven.
Customization: You have complete control over the ingredients. Whether you prefer dark chocolate chips, milk chocolate, or even a mix, you can tailor the recipe to suit your tastes.
No Artificial Additives: When you make your cookies at home, you avoid the preservatives and artificial flavors that often come in store-bought versions.
Great for Bonding: Baking with loved ones, especially children, is a wonderful bonding experience that creates lasting memories.
To make classic chocolate chip cookies, you’ll need a few key ingredients:
Butter: Softened butter is the base of the dough, providing flavor and contributing to the cookie’s chewy texture.
Granulated Sugar: Adds sweetness and helps achieve the golden color of the cookie.
Brown Sugar: Brown sugar adds moisture and a deeper, caramel-like flavor to the cookies.
Eggs: Eggs bind the ingredients together and help the cookies rise.
Vanilla Extract: Adds warmth and richness to the flavor profile.
All-Purpose Flour: Provides the structure and base for the dough.
Baking Soda: Helps the cookies rise and spread evenly.
Salt: Balances the sweetness and enhances the overall flavor.
Chocolate Chips: The star ingredient! Use semisweet, milk, or dark chocolate chips based on your preference.
4. Cultural History of Ingredients
Butter: Butter has been used in baking for centuries, with its rich flavor making it a preferred fat in many traditional cookie recipes. It adds moisture and contributes to the crisp edges of cookies.
Chocolate Chips: Chocolate chips were introduced by Ruth Wakefield in 1937 and have since become synonymous with American cookies. Chocolate is universally adored, and the combination of chocolate and cookies is undeniably a classic pairing.
Brown Sugar: Brown sugar has a long history, dating back to the 19th century. The addition of molasses gives it its distinctive flavor and moisture-retaining properties, making it a staple in many baked goods.
5. Equipment You’ll Need
For this recipe, you’ll need a few simple kitchen tools:
Mixing Bowls: For combining wet and dry ingredients.
Electric Mixer or Hand Mixer: To cream the butter and sugar together easily.
Baking Sheet: To spread the cookies evenly during baking.
Parchment Paper or Silpat Mat: To prevent the cookies from sticking to the pan and for easy cleanup.
Measuring Cups and Spoons: To ensure accurate measurements.
Cooling Rack: For cooling the cookies once baked to prevent sogginess.
6. Step-by-Step Instructions for Chocolate Chip Cookies
Preheat the Oven: Preheat your oven to 350°F (175°C). Line a baking sheet with parchment paper or a Silpat mat to prevent sticking.
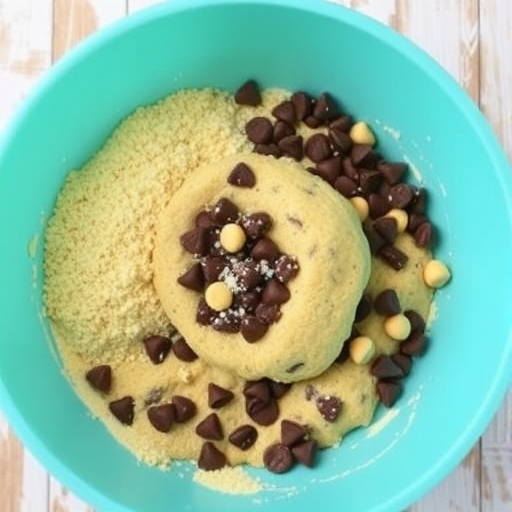
Mix Wet Ingredients: In a large mixing bowl, beat together 1 cup of softened butter, 1 cup of granulated sugar, and 1 cup of brown sugar until creamy. Add 2 large eggs, one at a time, followed by 2 teaspoons of vanilla extract, and continue to beat until smooth.
Combine Dry Ingredients: In a separate bowl, whisk together 3 1/4 cups of all-purpose flour, 1 teaspoon of baking soda, and 1/2 teaspoon of salt.
Mix the Dough: Gradually add the dry ingredients to the wet mixture, mixing on low speed until just combined. Be careful not to overmix.
Add the Chocolate Chips: Stir in 2 cups of chocolate chips (or more, if desired). You can use semisweet, milk, or dark chocolate chips for varying flavor profiles.
Scoop the Dough: Using a spoon or cookie scoop, drop tablespoon-sized portions of dough onto the prepared baking sheet. Leave about 2 inches between each cookie to allow for spreading.
Bake the Cookies: Bake in the preheated oven for 10–12 minutes or until the edges are golden and the centers are slightly soft.
Cool the Cookies: Remove the cookies from the oven and let them cool on the baking sheet for 5 minutes before transferring them to a wire rack to cool completely.
7. Suggestions for Serving and Storing
Serving: Serve the cookies warm, paired with a cold glass of milk or your favorite beverage.
Storing: Store the cookies in an airtight container at room temperature for up to a week. For longer storage, you can freeze them by placing them in a single layer in a freezer-safe bag for up to 3 months.
8. Chef Simon’s Tips for Chocolate Chip Cookies
Butter Temperature: Make sure your butter is softened but not melted. If it’s too cold, it will be harder to cream with the sugars. If it’s too melted, your cookies may spread too much.
Chill the Dough: For thicker, chewier cookies, chill the dough for 30 minutes to an hour before baking. This will help the cookies hold their shape and prevent excessive spreading.
Test One First: If you’re unsure about baking time, test one cookie first. If it spreads too much or is too thin, reduce the baking time or chill the dough.
9. Emotional and Psychological Impact of Food
Baking chocolate chip cookies is often associated with feelings of comfort, nostalgia, and warmth. The smell of freshly baked cookies wafting through the house can evoke positive memories and a sense of home. Eating a warm cookie can also provide a sense of satisfaction and joy, offering a temporary escape from stress.
10. Mindful Cooking Techniques
Baking chocolate chip cookies can be a great opportunity for mindful cooking. Focus on the process of measuring, mixing, and shaping the dough. Take your time and appreciate the simple act of creating something delicious with your hands. Let the experience of baking be as enjoyable as the final result.
11. Tips for Keeping the Recipe Fresh Longer
To keep your cookies fresh for longer:
Store them in an airtight container at room temperature, ensuring they don’t dry out.
Freeze them for longer storage, then defrost and warm them in the oven for a fresh-baked experience.
12. Advanced Culinary Terms and Techniques
Creaming Method: This technique involves beating the butter and sugar together until light and fluffy. It incorporates air into the dough, helping to give the cookies their light texture.
Blind Baking: Although not necessary for chocolate chip cookies, this technique is often used for pies and tarts to pre-bake the crust before filling it.
13. Healthy Ingredient Alternatives
Flour: Substitute all-purpose flour with almond flour for a gluten-free version.
Sugar: You can replace granulated sugar with coconut sugar or maple syrup for a more natural sweetener.
Butter: Replace butter with coconut oil for a dairy-free alternative.
14. More Serving Ideas
Chocolate chip cookies can be enjoyed in a variety of ways:
Ice Cream Sandwiches: Make a delicious treat by sandwiching a scoop of ice cream between two cookies.
Cookie Crumble Topping: Crumble up some cookies and use them as a topping for milkshakes, cupcakes, or parfaits.
15. Common Issues and Solutions
Too Thin or Spread Too Much: Ensure your butter isn’t too melted, and consider chilling the dough before baking.
Cookies Too Hard: Overbaking can lead to hard cookies. Always check them after 10 minutes for a golden edge.
16. Variations to Try
Nutty: Add walnuts, pecans, or almonds to the dough for extra crunch and flavor.
Dark Chocolate: Use dark chocolate chips for a richer, more intense flavor.
17. Nutritional Information and Health Benefits
A standard serving of chocolate chip cookies (1 cookie) contains:
Calories: Approximately 150–200 per cookie
Carbohydrates: 22–25 grams
Protein: 2 grams
Fat: 8–12 grams
Fiber: 1 gram
While chocolate chip cookies are indulgent, they provide some energy from carbohydrates and fats. To make them more nutritious, consider using whole-grain flour and adding nuts.
18. The Art of Pairing Chocolate Chip Cookies
Pairing chocolate chip cookies with complementary foods or drinks can enhance the overall experience. Here are some ideas for perfect pairings:
Milk: The classic pairing for chocolate chip cookies. Whole milk or even plant-based options like almond or oat milk bring out the sweetness of the cookies.
Coffee: The richness of coffee balances the sweetness of the cookies. A strong espresso or a mild latte works wonderfully.
Ice Cream: Serve your warm cookies with a scoop of vanilla, chocolate, or even a flavor like salted caramel or mint chocolate chip for an indulgent dessert.
Tea: A cup of black or green tea provides a subtle contrast to the rich, sweet cookies and is perfect for a lighter option.
Wine: For a more adult twist, pair cookies with dessert wines like a late-harvest Riesling or a port. Their sweetness complements the chocolate and brings out the flavor of the cookies.
19. Weather and Recipe Outcome
The weather can influence the texture and outcome of your cookies:
Hot, Humid Weather: On warmer days, you may notice your dough becomes too soft and sticky. If this happens, refrigerate the dough before baking. You can also reduce the amount of sugar slightly to prevent cookies from spreading too much.
Cold, Dry Weather: In colder temperatures, your dough may firm up quicker, so be sure to allow it to soften at room temperature before working with it. Also, ensure your oven temperature is accurate by checking it with an oven thermometer.
20. Other Cookie Recipes to Explore
If you love chocolate chip cookies, you may want to try other delicious cookie recipes:
Peanut Butter Cookies: Sweet and nutty, peanut butter cookies are another classic treat.
Oatmeal Raisin Cookies: Hearty and wholesome, oatmeal cookies are the perfect alternative for those who enjoy a chewy texture.
Snickerdoodles: These cinnamon-sugar cookies are a flavorful twist on the classic sugar cookie.
Double Chocolate Cookies: For even more chocolate indulgence, these cookies are packed with cocoa powder and chocolate chips.
21. Focus on Tools and Equipment
Using the right tools and equipment ensures that your cookies bake to perfection:
Cookie Scoop: A cookie scoop helps in portioning dough consistently, ensuring evenly sized cookies that bake uniformly.
Silicone Baking Mats: These mats prevent cookies from sticking to the baking sheet and help with even heat distribution.
Cooling Rack: A cooling rack allows air to circulate around the cookies, preventing them from becoming soggy.
Stand Mixer: A stand mixer is ideal for mixing dough quickly and efficiently, especially when making large batches.
22. Frequently Asked Questions (with answers)
Why did my cookies spread too much? If your cookies spread too much, your dough might be too soft. Try chilling the dough before baking to prevent excessive spreading. Also, make sure the butter is softened, not melted, when mixing the dough.
How do I make my cookies chewy instead of crispy? For chewier cookies, use more brown sugar than granulated sugar and avoid overbaking them. Remove the cookies from the oven when the edges are golden but the center is still soft.
Can I freeze the dough? Yes! You can freeze the dough by scooping it into individual balls and freezing them on a baking sheet. Once frozen, transfer the dough balls into a freezer-safe bag for up to 3 months. Bake them straight from the freezer, adding a couple of extra minutes to the baking time.
Can I make the cookies without eggs? Yes, you can replace the eggs with flaxseed meal or chia seeds mixed with water, or use a commercial egg replacer for a vegan option.
Conclusion
Chocolate chip cookies are a timeless treat that brings joy with every bite. Whether you’re baking them for a special occasion, as a gift, or simply to enjoy at home, this classic recipe will always deliver perfect, chewy cookies with just the right amount of sweetness. By following these steps and tips, you can make the most delicious chocolate chip cookies that are sure to impress your family, friends, and even yourself. So preheat your oven, gather your ingredients, and start baking your way to cookie perfection!
Thank you for visiting SqueezyRecipes! We’re dedicated to making cooking enjoyable and accessible for everyone, regardless of your skill level. Chef Simon is always ready to share the best recipes that bring a creative touch to your daily meals. With each visit, you’ll discover new recipes and innovative ideas that cater to every occasion. Don’t miss out on exploring SqueezyRecipes for the latest delicious dishes, and feel free to leave your feedback and share your experiences with the recipes you’ve tried. Cooking together makes everything better!
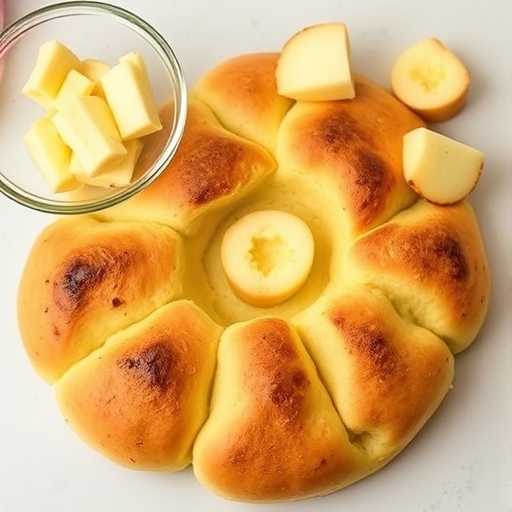
Yorkshire pudding is a quintessential British dish, traditionally served alongside roast beef and gravy. Known for its crispy edges and soft, airy center, it has become a beloved side dish that can also be enjoyed with sausages, or as a stand-alone dish with gravy. If you’ve ever wondered how to create perfect Yorkshire puddings at home, this recipe will guide you through every step.
Yorkshire pudding has a long and fascinating history, dating back to the 18th century. Originally, it was served as a starter to fill up diners before the main course of roast beef, allowing for cheaper cuts of meat to be used. The pudding was traditionally made from the drippings of the meat, which added flavor and richness to the dish.
The name “Yorkshire pudding” was coined to distinguish it from the similar dish made in other parts of the country. The recipe has evolved over the years, and it’s now a staple on the British Sunday dinner table, enjoyed for its golden color, crispiness, and savory flavor.
2. The Benefits of Making Your Own Yorkshire Pudding
There are numerous benefits to making Yorkshire pudding from scratch rather than buying it pre-made. Here are a few reasons why you should give this recipe a try:
Freshness: Homemade Yorkshire puddings are incredibly fresh and full of flavor. They puff up beautifully in the oven and have a light, airy texture that’s hard to match with store-bought versions.
Customization: When you make Yorkshire puddings yourself, you can adjust the recipe to suit your preferences. You can experiment with different oils or fats, or even add herbs for a unique twist.
Pride of Creation: There’s something immensely satisfying about making this iconic dish from scratch, especially when it rises perfectly and is served warm on your table.
Cost-Effective: Homemade Yorkshire puddings cost very little to make, and the ingredients are simple and easy to find.
To make perfect Yorkshire puddings, you’ll need the following simple ingredients:
1 cup (120g) all-purpose flour
1 cup (240ml) whole milk
2 large eggs
1/2 teaspoon salt
1 tablespoon vegetable oil or beef drippings (for the pan)
Optional: A pinch of freshly ground black pepper for seasoning
These ingredients come together to create the airy and crispy texture that makes Yorkshire pudding so irresistible.
4. Cultural History of Ingredients
Each ingredient in Yorkshire pudding has a story tied to both history and culture:
Flour: All-purpose flour is the primary base for the batter. Wheat flour has been a staple in British cuisine for centuries, providing the structure needed for the pudding to rise.
Eggs: Eggs are essential for binding the batter and giving the pudding its airy texture. They’ve been used in British cooking for hundreds of years, particularly in batter-based recipes.
Milk: Milk adds richness and helps create the creamy consistency needed for the batter. Dairy products have been central to British cooking for centuries.
Beef Drippings: Traditionally, beef drippings were used in Yorkshire pudding to give it a deep, savory flavor. This has evolved, but many still prefer to use beef drippings for authenticity.
5. Equipment You’ll Need
To make your Yorkshire puddings, you’ll need a few essential pieces of equipment:
Mixing Bowl: A large bowl to mix your batter ingredients.
Whisk: For whisking the batter smoothly, ensuring no lumps remain.
Measuring Cups and Spoons: To ensure accuracy in measuring the ingredients.
Muffin or Yorkshire Pudding Tin: A deep tray with individual wells is essential for achieving the perfect rise. You can use a standard muffin tin if a dedicated Yorkshire pudding tin is not available.
Oven: A preheated oven is key to achieving the desired crispiness and puff.
Cooling Rack: To allow the Yorkshire puddings to cool slightly without becoming soggy.
6. Step-by-Step Instructions for Yorkshire Pudding
Follow these steps to create perfect Yorkshire puddings:
Preheat the Oven: Preheat your oven to 450°F (230°C). This high temperature is essential for achieving that perfect rise.
Prepare the Batter: In a mixing bowl, whisk together the flour, eggs, milk, salt, and black pepper until smooth. The batter should be lump-free and fairly thin in consistency. Let the batter rest for at least 30 minutes; this helps to create a lighter texture.
Prepare the Tin: While the batter is resting, pour 1 tablespoon of vegetable oil or beef drippings into each well of your muffin tin or Yorkshire pudding tin. Place the tin in the oven to heat up for about 10 minutes, or until the oil is hot and shimmering.
Fill the Tin: Once the tin is hot, carefully remove it from the oven (use oven mitts), and quickly pour the batter into the hot oil, filling each well about halfway. The batter should sizzle when it hits the hot oil.
Bake: Immediately return the tin to the oven and bake for 20-25 minutes, or until the Yorkshire puddings have risen and turned golden brown. Do not open the oven door during baking, as this can cause the puddings to collapse.
Serve: Once they are golden and puffed, remove the Yorkshire puddings from the oven and transfer them to a cooling rack for a few minutes. Serve them warm, and enjoy the crispy, airy texture.
7. Suggestions for Serving and Storing
Yorkshire puddings are best served immediately while they are still hot and crispy. They pair wonderfully with roast beef, sausages, or even vegetarian dishes like lentils or mushrooms.
If you have leftovers, store them in an airtight container for up to 2 days at room temperature. To reheat, place them back in the oven at 350°F (175°C) for about 5-10 minutes to crisp them up again. While they can be frozen, they are best enjoyed fresh to preserve their crispy texture.
8. Chef Simon’s Tips for Yorkshire Pudding
Don’t Skimp on Resting Time: Letting the batter rest is key to getting the perfect rise. The batter should be at room temperature when poured into the hot tin, so don’t skip this step.
Hot Tin, Hot Oil: The oil must be very hot before you add the batter. This is crucial for creating the signature rise and crispy texture.
Avoid Opening the Oven: Opening the oven door during baking causes a drop in temperature, which can lead to the puddings deflating.
Use Drippings for Extra Flavor: For a more authentic taste, consider using beef drippings instead of vegetable oil. This will give the puddings a rich, savory flavor.
9. Emotional and Psychological Impact of Food
Food, like Yorkshire pudding, often carries a sense of comfort and nostalgia. For many, it’s a dish tied to family dinners and traditions, evoking feelings of warmth and togetherness. The crispy edges and soft interior of the pudding offer a satisfying sensory experience, making it a go-to comfort food that brings joy to the table.
10. Mindful Cooking Techniques
When making Yorkshire pudding, mindfulness can enhance the process. Pay attention to the details: listen to the sizzle when the batter hits the hot oil, watch the pudding rise in the oven, and savor the fragrance as it bakes. This engagement with the process adds an extra layer of appreciation for the food and the effort put into its creation.
11. Tips for Keeping Yorkshire Pudding Fresh Longer
Yorkshire pudding is best served fresh. However, if you need to store it, follow these tips:
Store leftovers in an airtight container for up to 2 days at room temperature.
To reheat, use the oven to bring back the crispy texture. Avoid microwaving, as it will make the pudding soggy.
For longer storage, freeze them, but know that they may lose some of their crispiness once thawed.
12. Advanced Culinary Terms and Techniques
Resting the Batter: Allowing the batter to sit before baking helps to create a smoother texture and a higher rise.
Searing: Preheating the oil in the tin before adding the batter is a form of searing. This step is essential for the pudding’s rise.
13. Healthy Ingredient Alternatives
While Yorkshire pudding is already a relatively simple dish, there are a few alternatives to make it a little healthier:
Use olive oil or coconut oil instead of vegetable oil for a healthier fat option.
For a lighter version, substitute some of the milk with a plant-based alternative like almond or oat milk.
14. More Serving Ideas
Yorkshire pudding isn’t just for roast dinners! Here are a few creative serving ideas:
Vegetarian Version: Serve with a hearty mushroom and gravy filling for a meat-free option.
Stuffed: Fill Yorkshire puddings with a stuffing made from sautéed vegetables, cheese, or even mashed potatoes.
15. Common Issues and Solutions
Puddings Didn’t Rise: Ensure that your oven is hot enough, and that your tin and oil were preheated sufficiently. If the batter was too cold, this could also prevent proper rising.
Soggy Bottoms: This can happen if the oil wasn’t hot enough or the batter wasn’t poured quickly into the tin. Always preheat the tin and oil, and pour the batter quickly to avoid the oil cooling down.
Flat or Dense Puddings: This could be due to overmixing the batter, which can cause the gluten in the flour to develop too much. Stir the batter gently, just enough to combine the ingredients.
16. Variations to Try
Yorkshire pudding is quite versatile. Here are some variations you can try:
Herb-Infused Yorkshire Puddings: Add finely chopped herbs such as rosemary, thyme, or sage to the batter for extra flavor.
Mini Yorkshire Puddings: Make smaller versions by using a mini muffin tin, perfect for serving at parties or as hors d’oeuvres.
Sweet Yorkshire Puddings: Add a little sugar to the batter for a sweet twist. Serve with a dusting of powdered sugar and berries for a dessert-style treat.
Cheese-Stuffed Yorkshire Puddings: Add a small cube of cheese (such as cheddar or Gruyère) to the center of each pudding before baking for a cheesy surprise.
17. Nutritional Information and Health Benefits
While traditional Yorkshire pudding is not considered a “health food,” it does provide certain nutritional benefits when enjoyed in moderation:
Calories: A serving of Yorkshire pudding typically contains around 100-150 calories, depending on the size and ingredients used.
Carbohydrates: Yorkshire pudding is rich in carbohydrates, which provide a quick source of energy.
Protein: The eggs in the batter contribute a small amount of protein, which is necessary for muscle repair and overall health.
Fat: The oil or drippings used to cook Yorkshire pudding add a source of fat, but using healthier oils can provide beneficial fats such as omega-3 fatty acids.
To make your Yorkshire puddings healthier, consider using less oil, a lighter dairy option, or adding vegetables for extra fiber and nutrients.
18. The Art of Pairing Yorkshire Pudding
Yorkshire pudding is incredibly versatile when it comes to pairing with other foods. Traditionally, it is served with:
Roast Beef: The ultimate pairing for Yorkshire pudding. The rich flavors of roast beef complement the crispy texture of the pudding perfectly.
Gravy: Whether you’re using beef gravy, vegetarian gravy, or even a mushroom sauce, Yorkshire pudding and gravy are a classic duo.
Sausages: Serve Yorkshire puddings with sausages for a comforting, hearty meal.
Roast Vegetables: If you’re serving a vegetarian meal, pair your Yorkshire pudding with roasted vegetables or a rich tomato-based sauce.
19. Weather and Recipe Outcome
Weather can have a slight impact on your Yorkshire pudding. In humid weather, your batter may be a little thicker than usual, and it may not rise as high. On the other hand, on very dry days, the batter may be a bit too runny. To combat this, make sure your ingredients are measured correctly, and avoid overmixing the batter.
20. Other Cookie Recipes to Explore
If you enjoy making Yorkshire pudding and want to try more baked treats, consider these other delicious recipes:
Shortbread Cookies: Buttery and melt-in-your-mouth, perfect for tea time.
Gingerbread Cookies: Spiced with warming ginger and cinnamon, perfect for the holidays.
Chocolate Chip Cookies: A classic American favorite that’s sure to please.
21. Focus on Tools and Equipment
Having the right tools can make all the difference when making Yorkshire puddings:
Muffin Tin or Yorkshire Pudding Tin: These are essential for ensuring your puddings cook evenly and rise to perfection. Invest in a heavy-duty tin to get the best results.
Whisk: A good whisk is vital for incorporating air into the batter, which helps achieve a light, fluffy texture.
Measuring Cups and Spoons: Accurate measurements are important to ensure the correct proportions for the batter.
22. Frequently Asked Questions (with Answers)
Q: Can I make the batter in advance? A: Yes, you can make the batter up to 24 hours ahead and store it in the refrigerator. Just make sure to bring it to room temperature before baking.
Q: Can I make Yorkshire puddings without eggs? A: While eggs are a crucial part of the traditional recipe, you can try egg substitutes like flaxseed meal or aquafaba. Keep in mind that the texture might vary slightly.
Q: Why didn’t my Yorkshire puddings rise? A: If your puddings didn’t rise, the oven might not have been hot enough, or the batter might not have been poured into the hot oil quickly enough. Make sure to preheat the tin and oil thoroughly before adding the batter.
Q: Can I make Yorkshire puddings in a different tin? A: Yes! While traditional Yorkshire puddings are made in a deep muffin tin or specialized pudding tin, you can use any tin with deep wells. Just be sure it’s preheated properly.
Conclusion
Yorkshire pudding is a classic British dish that brings comfort and joy to any meal. Whether you’re serving it with roast beef, sausages, or a vegetarian option, it’s a dish that never fails to impress. With its crispy edges and airy center, Yorkshire pudding is a true testament to the power of simple ingredients and the joy of home-cooked food. By following this recipe, you’ll create a batch of perfect Yorkshire puddings every time, and enjoy the satisfaction that comes with making such a timeless, delicious dish from scratch.
Thank you for visiting SqueezyRecipes! We’re dedicated to making cooking enjoyable and accessible for everyone, regardless of your skill level. Chef Simon is always ready to share the best recipes that bring a creative touch to your daily meals. With each visit, you’ll discover new recipes and innovative ideas that cater to every occasion. Don’t miss out on exploring SqueezyRecipes for the latest delicious dishes, and feel free to leave your feedback and share your experiences with the recipes you’ve tried. Cooking together makes everything better!
Huevos Rancheros is a classic Mexican dish that features sunny-side-up eggs served on corn tortillas, topped with a flavorful tomato-based sauce. This hearty, flavorful breakfast is often served with beans, avocado, and a sprinkle of fresh cilantro. It’s the perfect dish for brunch or any meal when you’re craving bold flavors and satisfying comfort food.
Huevos Rancheros, or “ranch-style eggs,” is a traditional Mexican breakfast dish originating from rural Mexico. Farmers and ranchers, who worked early in the morning, needed a hearty meal to sustain them through their laborious day. The dish is a celebration of fresh, simple ingredients—eggs, tortillas, tomatoes, and chilies—which were easy to find on the farms.
Over time, Huevos Rancheros became a popular dish across Mexico, and it is now enjoyed worldwide. The dish has regional variations, and some versions include additional ingredients such as cheese, refried beans, and avocado. It is often served with a side of rice and beans, making it a fulfilling and balanced meal.
2. The Benefits of Making Your Own Huevos Rancheros
Making Huevos Rancheros from scratch allows you to control the ingredients and adjust the flavors to your liking. By preparing the sauce and tortillas yourself, you can skip the preservatives and unhealthy additives often found in store-bought alternatives. Fresh, homemade Huevos Rancheros is an excellent source of protein from the eggs, fiber from the tortillas and beans, and vitamins from the tomatoes and chilies.
Moreover, preparing this dish at home gives you the opportunity to experiment with variations, such as adding different types of chilies for heat or customizing the toppings. Plus, it’s a fun dish to make with family or friends for a weekend brunch.
3. Essential Ingredients for the Perfect Huevos Rancheros
Corn tortillas: These serve as the base for the dish, providing a delicious, crisp texture that pairs perfectly with the soft eggs.
Eggs: Fresh, large eggs are the star of this dish. The runny yolk adds richness and depth of flavor.
Tomatoes: Fresh or canned tomatoes form the base of the ranchero sauce.
Chilies: Commonly used chilies include serrano, jalapeño, or poblano, providing a balance of heat and flavor.
Onion and garlic: These aromatics enhance the flavor of the sauce and add a savory depth.
Cilantro: Fresh cilantro adds a bright, herby finish to the dish.
Beans: Refried or black beans are often served on the side or under the eggs, offering a hearty addition.
Cheese: Crumbled queso fresco or a sprinkle of Cotija cheese adds a creamy, salty element to the dish.
Avocado: Sliced avocado is a common topping, bringing a creamy, cooling contrast to the spicy sauce.
4. Cultural History of Ingredients
The key ingredients in Huevos Rancheros reflect the flavors and traditions of Mexican cuisine, which has been shaped by centuries of indigenous and Spanish influences. Corn tortillas, for example, are a staple in Mexican cuisine and are a traditional food for indigenous peoples. Tomatoes, chilies, and beans are also foundational ingredients in Mexican cooking, with each adding unique flavors and nutrients.
The use of fresh herbs like cilantro and toppings such as cheese and avocado also adds depth and texture to the dish. These ingredients represent the rich diversity of Mexican cooking, which balances fresh, vibrant flavors with hearty, comforting staples.
5. Equipment You’ll Need
Skillet or frying pan: For frying the eggs and sautéing the sauce ingredients.
Blender or food processor: To blend the tomatoes and chilies for the ranchero sauce.
Ladle: For serving the ranchero sauce over the tortillas and eggs.
Tongs or spatula: To flip the tortillas and eggs gently without breaking them.
Serving plates: To assemble and present the dish in an appealing way.
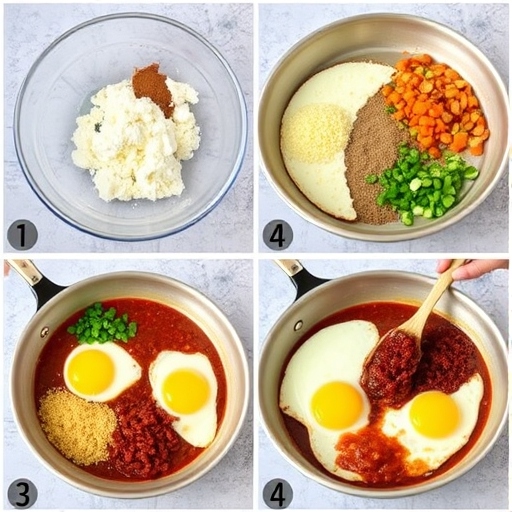
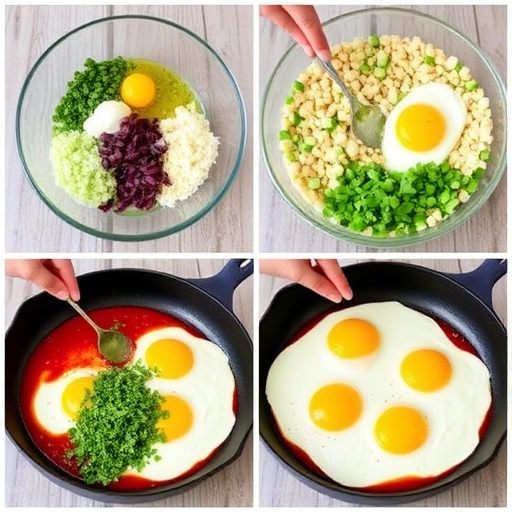
Prepare the sauce: Heat a tablespoon of oil in a skillet over medium heat. Add the chopped onion and garlic, sautéing for 2-3 minutes until softened.
Add the tomatoes and chilies: Add chopped tomatoes (fresh or canned) and chopped chilies (serrano, jalapeño, or poblano). Simmer for 5-7 minutes until the tomatoes soften.
Blend the sauce: Transfer the tomato and chili mixture to a blender or food processor and blend until smooth. Season with salt, pepper, and a pinch of cumin or oregano if desired. Set the sauce aside.
For the Huevos Rancheros:
Prepare the tortillas: Heat a small amount of oil in a separate skillet. Fry the corn tortillas until they’re slightly crispy on the edges but still soft in the center, about 1-2 minutes on each side. Set them aside on a paper towel to drain excess oil.
Fry the eggs: In the same skillet, cook your eggs sunny-side-up (or to your preference). Make sure the yolks remain intact.
Assemble the dish: Place a tortilla on each plate. Spoon some ranchero sauce over the tortilla, followed by a fried egg on top.
Garnish and serve: Top with fresh cilantro, crumbled cheese, avocado slices, and a side of beans. Serve immediately.
7. Suggestions for Serving and Storing
Huevos Rancheros is traditionally served with refried or black beans, avocado slices, and a sprinkle of cheese. You can also serve it with a side of rice for a complete meal.
To store leftovers, keep the sauce and eggs separate. The sauce can be stored in an airtight container in the refrigerator for up to 3 days. Reheat the sauce in a skillet before serving. Leftover eggs should be stored in a separate container and reheated gently on low heat to avoid overcooking.
8. Chef Simon’s Tips for Huevos Rancheros
Crispy tortillas: Make sure to fry the tortillas just enough to get them crispy but not too hard. They should still be pliable.
Don’t overcook the eggs: The runny yolk adds richness to the dish, so be careful not to overcook the eggs. Sunny-side-up eggs work best.
Adjust the heat: You can adjust the spiciness of the dish by using milder or hotter chilies depending on your preference.
Fresh toppings: Always use fresh cilantro and ripe avocado for the best flavor.
9. Emotional and Psychological Impact of Food
Huevos Rancheros evokes a sense of comfort and satisfaction, combining rich, flavorful ingredients that are both indulgent and nourishing. The act of making the dish, especially with loved ones, can bring joy and create lasting memories. It’s the kind of dish that warms the soul and provides a sense of connection to Mexican culinary traditions.
10. Mindful Cooking Techniques
As you prepare Huevos Rancheros, take the time to appreciate the fresh ingredients, the flavors, and the process. Mindful cooking can help you connect more deeply with the food you’re making, leading to a greater appreciation for the dish. Pay attention to each step, whether it’s blending the sauce or frying the eggs, and focus on the sensory experience—the sizzle of the oil, the colors of the ingredients, and the aromas that fill the kitchen.
11. Tips for Keeping the Recipe Fresh Longer
To keep the components of Huevos Rancheros fresh longer, store the sauce in an airtight container in the refrigerator for up to 3 days. Eggs should be eaten immediately after cooking, but you can prepare the tortillas in advance and reheat them before serving.
12. Advanced Culinary Terms and Techniques
Sautéing: Cooking ingredients quickly in a small amount of oil or butter over high heat.
Simmering: Cooking food gently at a low heat, just below the boiling point, to allow the flavors to meld.
Poaching: Gently cooking eggs in water or broth to achieve a soft, runny yolk.
13. Healthy Ingredient Alternatives
Tortillas: Use whole wheat or gluten-free tortillas for a healthier alternative.
Eggs: Opt for egg whites or a plant-based egg substitute if you’re looking to reduce cholesterol or calories.
Cheese: Use a lower-fat cheese, or omit it entirely for a dairy-free version.
Avocado: For a lighter version, you can replace avocado with a dollop of plain Greek yogurt.
14. More Serving Ideas
If you’re looking to serve Huevos Rancheros with more variety, try pairing it with:
Grilled vegetables: Add a side of grilled peppers, zucchini, or corn for a smoky flavor.
Fruit salsa: A fresh fruit salsa made with mango or pineapple can add a sweet contrast to the savory dish.
Hot sauce: For extra heat, serve with a variety of hot sauces on the side.
15. Common Issues and Solutions
The eggs are overcooked: To avoid overcooking, cook the eggs on medium-low heat, and don’t let them sit in the pan too long.
Tortillas are too crispy: If your tortillas get too crispy, they may break easily when you top them. Fry them for just a minute or so, making sure they’re still soft enough to hold the sauce and egg.
16. Variations to Try
Huevos Rancheros is a versatile dish, and you can experiment with different ingredients and flavors to make it your own. Here are some variations you might enjoy:
Huevos a la Mexicana: Add chopped onions, tomatoes, and chilies to scrambled eggs for a quick, flavorful breakfast.
Huevos Rancheros with Chorizo: Add spicy Mexican chorizo to the ranchero sauce or serve it on the side for added flavor and protein.
Huevos Rancheros with Salsa Verde: Replace the red tomato-based sauce with a tangy green salsa made with tomatillos and cilantro for a fresh twist.
Vegan Huevos Rancheros: Skip the eggs and use tofu or chickpea flour scrambled “eggs” for a plant-based version of this dish.
17. Nutritional Information and Health Benefits
Huevos Rancheros offers a balanced mix of macronutrients:
Calories: A typical serving of Huevos Rancheros provides approximately 400-500 calories, depending on the portion size and specific ingredients.
Protein: Eggs are a great source of high-quality protein, and the beans add extra protein and fiber.
Vitamins and minerals: Tomatoes and chilies provide an abundance of vitamin C, while avocado is rich in healthy fats and potassium.
Fiber: The corn tortillas and beans contribute a good amount of dietary fiber, promoting healthy digestion.
Although it’s a hearty meal, Huevos Rancheros can be made even healthier by using whole wheat tortillas, reducing the amount of cheese, or adding more vegetables.
18. The Art of Pairing Huevos Rancheros
Huevos Rancheros pairs beautifully with:
Fresh fruit: The acidity of citrus fruits like oranges or the sweetness of pineapple complements the spicy richness of the dish.
Light greens: A side of sautéed spinach or mixed greens with a simple vinaigrette can balance the richness of the eggs and sauce.
Beverages: Serve with a refreshing cold beverage like iced horchata or a glass of fresh orange juice. For a twist, try pairing it with a spicy bloody mary for a savory brunch.
19. Weather and Recipe Outcome
The weather can influence the preparation of Huevos Rancheros. On a warm, sunny day, the fresh, vibrant flavors of the dish are especially satisfying. On cooler days, the hearty and spicy nature of the dish provides comfort and warmth. If you’re making this dish during a hot summer, consider serving the eggs and sauce slightly chilled for a refreshing variation.
Table of Contents
20. Other Mexican Recipes to Explore
If you love Huevos Rancheros, you might also enjoy these other Mexican favorites:
Chilaquiles: Fried tortilla chips smothered in salsa and topped with eggs, cheese, and sour cream.
Molletes: Open-faced sandwiches with bolillo rolls, refried beans, melted cheese, and salsa.
Tamales: Corn dough filled with a variety of ingredients like meats, cheese, or chilies, and wrapped in corn husks.
These dishes offer similar rich, bold flavors and are perfect for a Mexican-themed breakfast or brunch.
21. Focus on Tools and Equipment
While the ingredients for Huevos Rancheros are simple, using the right tools will help you make the dish more efficiently and with better results:
Cast-iron skillet: Ideal for frying the eggs and tortillas evenly and ensuring that they develop a nice crispiness.
Blender or food processor: These are essential for making the smooth ranchero sauce that complements the eggs and tortillas.
Ladle or spoon: Use this to pour the sauce over the eggs without disturbing the yolk.
Spatula or tongs: To carefully flip the tortillas and eggs without breaking them.
Using quality tools makes the process smoother and more enjoyable, helping you achieve the perfect Huevos Rancheros every time.
22. Frequently Asked Questions (with answers)
Q: Can I make the ranchero sauce in advance? A: Yes! You can make the ranchero sauce a day ahead of time and store it in an airtight container in the fridge. Just reheat it gently on the stove before serving.
Q: Can I use flour tortillas instead of corn tortillas? A: While corn tortillas are traditional and add a unique flavor, you can use flour tortillas if you prefer a softer base for the dish. However, the texture and flavor will be different.
Q: Can I make this dish vegetarian? A: Yes, Huevos Rancheros is naturally vegetarian. If you want to make it vegan, simply replace the eggs with a tofu scramble or chickpea flour scramble for a plant-based alternative.
Q: Can I make Huevos Rancheros without the cheese? A: Absolutely! While cheese adds a delicious creamy element, you can skip it for a lighter dish or use a dairy-free cheese substitute.
Conclusion
Huevos Rancheros is a flavorful, satisfying dish that combines the richness of eggs, the smokiness of the ranchero sauce, and the heartiness of corn tortillas. Whether you’re enjoying it for breakfast, brunch, or any time of the day, this dish is sure to impress. With its simple ingredients, bold flavors, and numerous variations, Huevos Rancheros is a versatile and delicious way to celebrate Mexican cuisine. Enjoy the process of making this dish from scratch and savor every bite as you experience the flavors of Mexico.
Thank you for visiting SqueezyRecipes! We’re dedicated to making cooking enjoyable and accessible for everyone, regardless of your skill level. Chef Simon is always ready to share the best recipes that bring a creative touch to your daily meals. With each visit, you’ll discover new recipes and innovative ideas that cater to every occasion. Don’t miss out on exploring SqueezyRecipes for the latest delicious dishes, and feel free to leave your feedback and share your experiences with the recipes you’ve tried. Cooking together makes everything better!