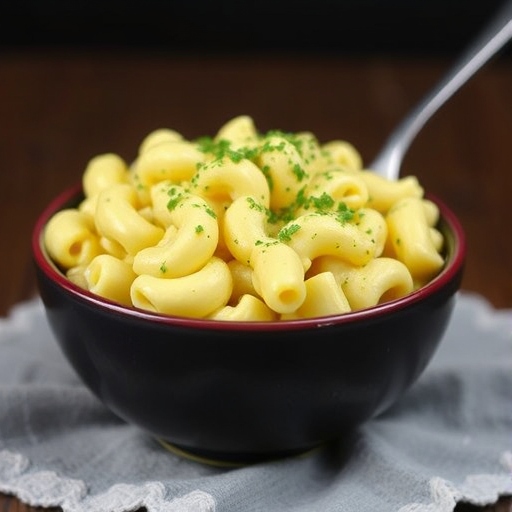
Discover Easy and Flavorful Recipes for Every Meal!

Best Pear Salad Recipe

Pear Salad

This Pear Salad brings together fresh pears, leafy greens, and a tangy dressing for a simple yet elegant dish. It’s perfect for entertaining or a light weeknight meal, combining the natural sweetness of ripe pears with savory and crunchy elements. This recipe celebrates the versatile pear, a fruit that shines in both sweet and savory dishes.

The Story Behind Pear Salad

Pear salads have been a culinary favorite for ages, originating in European cuisines where fruits were often paired with cheeses and nuts. This salad combines traditional flavors in a modern format, offering a balance of sweetness, acidity, and texture.

The Benefits of Making Your Own Pear Salad

Fresh Ingredients: Homemade salads mean the freshest produce.

Customizable: Adjust the flavors, add your favorite nuts, or experiment with different cheeses.

Nutritional Control: Control sugar, salt, and fats for a healthier salad.

Quick and Easy: Requires minimal prep and is ready in minutes.

Essential Ingredients for the Perfect Pear Salad

Pears: Bartlett or Bosc pears provide a soft texture and sweetness.

Greens: Arugula, spinach, or mixed greens add a peppery contrast.

Cheese: Gorgonzola or goat cheese for creaminess and a bit of sharpness.

Nuts: Walnuts or pecans bring crunch and earthy flavors.

Dressing: A light vinaigrette with honey, olive oil, and vinegar enhances the pear’s sweetness without overpowering.

Cultural History of Ingredients

Pears: Originally cultivated in Asia and Europe, pears are a symbol of health and prosperity in many cultures.

Cheese Pairings: European countries have a long tradition of pairing fruit with cheese, a practice that has expanded worldwide.

Vinaigrette: A French classic, vinaigrettes bring balance and brightness to salads.

Equipment You’ll Need

Salad Bowl: A large mixing bowl to toss ingredients.

Whisk: For combining the dressing smoothly.

Knife: A sharp knife to slice pears thinly without bruising.

Salad Tongs: For gently tossing ingredients together.

Step-by-Step Instructions for Pear Salad

Prepare the Pears: Slice pears thinly, leaving the skin on for added color and nutrients.

Assemble the Salad: In a large bowl, add greens, sliced pears, crumbled cheese, and nuts.

Make the Dressing: In a small bowl, whisk together olive oil, honey, and vinegar, seasoning with salt and pepper.

Dress the Salad: Drizzle dressing over the salad and toss gently to combine.

Serve: Transfer to a serving platter or individual plates, garnishing with extra nuts or cheese if desired.

Suggestions for Serving and Storing

Serving Suggestions: Serve immediately as a light lunch, side dish, or starter for a formal meal.

Storing Leftovers: Store undressed salad and dressing separately to keep ingredients fresh, as dressed salad may wilt quickly.

Refrigerating Pears: Keep pears in the fridge to extend freshness before slicing.

Chef Simon’s Tips for Pear Salad

Selecting Pears: Choose ripe but firm pears for the best texture.

Enhance with Citrus: Add a splash of lemon juice to prevent pear slices from browning.

Roast the Nuts: Toast nuts briefly in a pan for added flavor and crunch.

Emotional and Psychological Impact of Food

Natural Comfort: The sweet, crisp flavors are naturally comforting and satisfying.

Visual Appeal: The combination of fresh greens, pale pears, and vibrant cheese or nuts makes this salad as visually appealing as it is delicious.

Mindful Eating: Salads invite mindful eating, where each bite allows you to appreciate fresh flavors.

Mindful Cooking Techniques

Slice Carefully: Take your time to slice pears thinly and uniformly.

Toss Lightly: Over-tossing can bruise greens and pears, so mix just until combined.

Appreciate Aromas: Notice the sweetness of pears, earthy cheese, and fresh greens while preparing.

Tips for Keeping the Recipe Fresh Longer

Dress Just Before Serving: Add dressing right before serving to keep greens crisp.

Store Separately: Keep pears, greens, and cheese in separate containers if preparing in advance.

Add Lemon Juice: Lightly coat pear slices with lemon juice to prevent browning.

Advanced Culinary Terms and Techniques

Maceration: Lightly marinate fruit (like pears) in a bit of lemon juice or honey to bring out flavor.

Emulsify: Properly whisk dressing ingredients to create a smooth vinaigrette.

Crumbled Cheese Technique: Gently break up cheese by hand for a rustic look rather than using a knife.

Healthy Ingredient Alternatives

Light Cheese Options: Swap gorgonzola for feta or omit cheese entirely for a vegan version.

Nut-Free Version: Use sunflower seeds for similar texture without allergens.

Low-Sugar Dressing: Substitute honey with a low-sugar alternative or omit for a purely savory vinaigrette.

More Serving Ideas

As a Main Course: Add grilled chicken or salmon for extra protein.

Paired with Soup: Serve alongside a warm soup like butternut squash or tomato for a complete meal.

On a Charcuterie Board: Arrange with other small bites for a DIY salad plate at parties.

Common Issues and Solutions

Soggy Pears: Use firm pears and slice just before serving to avoid sogginess.

Overpowering Dressing: Adjust the amount of dressing based on the type of greens; arugula needs less than romaine.

Bitter Greens: Balance bitterness in greens with a bit more honey in the dressing.

Variations to Try

Fall Variation: Add dried cranberries and swap goat cheese for cheddar.

Winter Variation: Use radicchio and add toasted pine nuts for a seasonal twist.

Spring Variation: Add thinly sliced radishes and use a lemon vinaigrette.

Nutritional Information and Health Benefits

Vitamins: Pears are high in Vitamin C and fiber.

Healthy Fats: Olive oil in the dressing provides heart-healthy fats.

Protein Boost: Adding nuts or cheese increases protein content, making it more filling.

The Art of Pairing Pear Salad

Wine Pairing: Serve with a light, dry white wine like Sauvignon Blanc.

Side Dish Pairing: Complements grilled meats or roasted chicken.

Dessert Pairing: Finish with a light sorbet or fresh berries to keep the meal refreshing.

Weather and Recipe Outcome

Ideal for Warm Weather: Fresh and light, this salad is particularly suited for spring and summer.

Adjusting for Colder Months: Use spicier greens or hearty additions like roasted squash.

Other Fruit Salad Recipes to Explore

Apple Walnut Salad

Strawberry Spinach Salad with Balsamic Glaze

Mango Avocado Salad with Cilantro Lime Dressing

Focus on Tools and Equipment

High-Quality Knife: Essential for slicing pears thinly and uniformly.

Salad Spinner: Keep greens crisp by drying thoroughly before assembling.

Mixing Bowl with Pour Spout: For easy, mess-free dressing prep and pouring.

Frequently Asked Questions (with answers)

Can I make the salad in advance?

Yes, but keep dressing separate and slice pears just before serving.

What type of pear works best?

Bartlett or Anjou pears provide a great balance of sweetness and texture.

Can I use a different dressing?

Yes, balsamic vinaigrette or poppyseed dressing pairs well.

Conclusion

The Pear Salad recipe combines the natural sweetness of ripe pears with earthy, creamy, and tangy elements for a well-rounded dish. With fresh greens, crunchy nuts, and a balanced vinaigrette, this salad is a versatile choice for various meals. It’s easy to customize, nutritious, and offers an elegant touch to your table. Whether you’re preparing a light lunch or a sophisticated side for dinner, this Pear Salad recipe is sure to impress and delight.


Thank you for visiting SqueezyRecipes! We’re dedicated to making cooking enjoyable and accessible for everyone, regardless of your skill level. Chef Simon is always ready to share the best recipes that bring a creative touch to your daily meals. With each visit, you’ll discover new recipes and innovative ideas that cater to every occasion. Don’t miss out on exploring SqueezyRecipes for the latest delicious dishes, and feel free to leave your feedback and share your experiences with the recipes you’ve tried. Cooking together makes everything better!

Perfect Brussels Sprout Casserole Recipe

Brussels Sprout Casserole

Introduction

Introduce the Brussels Sprout Casserole as a creamy, flavorful dish that transforms Brussels sprouts into a satisfying casserole. Emphasize how this recipe pairs fresh Brussels sprouts with a rich cheese sauce, turning this often-underrated vegetable into a crowd-pleaser. Perfect for holiday dinners, family gatherings, or as a comforting weeknight meal, this casserole is sure to be a hit with both sprout lovers and skeptics alike.


1. The Story Behind Brussels Sprout Casserole

Explore the history of Brussels sprouts and how their reputation has shifted from being disliked by many to becoming a staple at dinner tables. Discuss the popularity of casseroles in American homes, particularly as a way to make vegetables more palatable. Mention how Brussels sprouts’ unique flavor pairs well with creamy sauces, making this dish a modern comfort food.


2. The Benefits of Making Your Own Brussels Sprout Casserole

  • Freshness: You control the quality of ingredients, ensuring the freshest Brussels sprouts.
  • Nutritional Control: Home-made allows you to adjust fat, salt, and other ingredients.
  • Customizable Flavor: Add your choice of cheese, spices, or other vegetables.
  • Family-Friendly: Turn Brussels sprouts into a dish that appeals to both kids and adults.

3. Essential Ingredients for the Perfect Brussels Sprout Casserole

  • Brussels Sprouts: The star ingredient, best when fresh and halved.
  • Cheese: Gruyere, cheddar, or parmesan for a rich, creamy sauce.
  • Cream: Heavy cream or milk to create a smooth, comforting sauce.
  • Garlic and Onion: Adds depth and aromatics.
  • Breadcrumbs: For a crunchy topping that contrasts the creamy filling.

4. Cultural History of Ingredients

  • Brussels Sprouts: Named after the capital of Belgium, this vegetable has a long history in European cuisine.
  • Casseroles in American Culture: Explore how casseroles became popular in the U.S. as a convenient, family-friendly meal.
  • Cheese Varieties: Discuss how different cheeses can alter the flavor of the casserole.

5. Equipment You’ll Need

  • Large Skillet: For sautéing Brussels sprouts and creating the sauce.
  • Mixing Bowl: To combine ingredients before transferring to the baking dish.
  • Baking Dish: A 9×13-inch dish is ideal for a family-sized casserole.
  • Whisk and Spatula: Essential for mixing the creamy sauce evenly.
  • Cheese Grater: For freshly grated cheese, which melts better in the casserole.

6. Step-by-Step Instructions for Brussels Sprout Casserole

  1. Prepare Brussels Sprouts: Trim and halve Brussels sprouts, blanch them if you prefer a softer texture.
  2. Sauté Aromatics: In a large skillet, sauté garlic and onions until fragrant.
  3. Add Brussels Sprouts: Sauté Brussels sprouts until they begin to caramelize.
  4. Make the Cream Sauce: Add cream, cheese, salt, and pepper, stirring until smooth.
  5. Combine and Bake: Transfer to a baking dish, top with breadcrumbs, and bake at 375°F (190°C) for 20-25 minutes until bubbly and golden.
  6. Serve Warm: Garnish with fresh herbs and serve immediately.

7. Suggestions for Serving and Storing

  • Serving Suggestions: Serve as a side dish to roasted meats or as a vegetarian main with a side of crusty bread.
  • Storing Leftovers: Keep leftovers in an airtight container in the fridge for up to 3 days.
  • Reheating Tips: Reheat in the oven at 350°F to maintain the crispy topping.

8. Chef Simon’s Tips for Brussels Sprout Casserole

  • Pre-Blanch for Tender Sprouts: Blanch the sprouts for 2-3 minutes before sautéing to reduce bitterness.
  • Experiment with Cheese Combinations: Gruyere and cheddar work well, but feel free to mix in mozzarella or fontina for extra creaminess.
  • Add a Touch of Spice: A pinch of red pepper flakes adds a subtle heat that complements the creaminess.

9. Emotional and Psychological Impact of Food

  • Comforting Qualities: The creamy, cheesy texture is reminiscent of traditional comfort foods.
  • Food Memories: Many people have stories around family dinners with casseroles, making this a nostalgic dish.
  • Social Dining: Casseroles are often shared, making them ideal for gatherings and family meals.

10. Mindful Cooking Techniques

  • Slow Down and Sauté: Take time to caramelize the Brussels sprouts to bring out their sweetness.
  • Mindful Mixing: As you add cheese to the sauce, stir mindfully to appreciate the thickening and creaminess.
  • Enjoy the Aromas: Notice the smell of garlic, cheese, and Brussels sprouts as the casserole bakes.

11. Tips for Keeping the Recipe Fresh Longer

  • Use Fresh Ingredients: Fresh Brussels sprouts and cheese will enhance the dish’s longevity.
  • Store Properly: Cover tightly with plastic wrap or store in a sealed container.
  • Freeze Individual Portions: Freeze leftover casserole in individual portions for easy reheating.

12. Advanced Culinary Terms and Techniques

  • Blanching: Briefly boiling vegetables before sautéing for a softer texture.
  • Caramelizing: Cooking Brussels sprouts until they develop a golden color for extra flavor.
  • Au Gratin: Adding a crispy, golden layer of breadcrumbs and cheese, as in this recipe.

13. Healthy Ingredient Alternatives

  • Low-Fat Cheese Option: Use a reduced-fat cheese or skip heavy cream for half-and-half.
  • Alternative Toppings: Use crushed nuts instead of breadcrumbs for a gluten-free topping.
  • Additional Vegetables: Add thinly sliced mushrooms or leeks to increase veggie content.

14. More Serving Ideas

  • As a Side for Roasted Meats: Complements beef, pork, or chicken beautifully.
  • In a Vegetarian Meal: Serve alongside a hearty grain or bean salad.
  • With Pasta: Mix with cooked pasta for a cheesy Brussels sprout pasta bake.

15. Common Issues and Solutions

  • Too Watery: If the casserole is too watery, add a tablespoon of flour to thicken the sauce.
  • Cheese Not Melting: Use freshly grated cheese, as pre-shredded cheese may not melt as smoothly.
  • Soggy Brussels Sprouts: Blanch the sprouts for less time or skip this step for a firmer texture.

16. Variations to Try

  • Different Cheeses: Try Swiss, Gouda, or blue cheese for a unique flavor.
  • Spicy Twist: Add diced jalapeños or sprinkle cayenne pepper for a kick.
  • Meaty Additions: Add crumbled bacon or cooked sausage for a hearty twist.

17. Nutritional Information and Health Benefits

  • Calories: Approximate calorie count per serving.
  • Fiber: High in fiber due to Brussels sprouts.
  • Vitamin C and K: Brussels sprouts are an excellent source of these vitamins.

18. The Art of Pairing Brussels Sprout Casserole

  • Wine Pairing: A crisp white wine, like Chardonnay, cuts through the richness.
  • Side Salad Pairing: A light, citrusy salad complements the creaminess of the casserole.
  • Dessert Pairing: Serve with a fresh fruit tart for a balanced meal.

19. Weather and Recipe Outcome

  • Winter Comfort Food: Ideal for colder months when warm, hearty dishes are preferred.
  • Summer Variations: Swap heavy cream with a lighter sauce to make it more summer-friendly.

20. Other Vegetable Casserole Recipes to Explore

  • Cheesy Cauliflower Casserole
  • Broccoli and Cheddar Casserole
  • Sweet Potato and Sage Casserole

21. Focus on Tools and Equipment

  • Good Quality Baking Dish: For even cooking and presentation.
  • Cheese Grater: Freshly grated cheese melts more smoothly.
  • Sharp Knife: Essential for trimming and slicing Brussels sprouts.

22. Frequently Asked Questions (with answers)

  • Can I make this casserole ahead of time? Yes, prepare and refrigerate, then bake just before serving.
  • Can I freeze Brussels Sprout Casserole? Yes, but note that the texture may change slightly.
  • What other vegetables can I add? Mushrooms, leeks, and spinach work well in this casserole.

Conclusion

Summarize the key highlights of this Brussels Sprout Casserole. Emphasize how this recipe transforms Brussels sprouts into a delicious, creamy casserole that’s perfect for gatherings or as a satisfying main dish. Encourage readers to try the recipe, make it their own with variations, and share it with family and friends for a memorable meal.


Thank you for visiting SqueezyRecipes! We’re dedicated to making cooking enjoyable and accessible for everyone, regardless of your skill level. Chef Simon is always ready to share the best recipes that bring a creative touch to your daily meals. With each visit, you’ll discover new recipes and innovative ideas that cater to every occasion. Don’t miss out on exploring SqueezyRecipes for the latest delicious dishes, and feel free to leave your feedback and share your experiences with the recipes you’ve tried. Cooking together makes everything better!

Heavenly Boursin Chicken with Lush Mushrooms and Tender Asparagus

Boursin Chicken, Mushroom, and Asparagus Skillet Recipe

Introduction

Introduce the Boursin Chicken, Mushroom, and Asparagus Skillet recipe as a quick, creamy, and flavor-packed meal. Highlight how this dish brings together tender chicken, earthy mushrooms, crisp asparagus, and creamy Boursin cheese for an easy yet elegant skillet meal. Mention how this recipe is perfect for both busy weeknights and special occasions.


1. The Story Behind Boursin Chicken, Mushroom, and Asparagus Skillet

Explore the origin of this recipe idea, possibly inspired by French cuisine due to the Boursin cheese. Share the story of how it became popular in kitchens for its simplicity and comforting flavors. Discuss why Boursin cheese is used and how it brings a unique garlic-herb richness to the dish.


2. The Benefits of Making Your Own Boursin Chicken Skillet

  • Healthier Options: Control the amount of salt and fat.
  • Customization: You can adjust the amount of cheese, herbs, and vegetables.
  • Cost-Effective: Making it at home is less expensive than dining out.
  • Quality Ingredients: Use fresh vegetables and organic or free-range chicken for a more wholesome meal.

3. Essential Ingredients for the Perfect Boursin Chicken Skillet

  • Chicken Breasts or Thighs: Tender and juicy, the star protein in this dish.
  • Boursin Cheese: A creamy, herbed cheese that melts into a rich sauce.
  • Mushrooms: Adds an earthy flavor and meaty texture.
  • Asparagus: A fresh, crisp contrast to the creamy sauce.
  • Garlic and Onions: For added depth of flavor.

4. Cultural History of Ingredients

  • Boursin Cheese: Brief history of Boursin cheese, created in Normandy, France.
  • Asparagus in Cuisine: Explore the use of asparagus in European cooking.
  • Chicken in French-Inspired Dishes: Talk about the role of chicken in French and other European cuisines.

5. Equipment You’ll Need

  • Skillet or Cast-Iron Pan: For even cooking and achieving a nice sear on the chicken.
  • Tongs and Spatula: Helpful for handling and stirring ingredients.
  • Sharp Knife: For cutting the chicken, mushrooms, and asparagus.
  • Serving Spoon: For transferring the dish from skillet to plate.

6. Step-by-Step Instructions for Boursin Chicken Skillet

  1. Prepare Ingredients: Season chicken, slice mushrooms, trim asparagus.
  2. Sear the Chicken: In a hot skillet, cook chicken until golden, then set aside.
  3. Sauté Vegetables: Add garlic, onions, mushrooms, and asparagus to the skillet.
  4. Combine with Boursin: Stir in Boursin cheese to make a creamy sauce.
  5. Return Chicken: Place the chicken back in the skillet, coat with sauce, and cook until done.
  6. Serve: Garnish with fresh herbs and serve hot.

7. Suggestions for Serving and Storing

  • Serving Suggestions: Pair with rice, mashed potatoes, or a fresh salad.
  • Storing Leftovers: Place in an airtight container and refrigerate for up to 3 days.
  • Reheating Tips: Gently reheat on the stovetop, adding a splash of milk to refresh the sauce.

8. Chef Simon’s Tips for Boursin Chicken Skillet

  • Perfect Sear: Ensure the skillet is hot to give the chicken a golden crust.
  • Enhanced Flavor: Add a dash of white wine to the sauce for depth.
  • Season As You Go: Season each layer to build balanced flavors throughout.

9. Emotional and Psychological Impact of Food

  • Comfort Food Qualities: The creamy, rich sauce creates a cozy feel.
  • Shared Meal Memories: Reminisce about family dinners where creamy chicken dishes were a staple.
  • Cooking as Therapy: How making this dish can be a calming and enjoyable experience.

10. Mindful Cooking Techniques

  • Focus on Each Step: Take time with each ingredient, from slicing mushrooms to stirring in the cheese.
  • Appreciate Freshness: Notice the aroma of fresh garlic and the color of asparagus as you cook.
  • Enjoy the Process: Let this recipe be an enjoyable cooking experience, not just a means to an end.

11. Tips for Keeping the Recipe Fresh Longer

  • Store Properly: Ensure it’s in an airtight container in the fridge.
  • Freeze Portions: Freeze extra portions in individual servings.
  • Add Fresh Garnish When Serving: Sprinkle fresh herbs when reheating to revive flavors.

12. Advanced Culinary Terms and Techniques

  • Searing: Explain the importance of a hot pan for sealing in juices.
  • Deglazing: Using a liquid to lift caramelized bits from the pan for added flavor.
  • Emulsifying: Creating a stable mixture of cheese and liquid for a smooth sauce.

13. Healthy Ingredient Alternatives

  • Low-Fat Cheese Option: Use a lower-fat version of Boursin or similar herbed cheese.
  • Lean Protein Substitute: Try turkey breast instead of chicken for a leaner option.
  • Additional Veggies: Add bell peppers or spinach to increase the vegetable content.

14. More Serving Ideas

  • Over Pasta: Serve the creamy chicken and veggies over pasta for a complete meal.
  • With Crusty Bread: Enjoy with crusty bread to soak up the delicious sauce.
  • As a Casserole: Transfer to a baking dish, top with breadcrumbs, and bake for a crispy twist.

15. Common Issues and Solutions

  • Sauce Too Thick: Add a splash of milk or broth to thin it.
  • Vegetables Too Soft: Sauté veggies quickly to retain some crunch.
  • Cheese Clumps: Stir constantly and avoid high heat when adding Boursin to the sauce.

16. Variations to Try

  • Different Cheese: Swap Boursin for goat cheese or cream cheese.
  • Different Protein: Try shrimp or tofu for a different protein option.
  • Herb Variations: Use basil or rosemary instead of thyme for a flavor twist.

17. Nutritional Information and Health Benefits

  • Calorie Count: Approximately X calories per serving.
  • Protein Content: High in protein due to chicken.
  • Vitamin and Mineral Content: Rich in vitamins A, C, and calcium from asparagus and cheese.

18. The Art of Pairing Boursin Chicken Skillet

  • Wine Pairing: A crisp Chardonnay complements the creaminess.
  • Salad Pairing: A light side salad with citrus dressing adds a refreshing contrast.
  • Dessert Pairing: Finish with a fruity dessert to cleanse the palate.

19. Weather and Recipe Outcome

  • Warmer Weather Adaptation: Substitute cream with a lighter sauce or serve over salad.
  • Cold-Weather Comfort: Enjoy as a warm, filling meal on chilly nights.

20. Other Creamy Skillet Recipes to Explore

  • Creamy Tuscan Chicken Skillet
  • Spinach and Artichoke Chicken
  • Garlic Parmesan Mushroom Skillet

21. Focus on Tools and Equipment

  • Heavy-Duty Skillet: Ideal for searing chicken and retaining heat.
  • Sturdy Spatula: Essential for flipping chicken without breaking it.
  • Garlic Press: Useful if you use fresh garlic instead of pre-minced.

22. Frequently Asked Questions (with answers)

  • Can I use another cheese instead of Boursin? Yes, other soft cheeses like goat cheese work well.
  • Can this dish be made dairy-free? Substitute Boursin with a dairy-free cheese alternative.
  • Is this recipe gluten-free? Yes, as long as the cheese is gluten-free.

Conclusion

Summarize the highlights of the Boursin Chicken, Mushroom, and Asparagus Skillet recipe. Emphasize how it’s an easy, elegant meal that’s perfect for any occasion. Encourage readers to try the recipe, share it with friends, and enjoy the delicious combination of creamy cheese, tender chicken, and fresh vegetables


Thank you for visiting SqueezyRecipes! We’re dedicated to making cooking enjoyable and accessible for everyone, regardless of your skill level. Chef Simon is always ready to share the best recipes that bring a creative touch to your daily meals. With each visit, you’ll discover new recipes and innovative ideas that cater to every occasion. Don’t miss out on exploring SqueezyRecipes for the latest delicious dishes, and feel free to leave your feedback and share your experiences with the recipes you’ve tried. Cooking together makes everything better!

Ultimate Fudge Brownies Chocolate

Fudge brownies chocolate Recipe

Introduction

Fudge brownies are the epitome of indulgence. Rich, gooey, and full of intense chocolate flavor, they’re a treat that satisfies every sweet craving. Whether you’re baking for a party, a family gathering, or just to satisfy a chocolate urge, these brownies are guaranteed to be a hit. Perfected with a balance of fudgy texture and decadent chocolate, this recipe is your ultimate guide to brownie heaven.


1. The Story Behind Fudge Brownies

The origin of brownies is a bit of a mystery, but they are believed to have been created in the United States in the late 19th century. The name “brownie” refers to the color, derived from their rich chocolate base. Over time, variations emerged, but the fudgy version became a favorite for its moist and dense texture. This recipe stays true to the classic American-style fudge brownie, offering a melt-in-your-mouth experience.


2. The Benefits of Making Your Own Fudge Brownies

  • Control Over Ingredients: Customize sweetness, chocolate intensity, or add nuts and other mix-ins.
  • Freshness: Homemade brownies are free from preservatives and taste far superior to store-bought versions.
  • Cost-Effective: Premium-quality brownies at a fraction of the price of bakery versions.
  • Therapeutic Baking: The process of baking is both relaxing and rewarding.

3. Essential Ingredients for the Perfect Fudge Brownies

  1. Chocolate: High-quality dark or semi-sweet chocolate is essential for flavor.
  2. Butter: Adds richness and helps create the fudgy texture.
  3. Sugar: Granulated sugar for sweetness and structure.
  4. Eggs: Bind the ingredients and contribute to the soft texture.
  5. Flour: A small amount of all-purpose flour keeps the brownies dense.
  6. Cocoa Powder: Enhances the chocolate flavor.
  7. Vanilla Extract: Adds depth and aroma.
  8. Salt: Balances the sweetness and enhances chocolate flavors.
  9. Optional Additions: Chopped nuts, chocolate chips, or a swirl of caramel.

4. Cultural History of Ingredients

  • Chocolate: Once a luxury item for royalty, chocolate became widely accessible in the 19th century, leading to its use in baked goods like brownies.
  • Butter: A staple in European and American baking, butter adds flavor and richness to many traditional desserts.
  • Cocoa Powder: Introduced by the Dutch in the 19th century, cocoa revolutionized chocolate desserts.

5. Equipment You’ll Need

  • Mixing bowls
  • A whisk or hand mixer
  • A rubber spatula
  • An 8×8-inch baking pan
  • Parchment paper or non-stick spray
  • A double boiler or microwave for melting chocolate

6. Step-by-Step Instructions for Fudge Brownies

Ingredients:

  • 1 cup (225g) unsalted butter
  • 8 oz (225g) semi-sweet chocolate, chopped
  • 1 1/4 cups (250g) granulated sugar
  • 3 large eggs
  • 1 tsp vanilla extract
  • 3/4 cup (95g) all-purpose flour
  • 1/4 cup (25g) cocoa powder
  • 1/2 tsp salt

Directions:

  1. Preheat and Prepare:
    • Preheat your oven to 350°F (175°C). Line an 8×8-inch baking pan with parchment paper, leaving an overhang for easy removal.
  2. Melt Chocolate and Butter:
    • In a double boiler or microwave, melt the chopped chocolate and butter together until smooth. Stir occasionally to prevent burning.
  3. Mix Wet Ingredients:
    • In a mixing bowl, whisk the sugar, eggs, and vanilla extract until combined. Slowly pour in the melted chocolate mixture and whisk until smooth.
  4. Sift and Combine Dry Ingredients:
    • Sift together the flour, cocoa powder, and salt. Gradually fold the dry ingredients into the wet mixture using a rubber spatula. Mix just until combined to avoid overmixing.
  5. Optional Add-Ins:
    • Stir in chocolate chips, chopped nuts, or a swirl of caramel if desired.
  6. Bake:
    • Pour the batter into the prepared pan and spread evenly. Bake for 30-35 minutes or until the edges are set and a toothpick inserted in the center comes out with a few moist crumbs.
  7. Cool and Slice:
    • Allow the brownies to cool completely in the pan before lifting them out using the parchment overhang. Slice into squares or rectangles.

7. Suggestions for Serving and Storing

  • Serving Ideas: Serve warm with a scoop of vanilla ice cream, drizzle with chocolate sauce, or dust with powdered sugar.
  • Storing: Store brownies in an airtight container at room temperature for up to 4 days or freeze for up to 3 months.

8. Chef Simon’s Tips for Fudge Brownies

  • Use high-quality chocolate for the best flavor.
  • Underbake slightly for an extra fudgy texture.
  • Chill the brownies before slicing for cleaner cuts.

9. Emotional and Psychological Impact of Food

The indulgent nature of fudge brownies brings a sense of comfort and nostalgia, evoking memories of childhood treats or special celebrations. Their rich chocolate aroma can instantly uplift moods.


10. Mindful Cooking Techniques

  • Focus on the texture of the batter as you fold in the dry ingredients.
  • Savor the aroma of the chocolate as it melts and mixes.
  • Appreciate the transformation from batter to a perfectly baked brownie.

11. Tips for Keeping the Recipe Fresh Longer

  • Store brownies in a sealed container with a slice of bread to retain moisture.
  • Wrap individual brownies in plastic wrap before freezing to prevent freezer burn.

12. Advanced Culinary Terms and Techniques

  • Bain-Marie: A water bath used to gently melt chocolate.
  • Blooming Cocoa: Mixing cocoa powder with a hot liquid to enhance its flavor.

13. Healthy Ingredient Alternatives

  • Substitute butter with coconut oil for a dairy-free version.
  • Replace some sugar with applesauce or honey for a lower-calorie option.
  • Use almond flour instead of all-purpose flour for a gluten-free version.

14. More Serving Ideas

  • Add a layer of cream cheese frosting for a decadent dessert.
  • Top with crushed peppermint for a festive touch.
  • Serve crumbled over yogurt or ice cream for a fun twist.

15. Common Issues and Solutions

  • Dry Brownies: Overbaking. Solution: Remove from the oven when the center is still slightly gooey.
  • Crumbly Texture: Overmixing the batter. Solution: Mix just until combined.

16. Variations to Try

  • Nutty Brownies: Add chopped walnuts or pecans for crunch.
  • Mocha Brownies: Mix in espresso powder for a coffee-chocolate combo.
  • Salted Caramel Brownies: Swirl in caramel and sprinkle with sea salt.

17. Nutritional Information and Health Benefits

  • Calories: Approximately 200 per square
  • Rich in Antioxidants: Thanks to the dark chocolate.
  • Energy Boost: A perfect pick-me-up snack.

18. The Art of Pairing Fudge Brownies

  • Drinks: Serve with a glass of cold milk, a cup of coffee, or red wine for a sophisticated pairing.
  • Desserts: Pair with fresh berries or whipped cream for added contrast.

19. Weather and Recipe Outcome

Brownies are a perfect treat for rainy or chilly days, as their warm, gooey texture offers comfort and warmth.


20. Other Chocolate Desserts to Explore

  • Chocolate Lava Cake
  • Triple Chocolate Cookies
  • Dark Chocolate Truffles

21. Focus on Tools and Equipment

  • Use a silicone spatula for easy mixing.
  • A metal baking pan ensures even heat distribution.

22. Frequently Asked Questions (with answers)

Q: Can I make this recipe dairy-free?
A: Yes, substitute butter with coconut oil and use dairy-free chocolate.

Q: Can I double the recipe?
A: Absolutely. Use a 9×13-inch pan and adjust the baking time as needed.

Q: How do I know when the brownies are done?
A: A toothpick inserted into the center should come out with a few moist crumbs.


Conclusion

This fudge brownie recipe is everything you could ask for—rich, indulgent, and irresistibly chocolaty. Whether you’re making them for a special occasion or just because, these brownies are bound to become a staple in your baking repertoire. Dive into the world of fudgy perfection and let every bite transport you to chocolate bliss.


Thank you for visiting SqueezyRecipes! We’re dedicated to making cooking enjoyable and accessible for everyone, regardless of your skill level. Chef Simon is always ready to share the best recipes that bring a creative touch to your daily meals. With each visit, you’ll discover new recipes and innovative ideas that cater to every occasion. Don’t miss out on exploring SqueezyRecipes for the latest delicious dishes, and feel free to leave your feedback and share your experiences with the recipes you’ve tried. Cooking together makes everything better!

Easy Garlic Dinner Rolls Recipe

Garlic Dinner Rolls

Introduction

Garlic dinner rolls are a must-have for any meal. Soft, fluffy, and infused with the irresistible aroma of garlic butter, these rolls elevate any dinner spread. Perfect as a side dish or a standalone snack, they’re a guaranteed hit for family meals, holiday dinners, or potluck gatherings. This recipe is designed to guide you step-by-step in creating the most delectable garlic dinner rolls at home.


1. The Story Behind Garlic Dinner Rolls

Dinner rolls have been a staple in American households for generations, often associated with warmth and comfort. Adding garlic butter takes these rolls to the next level, introducing a savory, aromatic twist. This recipe is inspired by traditional soft rolls but enhanced with a rich garlic infusion that makes them both unique and universally loved.


2. The Benefits of Making Your Own Garlic Dinner Rolls

  • Freshness: Homemade rolls are free of preservatives and are best served fresh out of the oven.
  • Customization: Adjust the level of garlic, add herbs, or even stuff them with cheese.
  • Cost-Effective: Making rolls at home is far cheaper than buying gourmet ones from a bakery.
  • Aromatherapy: The smell of freshly baked bread with garlic butter is unmatched.

3. Essential Ingredients for the Perfect Garlic Dinner Rolls

  1. All-Purpose Flour: The base for the rolls, providing structure.
  2. Milk: Adds moisture and richness to the dough.
  3. Butter: For both the dough and the garlic topping.
  4. Yeast: Active dry yeast helps the dough rise.
  5. Sugar: A small amount to activate the yeast and balance flavors.
  6. Salt: Enhances overall flavor.
  7. Garlic: Freshly minced for maximum aroma and taste.
  8. Egg: For a soft texture and a glossy finish.
  9. Parsley (Optional): For a touch of freshness and color in the garlic butter.

4. Cultural History of Ingredients

  • Garlic: A culinary staple across cultures, garlic has been cherished for its flavor and medicinal properties since ancient times.
  • Bread: A universal food, bread-making techniques have been passed down through generations and adapted to local flavors.
  • Butter: Known for its richness, butter was once a luxury but is now a cornerstone of baking.

5. Equipment You’ll Need

  • A mixing bowl
  • Measuring cups and spoons
  • A whisk
  • A stand mixer with a dough hook (optional but helpful)
  • A baking dish or sheet
  • A pastry brush
  • Parchment paper or non-stick spray

6. Step-by-Step Instructions for Garlic Dinner Rolls

Ingredients

For the Dough:

  • 3 ½ cups (440g) all-purpose flour
  • 1 packet (2 ¼ tsp) active dry yeast
  • 1 cup (240ml) warm milk (110°F/43°C)
  • 3 tbsp (40g) sugar
  • 1 tsp salt
  • 1 large egg
  • 4 tbsp (60g) unsalted butter, softened

For the Garlic Butter:

  • 4 tbsp (60g) unsalted butter, melted
  • 3 cloves garlic, minced
  • 1 tbsp fresh parsley, chopped (optional)

Directions

  1. Activate the Yeast:
    • In a small bowl, combine warm milk, sugar, and yeast. Let it sit for 5-10 minutes until frothy.
  2. Make the Dough:
    • In a large mixing bowl, combine flour and salt. Add the yeast mixture, softened butter, and egg. Mix until a shaggy dough forms.
  3. Knead the Dough:
    • Knead by hand for 8-10 minutes or use a stand mixer with a dough hook for 5-6 minutes until the dough is smooth and elastic.
  4. First Rise:
    • Place the dough in a greased bowl, cover with a damp towel or plastic wrap, and let it rise in a warm spot for 1-2 hours or until doubled in size.
  5. Shape the Rolls:
    • Punch down the dough and divide it into 12-16 equal pieces. Shape each piece into a ball and arrange them in a greased or parchment-lined baking dish.
  6. Second Rise:
    • Cover the rolls and let them rise again for 30-45 minutes until puffy. Preheat your oven to 375°F (190°C).
  7. Prepare Garlic Butter:
    • While the rolls rise, melt butter in a small saucepan or microwave. Stir in minced garlic and parsley.
  8. Bake:
    • Brush the rolls with a little garlic butter and bake for 20-25 minutes or until golden brown.
  9. Final Touch:
    • Immediately brush the hot rolls with more garlic butter for an irresistible glaze.

7. Suggestions for Serving and Storing

  • Serving Ideas: Serve warm alongside soups, pasta dishes, or holiday meals. They also make excellent mini sandwich bases.
  • Storing: Store in an airtight container at room temperature for 2-3 days. Reheat in the oven to refresh.

8. Chef Simon’s Tips for Garlic Dinner Rolls

  • Use bread flour for even softer rolls if you prefer.
  • Add grated Parmesan to the garlic butter for extra flavor.
  • Don’t skip the second rise—it ensures the rolls are light and airy.

9. Emotional and Psychological Impact of Food

There’s something incredibly comforting about tearing into a warm, buttery dinner roll. The savory aroma of garlic paired with the soft texture brings joy and satisfaction to any meal.


10. Mindful Cooking Techniques

  • Feel the dough as you knead, noticing when it becomes smooth and elastic.
  • Focus on the aroma of the garlic butter as it melts.
  • Appreciate the transformation during both rises.

11. Tips for Keeping the Recipe Fresh Longer

  • Wrap rolls individually in plastic wrap and store them in the freezer for up to a month. Reheat directly in the oven for fresh rolls anytime.
  • Avoid refrigerating as it can dry out the bread.

12. Advanced Culinary Terms and Techniques

  • Proofing: The process of letting the dough rise to develop structure and flavor.
  • Windowpane Test: A method to check dough elasticity by stretching it thin enough to see light through without tearing.

13. Healthy Ingredient Alternatives

  • Replace butter with olive oil for a lighter version.
  • Use whole wheat flour for added fiber.
  • Substitute milk with almond or oat milk for a dairy-free option.

14. More Serving Ideas

  • Top with sesame or poppy seeds before baking.
  • Serve with a side of herbed cream cheese or garlic aioli.
  • Use as a base for sliders or mini sandwiches.

15. Common Issues and Solutions

  • Dense Rolls: Likely due to under-proofing. Solution: Ensure the dough doubles in size during both rises.
  • Burnt Tops: Cover loosely with foil if the rolls brown too quickly.

16. Variations to Try

  • Cheesy Garlic Rolls: Add shredded mozzarella or cheddar into each roll before baking.
  • Herb Rolls: Mix dried rosemary or thyme into the dough for an aromatic twist.
  • Spicy Rolls: Add red pepper flakes to the garlic butter for a hint of heat.

17. Nutritional Information and Health Benefits

  • Calories: Approx. 150 per roll
  • Carbohydrates: Provide energy for the day.
  • Garlic: Contains antioxidants and promotes heart health.

18. The Art of Pairing Garlic Dinner Rolls

  • With Soups: Tomato soup, clam chowder, or butternut squash soup.
  • With Entrees: Roast chicken, steak, or pasta dishes.
  • With Drinks: Pair with a glass of Chardonnay or sparkling water with lemon.

19. Weather and Recipe Outcome

On humid days, the dough may rise faster due to warmth. Conversely, in cooler weather, you might need to extend rise times slightly.


20. Other Bread Recipes to Explore

  • Classic French Baguette
  • Rosemary Focaccia
  • Sweet Hawaiian Rolls

21. Focus on Tools and Equipment

  • Use a stand mixer for effortless kneading.
  • Invest in a high-quality pastry brush for even butter application.

22. Frequently Asked Questions (with answers)

Q: Can I make these rolls ahead of time?
A: Yes, you can refrigerate the dough overnight after the first rise and bake fresh the next day.

Q: Can I use instant yeast?
A: Absolutely, just skip the activation step and mix it directly into the flour.

Q: Why are my rolls not fluffy?
A: Ensure the yeast is fresh and the dough is given enough time to rise properly.


Conclusion

Garlic dinner rolls are more than just a side dish—they’re a versatile, crowd-pleasing addition to any meal. With their soft texture, rich buttery flavor, and aromatic garlic infusion, they can transform an ordinary dinner into a memorable feast. Whether you’re a seasoned baker or trying homemade bread for the first time, this recipe provides a foolproof guide to creating perfect garlic dinner rolls. Gather your ingredients, embrace the process, and enjoy the reward of warm, fluffy, and flavorful rolls fresh out of your oven.

Get creative with variations, pair them with your favorite meals, and don’t forget to share them with loved ones—it’s the perfect way to make any gathering special. Happy baking!


Thank you for visiting SqueezyRecipes! We’re dedicated to making cooking enjoyable and accessible for everyone, regardless of your skill level. Chef Simon is always ready to share the best recipes that bring a creative touch to your daily meals. With each visit, you’ll discover new recipes and innovative ideas that cater to every occasion. Don’t miss out on exploring SqueezyRecipes for the latest delicious dishes, and feel free to leave your feedback and share your experiences with the recipes you’ve tried. Cooking together makes everything better!

Jam and Cream Cheese Texas Kolaches: Irresistible Sweet Delight

Jam and Cream Cheese Texas Kolaches

Introduction

Texas Kolaches are a beloved pastry that bridges the gap between breakfast and dessert. Traditionally of Czech origin, these fluffy, slightly sweet rolls filled with jam and cream cheese have become a Texas staple. Perfect for a family breakfast, brunch with friends, or a snack with coffee, they’re versatile, comforting, and surprisingly easy to make. Let’s dive into the process of creating these delightful treats at home.


1. The Story Behind Jam and Cream Cheese Texas Kolaches

Kolaches were introduced to Texas by Czech immigrants in the 19th century, where they quickly became a cherished part of local cuisine. The traditional recipe often included fruit or cheese fillings, but over time, Texans added their flair, introducing ingredients like sausage and savory fillings. This version combines a classic cream cheese filling with the tangy sweetness of jam, creating a perfect blend of textures and flavors.


2. The Benefits of Making Your Own Kolaches

  • Freshness Guaranteed: Homemade kolaches are free of preservatives and taste better than store-bought versions.
  • Creative Freedom: Customize fillings to suit your taste, from apricot jam to raspberry or even Nutella.
  • Cost-Effective: Making a batch at home is more economical than purchasing them from a bakery.
  • Therapeutic Baking: The process of kneading dough and crafting these pastries is a rewarding, stress-relieving experience.

3. Essential Ingredients for the Perfect Kolaches

  • For the Dough:
    • 2 ¼ tsp active dry yeast
    • 1 cup warm milk (about 110°F)
    • ¼ cup sugar
    • 3 cups all-purpose flour
    • 1 tsp salt
    • 2 large eggs
    • ¼ cup unsalted butter, melted
  • For the Filling:
    • 8 oz cream cheese, softened
    • ¼ cup sugar
    • 1 tsp vanilla extract
    • ½ cup jam (flavor of your choice)
  • For the Topping:
    • ¼ cup melted butter
    • 2 tbsp sugar

4. Cultural History of Ingredients

  • Yeast: Essential in bread-making, yeast has been a staple ingredient in baking for centuries, symbolizing growth and life.
  • Cream Cheese: First made in the United States in the 1800s, cream cheese lends a creamy texture and tangy flavor to dishes.
  • Jam: A preserve with a history dating back to the Middle Ages, jam has been used to sweeten baked goods and desserts for centuries.

5. Equipment You’ll Need

  • Mixing bowls
  • Whisk and spatula
  • Stand mixer with a dough hook (optional)
  • Baking sheet
  • Parchment paper
  • Rolling pin
  • Measuring cups and spoons

6. Step-by-Step Instructions for Jam and Cream Cheese Texas Kolaches

Preparing the Dough

  1. Activate the Yeast: In a small bowl, mix the warm milk, sugar, and yeast. Let it sit for 5-10 minutes until frothy.
  2. Mix Wet Ingredients: In a large bowl, whisk the eggs and melted butter together. Add the yeast mixture.
  3. Combine Dry Ingredients: Gradually mix in flour and salt. Knead the dough until smooth and elastic (about 10 minutes by hand or 5 minutes using a stand mixer).
  4. Let it Rise: Cover the dough with a damp cloth and let it rise in a warm place for about 1 hour or until doubled in size.

Making the Filling

  1. In a medium bowl, beat the cream cheese, sugar, and vanilla extract until smooth. Set aside.

Shaping and Filling the Kolaches

  1. Divide the Dough: Punch down the risen dough and divide it into 12 equal portions. Roll each into a ball.
  2. Shape the Kolaches: Flatten each ball into a disc and place it on a parchment-lined baking sheet.
  3. Add the Filling: Make a small indentation in the center of each disc using your fingers or the back of a spoon. Fill with 1 tablespoon of cream cheese mixture and 1 teaspoon of jam.

Baking

  1. Final Rise: Cover the kolaches and let them rise for 20-30 minutes.
  2. Bake: Preheat the oven to 350°F (175°C). Bake for 18-20 minutes or until golden brown.
  3. Finish: Brush the warm kolaches with melted butter and sprinkle with sugar for a shiny, sweet finish.

7. Suggestions for Serving and Storing

  • Serve warm for the best texture and flavor.
  • Pair with coffee or tea for a delightful breakfast or snack.
  • Store in an airtight container at room temperature for up to 2 days or refrigerate for up to a week.

8. Chef Simon’s Tips for Kolaches

  • For a richer dough, substitute whole milk with half-and-half.
  • Experiment with different jams—apricot and raspberry are classic choices.
  • Use a piping bag for precise filling distribution.

9. Emotional and Psychological Impact of Food

Kolaches evoke a sense of comfort and nostalgia. Sharing these warm, homemade treats with loved ones fosters connection and creates lasting memories.


10. Mindful Cooking Techniques

Focus on the process: enjoy the feel of the dough as you knead, the aroma of baking, and the satisfaction of creating something from scratch.


11. Tips for Keeping the Recipe Fresh Longer

  • Wrap each kolache individually in plastic wrap and store in the freezer for up to 2 months.
  • Reheat in the oven at 300°F for 10 minutes before serving.

12. Advanced Culinary Terms and Techniques

  • Proofing: Allowing the dough to rise in a warm environment to develop flavor and texture.
  • Creaming: Mixing cream cheese with sugar until light and fluffy, a technique used for the filling.

13. Healthy Ingredient Alternatives

  • Use low-fat cream cheese for a lighter option.
  • Swap sugar for honey or maple syrup.
  • Use whole wheat flour for added fiber.

14. More Serving Ideas

  • Add a drizzle of melted chocolate for a decadent twist.
  • Top with fresh fruits like sliced strawberries or blueberries.

15. Common Issues and Solutions

  • Dough Too Sticky: Add a tablespoon of flour at a time until manageable.
  • Filling Spills Over: Ensure the indentations are deep enough to hold the filling.

16. Variations to Try

  • Savory Kolaches: Replace jam with diced ham or cooked sausage and cream cheese with shredded cheddar.
  • Nutella and Banana Kolaches: Swap the jam for Nutella and add a slice of banana.

17. Nutritional Information and Health Benefits

  • Approx. 220 calories per kolache
  • Good source of carbohydrates for energy
  • Provides calcium and protein from cream cheese

18. The Art of Pairing Kolaches

  • Pair sweet kolaches with black coffee for a balanced flavor.
  • Serve savory kolaches with tomato soup for a comforting meal.

19. Weather and Recipe Outcome

Humidity can affect the dough’s rising time. On humid days, expect faster proofing.


20. Other Pastry Recipes to Explore

  • Classic Cinnamon Rolls
  • Danish Pastries with Fruit Filling
  • Cream Puffs

21. Focus on Tools and Equipment

Invest in a sturdy baking sheet and a quality stand mixer to streamline the process.


22. Frequently Asked Questions (with answers)

Q: Can I make the dough ahead of time?
A: Yes, refrigerate the dough overnight and let it come to room temperature before shaping.

Q: Can I use pre-made dough?
A: While possible, homemade dough provides superior flavor and texture.

Q: What’s the best way to reheat kolaches?
A: Warm them in the oven at 300°F for 10 minutes.


Conclusion

Making Jam and Cream Cheese Texas Kolaches at home is more than just baking—it’s about preserving a tradition, experimenting with flavors, and sharing joy through food. These pastries are a testament to the beauty of blending cultural heritage with modern creativity. Whether for breakfast, dessert, or a special occasion, kolaches are bound to delight and impress.


Thank you for visiting SqueezyRecipes! We’re dedicated to making cooking enjoyable and accessible for everyone, regardless of your skill level. Chef Simon is always ready to share the best recipes that bring a creative touch to your daily meals. With each visit, you’ll discover new recipes and innovative ideas that cater to every occasion. Don’t miss out on exploring SqueezyRecipes for the latest delicious dishes, and feel free to leave your feedback and share your experiences with the recipes you’ve tried. Cooking together makes everything better!