Easy Black Pepper Beef and Cabbage Stir Fry Recipe

Black Pepper Beef and Cabbage Stir Fry

Introduction

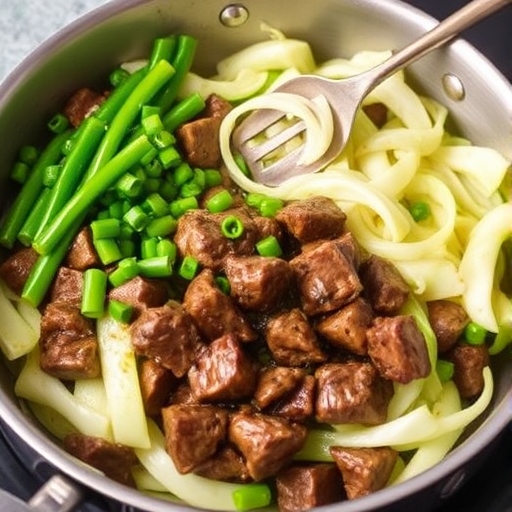
A quick and delicious stir fry, Black Pepper Beef and Cabbage combines tender strips of beef with crisp cabbage in a savory, peppery sauce. This dish is the perfect blend of flavors and textures, offering a satisfying, healthy meal that can be whipped up in under 30 minutes. With its bold flavors and vibrant ingredients, it’s a great choice for busy weeknights or when you’re looking for a hearty yet light dinner.


1. The Story Behind Black Pepper Beef and Cabbage Stir Fry

This stir fry is an inspired fusion dish that brings together the classic pairing of beef and cabbage, a combination that dates back to various Asian cuisines. The dish is influenced by the Chinese stir-fry tradition, where high-heat cooking retains the vegetables’ crispness and enhances the natural flavors. The addition of black pepper adds a sharp, spicy kick that elevates the dish and balances the richness of the beef. It’s a perfect example of how simple ingredients can be transformed into a flavorful meal with just the right seasonings.


2. The Benefits of Making Your Own Black Pepper Beef and Cabbage Stir Fry

  • Healthy & Nutritious: This dish is packed with protein from the beef and fiber from the cabbage, making it a balanced and nourishing meal.
  • Quick & Easy: Ready in less than 30 minutes, it’s a fast meal for busy weeknights.
  • Customizable: Add or remove vegetables to suit your preferences or dietary needs.
  • Low-Carb: With minimal use of starch, it’s a great choice for those on low-carb diets.

3. Essential Ingredients for the Perfect Black Pepper Beef and Cabbage Stir Fry

  • Beef: 1 lb (450g) of flank steak or sirloin, thinly sliced against the grain.
  • Cabbage: ½ small head of cabbage, thinly sliced.
  • Bell Pepper: 1 medium bell pepper, thinly sliced.
  • Onion: 1 medium onion, sliced.
  • Garlic: 3 cloves garlic, minced.
  • Ginger: 1-inch piece of fresh ginger, grated.
  • Soy Sauce: 3 tablespoons (low-sodium is recommended).
  • Black Pepper: 1-2 teaspoons freshly ground, or to taste.
  • Sesame Oil: 2 tablespoons for cooking.
  • Vegetable Oil: 1 tablespoon.
  • Rice Vinegar: 1 tablespoon for a touch of acidity.
  • Cornstarch: 1 teaspoon, to thicken the sauce.
  • Red Pepper Flakes (Optional): A pinch, for some extra heat.

4. Cultural History of Ingredients

  • Beef: A staple in many cuisines worldwide, beef is rich in protein and iron. It’s especially popular in Asian stir fry dishes, where it’s quickly cooked to maintain tenderness.
  • Cabbage: Cabbage is a key ingredient in Eastern European, Mediterranean, and Asian cuisines. It’s cheap, nutritious, and easy to grow, making it a food staple throughout history.
  • Black Pepper: Known as the “king of spices,” black pepper has been traded for centuries and is a prominent seasoning in both Asian and Western cooking. It adds a pungent, spicy flavor that pairs perfectly with beef.

5. Equipment You’ll Need

  • Wok or Skillet: A large skillet or wok for stir-frying.
  • Cutting Board and Knife: For slicing the beef and vegetables.
  • Measuring Spoons: To measure the soy sauce, rice vinegar, and black pepper.
  • Grater or Microplane: To grate the ginger.
  • Wooden Spoon or Tongs: For stirring the ingredients while cooking.

6. Step-by-Step Instructions for Black Pepper Beef and Cabbage Stir Fry

Preparation:

  1. Prep the Ingredients:
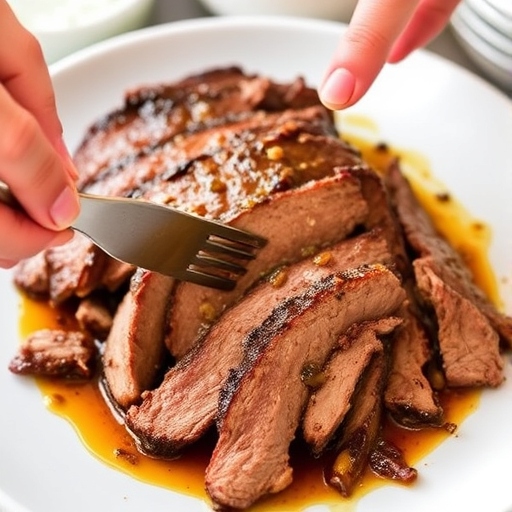
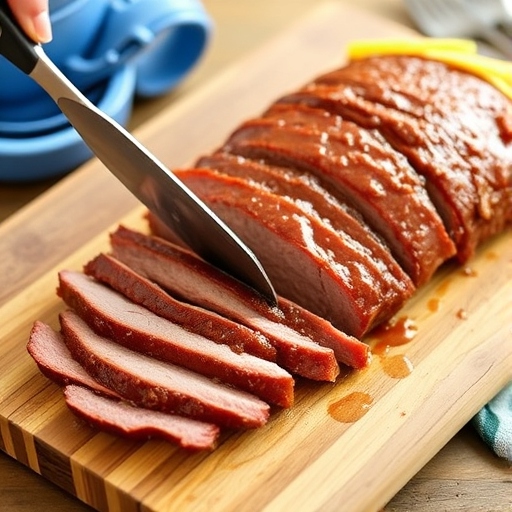
    • Slice the beef thinly against the grain.
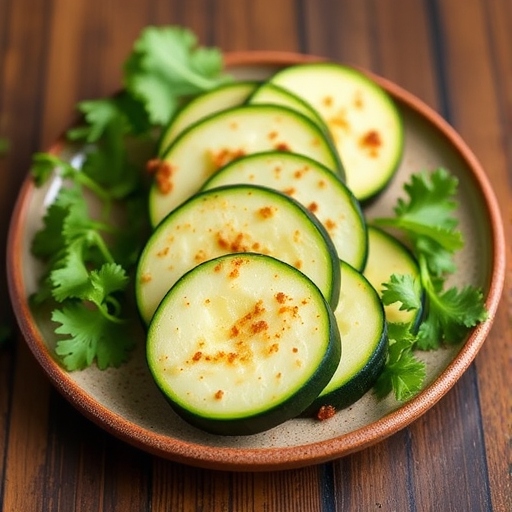
    • Slice the cabbage, onion, and bell pepper.
    • Mince the garlic and grate the ginger.
  2. Make the Sauce:
    • In a small bowl, mix the soy sauce, rice vinegar, and cornstarch. Stir until the cornstarch dissolves. Add the freshly ground black pepper and set aside.

Stir-Fry:

  1. Heat the Pan:
    • Heat 1 tablespoon of vegetable oil and 1 tablespoon of sesame oil in a wok or large skillet over medium-high heat.
  2. Cook the Beef:
    • Add the sliced beef to the pan and stir-fry for 2-3 minutes until browned. Remove the beef and set aside.
  3. Cook the Vegetables:
    • In the same pan, add the remaining sesame oil. Stir-fry the garlic, ginger, onion, and bell pepper for about 2 minutes until fragrant and the vegetables begin to soften.
  4. Add the Cabbage:
    • Add the sliced cabbage to the pan and cook for another 3-4 minutes, stirring occasionally until it’s just tender but still has a slight crunch.
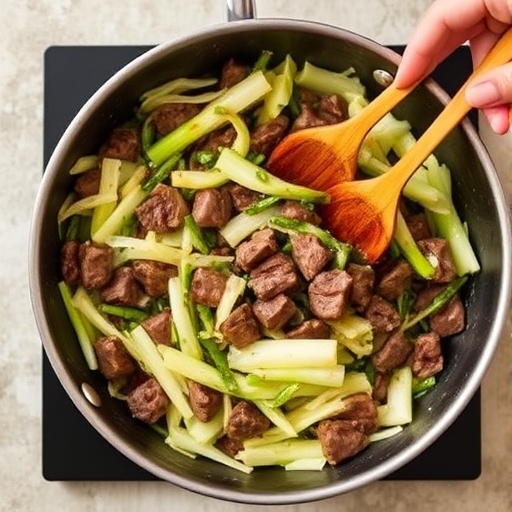
  5. Combine Beef and Sauce:
    • Return the beef to the pan and pour the sauce over the mixture. Stir everything together to coat evenly, cooking for an additional 2-3 minutes to allow the sauce to thicken and the flavors to combine.

Serving:

  1. Serve:
    • Serve the Black Pepper Beef and Cabbage stir fry hot, over a bed of steamed rice or noodles. Garnish with additional black pepper if desired.

7. Suggestions for Serving and Storing

  • Serving:
    • This stir fry pairs wonderfully with steamed white or brown rice. You can also serve it with noodles or over cauliflower rice for a low-carb option. For extra flavor, top with freshly chopped cilantro or green onions.
  • Storing:
    • Store any leftovers in an airtight container in the refrigerator for up to 3 days. Reheat in a skillet over medium heat for the best texture.

8. Chef Simon’s Tips for Black Pepper Beef and Cabbage Stir Fry

  • Tenderizing Beef:
    • To ensure the beef stays tender, slice it thinly against the grain and avoid overcooking. If you have time, marinate the beef in soy sauce and a dash of cornstarch for 10-15 minutes before cooking to enhance its tenderness.
  • Peppery Kick:
    • For extra heat, increase the amount of black pepper or add a pinch of red pepper flakes to the stir fry. The black pepper should be freshly ground to maximize flavor.
  • Cabbage Tip:
    • If you prefer a softer cabbage texture, cook it for a few minutes longer, but remember to keep it slightly crunchy for the best contrast with the beef.

9. Emotional and Psychological Impact of Food

The savory richness of beef paired with the slight crunch of cabbage offers a satisfying sensory experience. The peppery heat awakens the palate, making this stir fry both comforting and invigorating. It’s a great dish to enjoy after a long day, offering both comfort and a burst of flavor to lift your mood.


10. Mindful Cooking Techniques

Focus on the sizzling sounds as you cook, the aroma of garlic and ginger filling the air, and the vibrant colors of the vegetables. Stir-frying at high heat requires your full attention to avoid burning the ingredients and to ensure the perfect texture. Take your time and appreciate the process.


11. Tips for Keeping the Recipe Fresh Longer

  • Store Properly: Make sure to refrigerate any leftovers in an airtight container to keep the vegetables and beef fresh.
  • Reheat Gently: When reheating, do so on low heat to preserve the texture of the cabbage and beef.

12. Advanced Culinary Terms and Techniques

  • Stir-Frying: A high-heat cooking method, commonly used in Asian cuisine, where ingredients are quickly cooked in a small amount of oil while constantly being stirred.
  • Deglazing: This technique involves adding liquid (like soy sauce) to a pan to loosen browned bits from the bottom, which adds rich flavor to the dish.

13. Healthy Ingredient Alternatives

  • Beef Substitutes: Use lean ground turkey or chicken breast for a lighter protein option.
  • Vegetable Substitutes: Swap cabbage for bok choy, napa cabbage, or spinach for variety.
  • Low-Sodium Soy Sauce: Opt for low-sodium soy sauce to reduce the salt content in the dish.

14. More Serving Ideas

  • Pair with a side of sautéed greens like spinach or bok choy.
  • For a more filling meal, add a side of roasted potatoes or sweet potatoes.

15. Common Issues and Solutions

  • Overcooked Beef: Make sure the beef is thinly sliced and doesn’t sit in the pan too long. Stir-fry quickly to keep it tender.
  • Soggy Cabbage: If the cabbage releases too much water, cook it over higher heat to evaporate excess moisture.

16. Variations to Try

  • Vegetarian Version: Replace the beef with tofu or tempeh for a plant-based version of this stir fry.
  • Spicy Sichuan Style: Add Sichuan peppercorns or chili paste for a more intense flavor profile.

17. Nutritional Information and Health Benefits

  • Calories: Approximately 300-350 calories per serving.
  • Protein: 28g, primarily from the beef, making it a great source of lean protein.
  • Fiber: 5g, from the cabbage and other vegetables, which aids in digestion.
  • Fat: 18g, primarily from the sesame oil and beef, providing essential fatty acids.
  • Vitamins & Minerals: Rich in vitamin C from cabbage and bell peppers, iron from the beef, and antioxidants from the black pepper.

Health Benefits:

  • Cabbage: High in antioxidants, vitamin C, and fiber, cabbage can support immune health, reduce inflammation, and improve digestion.
  • Beef: A great source of iron, zinc, and vitamin B12, which are important for energy production and maintaining a healthy immune system.
  • Black Pepper: Contains piperine, which enhances the absorption of nutrients like turmeric, and can help improve digestion and metabolism.

18. The Art of Pairing Black Pepper Beef and Cabbage Stir Fry

Pair this flavorful stir fry with simple sides that won’t overpower the dish but complement its bold, savory profile.

  • Rice: Steamed jasmine or basmati rice is the ideal choice. The light fluffiness of the rice balances the intensity of the stir fry.
  • Noodles: For a different twist, serve the stir fry over rice noodles or soba for added texture and flavor.
  • Vegetables: Steamed or sautéed vegetables like broccoli, snap peas, or carrots add a fresh, crunchy contrast.

19. Weather and Recipe Outcome

This stir fry is perfect for both warm and cooler weather. During the summer, it makes a quick, satisfying meal when you want something light and flavorful without heating up the kitchen too much. In the winter, the richness of the beef and the warmth of the black pepper can provide a comforting dish on a cold night.


20. Other Stir Fry Recipes to Explore

If you love this Black Pepper Beef and Cabbage Stir Fry, you might also enjoy these other stir fry variations:

  • Ginger Chicken Stir Fry: A fragrant, fresh dish with the sharp flavor of ginger and tender chicken.
  • Vegetable Stir Fry: A vibrant, colorful option with mixed vegetables and a tangy stir-fry sauce.
  • Sweet and Sour Pork Stir Fry: A classic with pork, bell peppers, and a tangy-sweet sauce.

21. Focus on Tools and Equipment

When preparing a stir fry, using the right tools can make a big difference in the cooking process.

  • Wok or Large Skillet: A wok is ideal for stir frying because its sloped sides allow for even cooking and tossing of ingredients, but a large skillet will work well too.
  • Sharp Knife: A sharp knife is essential for slicing the beef thinly and chopping the vegetables evenly, ensuring a perfect cook.
  • Spatula or Tongs: Use a spatula or tongs to stir and toss the ingredients quickly in the hot pan without breaking them up.

22. Frequently Asked Questions (with answers)

Q1: Can I make this dish ahead of time?
Yes, this stir fry can be made ahead and stored in the fridge for up to 3 days. However, the cabbage may lose some of its crispness over time.

Q2: Can I substitute beef with another protein?
Yes! You can substitute beef with chicken, shrimp, or tofu for a different flavor or to meet dietary preferences.

Q3: Can I make it spicier?
Absolutely! You can add more black pepper or incorporate chili flakes or even fresh chili peppers for an extra spicy kick.

Q4: Is this recipe gluten-free?
The recipe is gluten-free as long as you use gluten-free soy sauce. Be sure to double-check the label to ensure it is certified gluten-free.


Conclusion

Black Pepper Beef and Cabbage Stir Fry is a versatile, delicious, and nutritious meal that packs a punch of flavor while remaining quick and simple to prepare. Whether you’re looking for a satisfying weeknight dinner or a dish to impress guests, this stir fry offers the perfect balance of savory beef, crisp cabbage, and the sharp spice of black pepper. It’s a dish that can be customized to suit your preferences and dietary needs, making it an excellent addition to any meal rotation. So gather your ingredients, fire up the stove, and treat yourself to this flavorful stir fry!


This recipe is a perfect example of how simple, fresh ingredients can come together to create a dish that’s not only satisfying but also packed with nutritional benefits. By following the step-by-step instructions and using Chef Simon’s expert tips, you’ll be able to recreate this meal in no time. Whether you’re a beginner or a seasoned cook, this Black Pepper Beef and Cabbage Stir Fry will quickly become one of your favorite go-to recipes.

Easy Zucchini Slice Recipe: Healthy and Delicious

Zucchini slice Recipe

Introduction

Zucchini slice is a delightful, versatile dish that blends wholesome ingredients into a savory slice of comfort. Whether enjoyed as a breakfast, snack, or light lunch, this recipe is a perfect way to use up garden zucchinis while creating a dish that’s both healthy and satisfying. Its simple preparation and incredible flavor make it a go-to for busy households.


1. The Story Behind Zucchini Slice

The zucchini slice has roots in Australian kitchens, where it gained popularity as a convenient, nutritious dish for families. It evolved from traditional frittata recipes, using zucchini as a star ingredient due to its abundance in local gardens. Over time, it became a staple for picnics, school lunches, and quick meals, celebrated for its simplicity and adaptability.


2. The Benefits of Making Your Own Zucchini Slice

  • Customizable: Add or omit ingredients to suit dietary needs or preferences.
  • Nutritious: Packed with vegetables and protein, making it a balanced meal or snack.
  • Cost-effective: Uses affordable, readily available ingredients.
  • Kid-friendly: A great way to sneak vegetables into meals for picky eaters.

3. Essential Ingredients for the Perfect Zucchini Slice

  • Zucchini: 2 medium-sized, grated.
  • Eggs: 5 large, beaten.
  • Cheese: 1 cup grated cheddar or your preferred cheese.
  • Flour: 1 cup self-raising flour.
  • Carrot (optional): 1, grated.
  • Onion: 1 small, finely chopped.
  • Olive Oil: ¼ cup.
  • Salt and Pepper: To taste.
  • Bacon (optional): ½ cup diced (or substitute with turkey or chicken).

4. Cultural History of Ingredients

  • Zucchini: A summer squash native to the Americas, introduced to Europe by explorers.
  • Cheese: A beloved dairy product with a rich history in European and Mediterranean cuisines.
  • Eggs: An ancient ingredient, symbolizing nourishment and versatility across cultures.

5. Equipment You’ll Need

  • Mixing Bowl: For combining ingredients.
  • Grater: To shred zucchini and optional vegetables.
  • Baking Dish: A medium-sized pan for baking.
  • Oven: Preheated to 350°F (175°C).

6. Step-by-Step Instructions for Zucchini Slice

Preparation:

  1. Preheat Oven: Set to 350°F (175°C). Grease or line a baking dish.
  2. Grate Zucchini: Use a grater to shred zucchini into fine pieces. Squeeze out excess moisture.

Mixing Ingredients:

  1. Combine Wet Ingredients: In a large bowl, mix eggs, olive oil, and seasoning.
  2. Add Vegetables: Fold in grated zucchini, onion, carrot, and bacon (if using).
  3. Incorporate Dry Ingredients: Gradually stir in flour and cheese until well combined.

Baking:

  1. Transfer to Dish: Pour mixture into the prepared baking dish.
  2. Bake: Place in the oven and bake for 30-40 minutes or until golden and set.

Serving:

  1. Cool and Slice: Allow to cool slightly before slicing into squares or wedges.

7. Suggestions for Serving and Storing

  • Serving: Serve warm with a side salad or enjoy cold as a snack.
  • Storing: Refrigerate in an airtight container for up to 3 days. It can also be frozen for up to a month.

8. Chef Simon’s Tips for Zucchini Slice

  • Opt for fresh, firm zucchinis for the best texture and flavor.
  • Add herbs like parsley or thyme for extra flavor.
  • Experiment with different cheeses like feta or Parmesan.

9. Emotional and Psychological Impact of Food

Zucchini slice offers comfort through its warm, homey flavors. Its simplicity and versatility make it a dish that brings families together, offering nourishment for both body and soul.


10. Mindful Cooking Techniques

Focus on each step, from grating the zucchini to mixing the batter, appreciating the textures and aromas as you go. This mindfulness enhances the cooking experience and the dish’s quality.


11. Tips for Keeping the Recipe Fresh Longer

  • Use freshly grated zucchini and avoid pre-shredded options to maintain freshness.
  • Store leftovers in a sealed container to retain moisture and prevent drying.

12. Advanced Culinary Terms and Techniques

  • Blanching (Optional): Lightly cook zucchini before mixing for a softer texture.
  • Folding: Gently incorporate ingredients to maintain lightness.

13. Healthy Ingredient Alternatives

  • Replace self-raising flour with whole-wheat flour and baking powder for extra fiber.
  • Use low-fat cheese or nutritional yeast for a lighter option.
  • Substitute bacon with diced mushrooms for a vegetarian twist.

14. More Serving Ideas

  • Pair with a dollop of Greek yogurt or sour cream.
  • Serve as a side to roasted chicken or grilled fish for a complete meal.

15. Common Issues and Solutions

  • Watery Slice: Squeeze zucchini thoroughly to remove excess moisture.
  • Dense Texture: Avoid overmixing the batter to keep it light.
  • Uneven Cooking: Use a consistent oven temperature and ensure the batter is evenly spread.

16. Variations to Try

  • Mediterranean Style: Add olives, sun-dried tomatoes, and feta cheese.
  • Spicy Version: Include chili flakes or diced jalapeños for a kick.
  • Gluten-Free Option: Use almond or coconut flour instead of regular flour.

17. Nutritional Information and Health Benefits

  • Calories: ~200 per slice (depending on ingredients).
  • Rich in Fiber: From zucchini and vegetables.
  • High in Protein: Eggs and cheese contribute to protein content.

18. The Art of Pairing Zucchini Slice

  • Beverages: Pair with a fresh citrus juice or herbal iced tea.
  • Side Dishes: Serve with a crisp cucumber salad or roasted cherry tomatoes.

19. Weather and Recipe Outcome

  • Enjoy warm zucchini slice on cool, rainy days for comfort.
  • Serve chilled on sunny days as a refreshing, light meal.

20. Other Savory Recipes to Explore

  • Spinach and Feta Pie
  • Quiche Lorraine
  • Vegetable Frittata

21. Focus on Tools and Equipment

Invest in a high-quality grater and a reliable non-stick baking dish for hassle-free preparation.


22. Frequently Asked Questions (with answers)

Q: Can I make zucchini slice without flour?
A: Yes, you can use almond flour or oat flour for a gluten-free alternative.

Q: Can I prepare the batter ahead of time?
A: It’s best to prepare it fresh, as zucchini releases water when left to sit.

Q: How do I know when it’s done?
A: The top should be golden brown, and a skewer inserted in the center should come out clean.


Conclusion

Zucchini slice is a wholesome, versatile dish that adapts to any occasion. Whether you’re enjoying it warm or cold, as a snack or a meal, its delightful flavors and nourishing ingredients will leave you satisfied. Try this recipe today and add a touch of homemade comfort to your dining table!

Quick And Easy Wisconsin Butter-Basted Burgers Recipe

Wisconsin Butter-Basted Burgers Recipe

Introduction

Wisconsin Butter-Basted Burgers are a savory treat inspired by the Midwest’s love of dairy and comfort food. These juicy patties are basted with rich butter during cooking, creating a mouthwatering crust and an indulgent burst of flavor with every bite. Paired with a buttery bun and classic toppings, this burger is a testament to Wisconsin’s culinary heritage.


The Story Behind Wisconsin Butter-Basted Burgers

The idea of butter-basting originates from Wisconsin’s dairy-rich culture, where butter isn’t just a cooking staple but a way of life. These burgers reflect the state’s pride in its dairy production, elevating a humble beef patty into a decadent meal. Traditionally grilled outdoors or on a griddle, butter-basted burgers have become a beloved treat for burger enthusiasts everywhere.


The Benefits of Making Your Own Wisconsin Butter-Basted Burgers

  • Flavor Control: Customize the richness by adjusting the butter and seasonings.
  • High-Quality Ingredients: Use fresh beef and butter for superior taste.
  • Perfect Texture: Achieve a juicy interior and a caramelized crust.
  • Family Favorite: A crowd-pleasing dish for any occasion.

Essential Ingredients for the Perfect Wisconsin Butter-Basted Burgers

  • Ground Beef: Choose an 80/20 blend for the perfect balance of fat and flavor.
  • Butter: High-quality, unsalted butter enhances the richness.
  • Seasonings: Salt, pepper, and optional garlic powder for depth.
  • Buns: Soft, buttery brioche or potato buns complement the burger’s richness.
  • Toppings: Classic options like lettuce, tomato, onion, and cheese (preferably Wisconsin cheddar).

Cultural History of Ingredients

  • Butter: Wisconsin is nicknamed “America’s Dairyland” and is known for its award-winning butter.
  • Cheddar Cheese: A signature Wisconsin product, adding a tangy richness to burgers.
  • Beef: A staple in American cuisine, symbolizing hearty, satisfying meals.

Equipment You’ll Need

  • A cast-iron skillet or griddle
  • A spatula for flipping burgers
  • A basting brush
  • Measuring spoons for seasonings

Step-by-Step Instructions for Wisconsin Butter-Basted Burgers

Ingredients:

  • 1 pound ground beef (80/20 blend)
  • 4 tablespoons unsalted butter, divided
  • 1 teaspoon salt
  • 1/2 teaspoon black pepper
  • 1/2 teaspoon garlic powder (optional)
  • 4 brioche buns, toasted
  • Toppings: Lettuce, tomato slices, onion rings, and Wisconsin cheddar

Instructions:

  1. Prepare the Patties:
    • Divide the ground beef into four equal portions.
    • Shape each portion into a patty, about 3/4 inch thick.
    • Season both sides with salt, pepper, and optional garlic powder.
  2. Preheat the Skillet:
    • Heat a cast-iron skillet or griddle over medium-high heat.
    • Add 2 tablespoons of butter and let it melt, coating the skillet evenly.
  3. Cook the Patties:
    • Place the patties in the skillet and cook for 3–4 minutes on one side.
    • Flip the patties and add the remaining butter.
  4. Baste with Butter:
    • As the butter melts, tilt the skillet slightly.
    • Use a spoon or basting brush to coat the patties with the melted butter.
  5. Add Cheese:
    • In the final minute of cooking, place a slice of Wisconsin cheddar on each patty.
    • Cover with a lid to melt the cheese.
  6. Toast the Buns:
    • While the patties cook, toast the brioche buns in a separate pan with a small amount of butter.
  7. Assemble the Burgers:
    • Spread butter or mayo on the toasted buns.
    • Layer with lettuce, tomato, onion, and the butter-basted patty.
  8. Serve Immediately:
    • Pair with fries, pickles, or a fresh salad for a complete meal.

Suggestions for Serving and Storing

  • Serving: Best enjoyed fresh, with a side of sweet potato fries or coleslaw.
  • Storing: Store leftover patties in an airtight container in the fridge for up to 2 days.
  • Reheating: Warm gently in a skillet with a dab of butter.

Chef Simon’s Tips for Butter-Basted Burgers

  • Don’t press down on the patties while cooking; this releases the juices.
  • Use clarified butter if you prefer a higher smoke point.
  • For an extra buttery flavor, mix a pat of cold butter into the ground beef before shaping the patties.

Emotional and Psychological Impact of Food

Butter-basted burgers evoke feelings of indulgence and comfort, making them the perfect treat for celebrations or simply to brighten your day. They bring people together, creating memories of shared meals and laughter.


Mindful Cooking Techniques

  • Focus on the sizzle to judge the heat of the skillet.
  • Take your time basting the patties, ensuring even coverage for maximum flavor.

Tips for Keeping the Recipe Fresh Longer

  • Store buns and toppings separately to avoid sogginess.
  • Freeze uncooked patties for quick meals in the future.

Advanced Culinary Terms and Techniques

  • Basting: Continuously spooning melted butter over the patties to enhance moisture and flavor.
  • Maillard Reaction: The browning process that creates a flavorful crust on the patties.

Healthy Ingredient Alternatives

  • Use lean ground turkey or chicken for a lighter version.
  • Swap regular butter for plant-based alternatives.
  • Replace the brioche bun with lettuce wraps for a low-carb option.

More Serving Ideas

  • Add caramelized onions for sweetness.
  • Include a fried egg for a breakfast-inspired twist.
  • Serve with a side of roasted vegetables for a healthier pairing.

Common Issues and Solutions

  • Patties Drying Out: Ensure you don’t overcook and use enough butter.
  • Butter Burning: Lower the heat and use clarified butter or a splash of oil.

Variations to Try

  • Garlic Butter Burgers: Infuse the butter with minced garlic for extra flavor.
  • Spicy Butter-Basted Burgers: Add a dash of cayenne pepper to the butter.
  • Herb-Infused Butter: Mix fresh thyme or rosemary into the butter for an aromatic twist.

Nutritional Information and Health Benefits

Approximate values per burger (without toppings):

  • Calories: 450
  • Protein: 25g
  • Carbohydrates: 28g
  • Fat: 26g

The Art of Pairing Butter-Basted Burgers

Pair your burger with a cold craft beer, a classic cola, or a refreshing lemonade.


Weather and Recipe Outcome

Perfect for grilling outdoors in summer or cooking indoors on a cold winter evening, this recipe adapts to any season.


Other Burger Recipes to Explore

  • Classic Cheeseburger
  • Spicy Jalapeño Burgers
  • Veggie Black Bean Burgers

Focus on Tools and Equipment

A well-seasoned cast-iron skillet is ideal for achieving a perfect sear and retaining the burger’s juices.


Frequently Asked Questions (with answers)

Q1: Can I use salted butter?
Yes, but reduce the salt in the seasoning to balance the flavors.

Q2: Can I grill these burgers instead?
Absolutely! Baste the patties with melted butter while grilling for similar results.

Q3: How do I prevent the patties from shrinking?
Make a small indentation in the center of each patty before cooking to help retain their shape.


Conclusion

Wisconsin Butter-Basted Burgers combine the richness of butter with the satisfying flavors of a perfectly cooked patty. Whether enjoyed at a family barbecue or a cozy dinner, this recipe brings a taste of Wisconsin’s culinary tradition to your table. Give it a try and savor the indulgence!

Authentic Texas-Style Beef Brisket Recipe: Smoky and Tender

Texas-Style Beef Brisket Recipe

Introduction

Texas-style beef brisket is the crown jewel of barbecue culture, celebrated for its smoky flavor, tender texture, and bold seasoning. This recipe combines time-honored techniques with simple ingredients, creating a meal that feels like a labor of love. Whether you’re hosting a backyard cookout or simply craving authentic BBQ, this recipe delivers smoky, melt-in-your-mouth goodness.


The Story Behind Texas-Style Beef Brisket

The origins of Texas-style beef brisket date back to the 19th century, brought by German and Czech immigrants who settled in Texas. They introduced smoking techniques to preserve meat, and over time, beef brisket became a staple. Today, it’s the star of Texan BBQ culture, where slow-smoking over wood is considered an art form.


The Benefits of Making Your Own Texas-Style Beef Brisket

  • Customizable Flavor: Adjust the seasoning to suit your taste.
  • Mastering BBQ Techniques: Develop patience and skill in the art of slow-smoking.
  • Cost-Effective: Homemade brisket is far more economical than ordering from a BBQ joint.
  • Deep Satisfaction: There’s immense pride in crafting a brisket with perfect bark and tenderness.

Essential Ingredients for the Perfect Texas-Style Beef Brisket

  • Brisket: A whole packer brisket (10–15 pounds) with both the point and flat sections intact.
  • Dry Rub: A blend of kosher salt, black pepper, paprika, garlic powder, and onion powder.
  • Wood: Oak or hickory for authentic Texan flavor.
  • Spritz: A mix of apple cider vinegar and water to keep the meat moist during smoking.

Cultural History of Ingredients

  • Brisket: Historically, brisket was considered a tough, inexpensive cut of meat, ideal for slow cooking.
  • Kosher Salt and Pepper: The simplicity of these two ingredients reflects the minimalist approach of Texan BBQ.
  • Oak and Hickory Wood: Central to Texas BBQ, these woods impart a distinct smoky flavor.

Equipment You’ll Need

  • Smoker (offset smoker preferred)
  • Meat thermometer
  • Aluminum foil or butcher paper
  • Sharp knife for trimming
  • Spray bottle for the spritz
  • Cutting board for carving

Step-by-Step Instructions for Texas-Style Beef Brisket

Ingredients

  • 1 whole packer brisket (10–15 pounds)
  • 1/4 cup kosher salt
  • 1/4 cup coarse black pepper
  • 2 tablespoons paprika
  • 1 tablespoon garlic powder
  • 1 tablespoon onion powder
  • 1 cup apple cider vinegar (for spritz)
  • 1 cup water (for spritz)

Instructions

  1. Trim the Brisket:
    • Remove excess fat, leaving a 1/4-inch layer for moisture.
    • Square off the edges to ensure even cooking.
  2. Apply the Rub:
    • Mix kosher salt, black pepper, paprika, garlic powder, and onion powder.
    • Generously coat the brisket on all sides with the rub.
  3. Prepare the Smoker:
    • Preheat the smoker to 225°F using oak or hickory wood.
    • Ensure the smoke is clean and thin for optimal flavor.
  4. Smoke the Brisket:
    • Place the brisket fat-side up on the smoker grates.
    • Insert a meat thermometer into the thickest part of the brisket.
  5. Spritz the Brisket:
    • Combine apple cider vinegar and water in a spray bottle.
    • Spritz the brisket every hour to maintain moisture and develop bark.
  6. Wrap the Brisket:
    • When the internal temperature reaches 165°F (around 6–8 hours), wrap the brisket tightly in aluminum foil or butcher paper.
  7. Continue Smoking:
    • Return the wrapped brisket to the smoker.
    • Cook until the internal temperature reaches 203°F (another 4–6 hours).
  8. Rest the Brisket:
    • Remove the brisket from the smoker and let it rest for 1–2 hours.
    • This allows the juices to redistribute, ensuring tenderness.
  9. Slice and Serve:
    • Slice against the grain into 1/4-inch thick pieces.
    • Serve with your favorite BBQ sauce, pickles, and bread.

Suggestions for Serving and Storing

  • Serving: Pair with classic sides like coleslaw, baked beans, or cornbread.
  • Storing: Wrap leftovers tightly in plastic wrap and refrigerate for up to 4 days.
  • Reheating: Warm in a 250°F oven with a splash of beef broth to retain moisture.

Chef Simon’s Tips for Texas-Style Beef Brisket

  • Always use a meat thermometer for accuracy.
  • Let the brisket rest to enhance juiciness.
  • Avoid opening the smoker too often to maintain consistent heat.

Emotional and Psychological Impact of Food

Cooking a brisket is a labor of love that rewards patience and care. Sharing it with friends and family creates lasting memories and celebrates the communal nature of food.


Mindful Cooking Techniques

  • Focus on the process, from trimming to basting.
  • Enjoy the aroma of the smoke and the transformation of the meat over hours.

Tips for Keeping the Recipe Fresh Longer

  • Store in airtight containers to prevent drying out.
  • Freeze in vacuum-sealed bags for longer storage.

Advanced Culinary Terms and Techniques

  • Bark: The flavorful crust formed on the brisket during smoking.
  • Smoke Ring: The pink layer just beneath the surface, a hallmark of well-smoked meat.
  • Stall: A phase during cooking when the temperature plateaus as moisture evaporates.

Healthy Ingredient Alternatives

  • Opt for leaner cuts of brisket if reducing fat intake.
  • Use a low-sodium rub for dietary restrictions.

More Serving Ideas

  • Create brisket sandwiches with pickles and BBQ sauce.
  • Use leftovers in tacos, quesadillas, or chili.

Common Issues and Solutions

  • Dry Brisket: Avoid overcooking and ensure proper wrapping.
  • Bitter Smoke Flavor: Use clean-burning wood and avoid thick, white smoke.

Variations to Try

  • Add cayenne pepper to the rub for a spicy kick.
  • Try different wood types like mesquite or pecan for unique flavors.

Nutritional Information and Health Benefits

Approximate values per serving (6 ounces):

  • Calories: 380
  • Protein: 35g
  • Fat: 25g
  • Carbohydrates: 0g

The Art of Pairing Texas-Style Beef Brisket

Pair with a cold beer, sweet tea, or a bold red wine to complement the smoky flavors.


Weather and Recipe Outcome

Perfect for summer cookouts, but equally satisfying when smoked in winter for a hearty meal.


Other BBQ Recipes to Explore

  • Smoked Pulled Chicken
  • BBQ Ribs
  • Grilled Corn on the Cob

Focus on Tools and Equipment

A high-quality smoker and a reliable thermometer are essential for success.


Frequently Asked Questions (with answers)

Q1: Can I cook this in an oven?
Yes, but you’ll miss the smoky flavor. Use liquid smoke for a similar effect.

Q2: What if I don’t have butcher paper?
Aluminum foil works well but may result in a softer bark.

Q3: How do I know when the brisket is done?
It’s done when the internal temperature is 203°F, and it feels tender when probed.


Conclusion

Texas-Style Beef Brisket is more than just a meal—it’s an experience. From the rich, smoky aroma to the tender, flavorful bites, this recipe embodies the heart and soul of Texan BBQ. Dedicate a day to this labor of love, and you’ll be rewarded with a dish that’s as satisfying to cook as it is to eat. Enjoy!

Rich Beef Tortellini in Cream Sauce Recipe: Comforting and Delicious

Beef Tortellini in Cream Sauce Recipe

Introduction

Beef tortellini in cream sauce is a luxurious yet easy-to-make dish that perfectly combines tender pasta filled with beef and a rich, velvety cream sauce. This comfort food is ideal for weeknight dinners or special occasions, offering an irresistible blend of flavors and textures. Whether you’re craving Italian-inspired cuisine or a hearty meal, this recipe is a surefire winner.


1. The Story Behind Beef Tortellini in Cream Sauce

Originating in Italy, tortellini is a traditional pasta known for its delicate shape and rich fillings, often including meats, cheeses, and herbs. The addition of cream sauce brings a northern Italian touch, where dairy products like cream and butter are staples. This recipe reflects the culinary art of turning simple ingredients into a sophisticated dish cherished worldwide.


2. The Benefits of Making Your Own Beef Tortellini in Cream Sauce

  • Control Over Quality: Fresh ingredients mean better flavors and fewer preservatives.
  • Customizable: Adjust the seasoning and sauce consistency to your liking.
  • Budget-Friendly: Homemade meals are more economical than dining out.
  • Impressive Presentation: A dish that looks and tastes gourmet but is surprisingly easy to prepare.

3. Essential Ingredients for the Perfect Beef Tortellini in Cream Sauce

For the Tortellini

  • Fresh beef tortellini (store-bought or homemade): 16 oz

For the Cream Sauce

  • Heavy Cream: 1 ½ cups, for a rich and creamy base.
  • Butter: 2 tablespoons, to sauté and add depth.
  • Garlic: 3 cloves, minced, for aromatic flavor.
  • Parmesan Cheese: ½ cup, freshly grated, to thicken and enhance the sauce.
  • Chicken or Beef Broth: ½ cup, to balance the creaminess.
  • White Pepper: ¼ teaspoon, for a mild spice.
  • Nutmeg: A pinch, for subtle warmth.
  • Salt: To taste.
  • Fresh Parsley: 2 tablespoons, chopped, for garnish.

4. Cultural History of Ingredients

  • Tortellini: Originating in Bologna and Modena, this pasta is often called the “belly button of Venus” due to its shape.
  • Heavy Cream and Parmesan: Staples of Northern Italian cuisine, highlighting the region’s love for rich, dairy-based sauces.
  • Garlic: A universal ingredient symbolizing warmth and flavor in Italian dishes.

5. Equipment You’ll Need

  • Large pot for boiling tortellini.
  • Skillet or saucepan for preparing the cream sauce.
  • Whisk for blending the sauce.
  • Strainer for draining pasta.
  • Serving dish or pasta bowls for presentation.

6. Step-by-Step Instructions for Beef Tortellini in Cream Sauce

Step 1: Cook the Tortellini

  1. Bring a large pot of salted water to a boil.
  2. Add the beef tortellini and cook according to the package instructions (usually 3–5 minutes for fresh tortellini).
  3. Reserve ½ cup of pasta water, then drain the tortellini and set aside.

Step 2: Prepare the Cream Sauce

  1. In a large skillet over medium heat, melt the butter.
  2. Add the minced garlic and sauté for 1–2 minutes until fragrant.
  3. Pour in the heavy cream and broth, whisking to combine.
  4. Stir in the grated Parmesan, white pepper, nutmeg, and salt.
  5. Simmer gently for 5–7 minutes, stirring occasionally, until the sauce thickens.

Step 3: Combine Tortellini with Sauce

  1. Add the cooked tortellini to the skillet, tossing to coat evenly in the sauce.
  2. If needed, use the reserved pasta water to adjust the sauce consistency.

Step 4: Garnish and Serve

  1. Sprinkle chopped parsley over the dish.
  2. Serve immediately in warm pasta bowls.

7. Suggestions for Serving and Storing

  • Serving: Pair with a side of garlic bread or a crisp green salad for a complete meal.
  • Storing: Store leftovers in an airtight container in the refrigerator for up to 3 days. Reheat gently on the stovetop, adding a splash of cream or broth to refresh the sauce.

8. Chef Simon’s Tips for Beef Tortellini in Cream Sauce

  • Enhance the Flavor: Add a splash of white wine to the sauce for depth.
  • Use Fresh Parmesan: Pre-grated cheese lacks the richness of freshly grated Parmesan.
  • Balance Creaminess: Adjust the broth-to-cream ratio to suit your preference.

9. Emotional and Psychological Impact of Food

This dish embodies comfort and indulgence, making it perfect for family gatherings or romantic dinners. The creamy sauce and hearty tortellini evoke feelings of warmth and satisfaction, turning an ordinary meal into a memorable occasion.


10. Mindful Cooking Techniques

  • Take your time whisking the sauce to ensure a smooth consistency.
  • Use fresh herbs for garnish to heighten the sensory experience.

11. Tips for Keeping the Recipe Fresh Longer

  • Store the tortellini and sauce separately to prevent the pasta from absorbing too much liquid.
  • Refrigerate the sauce in a sealed jar and use within 2–3 days.

12. Advanced Culinary Terms and Techniques

  • Reduction: Simmering the cream sauce to concentrate flavors and achieve the desired thickness.
  • Emulsification: The process of combining fat (butter) with liquids (cream and broth) to create a cohesive sauce.

13. Healthy Ingredient Alternatives

  • Replace heavy cream with half-and-half for a lighter option.
  • Use whole wheat tortellini for added fiber.
  • Substitute butter with olive oil for a healthier fat source.

14. More Serving Ideas

  • Serve with sautéed spinach or steamed asparagus for a balanced meal.
  • Add roasted mushrooms to the sauce for earthy flavor.

15. Common Issues and Solutions

  • Runny Sauce: Simmer longer to thicken or add more Parmesan.
  • Overcooked Tortellini: Reduce cooking time and immediately drain the pasta to prevent mushiness.
  • Too Salty: Balance with additional cream or a squeeze of lemon juice.

16. Variations to Try

  • Spicy Tortellini: Add crushed red pepper flakes to the sauce for heat.
  • Vegetarian Version: Swap beef tortellini for cheese or spinach-filled varieties.
  • Herb-Infused Sauce: Add rosemary or thyme for aromatic depth.

17. Nutritional Information and Health Benefits

  • Calories: ~450 per serving.
  • Protein: High in protein from beef and Parmesan.
  • Calcium: A good source from the cheese and cream.

18. The Art of Pairing Beef Tortellini

  • Wine: Pair with a light Pinot Noir or a crisp Chardonnay.
  • Side Dishes: Complement with roasted vegetables or a Caprese salad.

19. Weather and Recipe Outcome

Beef tortellini in cream sauce is ideal for cool or rainy days, offering warmth and comfort in every bite.


20. Other Pasta Recipes to Explore

  • Creamy Alfredo Fettuccine
  • Pesto Penne with Cherry Tomatoes
  • Baked Ziti with Mozzarella

21. Focus on Tools and Equipment

  • A high-quality skillet ensures even heat distribution for the sauce.
  • Use a microplane grater for finely shredded Parmesan.

22. Frequently Asked Questions (with answers)

Q: Can I use dried tortellini?
A: Yes, but adjust the cooking time and ensure it is fully cooked before adding to the sauce.

Q: Can I make this sauce ahead of time?
A: Absolutely! Prepare the sauce in advance, refrigerate, and reheat gently before serving.

Q: What can I add for extra protein?
A: Toss in cooked chicken or shrimp for an additional protein boost.


Conclusion

Beef tortellini in cream sauce is the epitome of comfort food, blending tender pasta with a creamy, flavorful sauce that’s easy to make and impossible to resist. Perfect for any occasion, this dish offers a taste of Italy in the comfort of your home. Try it today and create a memorable dining experience that everyone will love!

Easy Homemade Smoked Salmon Recipe

Smoked salmon

Introduction
Making your own smoked salmon at home is an artful way to create a luxurious dish that rivals store-bought varieties. With its rich, smoky flavor and delicate texture, this recipe transforms a simple fish fillet into an impressive centerpiece for brunches, appetizers, or gourmet meals.

Whether you’re a seasoned home chef or a beginner looking to try something new, this homemade smoked salmon recipe will guide you through the process step-by-step.


The Story Behind Homemade Smoked Salmon

Smoked salmon has been a staple in culinary traditions worldwide, from the Nordic regions to North America. Historically, smoking was used to preserve fish for longer periods, especially in colder climates. Over time, it evolved into a delicacy enjoyed for its distinctive flavor. This recipe allows you to recreate the essence of traditional methods with a modern twist, offering a satisfying experience from preparation to the first bite.


The Benefits of Making Your Own Smoked Salmon

  1. Customization: Adjust flavors to your liking with different wood chips, seasonings, and brining methods.
  2. Freshness Guaranteed: Homemade smoked salmon is free from preservatives and artificial flavors.
  3. Cost-Effective: High-quality smoked salmon can be expensive; making it at home is more economical.
  4. Satisfaction: There’s a unique joy in crafting this luxurious dish yourself.

Essential Ingredients for the Perfect Smoked Salmon

  • 1 lb fresh salmon fillet (skin-on)
  • ¼ cup kosher salt
  • ¼ cup brown sugar
  • 1 teaspoon black pepper
  • 1 teaspoon smoked paprika (optional)
  • Wood chips for smoking (hickory, applewood, or cherrywood)

Cultural History of Ingredients

  • Salmon: A prized fish in Scandinavian, Native American, and Japanese cuisines for centuries.
  • Salt and Sugar: Essential for curing, these ingredients draw out moisture while enhancing flavor.
  • Wood Chips: Different woods impart unique smoky profiles; hickory adds a robust flavor, while applewood lends a subtle sweetness.

Equipment You’ll Need

  • Smoker or grill with a lid
  • Aluminum foil or smoking tray
  • Meat thermometer
  • Sharp knife
  • Plastic wrap

Step-by-Step Instructions for Homemade Smoked Salmon

Step 1: Prepare the Salmon

  1. Rinse the salmon fillet under cold water and pat dry with paper towels.
  2. Check for pin bones and remove them using tweezers.

Step 2: Create the Cure

  1. In a bowl, mix kosher salt, brown sugar, black pepper, and smoked paprika.
  2. Rub the mixture evenly over both sides of the salmon.

Step 3: Cure the Salmon

  1. Place the salmon in a shallow dish or on a tray, skin-side down.
  2. Cover tightly with plastic wrap and refrigerate for 12–24 hours to cure.

Step 4: Rinse and Dry

  1. Rinse the cured salmon under cold water to remove excess salt and sugar.
  2. Pat dry and place on a wire rack to air-dry for 1–2 hours. This forms a pellicle, a sticky surface that helps absorb smoke.

Step 5: Smoke the Salmon

  1. Preheat your smoker or grill to 150–180°F.
  2. Add your chosen wood chips to the smoker.
  3. Place the salmon on the smoker grate, skin-side down. Smoke for 2–4 hours, or until the internal temperature reaches 145°F.

Step 6: Cool and Store

  1. Allow the smoked salmon to cool completely.
  2. Store in an airtight container in the refrigerator for up to one week.

Suggestions for Serving and Storing

  • Serving Ideas:
    • Serve on bagels with cream cheese and capers.
    • Pair with scrambled eggs for a gourmet breakfast.
    • Add to salads, pasta, or sushi rolls.
  • Storage Tips:
    • Wrap tightly in plastic wrap and store in the fridge.
    • Freeze portions for up to 3 months.

Chef Simon’s Tips for Smoked Salmon

  1. Experiment with Woods: Try mesquite for bold flavors or alder for a milder taste.
  2. Add Herbs: Mix fresh dill or thyme into the curing mixture for an herbal note.
  3. Don’t Rush: Let the salmon cure and air-dry fully for the best results.

Emotional and Psychological Impact of Food

Homemade smoked salmon offers a sense of achievement and pride. Its rich aroma and flavor evoke memories of shared meals and celebrations, creating a lasting impression on those you serve it to.


Mindful Cooking Techniques

  • Take time to rub the cure evenly, appreciating the transformation of raw ingredients.
  • Focus on the scent of the wood chips as they smoke, connecting with the tradition of slow cooking.

Tips for Keeping the Recipe Fresh Longer

  • Store smoked salmon in vacuum-sealed bags for extended freshness.
  • Avoid exposure to air, which can cause the fish to dry out or spoil.

Advanced Culinary Terms and Techniques

  • Pellicle Formation: The tacky surface that forms during air-drying, essential for holding smoke flavor.
  • Cold Smoking vs. Hot Smoking: This recipe uses hot smoking for safe, easy home preparation.

Healthy Ingredient Alternatives

  1. Low-Sodium Version: Reduce the salt in the cure and extend curing time.
  2. Sugar-Free Option: Substitute brown sugar with stevia or leave it out entirely.
  3. Omega-3 Boost: Use wild-caught salmon for higher nutritional benefits.

More Serving Ideas

  • Use as a topping for avocado toast.
  • Incorporate into a creamy smoked salmon dip.
  • Make gourmet wraps with smoked salmon, arugula, and lemon aioli.

Common Issues and Solutions

  • Salmon Too Salty: Reduce cure time or rinse thoroughly before smoking.
  • Dry Texture: Avoid overcooking; monitor internal temperature closely.
  • Inconsistent Smoke Flavor: Ensure even airflow in the smoker.

Variations to Try

  1. Maple-Glazed Smoked Salmon: Add maple syrup to the curing mix for a sweet twist.
  2. Spicy Smoked Salmon: Include cayenne pepper or chili flakes in the rub.
  3. Cold-Smoked Salmon: Requires specialized equipment but delivers silky, lox-like results.

Nutritional Information and Health Benefits

  • Calories: ~120 per serving
  • Protein: Packed with high-quality protein for muscle repair
  • Omega-3 Fatty Acids: Promote heart and brain health

The Art of Pairing Smoked Salmon

  • With Drinks: Pair with sparkling wine, a crisp Sauvignon Blanc, or iced green tea.
  • With Cheese: Serve alongside creamy cheeses like brie or mascarpone.
  • With Breads: Complement with crusty baguettes or soft brioche.

Weather and Recipe Outcome

Smoking salmon is a year-round activity, but the cozy, smoky flavors feel especially satisfying during cooler months or festive occasions.


Other Fish Recipes to Explore

  • Baked Herb-Crusted Salmon
  • Grilled Tuna Steaks
  • Classic Fish Tacos
  • Lemon Butter Cod

Focus on Tools and Equipment

  • Smoker: A quality smoker ensures consistent temperatures and even smoke distribution.
  • Digital Thermometer: Essential for accurate internal temperature readings.
  • Curing Tray: Keeps juices contained during the curing process.

Frequently Asked Questions (with answers)

Q: Can I use frozen salmon for this recipe?
A: Yes, but thaw it completely and pat dry before curing.

Q: How long should I smoke the salmon?
A: 2–4 hours, depending on the thickness of the fillet.

Q: What’s the best wood for smoking salmon?
A: Applewood, cherrywood, or alder are great choices for a mild, sweet flavor.


Conclusion

Crafting homemade smoked salmon is an adventure in flavor, texture, and tradition. With a balance of curing, drying, and smoking, this recipe allows you to create a dish that’s as rewarding to prepare as it is to eat. Give it a try and savor the rich, smoky satisfaction of your own culinary masterpiece!