Easy Chicken Potpie Recipe

Chicken Potpie Recipe

Introduction

Chicken potpie is a classic comfort food that never fails to bring warmth and satisfaction to any meal. With its flaky, golden crust and creamy filling of tender chicken, vegetables, and savory herbs, it’s a dish that’s both hearty and heartwarming. Whether you’re making it for a family dinner or a special occasion, this chicken potpie is sure to be a crowd-pleaser.


The Story Behind Chicken Potpie

The origins of chicken potpie can be traced back to the ancient Greeks and Romans, who first experimented with pastry-covered dishes. However, the modern version, which became popular in the United States in the 19th century, is often associated with the classic comfort food traditions of New England. In this version, chicken and vegetables are simmered together in a creamy sauce, encased in a buttery, flaky pastry crust. Over the years, chicken potpie has evolved into a beloved comfort dish, enjoyed by families for generations.


The Benefits of Making Your Own Chicken Potpie

  • Control Over Ingredients: You can choose high-quality, fresh ingredients, ensuring a healthier, more flavorful meal.
  • Customization: Make it exactly to your taste—add extra vegetables, spices, or a different type of crust.
  • Satisfying Meal: The combination of creamy filling and flaky crust provides a perfectly balanced meal in one dish.
  • Freezing for Later: Chicken potpie freezes well, making it an excellent option for meal prepping or future dinners.

Essential Ingredients for the Perfect Chicken Potpie

For the Filling:

  • 2 tablespoons unsalted butter
  • 1 medium onion, diced
  • 2 garlic cloves, minced
  • 3 medium carrots, peeled and diced
  • 2 celery stalks, diced
  • 1 cup frozen peas
  • 4 cups cooked chicken, shredded or diced (rotisserie chicken works well)
  • 2 ½ cups chicken broth
  • 1 cup heavy cream
  • 1 teaspoon dried thyme
  • 1 teaspoon dried rosemary
  • Salt and pepper to taste
  • 2 tablespoons all-purpose flour (for thickening)

For the Crust:

  • 2 ½ cups all-purpose flour
  • 1 teaspoon salt
  • 1 cup unsalted butter, cold and cut into cubes
  • 6 tablespoons ice water (more if needed)
  • 1 egg (for egg wash, optional)

Cultural History of Ingredients

  • Chicken: A common protein in Western cuisine, it serves as the base for the rich, comforting filling in potpie.
  • Carrots and Celery: These vegetables are the backbone of many classic soups and stews, contributing both flavor and texture.
  • Pastry Crust: A buttery, flaky crust adds an indulgent touch to the dish, with its origins in European cooking, where pastries were used to encase fillings for ease and portability.

Equipment You’ll Need

  • Oven: For baking the potpie to golden perfection.
  • Skillet or Dutch Oven: For preparing the filling.
  • Rolling Pin: For rolling out the dough.
  • Pie Dish: To assemble and bake the potpie.
  • Pastry Brush: For brushing the crust with the egg wash.
  • Knife and Cutting Board: For chopping vegetables and chicken.

Step-by-Step Instructions for Chicken Potpie

Step 1: Make the Pie Crust

  1. In a large bowl, combine the flour and salt. Add the cold butter and cut it into the flour using a pastry cutter or your hands until the mixture resembles coarse crumbs.
  2. Gradually add the ice water, one tablespoon at a time, mixing with a fork until the dough starts to come together.
  3. Turn the dough out onto a floured surface and knead gently until it forms a smooth ball. Wrap it in plastic wrap and refrigerate for at least 30 minutes.

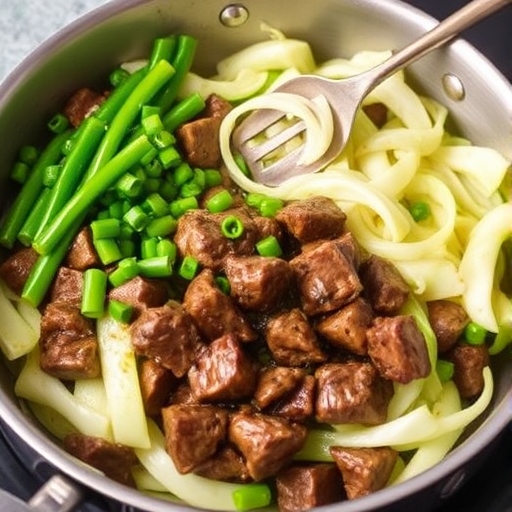
Step 2: Prepare the Filling

  1. In a large skillet or Dutch oven, melt the butter over medium heat. Add the diced onion, garlic, carrots, and celery. Sauté for about 5 minutes until the vegetables begin to soften.
  2. Stir in the flour and cook for 1-2 minutes to form a roux.
  3. Gradually pour in the chicken broth while stirring, then add the cream, thyme, rosemary, salt, and pepper. Simmer for 5 minutes, allowing the sauce to thicken.
  4. Add the cooked chicken and frozen peas, stirring to combine. Adjust seasoning as needed.
  5. Remove from heat and set aside to cool slightly while you prepare the crust.

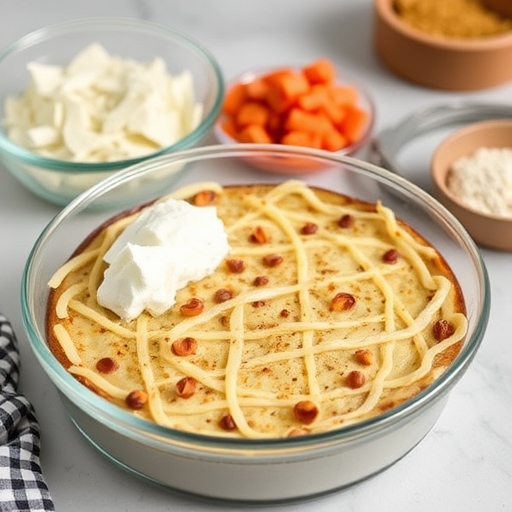
Step 3: Assemble the Potpie

  1. Preheat your oven to 400°F (200°C).
  2. Roll out the chilled dough on a floured surface to fit your pie dish. You will need a top and bottom crust.
  3. Place one piece of dough in the bottom of your pie dish, pressing it gently into place.
  4. Pour the chicken filling into the pie dish, spreading it evenly.
  5. Roll out the second piece of dough and place it over the filling. Trim any excess dough, and crimp the edges to seal the pie.
  6. Cut a few small slits in the top of the crust to allow steam to escape. Optionally, brush the top with a beaten egg for a golden finish.

Step 4: Bake the Potpie

  1. Bake the potpie in the preheated oven for 30-35 minutes, or until the crust is golden brown and the filling is bubbling.
  2. Allow the potpie to rest for 5-10 minutes before slicing and serving.

Suggestions for Serving and Storing

  • Serving: Serve with a side salad or some roasted vegetables for a balanced meal.
  • Storing: Leftover chicken potpie can be stored in an airtight container in the refrigerator for up to 3 days. Reheat in the oven for the best texture. You can also freeze the entire potpie before baking; just thaw and bake when needed.

Chef Simon’s Tips for Chicken Potpie

  • Flavor Boost: Add a splash of white wine to the filling for added depth of flavor.
  • Crust Alternatives: If you’re short on time, you can use store-bought puff pastry or pie dough.
  • Make It Veggie-Heavy: For a lighter version, add more vegetables, such as mushrooms, parsnips, or zucchini.

Emotional and Psychological Impact of Food

Chicken potpie is more than just a meal; it’s a reminder of home and family. The warmth and richness of the dish provide a sense of comfort, while the act of making it can be therapeutic. It brings people together, evoking feelings of nostalgia and contentment with every bite.


Mindful Cooking Techniques

  • Savor the Process: Take your time rolling out the dough and assembling the potpie—it’s a chance to slow down and enjoy the creative process of making something homemade.
  • Smell the Aroma: As the filling simmers and the crust bakes, take a moment to appreciate the delightful aromas that fill your kitchen.

Tips for Keeping the Recipe Fresh Longer

  • Store Separately: Keep the pie crust and filling separate if you plan to store leftovers. The crust stays crisp when kept apart from the filling.
  • Cover Well: If freezing, wrap the assembled potpie in plastic wrap and aluminum foil to prevent freezer burn.

Advanced Culinary Terms and Techniques

  • Roux: A mixture of fat (butter) and flour used to thicken sauces and soups.
  • Blind Baking: A technique where the crust is pre-baked before adding the filling to ensure it stays crisp.
  • Egg Wash: A mixture of beaten egg and water or milk brushed on the crust to create a golden finish.

Healthy Ingredient Alternatives

  • Crust: Use a whole-wheat or almond flour-based crust for a healthier, gluten-free option.
  • Cream: Swap out the heavy cream for a lighter option, like half-and-half or coconut cream, to reduce fat.
  • Vegetarian Version: Replace the chicken with tofu or chickpeas and add extra vegetables like spinach or kale.

More Serving Ideas

  • Mini Potpies: Make individual-sized potpies for a fun, portion-controlled dinner.
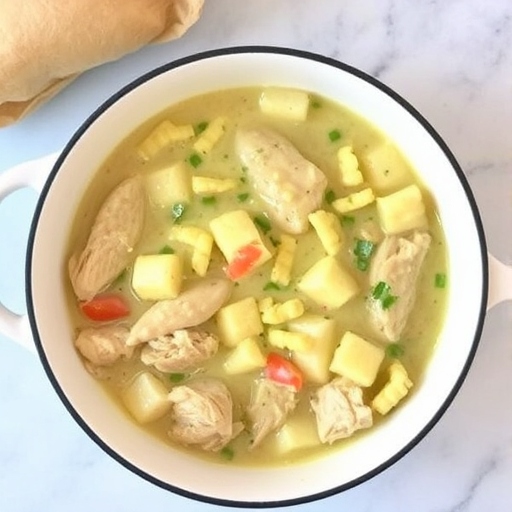
  • Potpie Soup: Transform the filling into a soup by adding more broth and serving it with crusty bread on the side.

Common Issues and Solutions

  • Soggy Bottom Crust: To prevent a soggy bottom, make sure the filling is not too runny, and pre-bake the crust for a few minutes before adding the filling.
  • Overcooked Chicken: Be careful not to overcook the chicken when adding it to the filling. If you’re using leftover chicken, add it in at the end to avoid drying it out.

Variations to Try

  • Chicken and Mushroom Potpie: Add sautéed mushrooms for an earthy twist.
  • Spicy Chicken Potpie: Add jalapeños or a dash of hot sauce to spice things up.
  • Curry Chicken Potpie: Add curry powder or a little coconut milk to give the filling a unique flavor.

Nutritional Information and Health Benefits

Per Serving (1 slice):

  • Calories: 450
  • Protein: 25g
  • Fat: 30g
  • Carbohydrates: 35g
  • Fiber: 4g
  • Sugars: 5g
  • Sodium: 500mg

Health Benefits:

Chicken potpie is a balanced meal that provides a good amount of protein from the chicken, vitamins from the vegetables, and healthy fats from the butter and cream. The dish can be made even healthier by using whole-wheat flour for the crust or substituting the cream with lighter alternatives. Additionally, vegetables like carrots, celery, and peas contribute essential nutrients such as fiber, vitamins A and C, and antioxidants, making this a well-rounded and comforting dish.


The Art of Pairing Chicken Potpie

Chicken potpie pairs wonderfully with a crisp, refreshing salad or roasted vegetables to balance the richness of the filling. Consider a light vinaigrette salad with mixed greens, tomatoes, and a citrus dressing to complement the savory flavors of the pie. For a more hearty side, roasted root vegetables like sweet potatoes or parsnips work wonderfully.


Weather and Recipe Outcome

Chicken potpie is perfect for cooler weather, especially during the fall and winter months when you want a comforting, filling meal. The warm, hearty filling and golden crust are ideal for enjoying after a day in the cold. On a rainy day, it becomes an even more indulgent choice to enjoy with a hot drink, wrapped in a cozy blanket.


Other Chicken Recipes to Explore

  • Chicken Alfredo: A creamy, cheesy pasta dish that’s both comforting and indulgent.
  • Chicken Parmesan: Breaded chicken topped with marinara sauce and melted mozzarella, perfect for a hearty dinner.
  • Grilled Chicken Salad: A lighter option with marinated grilled chicken served over fresh greens.

Focus on Tools and Equipment

To create the perfect chicken potpie, having the right tools can make the process easier:

  • Pastry Cutter: For cutting the butter into the flour to achieve the perfect flaky crust.
  • Dutch Oven: Ideal for making the filling, as it provides an even heat for sautéing and simmering.
  • Pie Dish: A classic glass or ceramic pie dish is perfect for even baking and serving.

Frequently Asked Questions (with answers)

Q1: Can I make chicken potpie ahead of time?
Yes! You can assemble the potpie in advance and store it in the refrigerator for up to 24 hours before baking. If freezing, wrap the pie well in plastic wrap and aluminum foil before placing it in the freezer. Bake from frozen, adding extra time to the baking process.

Q2: Can I use store-bought pie crust?
Absolutely! If you’re short on time, store-bought pie crusts are a great option. Just ensure they’re pre-baked if you’re using a bottom crust, or use them as-is for a top crust.

Q3: How do I reheat leftover chicken potpie?
To reheat leftover chicken potpie, cover it with foil and bake in a 350°F oven for about 20 minutes, or until heated through. If reheating individual slices, microwave for 2-3 minutes, but the crust may not stay as crispy.

Q4: Can I use a different protein besides chicken?
Yes! You can use turkey, beef, or even a vegetarian filling like mushrooms and tofu for a twist on the classic.

Q5: Can I make a gluten-free chicken potpie?
Yes, you can make a gluten-free chicken potpie by using gluten-free flour for the crust and ensuring your filling ingredients are gluten-free.


Conclusion

Chicken potpie is the ultimate comfort food, offering the perfect balance of flavors, textures, and warmth. It’s a dish that brings people together and can be customized to suit your tastes or dietary needs. Whether you make it from scratch or opt for store-bought shortcuts, this hearty meal is guaranteed to satisfy. So, roll up your sleeves, gather your ingredients, and create a comforting chicken potpie that everyone will love. Bon appétit!


Thank you for visiting SqueezyRecipes! We’re dedicated to making cooking enjoyable and accessible for everyone, regardless of your skill level. Chef Simon is always ready to share the best recipes that bring a creative touch to your daily meals. With each visit, you’ll discover new recipes and innovative ideas that cater to every occasion. Don’t miss out on exploring SqueezyRecipes for the latest delicious dishes, and feel free to leave your feedback and share your experiences with the recipes you’ve tried. Cooking together makes everything better!

Delicious Brie and Sausage Brunch Bake Recipe

Brie and Sausage Brunch Bake

Introduction

The Brie and Sausage Brunch Bake is the perfect way to elevate your weekend mornings or special gatherings. This dish combines savory sausage, creamy brie, and fluffy eggs baked into a golden, cheesy casserole. Ideal for brunch or breakfast-for-dinner nights, this recipe is both indulgent and satisfying, bringing gourmet flair to your table with minimal effort.


The Story Behind Brie and Sausage Brunch Bake

This dish draws inspiration from traditional breakfast casseroles but incorporates the sophistication of French brie cheese. Its origin is a blend of European flavors and American practicality, making it a favorite at gatherings where simple, crowd-pleasing meals are a must. Over time, cooks have adapted this recipe to include regional sausages, artisanal breads, and seasonal vegetables, resulting in endless variations.


The Benefits of Making Your Own Brie and Sausage Brunch Bake

  1. Customizable: Add your favorite ingredients like mushrooms, spinach, or different cheeses to suit your taste.
  2. Time-Saving: Prepare the dish the night before and simply bake it in the morning.
  3. Crowd-Pleaser: A hit at potlucks, holiday brunches, or lazy weekends with family.
  4. Balanced Meal: Combines protein, dairy, and carbs in one dish.

Essential Ingredients for the Perfect Brie and Sausage Brunch Bake

  • Sausage: Mild, spicy, or even chicken sausage works well.
  • Brie Cheese: Provides a creamy texture and slightly nutty flavor.
  • Eggs: The foundation for a rich and fluffy casserole.
  • Bread Cubes: Day-old bread absorbs the egg mixture perfectly.
  • Heavy Cream: Adds richness to the dish.
  • Seasonings: Garlic powder, thyme, salt, and pepper enhance the flavors.

Cultural History of Ingredients

  1. Brie Cheese: A French classic with roots in the Île-de-France region, brie has been a staple in European cuisine since the Middle Ages.
  2. Sausage: With its origins in ancient Rome, sausage has evolved into countless regional variations, becoming a breakfast favorite in many cultures.
  3. Eggs: A universal breakfast ingredient, eggs symbolize nourishment and are key in many traditional dishes.
  4. Bread: Staple food across cultures, bread adds texture and heartiness to this bake.

Equipment You’ll Need

  • Large skillet for cooking sausage
  • Mixing bowl for egg mixture
  • Whisk
  • 9×13-inch baking dish
  • Spatula for layering and serving

Step-by-Step Instructions for Brie and Sausage Brunch Bake

  1. Prepare the Sausage:
    • In a skillet, cook the sausage over medium heat until browned and cooked through. Drain any excess grease and set aside.
  2. Cube the Bread:
    • Cut day-old bread into 1-inch cubes. Spread them evenly in a greased 9×13-inch baking dish.
  3. Mix the Egg Mixture:
    • In a large bowl, whisk together eggs, heavy cream, garlic powder, thyme, salt, and pepper.
  4. Assemble the Bake:
    • Layer the cooked sausage over the bread cubes, followed by slices or chunks of brie. Pour the egg mixture evenly over the top.
  5. Let it Rest:
    • Cover the dish with foil and refrigerate for at least 2 hours or overnight to allow the bread to soak up the liquid.
  6. Bake:
    • Preheat your oven to 350°F (175°C). Bake the dish, covered, for 30 minutes. Remove the foil and bake for an additional 15-20 minutes, until the top is golden and set.
  7. Serve:
    • Let the bake cool slightly before slicing. Garnish with fresh herbs like parsley or chives if desired.

Suggestions for Serving and Storing

  • Serve With: A side of fresh fruit salad, a mimosa, or a cup of coffee.
  • Storing: Refrigerate leftovers in an airtight container for up to 3 days.
  • Reheating: Warm individual portions in the microwave or the oven at 300°F (150°C).

Chef Simon’s Tips for Brie and Sausage Brunch Bake

  • Use a combination of brie and a sharp cheese like cheddar for added flavor complexity.
  • Swap heavy cream for half-and-half if you prefer a lighter dish.
  • For a crispy texture, sprinkle breadcrumbs on top before baking.

Emotional and Psychological Impact of Food

The combination of creamy brie and savory sausage in this dish evokes a sense of comfort and indulgence. It’s the kind of meal that brings people together, creating cherished moments around the table. The warmth of the bake makes it a perfect choice for holiday mornings or family brunches.


Mindful Cooking Techniques

  • Focus on the layering process to evenly distribute flavors.
  • Take your time slicing the brie for even melting.
  • Enjoy the process of whisking the eggs and cream, treating it as a meditative act.

Tips for Keeping the Recipe Fresh Longer

  • Ensure the dish is fully cooled before storing to maintain its texture.
  • Cover tightly with plastic wrap or transfer to an airtight container to avoid drying out.
  • Reheat slowly to prevent overcooking the eggs.

Advanced Culinary Terms and Techniques

  • Mise en Place: Organize all your ingredients before you start cooking for smoother preparation.
  • Deglazing: Use the sausage drippings to flavor vegetables or broth for an extra depth of flavor.
  • Resting Time: Allowing the dish to sit before baking ensures even distribution of flavors and a better texture.

Healthy Ingredient Alternatives

  • Use turkey or plant-based sausage for a lighter option.
  • Substitute whole milk for heavy cream to reduce calories.
  • Add more vegetables like spinach or bell peppers for extra nutrients.

More Serving Ideas

  • Top with a drizzle of hot honey for a sweet-savory twist.
  • Serve alongside roasted vegetables for a complete meal.
  • Pair with a crisp green salad dressed with lemon vinaigrette.

Common Issues and Solutions

  • Soggy Texture: Use day-old bread to prevent the bake from becoming too wet.
  • Uneven Cooking: Rotate the dish halfway through baking for even heat distribution.
  • Lack of Flavor: Adjust seasonings like garlic powder or add a dash of paprika for more depth.

Variations to Try

  1. Vegetarian: Replace sausage with sautéed mushrooms, spinach, and onions.
  2. Spicy: Use chorizo or add red pepper flakes for a kick.
  3. Holiday Edition: Incorporate dried cranberries and walnuts for a festive touch.

Nutritional Information and Health Benefits

  • Calories (per serving): 400
  • Protein: 18g
  • Carbs: 20g
  • Fat: 25g

This dish is high in protein and provides essential nutrients from the eggs and cheese.


The Art of Pairing Brie and Sausage Brunch Bake

Pair this dish with fresh-squeezed orange juice or a light sparkling wine for an elevated brunch experience. A side of roasted asparagus or grilled tomatoes complements the rich flavors beautifully.


Weather and Recipe Outcome

This bake is versatile enough to enjoy year-round. It’s especially comforting during the cooler months, as the creamy texture and hearty ingredients provide warmth and satisfaction.


Other Brunch Recipes to Explore

  • Savory Spinach and Feta Quiche
  • Classic Eggs Benedict
  • Blueberry Pancake Casserole

Focus on Tools and Equipment

  • Non-Stick Baking Dish: Ensures easy cleanup and prevents sticking.
  • Whisk: For a smooth egg mixture.
  • Sharp Knife: Essential for slicing brie and other ingredients.

Frequently Asked Questions (with answers)

Q: Can I make this recipe gluten-free?
Yes! Use gluten-free bread or omit the bread entirely and add more vegetables.

Q: Can I freeze the bake?
Yes, assemble the dish but don’t bake it. Cover tightly and freeze for up to 2 months. Bake directly from frozen, adding 10-15 minutes to the baking time.

Q: Can I use a different cheese?
Absolutely! Gruyère, mozzarella, or gouda make excellent substitutes.


Conclusion

The Brie and Sausage Brunch Bake is a versatile, flavorful dish that transforms simple ingredients into a show-stopping meal. Whether for a holiday brunch or a casual weekend breakfast, this recipe is sure to impress and delight your guests. Try it today and savor the perfect blend of comfort and sophistication!

Delicious Strata Recipe

Strata Recipe

Introduction

Strata is a savory, versatile dish perfect for breakfast, brunch, or even dinner. This hearty casserole is made with layers of bread, eggs, cheese, and various fillings such as vegetables, sausage, or bacon. It’s easy to prepare and can be made ahead of time, making it an ideal choice for busy mornings or gatherings. Whether you’re hosting a special brunch or simply craving a cozy meal, strata is a comforting, crowd-pleasing choice.


The Story Behind Strata

Strata, a dish with Italian origins, has become a beloved American breakfast staple. The word “strata” comes from the Latin word for “layer,” which reflects the layered structure of this dish. While its roots are in Italy, where savory bread puddings are common, it gained popularity in the U.S. during the 1970s. Strata’s ability to incorporate a variety of ingredients makes it highly adaptable to personal tastes, regional flavors, and dietary preferences, making it a favorite for all occasions.


The Benefits of Making Your Own Strata

  1. Customizable: You can fill it with your favorite vegetables, meats, and cheeses to suit your preferences.
  2. Make-Ahead: Strata can be prepared the night before, allowing the flavors to meld and making it a convenient breakfast or brunch option.
  3. Hearty Meal: It’s a complete meal, combining bread, protein, and dairy, which is both satisfying and balanced.
  4. Great for Leftovers: It’s an excellent way to use up stale bread and leftover vegetables, meats, and cheese.

Essential Ingredients for the Perfect Strata

  • Bread: Day-old bread, such as French bread, sourdough, or challah, is ideal for strata as it soaks up the egg mixture without becoming soggy.
  • Eggs: The foundation of the dish, binding all the ingredients together.
  • Cheese: A combination of cheeses, such as sharp cheddar, mozzarella, or Gruyère, provides flavor and creaminess.
  • Milk or Cream: Adds richness to the egg mixture.
  • Fillings: Sausage, bacon, ham, mushrooms, spinach, and bell peppers are popular choices.
  • Seasonings: Salt, pepper, garlic powder, and fresh herbs like thyme or rosemary enhance the flavor.

Cultural History of Ingredients

  1. Bread: Bread has been a staple of European cuisine for centuries, and in strata, it forms the base of the dish, soaking up all the delicious flavors.
  2. Eggs: Eggs symbolize nourishment and have been a crucial ingredient in breakfast dishes worldwide.
  3. Cheese: A beloved ingredient in many cultures, cheese adds richness and depth to dishes like strata.
  4. Sausage/Bacon: Commonly used in breakfast dishes, these ingredients add a savory, smoky flavor to strata.

Equipment You’ll Need

  • Large mixing bowl for the egg mixture
  • Skillet for cooking sausage, bacon, or vegetables
  • 9×13-inch baking dish
  • Whisk
  • Measuring cups and spoons
  • Sharp knife for chopping vegetables and meat

Step-by-Step Instructions for Strata

  1. Prepare the Bread:
    • Tear or cut the bread into 1-inch cubes. Place them in a greased 9×13-inch baking dish. If the bread is fresh, toast it lightly to dry it out a bit.
  2. Cook the Fillings:
    • In a skillet, cook sausage or bacon until browned and cooked through. Remove from heat and set aside. If using vegetables, sauté them in the same skillet until tender.
  3. Make the Egg Mixture:
    • In a large bowl, whisk together eggs, milk or cream, salt, pepper, and any desired seasonings.
  4. Assemble the Strata:
    • Layer the cooked sausage, vegetables, and cheese over the bread cubes. Pour the egg mixture evenly over the top, making sure all the bread is soaked. Press down gently to ensure everything is covered.
  5. Let it Rest:
    • Cover the dish and refrigerate for at least 2 hours, or overnight, to allow the bread to absorb the egg mixture.
  6. Bake:
    • Preheat your oven to 350°F (175°C). Bake the strata, uncovered, for 45-50 minutes, or until the top is golden and the eggs are set.
  7. Serve:
    • Let the strata cool for a few minutes before slicing. Garnish with fresh herbs if desired.

Suggestions for Serving and Storing

  • Serve With: A simple green salad or roasted potatoes complement the richness of the strata.
  • Storing: Leftovers can be stored in an airtight container in the refrigerator for up to 3 days.
  • Reheating: Warm individual slices in the microwave or oven for best results.

Chef Simon’s Tips for Strata

  • Use a variety of cheeses for a more complex flavor. A combination of sharp cheddar and mozzarella works beautifully.
  • Don’t skip the resting time! This allows the bread to soak up the egg mixture and results in a creamy, flavorful strata.
  • Try adding some hot sauce or red pepper flakes for a spicy kick.

Emotional and Psychological Impact of Food

Strata is the kind of dish that brings comfort and satisfaction. Its hearty, savory flavors evoke feelings of warmth and homeliness, making it ideal for family gatherings or casual weekend breakfasts. The aroma of a freshly baked strata fills the house with a sense of togetherness and love.


Mindful Cooking Techniques

  • Focus on layering the ingredients thoughtfully to ensure each bite has a balance of bread, egg, cheese, and fillings.
  • Take your time mixing the egg and milk mixture to achieve a smooth, creamy consistency.
  • Enjoy the process of assembling the strata, knowing it will soon be a delicious, comforting meal.

Tips for Keeping the Recipe Fresh Longer

  • Refrigerate the strata in an airtight container to maintain its flavor and texture for up to 3 days.
  • If reheating, cover the strata with foil to prevent it from drying out.
  • You can also freeze unbaked strata for up to a month. Simply thaw in the refrigerator overnight before baking.

Advanced Culinary Terms and Techniques

  • Mise en Place: Have all your ingredients prepped and ready before you begin assembling the strata for a smooth cooking process.
  • Deglaze: After cooking your sausage or vegetables, deglaze the skillet with a bit of broth or wine to capture all the flavorful bits stuck to the pan.
  • Resting: Allowing the strata to rest in the refrigerator before baking is key to achieving the perfect texture.

Healthy Ingredient Alternatives

  • Use turkey sausage or vegetarian sausage for a leaner version.
  • Swap out whole milk for almond milk or another dairy-free alternative.
  • Add more vegetables, such as spinach, zucchini, or bell peppers, to boost the dish’s nutritional value.

More Serving Ideas

  • Serve strata with a side of fresh fruit or a light yogurt parfait for a well-rounded breakfast.
  • For a lighter option, pair with a green smoothie or a fruit salad.
  • Add a dollop of sour cream or a drizzle of hot sauce on top for extra flavor.

Common Issues and Solutions

  • Soggy Texture: Use day-old bread to prevent the strata from becoming too soggy. If using fresh bread, toast it first.
  • Uneven Cooking: Make sure the strata is spread evenly in the baking dish to ensure uniform cooking.
  • Too Dry: Add more milk or cream to the egg mixture if the strata appears too dry.

Variations to Try

  1. Vegetarian: Skip the meat and load the strata with extra vegetables like mushrooms, spinach, and tomatoes.
  2. Southwestern: Add chorizo, black beans, and a sprinkle of cumin for a spicy twist.
  3. Breakfast Classic: Include bacon, cheddar cheese, and diced potatoes for a hearty, classic breakfast.

Nutritional Information and Health Benefits

  • Calories (per serving): 350
  • Protein: 20g
  • Carbs: 30g
  • Fat: 20g

Strata is a filling and well-balanced dish that offers a good source of protein and healthy fats, making it a satisfying meal.


The Art of Pairing Strata

Pair strata with a refreshing mimosa or a strong cup of coffee to balance the richness of the dish. A side of roasted vegetables or a tangy citrus salad complements the savory flavors beautifully.


Weather and Recipe Outcome

Strata is perfect for colder weather when you’re craving something warm and filling. It also makes an excellent comfort food for rainy days or family get-togethers.


Other Breakfast Recipes to Explore

  • Breakfast Casserole with Bacon and Spinach
  • Classic Quiche Lorraine
  • Pancake Muffins

Focus on Tools and Equipment

  • Baking Dish: A sturdy 9×13-inch baking dish is ideal for layering the strata.
  • Whisk: For thoroughly mixing the eggs and milk.
  • Knife: Sharp knives are necessary for chopping vegetables and meats evenly.

Frequently Asked Questions (with answers)

Q: Can I prepare strata the night before?
Yes! Strata is perfect for make-ahead meals.

Q: Can I freeze strata?
Yes, you can freeze strata before baking. Assemble it in the baking dish, cover it tightly, and freeze for up to one month. Thaw it overnight in the refrigerator, then bake as directed the next day.

Q: Can I substitute the bread with a gluten-free option?
Yes, you can use gluten-free bread for a gluten-free strata. Just make sure the bread is sturdy enough to hold up in the egg mixture.

Q: How can I make the strata spicier?
Add some diced jalapeños, a dash of hot sauce, or spicy sausage to the dish for an extra kick.

Q: Can I make a vegetarian version of strata?
Absolutely! Skip the meat and load up on vegetables like mushrooms, spinach, tomatoes, and zucchini for a hearty, vegetarian version.


Conclusion

Strata is an incredibly adaptable, flavorful, and satisfying dish that is perfect for any occasion, whether it’s a casual family breakfast or a special brunch gathering. With its layers of egg, cheese, bread, and your favorite fillings, this savory casserole is a comforting and easy-to-make choice. You can customize it to suit your tastes, make it ahead of time, and enjoy it for days, making it a go-to recipe for busy mornings. Whether you opt for a classic version or get creative with ingredients, strata will always be a crowd-pleaser.

Remember to follow the step-by-step instructions, be mindful of the resting time to let the flavors meld, and enjoy the process of preparing this warm and comforting meal. You’re sure to find that strata isn’t just a dish; it’s an experience that brings people together to share good food and even better memories. Happy cooking!

Spicy Blackened Tuna Steaks with Mango Salsa Recipe: Bold and Refreshing

Blackened Tuna Steaks with Mango Salsa Recipe

1. Introduction

Blackened Tuna Steaks with Mango Salsa is a vibrant, flavorful dish that blends the richness of seared tuna with the sweet, zesty kick of fresh mango salsa. This recipe is perfect for those who appreciate bold flavors and a fresh twist on a classic seafood dish. Whether you’re grilling on a warm summer evening or preparing a light, satisfying meal, this dish delivers a punch of flavor and a visually stunning plate.


2. The Story Behind Blackened Tuna Steaks with Mango Salsa

The “blackening” technique, originally popularized by Chef Paul Prudhomme in the 1980s, involves seasoning fish or meat with a mix of spices and then searing it in a hot pan to form a flavorful, crispy crust. Paired with a tangy, tropical mango salsa, this recipe marries the deep, smoky flavors of the blackened tuna with the bright, refreshing taste of the salsa. It’s a fusion of Southern Cajun cooking and tropical flavors that creates an unforgettable dish.


3. The Benefits of Making Your Own Blackened Tuna Steaks with Mango Salsa

Making this dish at home gives you full control over the seasoning and freshness of the ingredients. By preparing the salsa from scratch, you can adjust the sweetness and heat levels to your preference, while ensuring that the tuna remains tender and flavorful. The homemade approach also means no preservatives or hidden sugars, just pure, delicious, and healthy ingredients.

  • Tuna: High in lean protein, omega-3 fatty acids, and vitamin D, tuna is a heart-healthy choice.
  • Mango Salsa: Packed with vitamins A and C, mangoes boost immunity, improve skin health, and aid digestion.

4. Essential Ingredients for the Perfect Blackened Tuna Steaks with Mango Salsa

For the Tuna Steaks:

  • 4 fresh tuna steaks (about 6 oz each)
  • 2 tablespoons olive oil (for searing)
  • 2 teaspoons paprika
  • 1 teaspoon cayenne pepper
  • 1 teaspoon garlic powder
  • 1 teaspoon onion powder
  • 1/2 teaspoon thyme
  • 1/2 teaspoon oregano
  • Salt and pepper to taste

For the Mango Salsa:

  • 1 ripe mango, peeled and diced
  • 1/2 red bell pepper, finely chopped
  • 1/4 red onion, finely chopped
  • 1 small jalapeño, seeds removed and finely chopped (optional for heat)
  • 1 tablespoon fresh cilantro, chopped
  • Juice of 1 lime
  • Salt and pepper to taste

5. Cultural History of Ingredients

  • Tuna: Widely enjoyed around the world, tuna has been a staple of various cuisines, from Japanese sushi to Mediterranean seafood dishes. It’s a symbol of rich, healthy eating, with cultures around the globe appreciating its versatility and nutritional benefits.
  • Mango: Often referred to as the “king of fruits,” mangoes are native to South Asia but have become a staple in tropical and subtropical regions around the world. They are a vital ingredient in many tropical salsas and chutneys, offering a perfect balance of sweetness and tartness.

6. Equipment You’ll Need

  • Cast iron skillet or heavy pan: Ideal for creating a blackened crust on the tuna steaks.
  • Knife and cutting board: For chopping the mango, bell pepper, onion, and other salsa ingredients.
  • Small bowl: For mixing the seasoning for the tuna steaks.
  • Lime squeezer: To easily extract lime juice for the salsa.

7. Step-by-Step Instructions for Blackened Tuna Steaks with Mango Salsa

Step 1: Prepare the Mango Salsa

  1. Start by preparing the salsa. In a medium-sized bowl, combine the diced mango, chopped red bell pepper, red onion, jalapeño (if using), and cilantro.
  2. Squeeze the lime juice over the mixture and stir to combine.
  3. Season the salsa with salt and pepper to taste. Set aside to allow the flavors to meld.

Step 2: Prepare the Blackened Tuna Steaks

  1. In a small bowl, mix together the paprika, cayenne pepper, garlic powder, onion powder, thyme, oregano, salt, and pepper.
  2. Pat the tuna steaks dry with paper towels and rub the spice mixture evenly on both sides of each steak.
  3. Heat a cast-iron skillet or heavy pan over medium-high heat and add olive oil. Once the oil is shimmering, place the tuna steaks in the skillet.
  4. Sear the tuna steaks for 2-3 minutes on each side, or until a crispy blackened crust forms. The tuna should still be rare in the center, as overcooking will result in a dry steak.
  5. Remove the tuna steaks from the skillet and let them rest for a couple of minutes before serving.

Step 3: Serve

  1. Place the tuna steaks on plates and top each with a generous spoonful of mango salsa.
  2. Serve immediately, perhaps alongside a fresh salad or roasted vegetables.

8. Suggestions for Serving and Storing

  • Serving: This dish pairs well with a simple side of sautéed greens, quinoa, or a light salad. You can also serve it with a chilled glass of white wine or a crisp, cold beer.
  • Storing: If you have leftovers, store the tuna steaks and salsa separately in airtight containers in the refrigerator for up to 2 days. The salsa will keep its freshness, but the tuna may lose its crispness. Reheat the tuna briefly in a pan to maintain its flavor.

9. Chef Simon’s Tips for Blackened Tuna Steaks with Mango Salsa

  • Don’t Overcook the Tuna: Tuna is best served rare to medium-rare, so keep a close eye on the cooking time. Searing it for too long will result in a tough, dry steak.
  • Adjust the Spice Level: If you prefer a milder flavor, reduce the amount of cayenne pepper in the blackening seasoning, or omit the jalapeño from the salsa.

10. Emotional and Psychological Impact of Food

Food is often more than just sustenance; it’s a way to connect with others and celebrate experiences. The combination of the bold blackened tuna and refreshing mango salsa invokes feelings of excitement and satisfaction. The tropical sweetness of mango reminds us of warm, sunny days, while the savory tuna brings a sense of grounding comfort. Enjoying this dish can be a reminder to savor life’s simple pleasures and nourish both body and soul.


11. Mindful Cooking Techniques

  • Focus on Freshness: When preparing the salsa, try to use the freshest ingredients possible. Ripe mangoes will add sweetness and depth to the dish, while freshly squeezed lime juice enhances the overall flavor.
  • Pay Attention to Heat: When blackening the tuna, keep an eye on the heat of the pan. Too hot, and you risk burning the seasoning; too cool, and you won’t get that signature crispy crust.

12. Tips for Keeping the Recipe Fresh Longer

To keep the leftover tuna fresh, store it in an airtight container in the refrigerator. Since the salsa is made with fresh ingredients, it’s best consumed within 1-2 days to retain its vibrant flavor. For the best results, do not freeze the salsa as it may lose its texture.


13. Advanced Culinary Terms and Techniques

  • Blackening: This is a cooking technique where a protein, such as fish or chicken, is coated with a mixture of spices and then cooked in a very hot pan, creating a dark, crispy crust while sealing in the juices.
  • Searing: The process of cooking meat at high heat to form a caramelized crust while keeping the inside tender and juicy.

14. Healthy Ingredient Alternatives

  • Tuna: If you’re looking for an alternative to tuna, you can use other firm fish like swordfish, salmon, or even a plant-based protein like tofu for a vegetarian option.
  • Mango Salsa: You can substitute mango with pineapple, peaches, or papaya for a different tropical flair.

15. More Serving Ideas

  • Taco Style: Use the blackened tuna and mango salsa as a filling for soft corn tortillas for a delicious fish taco.
  • Bowls: Serve the tuna and salsa over a bed of rice, quinoa, or couscous for a light and wholesome bowl meal.

16. Common Issues and Solutions

  • Issue: Tuna Overcooked
    Solution: Keep an eye on the cooking time. Tuna cooks very quickly, and overcooking it can lead to a dry steak. Aim for a sear of 2-3 minutes per side.
  • Issue: Salsa Too Sour
    Solution: Adjust the lime juice or add a pinch of sugar to balance the tartness.

17. Variations to Try

  • Citrus Twist: Add orange or grapefruit segments to the mango salsa for an extra burst of citrus.
  • Spicy Kick: Mix in a few dashes of hot sauce or a pinch of red pepper flakes to the blackening seasoning or salsa for added heat.

18. Nutritional Information and Health Benefits

  • Calories: 350 per serving (with salsa)
  • Protein: 28g
  • Fat: 22g (healthy fats from tuna and olive oil)
  • Carbohydrates: 15g (from mango and vegetables)
  • Fiber: 3g
  • Vitamin C: 60% of daily recommended intake (from mango and lime)
  • Omega-3 Fatty Acids: 1000 mg (from tuna)

This dish is packed with lean protein, healthy fats, and plenty of fiber and vitamins, making it not only delicious but also nourishing for your body. The omega-3 fatty acids found in tuna are particularly beneficial for heart health and brain function, while the vitamin C in the mango salsa supports the immune system.


19. The Art of Pairing Blackened Tuna Steaks with Mango Salsa

The natural richness of the tuna pairs beautifully with the tropical sweetness of the mango salsa. This combination creates a contrast of flavors that excite the palate. To elevate the dish even further, pair it with a light, crisp white wine like Sauvignon Blanc or Pinot Grigio. The acidity in these wines balances the richness of the tuna and complements the tangy lime in the salsa. Alternatively, a cold, citrus-infused beer like a wheat beer or pale ale would also be a refreshing pairing.


20. Weather and Recipe Outcome

The outcome of this recipe can be affected by the weather in a few ways:

  • Warm Weather: This dish is perfect for hot summer days when you want something light and refreshing but still packed with flavor. The coolness of the mango salsa is particularly satisfying in warm weather.
  • Cold Weather: While this recipe is typically served as a light meal, it can also be enjoyed in colder weather with a warm side like roasted potatoes or a soup starter. The blackened tuna’s smoky flavor contrasts nicely with a more substantial side dish in the winter.

21. Other Recipes to Explore

If you love the flavors of this dish, here are a few other recipes you might enjoy:

  • Grilled Salmon with Avocado Salsa: A fresh take on grilled fish with a creamy, zesty salsa.
  • Mango Chicken Salad: A light salad featuring grilled chicken and a mango-lime dressing.
  • Shrimp Tacos with Pineapple Salsa: Another tropical dish with bold flavors and a satisfying crunch.

22. Focus on Tools and Equipment

The right equipment can make all the difference in this recipe. Here’s a closer look at the tools you’ll need:

  • Cast Iron Skillet: Ideal for blackening, as it can withstand high heat and provides even cooking.
  • Sharp Knife: Ensures clean cuts when preparing the salsa ingredients and the tuna steaks.
  • Lime Squeezer: A handy tool for extracting maximum juice from your limes, ensuring a fresh and vibrant flavor in your salsa.

23. Frequently Asked Questions (with answers)

  • Q: Can I use frozen tuna for this recipe? A: While fresh tuna yields the best results, you can use frozen tuna steaks as long as they are fully thawed before cooking. Just be sure to pat them dry before seasoning.
  • Q: Can I make the salsa in advance? A: Yes, you can prepare the mango salsa a few hours ahead of time. Just store it in the refrigerator in an airtight container. The salsa will keep for about 1-2 days, but it’s best enjoyed fresh.
  • Q: Can I substitute the tuna with another type of fish? A: Yes, other firm fish such as swordfish, halibut, or salmon can work well as a substitute. Just adjust the cooking time depending on the thickness of the fish.

Conclusion

Blackened Tuna Steaks with Mango Salsa is a dish that offers a harmonious blend of flavors, textures, and colors. From the savory blackened crust on the tuna to the sweet and tangy freshness of the mango salsa, every bite is a burst of excitement. This recipe is not only a feast for the senses but also a healthy, vibrant meal that’s perfect for any occasion. Whether you’re cooking for a special event or just looking to treat yourself to something flavorful, this dish is sure to impress. So go ahead, fire up the skillet, and enjoy this tropical, zesty dish that will leave you craving more!

Easy Black Pepper Beef and Cabbage Stir Fry Recipe

Black Pepper Beef and Cabbage Stir Fry

Introduction

A quick and delicious stir fry, Black Pepper Beef and Cabbage combines tender strips of beef with crisp cabbage in a savory, peppery sauce. This dish is the perfect blend of flavors and textures, offering a satisfying, healthy meal that can be whipped up in under 30 minutes. With its bold flavors and vibrant ingredients, it’s a great choice for busy weeknights or when you’re looking for a hearty yet light dinner.


1. The Story Behind Black Pepper Beef and Cabbage Stir Fry

This stir fry is an inspired fusion dish that brings together the classic pairing of beef and cabbage, a combination that dates back to various Asian cuisines. The dish is influenced by the Chinese stir-fry tradition, where high-heat cooking retains the vegetables’ crispness and enhances the natural flavors. The addition of black pepper adds a sharp, spicy kick that elevates the dish and balances the richness of the beef. It’s a perfect example of how simple ingredients can be transformed into a flavorful meal with just the right seasonings.


2. The Benefits of Making Your Own Black Pepper Beef and Cabbage Stir Fry

  • Healthy & Nutritious: This dish is packed with protein from the beef and fiber from the cabbage, making it a balanced and nourishing meal.
  • Quick & Easy: Ready in less than 30 minutes, it’s a fast meal for busy weeknights.
  • Customizable: Add or remove vegetables to suit your preferences or dietary needs.
  • Low-Carb: With minimal use of starch, it’s a great choice for those on low-carb diets.

3. Essential Ingredients for the Perfect Black Pepper Beef and Cabbage Stir Fry

  • Beef: 1 lb (450g) of flank steak or sirloin, thinly sliced against the grain.
  • Cabbage: ½ small head of cabbage, thinly sliced.
  • Bell Pepper: 1 medium bell pepper, thinly sliced.
  • Onion: 1 medium onion, sliced.
  • Garlic: 3 cloves garlic, minced.
  • Ginger: 1-inch piece of fresh ginger, grated.
  • Soy Sauce: 3 tablespoons (low-sodium is recommended).
  • Black Pepper: 1-2 teaspoons freshly ground, or to taste.
  • Sesame Oil: 2 tablespoons for cooking.
  • Vegetable Oil: 1 tablespoon.
  • Rice Vinegar: 1 tablespoon for a touch of acidity.
  • Cornstarch: 1 teaspoon, to thicken the sauce.
  • Red Pepper Flakes (Optional): A pinch, for some extra heat.

4. Cultural History of Ingredients

  • Beef: A staple in many cuisines worldwide, beef is rich in protein and iron. It’s especially popular in Asian stir fry dishes, where it’s quickly cooked to maintain tenderness.
  • Cabbage: Cabbage is a key ingredient in Eastern European, Mediterranean, and Asian cuisines. It’s cheap, nutritious, and easy to grow, making it a food staple throughout history.
  • Black Pepper: Known as the “king of spices,” black pepper has been traded for centuries and is a prominent seasoning in both Asian and Western cooking. It adds a pungent, spicy flavor that pairs perfectly with beef.

5. Equipment You’ll Need

  • Wok or Skillet: A large skillet or wok for stir-frying.
  • Cutting Board and Knife: For slicing the beef and vegetables.
  • Measuring Spoons: To measure the soy sauce, rice vinegar, and black pepper.
  • Grater or Microplane: To grate the ginger.
  • Wooden Spoon or Tongs: For stirring the ingredients while cooking.

6. Step-by-Step Instructions for Black Pepper Beef and Cabbage Stir Fry

Preparation:

  1. Prep the Ingredients:
    • Slice the beef thinly against the grain.
    • Slice the cabbage, onion, and bell pepper.
    • Mince the garlic and grate the ginger.
  2. Make the Sauce:
    • In a small bowl, mix the soy sauce, rice vinegar, and cornstarch. Stir until the cornstarch dissolves. Add the freshly ground black pepper and set aside.

Stir-Fry:

  1. Heat the Pan:
    • Heat 1 tablespoon of vegetable oil and 1 tablespoon of sesame oil in a wok or large skillet over medium-high heat.
  2. Cook the Beef:
    • Add the sliced beef to the pan and stir-fry for 2-3 minutes until browned. Remove the beef and set aside.
  3. Cook the Vegetables:
    • In the same pan, add the remaining sesame oil. Stir-fry the garlic, ginger, onion, and bell pepper for about 2 minutes until fragrant and the vegetables begin to soften.
  4. Add the Cabbage:
    • Add the sliced cabbage to the pan and cook for another 3-4 minutes, stirring occasionally until it’s just tender but still has a slight crunch.
  5. Combine Beef and Sauce:
    • Return the beef to the pan and pour the sauce over the mixture. Stir everything together to coat evenly, cooking for an additional 2-3 minutes to allow the sauce to thicken and the flavors to combine.

Serving:

  1. Serve:
    • Serve the Black Pepper Beef and Cabbage stir fry hot, over a bed of steamed rice or noodles. Garnish with additional black pepper if desired.

7. Suggestions for Serving and Storing

  • Serving:
    • This stir fry pairs wonderfully with steamed white or brown rice. You can also serve it with noodles or over cauliflower rice for a low-carb option. For extra flavor, top with freshly chopped cilantro or green onions.
  • Storing:
    • Store any leftovers in an airtight container in the refrigerator for up to 3 days. Reheat in a skillet over medium heat for the best texture.

8. Chef Simon’s Tips for Black Pepper Beef and Cabbage Stir Fry

  • Tenderizing Beef:
    • To ensure the beef stays tender, slice it thinly against the grain and avoid overcooking. If you have time, marinate the beef in soy sauce and a dash of cornstarch for 10-15 minutes before cooking to enhance its tenderness.
  • Peppery Kick:
    • For extra heat, increase the amount of black pepper or add a pinch of red pepper flakes to the stir fry. The black pepper should be freshly ground to maximize flavor.
  • Cabbage Tip:
    • If you prefer a softer cabbage texture, cook it for a few minutes longer, but remember to keep it slightly crunchy for the best contrast with the beef.

9. Emotional and Psychological Impact of Food

The savory richness of beef paired with the slight crunch of cabbage offers a satisfying sensory experience. The peppery heat awakens the palate, making this stir fry both comforting and invigorating. It’s a great dish to enjoy after a long day, offering both comfort and a burst of flavor to lift your mood.


10. Mindful Cooking Techniques

Focus on the sizzling sounds as you cook, the aroma of garlic and ginger filling the air, and the vibrant colors of the vegetables. Stir-frying at high heat requires your full attention to avoid burning the ingredients and to ensure the perfect texture. Take your time and appreciate the process.


11. Tips for Keeping the Recipe Fresh Longer

  • Store Properly: Make sure to refrigerate any leftovers in an airtight container to keep the vegetables and beef fresh.
  • Reheat Gently: When reheating, do so on low heat to preserve the texture of the cabbage and beef.

12. Advanced Culinary Terms and Techniques

  • Stir-Frying: A high-heat cooking method, commonly used in Asian cuisine, where ingredients are quickly cooked in a small amount of oil while constantly being stirred.
  • Deglazing: This technique involves adding liquid (like soy sauce) to a pan to loosen browned bits from the bottom, which adds rich flavor to the dish.

13. Healthy Ingredient Alternatives

  • Beef Substitutes: Use lean ground turkey or chicken breast for a lighter protein option.
  • Vegetable Substitutes: Swap cabbage for bok choy, napa cabbage, or spinach for variety.
  • Low-Sodium Soy Sauce: Opt for low-sodium soy sauce to reduce the salt content in the dish.

14. More Serving Ideas

  • Pair with a side of sautéed greens like spinach or bok choy.
  • For a more filling meal, add a side of roasted potatoes or sweet potatoes.

15. Common Issues and Solutions

  • Overcooked Beef: Make sure the beef is thinly sliced and doesn’t sit in the pan too long. Stir-fry quickly to keep it tender.
  • Soggy Cabbage: If the cabbage releases too much water, cook it over higher heat to evaporate excess moisture.

16. Variations to Try

  • Vegetarian Version: Replace the beef with tofu or tempeh for a plant-based version of this stir fry.
  • Spicy Sichuan Style: Add Sichuan peppercorns or chili paste for a more intense flavor profile.

17. Nutritional Information and Health Benefits

  • Calories: Approximately 300-350 calories per serving.
  • Protein: 28g, primarily from the beef, making it a great source of lean protein.
  • Fiber: 5g, from the cabbage and other vegetables, which aids in digestion.
  • Fat: 18g, primarily from the sesame oil and beef, providing essential fatty acids.
  • Vitamins & Minerals: Rich in vitamin C from cabbage and bell peppers, iron from the beef, and antioxidants from the black pepper.

Health Benefits:

  • Cabbage: High in antioxidants, vitamin C, and fiber, cabbage can support immune health, reduce inflammation, and improve digestion.
  • Beef: A great source of iron, zinc, and vitamin B12, which are important for energy production and maintaining a healthy immune system.
  • Black Pepper: Contains piperine, which enhances the absorption of nutrients like turmeric, and can help improve digestion and metabolism.

18. The Art of Pairing Black Pepper Beef and Cabbage Stir Fry

Pair this flavorful stir fry with simple sides that won’t overpower the dish but complement its bold, savory profile.

  • Rice: Steamed jasmine or basmati rice is the ideal choice. The light fluffiness of the rice balances the intensity of the stir fry.
  • Noodles: For a different twist, serve the stir fry over rice noodles or soba for added texture and flavor.
  • Vegetables: Steamed or sautéed vegetables like broccoli, snap peas, or carrots add a fresh, crunchy contrast.

19. Weather and Recipe Outcome

This stir fry is perfect for both warm and cooler weather. During the summer, it makes a quick, satisfying meal when you want something light and flavorful without heating up the kitchen too much. In the winter, the richness of the beef and the warmth of the black pepper can provide a comforting dish on a cold night.


20. Other Stir Fry Recipes to Explore

If you love this Black Pepper Beef and Cabbage Stir Fry, you might also enjoy these other stir fry variations:

  • Ginger Chicken Stir Fry: A fragrant, fresh dish with the sharp flavor of ginger and tender chicken.
  • Vegetable Stir Fry: A vibrant, colorful option with mixed vegetables and a tangy stir-fry sauce.
  • Sweet and Sour Pork Stir Fry: A classic with pork, bell peppers, and a tangy-sweet sauce.

21. Focus on Tools and Equipment

When preparing a stir fry, using the right tools can make a big difference in the cooking process.

  • Wok or Large Skillet: A wok is ideal for stir frying because its sloped sides allow for even cooking and tossing of ingredients, but a large skillet will work well too.
  • Sharp Knife: A sharp knife is essential for slicing the beef thinly and chopping the vegetables evenly, ensuring a perfect cook.
  • Spatula or Tongs: Use a spatula or tongs to stir and toss the ingredients quickly in the hot pan without breaking them up.

22. Frequently Asked Questions (with answers)

Q1: Can I make this dish ahead of time?
Yes, this stir fry can be made ahead and stored in the fridge for up to 3 days. However, the cabbage may lose some of its crispness over time.

Q2: Can I substitute beef with another protein?
Yes! You can substitute beef with chicken, shrimp, or tofu for a different flavor or to meet dietary preferences.

Q3: Can I make it spicier?
Absolutely! You can add more black pepper or incorporate chili flakes or even fresh chili peppers for an extra spicy kick.

Q4: Is this recipe gluten-free?
The recipe is gluten-free as long as you use gluten-free soy sauce. Be sure to double-check the label to ensure it is certified gluten-free.


Conclusion

Black Pepper Beef and Cabbage Stir Fry is a versatile, delicious, and nutritious meal that packs a punch of flavor while remaining quick and simple to prepare. Whether you’re looking for a satisfying weeknight dinner or a dish to impress guests, this stir fry offers the perfect balance of savory beef, crisp cabbage, and the sharp spice of black pepper. It’s a dish that can be customized to suit your preferences and dietary needs, making it an excellent addition to any meal rotation. So gather your ingredients, fire up the stove, and treat yourself to this flavorful stir fry!


This recipe is a perfect example of how simple, fresh ingredients can come together to create a dish that’s not only satisfying but also packed with nutritional benefits. By following the step-by-step instructions and using Chef Simon’s expert tips, you’ll be able to recreate this meal in no time. Whether you’re a beginner or a seasoned cook, this Black Pepper Beef and Cabbage Stir Fry will quickly become one of your favorite go-to recipes.

Easy Zucchini Slice Recipe: Healthy and Delicious

Zucchini slice Recipe

Introduction

Zucchini slice is a delightful, versatile dish that blends wholesome ingredients into a savory slice of comfort. Whether enjoyed as a breakfast, snack, or light lunch, this recipe is a perfect way to use up garden zucchinis while creating a dish that’s both healthy and satisfying. Its simple preparation and incredible flavor make it a go-to for busy households.


1. The Story Behind Zucchini Slice

The zucchini slice has roots in Australian kitchens, where it gained popularity as a convenient, nutritious dish for families. It evolved from traditional frittata recipes, using zucchini as a star ingredient due to its abundance in local gardens. Over time, it became a staple for picnics, school lunches, and quick meals, celebrated for its simplicity and adaptability.


2. The Benefits of Making Your Own Zucchini Slice

  • Customizable: Add or omit ingredients to suit dietary needs or preferences.
  • Nutritious: Packed with vegetables and protein, making it a balanced meal or snack.
  • Cost-effective: Uses affordable, readily available ingredients.
  • Kid-friendly: A great way to sneak vegetables into meals for picky eaters.

3. Essential Ingredients for the Perfect Zucchini Slice

  • Zucchini: 2 medium-sized, grated.
  • Eggs: 5 large, beaten.
  • Cheese: 1 cup grated cheddar or your preferred cheese.
  • Flour: 1 cup self-raising flour.
  • Carrot (optional): 1, grated.
  • Onion: 1 small, finely chopped.
  • Olive Oil: ¼ cup.
  • Salt and Pepper: To taste.
  • Bacon (optional): ½ cup diced (or substitute with turkey or chicken).

4. Cultural History of Ingredients

  • Zucchini: A summer squash native to the Americas, introduced to Europe by explorers.
  • Cheese: A beloved dairy product with a rich history in European and Mediterranean cuisines.
  • Eggs: An ancient ingredient, symbolizing nourishment and versatility across cultures.

5. Equipment You’ll Need

  • Mixing Bowl: For combining ingredients.
  • Grater: To shred zucchini and optional vegetables.
  • Baking Dish: A medium-sized pan for baking.
  • Oven: Preheated to 350°F (175°C).

6. Step-by-Step Instructions for Zucchini Slice

Preparation:

  1. Preheat Oven: Set to 350°F (175°C). Grease or line a baking dish.
  2. Grate Zucchini: Use a grater to shred zucchini into fine pieces. Squeeze out excess moisture.

Mixing Ingredients:

  1. Combine Wet Ingredients: In a large bowl, mix eggs, olive oil, and seasoning.
  2. Add Vegetables: Fold in grated zucchini, onion, carrot, and bacon (if using).
  3. Incorporate Dry Ingredients: Gradually stir in flour and cheese until well combined.

Baking:

  1. Transfer to Dish: Pour mixture into the prepared baking dish.
  2. Bake: Place in the oven and bake for 30-40 minutes or until golden and set.

Serving:

  1. Cool and Slice: Allow to cool slightly before slicing into squares or wedges.

7. Suggestions for Serving and Storing

  • Serving: Serve warm with a side salad or enjoy cold as a snack.
  • Storing: Refrigerate in an airtight container for up to 3 days. It can also be frozen for up to a month.

8. Chef Simon’s Tips for Zucchini Slice

  • Opt for fresh, firm zucchinis for the best texture and flavor.
  • Add herbs like parsley or thyme for extra flavor.
  • Experiment with different cheeses like feta or Parmesan.

9. Emotional and Psychological Impact of Food

Zucchini slice offers comfort through its warm, homey flavors. Its simplicity and versatility make it a dish that brings families together, offering nourishment for both body and soul.


10. Mindful Cooking Techniques

Focus on each step, from grating the zucchini to mixing the batter, appreciating the textures and aromas as you go. This mindfulness enhances the cooking experience and the dish’s quality.


11. Tips for Keeping the Recipe Fresh Longer

  • Use freshly grated zucchini and avoid pre-shredded options to maintain freshness.
  • Store leftovers in a sealed container to retain moisture and prevent drying.

12. Advanced Culinary Terms and Techniques

  • Blanching (Optional): Lightly cook zucchini before mixing for a softer texture.
  • Folding: Gently incorporate ingredients to maintain lightness.

13. Healthy Ingredient Alternatives

  • Replace self-raising flour with whole-wheat flour and baking powder for extra fiber.
  • Use low-fat cheese or nutritional yeast for a lighter option.
  • Substitute bacon with diced mushrooms for a vegetarian twist.

14. More Serving Ideas

  • Pair with a dollop of Greek yogurt or sour cream.
  • Serve as a side to roasted chicken or grilled fish for a complete meal.

15. Common Issues and Solutions

  • Watery Slice: Squeeze zucchini thoroughly to remove excess moisture.
  • Dense Texture: Avoid overmixing the batter to keep it light.
  • Uneven Cooking: Use a consistent oven temperature and ensure the batter is evenly spread.

16. Variations to Try

  • Mediterranean Style: Add olives, sun-dried tomatoes, and feta cheese.
  • Spicy Version: Include chili flakes or diced jalapeños for a kick.
  • Gluten-Free Option: Use almond or coconut flour instead of regular flour.

17. Nutritional Information and Health Benefits

  • Calories: ~200 per slice (depending on ingredients).
  • Rich in Fiber: From zucchini and vegetables.
  • High in Protein: Eggs and cheese contribute to protein content.

18. The Art of Pairing Zucchini Slice

  • Beverages: Pair with a fresh citrus juice or herbal iced tea.
  • Side Dishes: Serve with a crisp cucumber salad or roasted cherry tomatoes.

19. Weather and Recipe Outcome

  • Enjoy warm zucchini slice on cool, rainy days for comfort.
  • Serve chilled on sunny days as a refreshing, light meal.

20. Other Savory Recipes to Explore

  • Spinach and Feta Pie
  • Quiche Lorraine
  • Vegetable Frittata

21. Focus on Tools and Equipment

Invest in a high-quality grater and a reliable non-stick baking dish for hassle-free preparation.


22. Frequently Asked Questions (with answers)

Q: Can I make zucchini slice without flour?
A: Yes, you can use almond flour or oat flour for a gluten-free alternative.

Q: Can I prepare the batter ahead of time?
A: It’s best to prepare it fresh, as zucchini releases water when left to sit.

Q: How do I know when it’s done?
A: The top should be golden brown, and a skewer inserted in the center should come out clean.


Conclusion

Zucchini slice is a wholesome, versatile dish that adapts to any occasion. Whether you’re enjoying it warm or cold, as a snack or a meal, its delightful flavors and nourishing ingredients will leave you satisfied. Try this recipe today and add a touch of homemade comfort to your dining table!