Scalloped Potatoes Recipe: Easy Steps for Your Family

Scalloped Potatoes

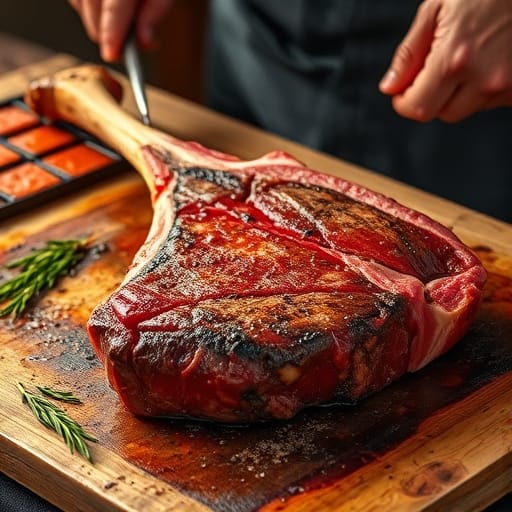
There’s something magical about a dish that brings people together. For many, scalloped potatoes are more than just a side—they’re a reminder of family gatherings, holiday feasts, and cherished traditions. Whether it’s Easter dinner or a cozy Sunday meal, this recipe has a way of making moments feel special.

This classic scalloped potato recipe combines creamy richness with fresh thyme and sharp cheddar cheese. It’s a dish that’s both comforting and elegant, perfect for feeding a crowd. Unlike au gratin, which relies heavily on cheese, this version lets the creamy sauce shine while still offering a cheesy finish.

With a total time of just 1 hour and 30 minutes, this recipe is surprisingly simple to prepare. It serves 12, making it ideal for large gatherings, and can even be made ahead of time for stress-free hosting. Tested and perfected, this dish is sure to become a family favorite.

Key Takeaways

  • Scalloped potatoes are a nostalgic comfort food tied to family holidays like Easter.
  • This recipe balances creamy richness with fresh thyme and cheddar cheese.
  • It differs from au gratin by focusing on a homemade cream sauce rather than heavy cheese.
  • Total preparation time is 1 hour and 30 minutes, serving 12 people.
  • The dish can be made ahead of time for convenience.

Introduction to Scalloped Potatoes

Rooted in tradition, this creamy dish has been a staple for generations. Originally a budget-friendly comfort food, it was created to make the most of simple ingredients like potatoes, milk, and butter. Over time, it evolved into a beloved recipe for family gatherings and holiday feasts.

Modern variations of this dish have expanded beyond the traditional milk-based version. Today, many recipes include cheese for added richness. Whether you prefer the classic or a cheesy twist, this dish remains a versatile favorite.

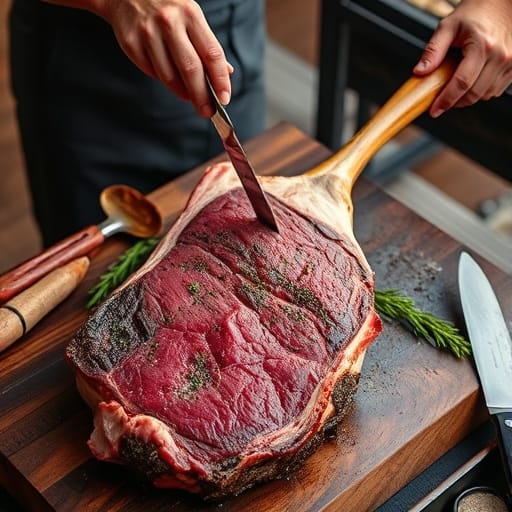
This recipe shines on special occasions like Easter or Christmas dinners. It also works well for cozy weeknight meals. Pair it with ham or roasted chicken for a complete, satisfying spread.

When it comes to ingredients, the choice of potatoes matters. Yukon Gold potatoes offer a buttery texture, while russet potatoes provide a firmer bite. Both work well, so choose based on your preference.

Nutritionally, this dish offers benefits too. A single serving contains about 286 calories, along with calcium and vitamin C. It’s a comforting yet nourishing addition to your table.

Ingredients for Scalloped Potatoes

Crafting the perfect dish starts with the right ingredients. For this recipe, the combination of fresh, high-quality components ensures a rich and satisfying result. Whether you’re cooking for a holiday feast or a family dinner, these elements come together to create a dish that’s both comforting and flavorful.

Essential Ingredients

The base of this recipe relies on a few key items. Start with 3 pounds of Yukon Gold potatoes, known for their buttery texture and ability to hold shape. You’ll also need butter and flour to create a smooth roux, which thickens the creamy sauce. Combine this with a blend of milk and broth for a velvety consistency.

Fresh thyme adds an aromatic touch, while sharp cheddar cheese brings a tangy finish. For seasoning, don’t forget salt and pepper to enhance the flavors. Slicing the potatoes uniformly to 1/8-inch thickness ensures even cooking and a perfect texture.

Optional Add-ons

If you’re looking to elevate the dish, consider a few upgrades. Crispy bacon bits add a smoky crunch, while caramelized onions bring a sweet depth of flavor. For a hint of warmth, sprinkle in some smoked paprika.

For a richer sauce, swap out regular milk for half-and-half. If you prefer a different cheese, try gruyere for a nuttier taste. These small tweaks can make the recipe uniquely yours.

How to Make Scalloped Potatoes

Mastering this classic recipe involves a few key steps that ensure perfection. From slicing to layering, each stage plays a crucial role in achieving the creamy, comforting dish you love. Let’s break it down into simple, actionable steps.

Preparing the Potatoes

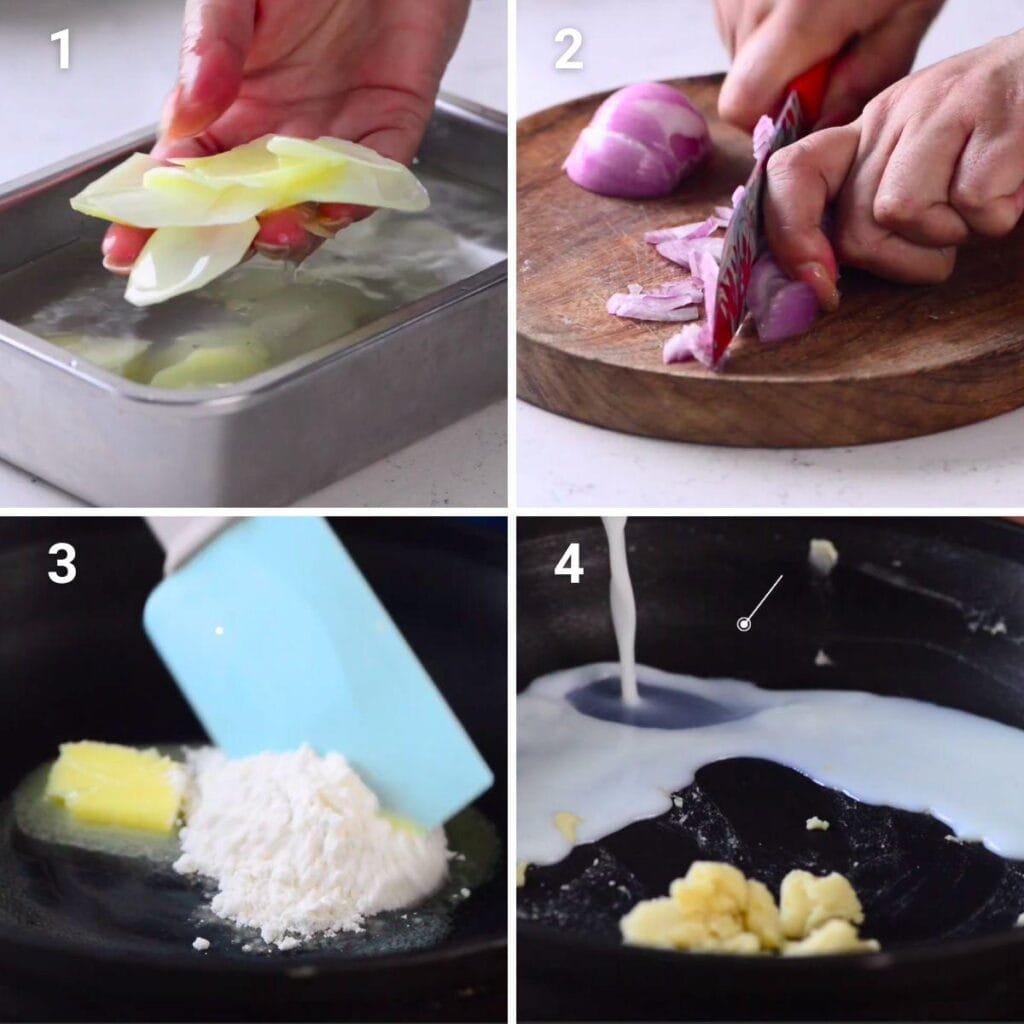
Start by thinly sliced potatoes to about 1/8-inch thickness. Use a sharp knife or a mandoline for precision. Soak the potato slices in cold water for 10 minutes to prevent oxidation and remove excess starch. This step ensures even cooking and a perfect texture.

Safety tip: If using a mandoline, always use the guard to protect your fingers. A steady hand with a knife works just as well for thin, uniform slices.

Making the Cream Sauce

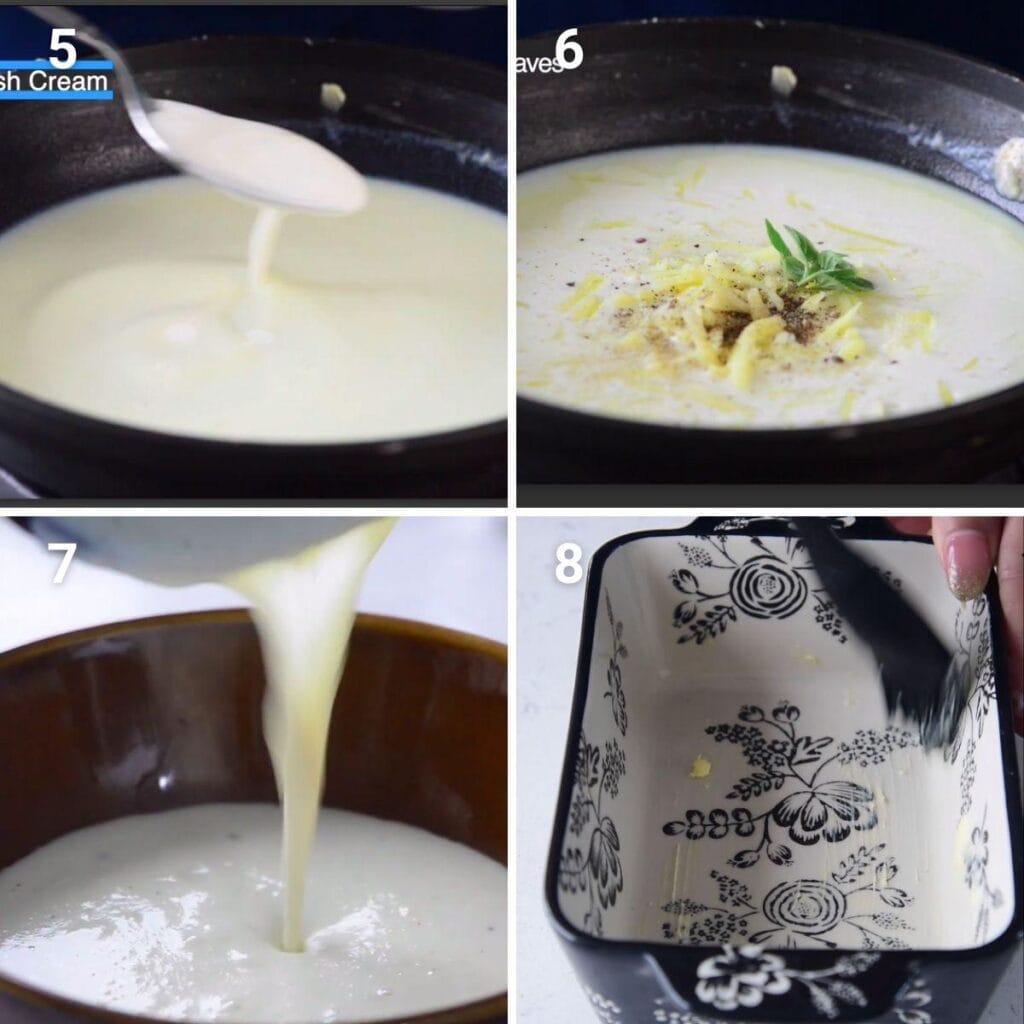
Next, prepare the creamy sauce. Melt 3 tablespoons of butter in a saucepan over medium heat. Add 3 tablespoons of flour and cook for exactly 2 minutes to create a smooth roux. Gradually whisk in 2 cups of milk and 1 cup of broth to prevent lumps.

Bring the mixture to a gentle simmer, stirring constantly. Add fresh thyme, salt, and pepper for flavor. The sauce should thicken in about 5 minutes. Remove from heat and set aside.

Assembling the Casserole

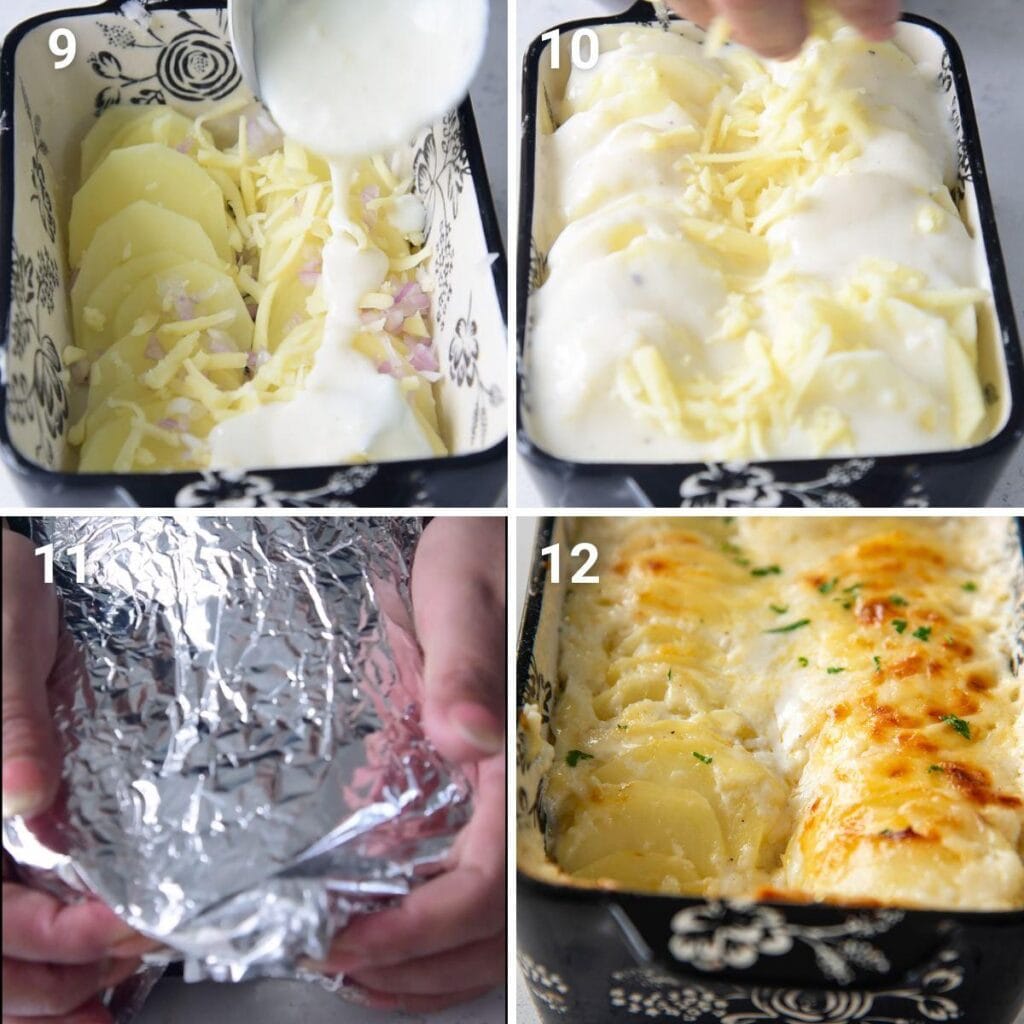
Now, it’s time to layer the dish. Grease a 9×13-inch baking dish and start with a single layer of potato slices. Add a sprinkle of caramelized onions, followed by a generous pour of the cream sauce. Repeat this layer pattern until all ingredients are used, finishing with a cheesy topping.

Here’s a quick guide to layering:

LayerIngredients
1Potato slices
2Caramelized onions
3Cream sauce
4Cheese

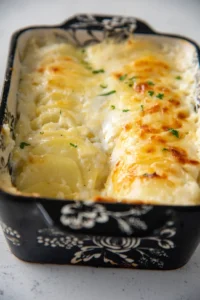
This method ensures even distribution and a perfectly baked dish. Cover with foil and bake at 375°F for about 1 hour, removing the foil for the last 15 minutes to brown the top.

Baking Scalloped Potatoes

Baking transforms simple ingredients into a comforting masterpiece. The oven plays a crucial role in achieving the perfect texture—tender slices with a golden, cheesy top. Whether you choose 375°F or 400°F, the key is to monitor the dish closely.

For the first 45 minutes, tent the dish with foil. This step traps steam, ensuring the potatoes tender evenly. After removing the foil, the edges should bubble, and the cheese should turn a rich, golden brown. These are clear signs your dish is ready.

Once out of the oven, let it rest for 20 minutes. This allows the sauce to thicken, making each bite creamier. For an extra crispy finish, broil the top for 3 minutes. This quick hack adds a delightful crunch to every serving.

“Patience is the secret to perfect baking. Let the dish rest, and you’ll be rewarded with a creamy, golden result.”

Experiment with temperatures to find your preference. Lower heat (350°F) with foil yields a softer texture, while higher heat (400°F) creates a crispier top. Either way, the baking process ensures a dish that’s both comforting and impressive.

Make-Ahead Scalloped Potatoes

Planning ahead can make your meals stress-free and delicious. This dish is perfect for busy schedules, allowing you to prepare it up to two days in advance. Simply follow the steps below to ensure it stays fresh and flavorful.

For the full make-ahead method, let the dish cool completely after baking. Cover it tightly with foil or plastic wrap and refrigerate. This keeps it fresh for up to two days, making it ideal for holiday meals or weeknight dinners.

When reheating, adjust the oven temperature to 325°F. This lower heat prevents the sauce from separating. Bake for about 1 hour, or until the dish is heated through. If the top isn’t golden, broil for 2-3 minutes.

Freezing is an option, but keep in mind that dairy-based sauces may change texture. To freeze, portion the dish into airtight containers. Thaw in the refrigerator overnight before reheating.

For easy single servings, use individual ramekins. This method ensures even heating and makes portion control simple. Here’s a quick guide to reheating adjustments:

MethodTemperatureTime
Oven Reheat325°F1 hour
Broil FinishHigh2-3 minutes

With these tips, you can make scalloped potatoes ahead of time and enjoy a stress-free meal. Whether for a holiday or a weeknight, this method saves you valuable hours in the kitchen.

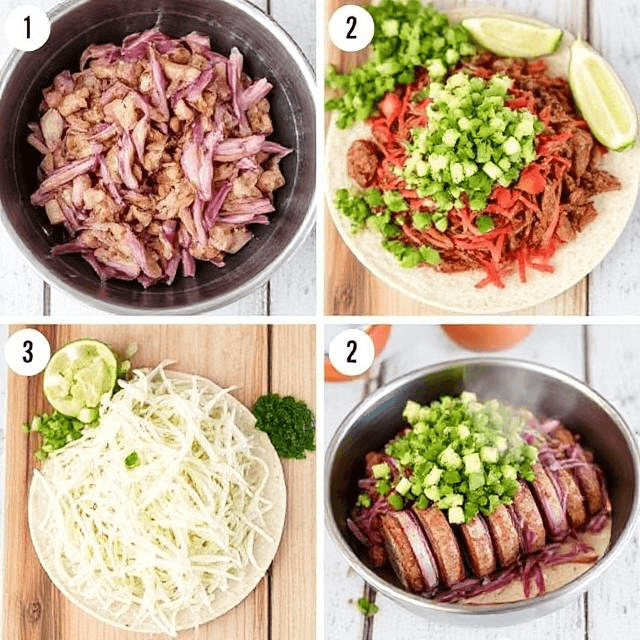
Also Read : Mexican Casserole Recipe

Variations of Scalloped Potatoes

Exploring different takes on a classic dish can add excitement to your meals. This creamy, cheesy favorite is versatile, allowing you to customize it to suit your taste or occasion. Whether you’re craving extra richness or a protein-packed version, these variations will inspire you to get creative in the kitchen.

Cheesy Scalloped Potatoes

For cheese lovers, this version takes indulgence to the next level. Add up to 2 cups of your favorite cheese blend. A mix of Parmesan, fontina, and gouda creates a complex, nutty flavor. The result is a dish that’s closer to a gratin, with a golden, bubbly top.

Here’s how to make it stand out:

  • Layer the cheese between potato slices for even distribution.
  • Finish with a generous sprinkle on top for a crispy crust.
  • Experiment with smoked cheeses for a unique twist.

Scalloped Potatoes with Ham

Pairing this dish with ham transforms it into a hearty main course. Diced holiday ham or crispy pancetta cubes add savory depth. This version is perfect for using up leftovers or creating a filling meal for family dinners.

Tips for success:

  • Use smoked ham for a robust flavor.
  • Layer the ham evenly to ensure every bite is satisfying.
  • Add a touch of Dijon mustard to the cream sauce for a tangy kick.

For a vegetarian twist, try adding a layer of mushroom duxelles. This earthy addition complements the creamy texture beautifully. If you’re looking for a crunchy contrast, top the dish with a panko-herb mixture before baking.

“Variety is the spice of life—and the key to keeping your meals exciting.”

These variations prove that this classic dish can adapt to any occasion. Whether you’re serving it as a side or the star of the meal, there’s a version for everyone to enjoy.

Serving Suggestions for Scalloped Potatoes

Finding the perfect pairing can elevate any dish to a memorable meal. This creamy classic shines as a side but becomes even more versatile when paired with complementary dishes. Whether you’re planning a holiday feast or a casual weeknight dinner, these serving ideas will inspire you.

For a festive spread, pair this dish with glazed ham and roasted Brussels sprouts. The savory ham balances the creamy richness, while the sprouts add a crisp contrast. It’s a combination that’s sure to impress your guests.

On busy weeknights, serve it alongside herb-roasted chicken and steamed broccoli. This trio creates a balanced meal that’s both comforting and nutritious. The simplicity of the pairing makes it a family favorite.

Leftovers? Transform them into a hearty breakfast by pan-frying slices and topping them with fried eggs. The crispy edges and creamy center make for a satisfying morning treat.

Don’t forget the wine! A buttery Chardonnay complements the dish’s richness, while a crisp Riesling adds a refreshing contrast. These pairings complete the dining experience, making every bite unforgettable.

Also Read : Scalloped Potatoes Recipe

Conclusion

Creating a memorable meal often comes down to mastering the basics. For this recipe, the key lies in uniform slice thickness and a velvety sauce consistency. These elements ensure your dish turns out perfectly every time.

Don’t be afraid to experiment with different herbs or cheeses. Adding rosemary or swapping cheddar for gruyere can bring a fresh twist to your potatoes. Cooking is all about making it your own.

We’d love to see your creations! Share photos of your finished recipe and leave a rating to help others discover this classic dish. Stay tuned for more potato-inspired recipes, from mashed to roasted, coming soon!

Easy Birria Tacos Recipe

Birria Tacos

Birria tacos have taken the culinary world by storm, and for good reason. This traditional Mexican dish, known for its rich, flavorful broth and tender meat, has evolved into a beloved street food and comfort meal. But birria tacos are more than just a trend—they’re a celebration of culture, history, and the art of slow cooking. In this guide, we’ll explore everything you need to know about birria tacos, from their origins to step-by-step instructions for making them at home. Whether you’re a seasoned cook or a beginner, this article will help you master the art of birria tacos and impress your family and friends.


1. The Story Behind Birria Tacos

Birria originates from the state of Jalisco, Mexico, where it was traditionally made with goat meat. The dish was often served at celebrations and special occasions, symbolizing abundance and community. Over time, birria evolved, and beef became a popular alternative to goat. The modern birria taco, however, is a more recent innovation. It involves dipping tortillas in the flavorful birria broth, frying them until crispy, and filling them with tender, shredded meat. This fusion of traditional birria and taco culture has created a dish that’s both nostalgic and contemporary, loved by food enthusiasts worldwide.


2. The Benefits of Making Your Own Birria Tacos

Making birria tacos at home is a rewarding experience for several reasons. First, you can control the quality of ingredients, ensuring a fresh and wholesome meal. Second, homemade birria allows you to adjust the flavors to your liking—whether you prefer it spicier, smokier, or more aromatic. Additionally, the slow-cooking process fills your home with irresistible aromas and creates a sense of anticipation. Finally, making birria tacos from scratch is a great way to connect with Mexican culinary traditions and share them with others.


3. Essential Ingredients for the Perfect Birria Tacos

To make authentic birria tacos, you’ll need a combination of fresh ingredients and traditional spices. Here’s what you’ll need:

  • Meat: Traditionally, goat or lamb is used, but beef (such as chuck roast or short ribs) is a popular alternative.
  • Dried Chiles: Guajillo, ancho, and chile de árbol provide the dish’s signature depth and heat.
  • Aromatics: Garlic, onions, and bay leaves add layers of flavor.
  • Spices: Cumin, oregano, thyme, and cloves create the dish’s complex spice profile.
  • Vinegar: Apple cider vinegar adds a tangy note to balance the richness.
  • Tortillas: Corn tortillas are essential for authentic birria tacos.
  • Cheese: Oaxaca or Monterey Jack cheese is often used for melting.
  • Toppings: Fresh cilantro, diced onions, and lime wedges add brightness and contrast.

4. Cultural History of Ingredients

The ingredients used in birria tacos tell a story of Mexican culinary heritage. Dried chiles, for example, have been a staple in Mexican cooking for centuries, dating back to pre-Columbian times. Goat meat, while less common in other cuisines, has long been a protein source in rural Mexico due to the animal’s adaptability to arid climates. Corn tortillas, another key component, are a symbol of Mesoamerican culture, with corn being considered sacred by indigenous peoples. Together, these ingredients create a dish that’s deeply rooted in history and tradition.


5. Equipment You’ll Need

To make birria tacos, you’ll need a few essential tools:

  • Large Pot or Dutch Oven: For slow-cooking the meat and broth.
  • Blender: To puree the chile sauce.
  • Skillet or Griddle: For frying the tacos.
  • Tongs: For flipping and handling the tacos.
  • Knife and Cutting Board: For prepping ingredients.
  • Strainer: To strain the chile sauce for a smooth consistency.

6. Step-by-Step Instructions for Birria Tacos

Step 1: Prepare the Chile Sauce

  1. Remove stems and seeds from dried chiles, then toast them lightly in a skillet.
  2. Soak the chiles in hot water for 20 minutes to soften.
  3. Blend the chiles with garlic, onions, vinegar, and spices until smooth.
  4. Strain the sauce to remove any chunks.

Step 2: Cook the Meat

  1. Sear the meat in a large pot to lock in flavor.
  2. Add the chile sauce and enough water to cover the meat.
  3. Simmer on low heat for 3-4 hours until the meat is tender and easily shreds.

Step 3: Assemble the Tacos

  1. Dip corn tortillas in the birria broth.
  2. Fry the tortillas on a skillet until crispy.
  3. Fill with shredded meat and cheese, then fold.
  4. Serve with a side of consomé (broth) for dipping.

7. Suggestions for Serving and Storing

Birria tacos are best served hot, with a side of consomé for dipping. Garnish with fresh cilantro, diced onions, and a squeeze of lime for added flavor. To store leftovers, keep the meat and broth separate from the tortillas. The meat can be refrigerated for up to 3 days or frozen for up to 3 months. Reheat gently on the stove or in the microwave.


8. Chef Simon’s Tips for Birria Tacos

  • Toast the Chiles: Lightly toasting the dried chiles before blending enhances their flavor.
  • Low and Slow: Cooking the meat on low heat ensures it becomes tender and flavorful.
  • Double Dip: For extra flavor, dip the tortillas in the broth twice before frying.
  • Use Fresh Tortillas: Freshly made corn tortillas make a world of difference.

9. Emotional and Psychological Impact of Food

Food has the power to evoke emotions and create lasting memories. Birria tacos, with their rich flavors and communal nature, often bring people together. The act of slow-cooking and sharing this dish can foster a sense of connection and nostalgia, reminding us of family gatherings and cultural traditions.


10. Mindful Cooking Techniques

Mindful cooking involves being present and intentional in the kitchen. When making birria tacos, take the time to appreciate the aromas, textures, and colors of the ingredients. Focus on each step, from toasting the chiles to shredding the meat, and savor the process as much as the final dish.


11. Tips for Keeping the Recipe Fresh Longer

  • Store Components Separately: Keep the meat, broth, and tortillas separate to maintain freshness.
  • Freeze in Portions: Freeze the meat and broth in individual portions for easy reheating.
  • Reheat Gently: Use low heat to reheat the meat and broth, preserving their flavors.

12. Advanced Culinary Terms and Techniques

  • Braising: Slow-cooking meat in liquid to tenderize it.
  • Reduction: Simmering the broth to concentrate its flavors.
  • Emulsification: Blending the chile sauce to create a smooth, cohesive mixture.

13. Healthy Ingredient Alternatives

  • Leaner Meat: Use chicken or turkey for a lighter version.
  • Low-Sodium Broth: Reduce salt by using low-sodium broth.
  • Whole Wheat Tortillas: Substitute corn tortillas with whole wheat for added fiber.

14. More Serving Ideas

  • Birria Quesadillas: Use the meat and cheese to make crispy quesadillas.
  • Birria Ramen: Add the meat and broth to a bowl of ramen noodles.
  • Birria Pizza: Use the meat as a topping for a unique pizza.

15. Common Issues and Solutions

  • Meat Too Tough: Cook longer on low heat until tender.
  • Broth Too Spicy: Add more water or broth to dilute the heat.
  • Tortillas Tear: Use fresh, high-quality tortillas and handle them gently.

16. Variations to Try

  • Vegetarian Birria: Use mushrooms or jackfruit instead of meat.
  • Seafood Birria: Substitute meat with shrimp or fish.
  • Spicy Birria: Add extra chile de árbol for more heat.

17. Nutritional Information and Health Benefits

Birria tacos are rich in protein, vitamins, and minerals. The chiles provide antioxidants, while the meat offers essential amino acids. Pairing the dish with fresh toppings like cilantro and lime adds a boost of vitamin C.


18. The Art of Pairing Birria Tacos

Pair birria tacos with a light, refreshing drink like horchata or agua de jamaica. For a more indulgent experience, try a Mexican lager or a smoky mezcal.


19. Weather and Recipe Outcome

Birria tacos are perfect for cold weather, as the warm broth and hearty meat provide comfort. However, they can be enjoyed year-round with a side of fresh salsa or a cold salad.


20. Other Taco Recipes to Explore

  • Carnitas Tacos: Slow-cooked pork tacos.
  • Al Pastor Tacos: Marinated pork with pineapple.
  • Fish Tacos: Crispy fish with tangy slaw.

21. Focus on Tools and Equipment

Investing in quality tools, like a sturdy Dutch oven and a high-powered blender, can elevate your birria taco game. Proper equipment ensures even cooking and smooth sauces.


22. Frequently Asked Questions (with Answers)

  • Can I use chicken instead of beef? Yes, chicken works well for a lighter version.
  • How do I make it less spicy? Reduce the number of chiles or remove the seeds.
  • Can I make it ahead of time? Yes, the flavors deepen when made a day in advance.

Conclusion

Birria tacos are more than just a meal—they’re a celebration of culture, flavor, and community. By making them at home, you not only enjoy a delicious dish but also connect with the rich traditions behind it. Whether you stick to the classic recipe or experiment with variations, birria tacos are sure to become a favorite in your kitchen. So gather your ingredients, fire up the stove, and let the magic of birria tacos bring joy to your table.

Perfect Tomahawk Steak Recipe: Juicy, Tender, and Flavorful

Tomahawk steak

A Tomahawk steak is a culinary masterpiece that never fails to impress. With its dramatic bone-in presentation and rich, succulent flavor, it’s the crown jewel of any steak enthusiast’s repertoire. This recipe takes you through everything you need to know about preparing the perfect Tomahawk steak, from selecting the right cut to mastering the cooking process.


1. The Story Behind Tomahawk Steak

The Tomahawk steak derives its name from its resemblance to the Native American tomahawk axe, with a long bone attached to a ribeye cut. This steak is not only a feast for the taste buds but also a statement piece on the plate. Often associated with high-end steakhouses, it has become a favorite for backyard grilling and celebratory meals due to its dramatic appearance and robust flavor. Its origins can be traced back to traditional butchering techniques aimed at preserving the rib bone for aesthetic and flavor-enhancing purposes.


2. The Benefits of Making Your Own Tomahawk Steak

Why opt for a homemade Tomahawk steak?

  • Cost Savings: A well-prepared steak at home can rival the quality of a fine dining restaurant for a fraction of the cost.
  • Customization: You control the seasoning, cooking method, and doneness to suit your preferences.
  • Experience: Preparing a Tomahawk steak is a rewarding culinary adventure that sharpens your cooking skills and impresses your guests.

3. Essential Ingredients for the Perfect Tomahawk Steak

Main Ingredients

  • 1 Tomahawk steak (2–3 inches thick, about 2–3 lbs)
  • Kosher salt (to taste)
  • Freshly ground black pepper (to taste)

Optional Seasonings

  • Garlic powder
  • Smoked paprika
  • Fresh rosemary sprigs
  • Unsalted butter (for basting)

4. Cultural History of Ingredients

  • Beef: Revered for centuries, beef is a symbol of luxury and sustenance in many cultures. The ribeye cut is prized for its marbling and flavor, making it a staple in American steakhouses.
  • Salt: A universal seasoning, salt enhances the natural flavors of the beef.
  • Black Pepper: Native to India, black pepper adds a subtle spice that complements the steak’s richness.

5. Equipment You’ll Need

  • Cast-iron skillet or grill
  • Meat thermometer
  • Tongs
  • Aluminum foil
  • Basting brush
  • Sharp knife for carving

6. Step-by-Step Instructions for Tomahawk Steak

Step 1: Preparing the Steak

  1. Remove the Tomahawk steak from the refrigerator and let it come to room temperature for about 1 hour.
  2. Generously season both sides with kosher salt and black pepper. For extra flavor, add garlic powder and smoked paprika.

Step 2: Searing the Steak

  1. Heat a cast-iron skillet over high heat until it’s smoking hot.
  2. Add a tablespoon of oil or butter to the skillet.
  3. Sear the steak for 2–3 minutes on each side, including the edges, to create a golden-brown crust.

Step 3: Cooking to Perfection

  1. Preheat your oven to 375°F (190°C) or prepare your grill for indirect heat.
  2. Transfer the seared steak to the oven or place it on the cooler side of the grill.
  3. Cook until the internal temperature reaches your desired doneness:
    • Rare: 120°F (49°C)
    • Medium-rare: 130°F (54°C)
    • Medium: 140°F (60°C)

Step 4: Resting the Steak

  1. Remove the steak from the heat and tent it with aluminum foil.
  2. Let it rest for 10–15 minutes to allow the juices to redistribute.

Step 5: Carving and Serving

  1. Slice the steak against the grain for maximum tenderness.
  2. Serve with your favorite sides, such as roasted vegetables or mashed potatoes.

7. Suggestions for Serving and Storing

  • Serving: Pair the steak with red wine, garlic herb butter, or chimichurri sauce.
  • Storing: Refrigerate leftovers in an airtight container for up to 3 days. Reheat gently to avoid drying out the meat.

8. Chef Simon’s Tips for Tomahawk Steak

  • Let the steak rest after cooking to retain its juices.
  • Use a meat thermometer for precise doneness.
  • Sear the edges to ensure an even crust all around.

9. Emotional and Psychological Impact of Food

Cooking and sharing a Tomahawk steak can evoke feelings of pride, gratitude, and connection. The steak’s grandeur elevates any occasion, turning a meal into a cherished memory.


10. Mindful Cooking Techniques

  • Focus on the process of seasoning and searing to engage your senses.
  • Use the time while the steak rests to prepare a simple side dish or reflect on the cooking experience.

11. Tips for Keeping the Recipe Fresh Longer

  • Wrap leftovers tightly in aluminum foil to prevent oxidation.
  • Store in the coldest part of the refrigerator and consume within 3 days.

12. Advanced Culinary Terms and Techniques

  • Maillard Reaction: The chemical process that creates the steak’s flavorful crust.
  • Reverse Searing: Cooking the steak slowly first, then searing for a perfect finish.

13. Healthy Ingredient Alternatives

  • Replace butter with olive oil for a lighter basting option.
  • Serve with a side of grilled vegetables for added nutrients.

14. More Serving Ideas

  • Top the steak with sautéed mushrooms and onions.
  • Serve with a fresh arugula salad drizzled with balsamic glaze.

15. Common Issues and Solutions

  • Dry Steak: Avoid overcooking by using a meat thermometer.
  • Uneven Cooking: Ensure the steak is at room temperature before cooking.

16. Variations to Try

  • Smoked Tomahawk: Add wood chips to your grill for a smoky flavor.
  • Spiced Rub: Use a blend of cumin, chili powder, and cayenne for a bold taste.

17. Nutritional Information and Health Benefits

  • Calories: ~1200 (per steak)
  • Protein: 85g
  • Fat: 90g

Rich in protein and iron, this steak supports muscle repair and energy production.


18. The Art of Pairing Tomahawk Steak

  • Pair with robust red wines like Cabernet Sauvignon or Malbec.
  • For non-alcoholic options, try sparkling water with a hint of citrus.

19. Weather and Recipe Outcome

  • Grill outdoors in warm weather for a perfect BBQ experience.
  • On colder days, cook indoors using a cast-iron skillet for consistent results.

20. Other Recipes to Explore

  • Grilled Ribeye
  • Prime Rib Roast
  • Garlic Butter Filet Mignon

21. Focus on Tools and Equipment

  • Invest in a high-quality meat thermometer for accurate cooking.
  • Use a heavy-duty cast-iron skillet for optimal heat retention.

22. Frequently Asked Questions (with answers)

Q1: Can I cook a Tomahawk steak without a grill?
A1: Yes, a cast-iron skillet works perfectly for stovetop searing and oven finishing.

Q2: How do I know when the steak is done?
A2: Use a meat thermometer to check the internal temperature.


Conclusion

The Tomahawk steak is more than just a meal; it’s a culinary experience. From its dramatic presentation to its tender, juicy flavor, it’s a dish that will elevate any occasion. By following this recipe, you can create a steakhouse-quality masterpiece in your own kitchen. Whether it’s for a special celebration or a weekend indulgence, this recipe ensures your Tomahawk steak is unforgettable. Enjoy the process, savor the flavors, and share the joy with loved ones!

Easy Meatloaf Recipe

Meatloaf

Introduction

This meatloaf recipe is designed to be a delicious, comforting dish for those avoiding pork and wine in their meals. Packed with flavor, tender, and moist, this recipe offers the perfect balance of taste and texture. Whether you’re preparing a weeknight dinner or a hearty dish for family gatherings


The Story Behind Meatloaf

Meatloaf has its roots in European cuisine, dating back to ancient Rome, where ground meat was combined with bread and spices. Over centuries, it evolved, and in America, it became a symbol of comfort food during the Great Depression when families stretched their budgets with creative cooking. This modern version continues the tradition, adapting to dietary preferences while keeping its classic essence intact.


The Benefits of Making Your Own Meatloaf

  • Control Over Ingredients: Ensure fresh, wholesome, and high-quality ingredients.
  • Healthier Option: Avoid preservatives, pork, and wine while tailoring it to your preferences.
  • Customizable: Adjust the flavor profile or add vegetables for extra nutrition.
  • Economical: A budget-friendly meal that can serve multiple portions.

Essential Ingredients for the Perfect Meatloaf

Ingredients

  • Ground Meat: 2 lbs ground beef, turkey, or chicken.
  • Breadcrumbs: 1 cup, to bind and add structure.
  • Eggs: 2 large, for binding.
  • Milk: ½ cup (or non-dairy alternative for lactose intolerance).
  • Onion: 1 small, finely chopped.
  • Garlic: 2 cloves, minced.
  • Ketchup: 2 tbsp for the mixture and additional for the glaze.
  • Worcestershire Sauce: 1 tbsp (ensure it is alcohol-free).
  • Seasonings: 1 tsp salt, ½ tsp black pepper, ½ tsp paprika, 1 tsp dried parsley, ½ tsp dried thyme.

For the Glaze

  • ¼ cup ketchup
  • 1 tbsp mustard
  • 1 tbsp brown sugar

Cultural History of Ingredients

  • Ground Meat: A staple in many cuisines, symbolizing versatility and resourcefulness.
  • Breadcrumbs: Used for centuries as a binder in recipes worldwide.
  • Ketchup: Originated in Asia as a fish sauce and evolved into the sweet tomato-based condiment we know today.
  • Worcestershire Sauce: Created in England, it adds depth to recipes with its complex umami flavor.

Equipment You’ll Need

  • Large mixing bowl
  • Measuring cups and spoons
  • Loaf pan or baking sheet
  • Spatula
  • Meat thermometer
  • Knife and cutting board

Step-by-Step Instructions for Meatloaf

  1. Preheat Oven: Preheat your oven to 375°F (190°C). Grease a loaf pan or line a baking sheet with parchment paper.
  2. Prepare the Mixture: In a large bowl, combine ground meat, breadcrumbs, eggs, milk, onion, garlic, ketchup, Worcestershire sauce, and seasonings. Mix gently until just combined.
  3. Shape the Meatloaf: Transfer the mixture to your prepared pan or baking sheet, shaping it into a loaf.
  4. Make the Glaze: Mix ketchup, mustard, and brown sugar in a small bowl. Spread this evenly over the top of the meatloaf.
  5. Bake: Bake for 50-60 minutes, or until the internal temperature reaches 160°F (71°C).
  6. Rest: Let the meatloaf rest for 10 minutes before slicing to retain its juices.

Suggestions for Serving and Storing

  • Serve With: Mashed potatoes, roasted vegetables, or a fresh side salad.
  • Store: Wrap slices tightly in foil or store in an airtight container for up to 3 days in the refrigerator.

Chef Simon’s Tips for Meatloaf

  • Avoid overmixing the ingredients to keep the meatloaf tender.
  • Use a meat thermometer to ensure perfect doneness.
  • Add finely chopped vegetables like zucchini or carrots for extra moisture and nutrition.

Emotional and Psychological Impact of Food

Meatloaf evokes feelings of nostalgia and comfort, making it a perfect dish to share with loved ones. The act of preparing and serving this dish creates a sense of community and warmth, especially when enjoyed together at the dinner table.


Mindful Cooking Techniques

  • Focus on the process: Chop ingredients mindfully and enjoy the tactile experience of mixing.
  • Appreciate the aromas and textures as the meatloaf bakes, bringing mindfulness to the cooking process.

Tips for Keeping the Recipe Fresh Longer

  • Freeze It: Wrap the uncooked loaf tightly and freeze for up to 3 months.
  • Reheat Properly: Cover slices with foil and bake at 350°F (175°C) until warmed through.

Advanced Culinary Terms and Techniques

  • Mirepoix: Use a finely chopped mix of onions, carrots, and celery for added depth.
  • Deglaze: (Optional) Use a splash of broth to scrape up browned bits for a sauce.

Healthy Ingredient Alternatives

  • Replace breadcrumbs with oat flour or almond meal for a gluten-free version.
  • Use ground turkey or chicken for a leaner option.
  • Substitute milk with unsweetened almond or oat milk.

More Serving Ideas

  • Serve with gravy or mushroom sauce for a rich, hearty touch.
  • Slice leftovers for sandwiches or sliders the next day.

Common Issues and Solutions

  • Dry Meatloaf: Add more liquid ingredients like milk or grated vegetables.
  • Falls Apart: Ensure proper binding with enough eggs and breadcrumbs.
  • Undercooked Center: Use a meat thermometer to guarantee even cooking.

Variations to Try

  • Italian Meatloaf: Add Parmesan cheese and Italian herbs, and top with marinara sauce.
  • Cheesy Center: Stuff the loaf with mozzarella for a gooey surprise.
  • BBQ Twist: Use barbecue sauce instead of ketchup for the glaze.

Nutritional Information and Health Benefits

(Per Serving, 6 Servings)

  • Calories: ~320
  • Protein: ~25g
  • Carbs: ~15g
  • Fat: ~18g

The Art of Pairing Meatloaf

  • Sides: Mashed sweet potatoes, sautéed green beans, or a tangy coleslaw.
  • Beverages: Lemonade, iced tea, or sparkling water.

Weather and Recipe Outcome

On cooler days, meatloaf provides warmth and comfort. It’s a perfect choice for cozy evenings, as the oven heat also warms your kitchen.


Other Meat-Based Recipes to Explore

  • Beef Stroganoff: A creamy, savory delight.
  • Chicken Meatballs: A versatile addition to pasta or soups.
  • Turkey Shepherd’s Pie: A healthy spin on a classic dish.

Focus on Tools and Equipment

  • A high-quality loaf pan ensures even cooking.
  • A digital meat thermometer prevents over- or under-cooking.

Frequently Asked Questions (FAQs)

1. Can I freeze cooked meatloaf?
Yes, slice it and wrap each piece individually before freezing for up to 3 months.

2. Can I make it dairy-free?
Substitute milk with a non-dairy option like almond or oat milk.

3. Can I use gluten-free breadcrumbs?
Absolutely, they work perfectly without affecting the texture.

4. Can I add vegetables?
Yes, grated carrots, zucchini, or bell peppers can be mixed in for added nutrients.

5. How can I make it spicier?
Add a pinch of cayenne pepper or diced jalapeños to the mixture.


Conclusion

This pork- and wine-free meatloaf is a versatile, flavorful dish that’s easy to make and perfect for any occasion. With customizable options, mindful cooking techniques, and heartwarming results, it’s a recipe you’ll return to time and time again. Enjoy the simplicity of creating a meal that brings comfort and joy to your table!

Easy Empanadas Recipe

Empanadas recipe

Introduction
Empanadas, beloved worldwide, are hand-held pastries filled with flavorful ingredients ranging from savory meats and cheeses to sweet fruits and custards. Originating from Spain and Latin America, empanadas have become a global favorite for their portability, versatility, and satisfying taste. This recipe focuses on the classic beef empanada, with flaky, golden pastry encasing a rich, spiced filling.


The Story Behind Empanadas

The word “empanada” comes from the Spanish verb empanar, meaning “to wrap in bread.” These delightful pockets were historically created to provide travelers and workers with portable, nourishing meals. While the concept is centuries old, empanadas have evolved to reflect the diverse culinary traditions of the countries where they’re made. From Argentinian empanadas stuffed with olives and eggs to Filipino sweet versions, every bite tells a story.


The Benefits of Making Your Own Empanadas

  • Customizable Fillings: You can mix and match flavors, from vegetarian options to meaty favorites.
  • Freshness: Homemade pastry ensures a superior texture and taste.
  • Budget-Friendly: Making empanadas at home is often cheaper than buying pre-made or restaurant versions.
  • Freezer-Friendly: Prepare a batch and freeze for quick meals or snacks.

Essential Ingredients for the Perfect Empanadas

Dough

  • 2 ½ cups all-purpose flour
  • 1 teaspoon salt
  • 1 stick cold unsalted butter, diced
  • 2 eggs (1 for the dough, 1 for brushing)
  • ⅓ cup cold water

Filling

  • 1 tablespoon olive oil
  • 1 small onion, diced
  • 2 garlic cloves, minced
  • ½ pound ground beef
  • ½ teaspoon smoked paprika
  • ½ teaspoon cumin
  • ¼ teaspoon chili powder (optional)
  • ¼ cup tomato paste
  • ¼ cup green olives, chopped
  • 1 hard-boiled egg, diced (optional)
  • Salt and pepper to taste

Cultural History of Ingredients

  • Dough: Similar to pie crusts, empanada dough is designed to be sturdy yet tender, reflecting European pastry traditions.
  • Beef: A staple protein in many cultures, it brings a rich, hearty flavor to empanadas.
  • Olives: A nod to Spanish culinary influence, olives add a salty, tangy element.
  • Spices: Cumin and paprika, commonly used in Latin American cooking, provide warmth and depth.

Equipment You’ll Need

  • Rolling pin
  • Pastry cutter or knife
  • Skillet
  • Baking sheet
  • Parchment paper
  • Fork for crimping

Step-by-Step Instructions for Empanadas

Step 1: Prepare the Dough

  1. Combine flour and salt in a bowl.
  2. Add cold butter and use your fingers or a pastry cutter to blend until the mixture resembles coarse crumbs.
  3. Mix in one beaten egg and cold water, kneading gently until a dough forms. Wrap in plastic wrap and refrigerate for at least 30 minutes.

Step 2: Make the Filling

  1. Heat olive oil in a skillet over medium heat.
  2. Sauté onions and garlic until softened.
  3. Add ground beef, breaking it apart as it cooks. Stir in paprika, cumin, chili powder, and tomato paste.
  4. Once the beef is fully cooked, mix in olives and hard-boiled egg (if using). Season with salt and pepper. Let the filling cool.

Step 3: Assemble the Empanadas

  1. Preheat oven to 375°F (190°C).
  2. Roll out the dough on a floured surface to about ⅛-inch thickness.
  3. Cut out circles using a round cutter (4–5 inches in diameter).
  4. Place a tablespoon of filling in the center of each circle. Fold the dough over to form a half-moon shape.
  5. Crimp the edges with a fork to seal.

Step 4: Bake the Empanadas

  1. Place empanadas on a parchment-lined baking sheet.
  2. Brush with a beaten egg for a golden finish.
  3. Bake for 20–25 minutes, or until golden brown.

Suggestions for Serving and Storing

  • Serving: Pair with chimichurri sauce, salsa, or a dollop of sour cream.
  • Storing: Store in an airtight container in the fridge for up to 3 days.
  • Freezing: Freeze uncooked empanadas and bake them straight from the freezer, adding 5–7 minutes to the baking time.

Chef Simon’s Tips for Empanadas

  • Use chilled butter and water for a flakier dough.
  • Avoid overfilling the empanadas to prevent leaks during baking.
  • Experiment with fillings like shredded chicken, black beans, or cheese for variety.

Emotional and Psychological Impact of Food

Empanadas evoke feelings of comfort and nostalgia, often tied to family gatherings or festive occasions. Preparing and sharing them can strengthen bonds and create lasting memories.


Mindful Cooking Techniques

Focus on the tactile elements of making empanadas, like shaping the dough and crimping the edges. These activities can help you stay present and enjoy the process.


Tips for Keeping the Recipe Fresh Longer

Reheat empanadas in the oven rather than the microwave to maintain their crispness.


Advanced Culinary Terms and Techniques

  • Blind Baking: Partially baking the dough before filling (optional for extra-crispy empanadas).
  • Docking: Pricking the dough with a fork to prevent puffing.

Healthy Ingredient Alternatives

  • Use whole wheat flour for the dough.
  • Swap beef for turkey or plant-based protein.
  • Add diced vegetables like zucchini or bell peppers for extra nutrition.

More Serving Ideas

  • Pair with a light salad for a balanced meal.
  • Serve as an appetizer alongside other Latin-inspired dishes like guacamole and ceviche.

Common Issues and Solutions

  • Dry Dough: Add a splash of water if the dough is too dry.
  • Soggy Bottoms: Ensure the filling is cool and not too moist before assembling.

Variations to Try

  • Sweet Empanadas: Fill with dulce de leche, apples, or bananas.
  • Vegetarian Empanadas: Use spinach, feta, and mushrooms.
  • Seafood Empanadas: Try shrimp or crab with a creamy sauce.

Nutritional Information and Health Benefits

  • Calories: ~200 per empanada (depending on filling).
  • Protein: High in protein from beef and eggs.
  • Iron: Beef and olives contribute to iron intake.

The Art of Pairing Empanadas

Serve with a bold Malbec wine or a refreshing agua fresca to complement the flavors.


Weather and Recipe Outcome

Empanadas are versatile and can be enjoyed year-round. They’re particularly comforting on cold days when served warm with a hearty soup.


Other Empanada Recipes to Explore

  • Argentinian Beef Empanadas
  • Chicken and Cheese Empanadas
  • Filipino Sweet Empanadas

Focus on Tools and Equipment

Invest in a quality pastry cutter and rolling pin for a smooth dough-making process.


Frequently Asked Questions (with answers)

Q: Can I fry the empanadas instead of baking?
A: Yes, frying gives them a crispy texture, but it increases the calorie count.

Q: Can I make the dough ahead of time?
A: Absolutely! Store it in the fridge for up to 2 days or freeze it for later use.

Q: How do I prevent the empanadas from bursting?
A: Avoid overfilling and ensure the edges are sealed tightly.


Conclusion

Empanadas are a testament to the beauty of simple, flavorful cooking. This recipe gives you the tools to create a classic yet adaptable dish that’s perfect for any occasion. Whether you’re serving them at a party, enjoying a cozy night in, or preparing a snack for the week, empanadas are sure to impress. Try this recipe today and enjoy the joy of homemade empanadas!

Easy Chicken Paws Recipe

Chicken Paws

Introduction

Chicken paws (or chicken feet) are a delicacy enjoyed across various cultures for their unique texture, rich collagen content, and ability to absorb bold flavors. While some may find the idea unconventional, chicken paws are a powerhouse of nutrients and a culinary treasure.

Whether you’re making them for a comforting broth, a saucy dish, or a crispy snack, this recipe will guide you through the process of creating tender, flavorful chicken paws that are both satisfying and nutrient-rich. Let’s demystify the art of cooking chicken paws!


1. The Story Behind Chicken Paws

Chicken paws have long been considered a hidden gem in the culinary world. In Asian cuisines, they’re revered for their ability to create gelatin-rich soups and stews. In African and Latin American cooking, they’re enjoyed for their chewy texture and deep flavor absorption.

Once considered a “waste” product in Western cuisines, chicken paws are now gaining popularity as chefs and home cooks embrace their versatility. They’re proof that every part of the chicken can be transformed into something delicious.


2. The Benefits of Making Your Own Chicken Paws

1. Nutritional Powerhouse

Chicken paws are rich in collagen, which promotes healthy skin, joints, and hair. They’re also a source of calcium and protein.

2. Budget-Friendly

Often sold at a fraction of the cost of other chicken cuts, they’re an economical option for creating flavorful meals.

3. Customizable

Making chicken paws at home allows you to experiment with different flavors and textures, whether you prefer them stewed, fried, or grilled.

4. Sustainability

Using chicken paws reduces food waste and ensures every part of the animal is utilized.


3. Essential Ingredients for the Perfect Chicken Paws

Here’s what you’ll need:

  • Chicken Paws (2 lbs): Cleaned and trimmed.
  • Garlic (4 cloves, minced): Adds depth of flavor.
  • Ginger (1-inch piece, sliced): A must for balancing the rich taste of chicken paws.
  • Soy Sauce (1/4 cup): Adds umami.
  • Oyster Sauce (2 tbsp): For a hint of sweetness and complexity.
  • Rice Wine or White Vinegar (2 tbsp): Helps tenderize and enhance flavor.
  • Sugar (1 tbsp): Balances the salty and savory notes.
  • Water or Broth (2 cups): For simmering.
  • Vegetable Oil (2 tbsp): For sautéing.
  • Chili Flakes (optional): Adds heat if you prefer a spicy kick.

4. Cultural History of Ingredients

Chicken Paws

Chicken paws have been a culinary staple in countries like China, Thailand, and the Philippines for centuries. Known for their ability to create gelatin-rich broths, they’re often considered a health food in these regions.

Soy Sauce and Oyster Sauce

Both sauces hail from Asian cuisine, with soy sauce tracing its roots to ancient China and oyster sauce being a Cantonese invention. These ingredients bring savory, umami flavors to any dish.

Ginger and Garlic

These aromatics are foundational to Asian cooking, prized for their medicinal properties and ability to enhance flavors.


5. Equipment You’ll Need

  • Large Pot: For blanching and simmering.
  • Tongs: For handling the paws during cooking.
  • Knife and Cutting Board: To trim nails and clean the paws.
  • Strainer: For draining water after blanching.
  • Sauté Pan or Wok: If stir-frying.

6. Step-by-Step Instructions for Chicken Paws

Step 1: Prep the Chicken Paws

  1. Clean Thoroughly: Rinse the chicken paws under cold water. Remove any dirt or debris.
  2. Trim the Nails: Use a sharp knife or kitchen shears to remove the nails from each paw.

Step 2: Blanch the Chicken Paws

  1. Bring a large pot of water to a boil. Add the chicken paws, along with a few slices of ginger and a tablespoon of salt.
  2. Boil for 5 minutes to remove impurities and soften the skin.
  3. Drain and rinse under cold water to stop the cooking process.

Step 3: Sauté Aromatics

  1. Heat oil in a large pan or wok over medium heat.
  2. Add minced garlic and sliced ginger, sautéing until fragrant.

Step 4: Cook the Chicken Paws

  1. Add the blanched chicken paws to the pan, tossing to coat in the aromatics.
  2. Stir in soy sauce, oyster sauce, rice wine, sugar, and chili flakes (if using).

Step 5: Simmer

  1. Add water or broth to the pan, ensuring the chicken paws are mostly submerged.
  2. Cover and simmer for 30–40 minutes, stirring occasionally, until the paws are tender and the sauce has thickened.

Step 6: Serve

  1. Garnish with fresh cilantro or green onions. Serve hot as a snack, appetizer, or part of a larger meal.

7. Suggestions for Serving and Storing

Serving Suggestions

  • Serve as an appetizer with a side of soy-vinegar dipping sauce.
  • Pair with steamed rice and sautéed greens for a hearty meal.
  • Add to soups or stews for extra richness and texture.

Storing Tips

  • Refrigerate: Store in an airtight container for up to 3 days.
  • Freeze: Freeze in sauce for up to a month. Thaw overnight in the fridge before reheating.

(Continued in next message…)


8. Chef Simon’s Tips for Chicken Paws

  • Patience is Key: Simmering chicken paws slowly allows them to absorb flavors and become tender.
  • Experiment with Spices: Add star anise, cinnamon, or cloves for a deeper, more aromatic flavor.
  • Balance the Texture: If you prefer crispier paws, finish them by frying briefly after simmering.

9. Emotional and Psychological Impact of Food

Chicken paws are a nostalgic dish for many, evoking memories of family gatherings and traditional celebrations. They symbolize resourcefulness and the joy of turning humble ingredients into something delicious. The act of preparing them can be grounding, while their rich, comforting flavors provide a sense of warmth and connection.


10. Mindful Cooking Techniques

  • Be Present: Focus on each step, from trimming the paws to layering the flavors.
  • Engage Your Senses: Notice the aroma of ginger and garlic as they cook, and appreciate the transformation of the paws during simmering.
  • Slow Down: Let the paws simmer slowly, allowing time for the sauce to thicken and flavors to meld.

11. Tips for Keeping the Recipe Fresh Longer

  • Keep the chicken paws submerged in sauce when storing to retain their moisture and flavor.
  • Reheat gently on low heat to avoid breaking the delicate texture of the paws.
  • If freezing, store in single portions to make reheating quick and easy.

12. Advanced Culinary Terms and Techniques

  • Velveting: A technique where meat is coated in a mixture of cornstarch, egg white, and rice wine to create a tender texture.
  • Glazing: The process of reducing a sauce until it thickly coats the paws, creating a glossy finish.
  • Braising: Cooking the chicken paws slowly in liquid to infuse them with flavor while tenderizing.

13. Healthy Ingredient Alternatives

  • Low-Sodium Soy Sauce: Reduces sodium content while maintaining flavor.
  • Honey or Maple Syrup: Use these instead of sugar for a natural sweetness.
  • Vegetable Broth: Substitute for water to add extra nutrients and flavor.

14. More Serving Ideas

  • Toss the chicken paws in a spicy buffalo sauce for a fusion twist.
  • Serve cold as part of a salad with a tangy sesame dressing.
  • Use them as a topping for ramen or noodle soup for added richness.

15. Common Issues and Solutions

Problem: Chicken Paws Are Tough

  • Solution: Extend the simmering time until they become tender.

Problem: Sauce Is Too Thin

  • Solution: Simmer uncovered or add a cornstarch slurry to thicken.

16. Variations to Try

  • Spicy Chicken Paws: Add Szechuan peppercorns and chili oil for a fiery dish.
  • BBQ Chicken Paws: Marinate in BBQ sauce and grill for a smoky flavor.
  • Herbal Paws: Simmer with lemongrass, kaffir lime leaves, and coconut milk for a Southeast Asian-inspired dish.

17. Nutritional Information and Health Benefits

Chicken paws are:

  • Rich in Collagen: Promotes healthy joints, skin elasticity, and hair growth.
  • Low in Calories: A nutrient-dense option for those watching their intake.
  • Full of Minerals: Provides calcium and magnesium, essential for bone health.

18. The Art of Pairing

Pair chicken paws with:

  • Drink: A light beer or herbal tea to balance the richness of the dish.
  • Side Dish: Steamed jasmine rice or garlic noodles complement the flavors beautifully.
  • Dessert: Finish the meal with a fresh fruit salad or mango sticky rice.

19. Weather and Recipe Outcome

Chicken paws are a perfect comfort food for colder weather, offering warmth and richness. In warmer climates, serve them chilled in a tangy sauce for a refreshing alternative.


20. Other Recipes to Explore

  • Chicken Adobo: A tangy, savory Filipino dish.
  • Beef Bone Broth: Another collagen-rich option.
  • Braised Pork Feet: Similar in texture, offering a different flavor profile.

21. Focus on Tools and Equipment

  • Kitchen Shears: Essential for trimming nails quickly and cleanly.
  • Heavy-Bottomed Pan: Ensures even cooking and prevents sticking.
  • Fine Mesh Strainer: Useful for rinsing the paws and separating the sauce.

22. Frequently Asked Questions

Q: Can I skip blanching the chicken paws?
Blanching is highly recommended to remove impurities and achieve a cleaner flavor.

Q: How do I make chicken paws crispier?
After simmering, pat them dry and fry in hot oil until crispy.

Q: Can I use frozen chicken paws?
Yes, just thaw them completely before cooking to ensure even results.


Conclusion

Chicken paws might be an unconventional choice, but they’re a culinary delight waiting to be discovered. With their unique texture, deep flavor absorption, and health benefits, they’re a versatile ingredient that can shine in a variety of dishes.

From simmering to frying, the possibilities with chicken paws are endless. So, roll up your sleeves, embrace the process, and let this humble ingredient transform into something extraordinary. Happy cooking!