Easy Macaroni Coleslaw Recipe

Macaroni Coleslaw Recipe

Introduction

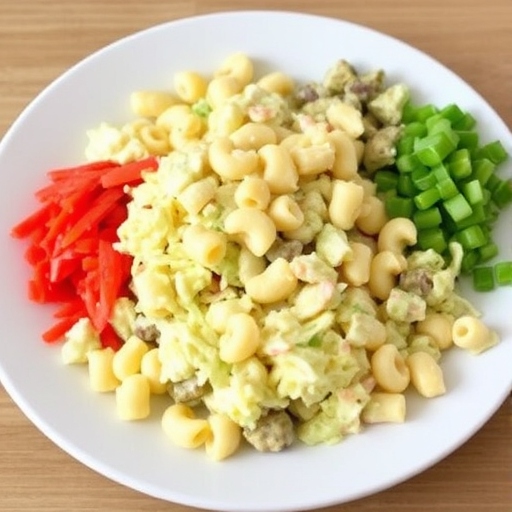
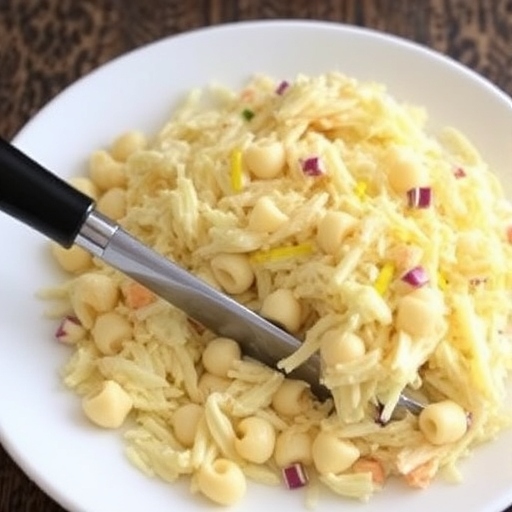
Macaroni coleslaw is the perfect fusion of two classic comfort foods: creamy coleslaw and hearty macaroni salad. This dish combines tender pasta with crisp, crunchy vegetables and a creamy dressing that’s tangy, sweet, and utterly satisfying. Whether served at a barbecue, picnic, or family gathering, macaroni coleslaw is sure to become a favorite at your table. The best part? It’s quick to prepare, customizable to your preferences, and a guaranteed crowd-pleaser!


The Story Behind Macaroni Coleslaw

While both macaroni salad and coleslaw have long histories in American cuisine, the combination of the two into one dish became popular as part of the growing trend for salad recipes in the 20th century. Macaroni salad, often associated with summer picnics and barbecues, was a staple in American homes, as was coleslaw—a dish that dates back to the early Dutch settlers in New York. The two came together as a playful and delicious way to enjoy the creamy textures and fresh crunch in one dish. Macaroni coleslaw adds an extra layer of comfort, offering the best of both worlds with every bite.


The Benefits of Making Your Own Macaroni Coleslaw

  • Fresh Ingredients: Homemade macaroni coleslaw lets you control the quality of the ingredients, using fresh, seasonal vegetables and real, wholesome ingredients.
  • Customization: You can easily adjust the level of sweetness, tanginess, or creaminess to suit your tastes.
  • Versatility: Perfect for serving at a variety of events, from casual barbecues to potlucks. It pairs well with meats, seafood, and even as a stand-alone dish.
  • Healthier Option: By making your own dressing, you avoid unnecessary preservatives, while still enjoying the creamy indulgence of store-bought versions.

Essential Ingredients for the Perfect Macaroni Coleslaw

  • Macaroni Pasta: Small elbow macaroni or shell pasta is ideal for soaking up the creamy dressing.
  • Cabbage: Finely shredded green cabbage is the base of any good coleslaw, adding crunch and freshness.
  • Carrots: Shredded carrots provide sweetness and color to the dish.
  • Red Onion: Adds a mild onion flavor with a pop of color.
  • Mayonnaise: The creamy base of the dressing, bringing richness to the dish.
  • Vinegar: Apple cider vinegar or white vinegar adds tanginess to balance the richness of the mayo.
  • Sugar: A bit of sugar enhances the sweetness of the coleslaw, balancing the acidity.
  • Dijon Mustard: For a touch of sharpness and depth of flavor.
  • Celery Seed: Adds a subtle aromatic note that’s typical in classic coleslaw.
  • Salt and Pepper: Essential seasonings for enhancing the flavor.

Cultural History of Ingredients

  • Macaroni Pasta: Though associated with Italian cuisine, pasta became widely popular in the U.S. during the 19th century, particularly after the Italian immigration waves.
  • Cabbage: This versatile vegetable is a staple in many global cuisines, dating back to ancient civilizations, and has been an essential ingredient in coleslaw for centuries.
  • Mayonnaise: Believed to have originated in France in the 18th century, mayonnaise became popular in the U.S. by the late 1800s and remains a key ingredient in many salad recipes, including macaroni and coleslaw.

Equipment You’ll Need

  • Large mixing bowl
  • Pot for boiling pasta
  • Strainer for draining pasta
  • Grater for shredding vegetables
  • Whisk for mixing dressing
  • Measuring spoons for seasonings

Step-by-Step Instructions for Macaroni Coleslaw

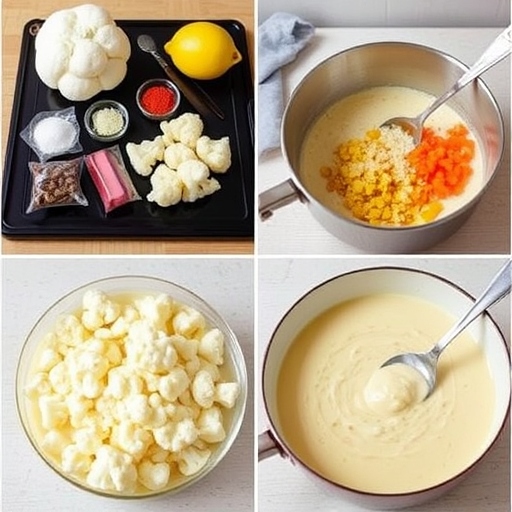
  1. Cook the Pasta: Bring a large pot of salted water to a boil. Add the macaroni and cook according to package instructions, about 8-10 minutes, until tender. Drain and set aside to cool.
  2. Prepare the Vegetables: While the pasta is cooking, shred the cabbage and carrots. Finely chop the red onion.
  3. Make the Dressing: In a separate bowl, whisk together mayonnaise, vinegar, sugar, Dijon mustard, celery seed, salt, and pepper until smooth. Adjust the sweetness and tanginess to your taste by adding more sugar or vinegar if needed.
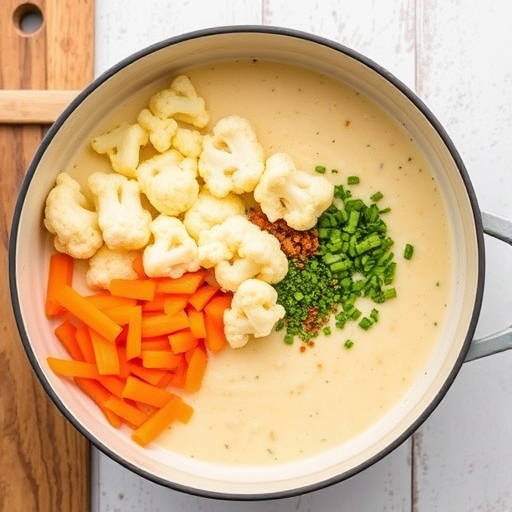
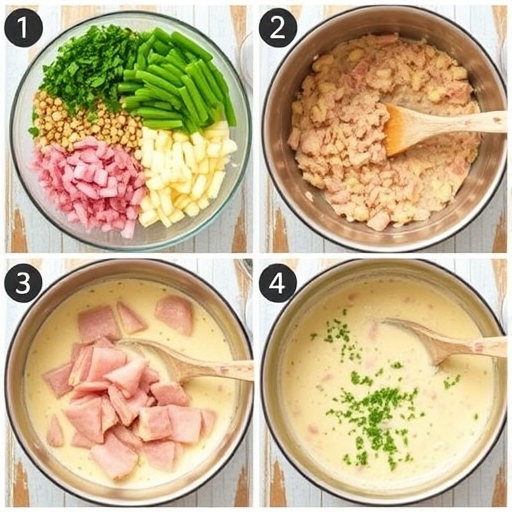
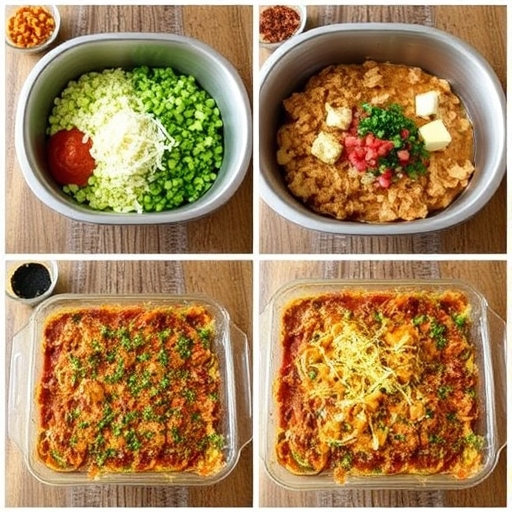
  4. Combine the Ingredients: In a large mixing bowl, combine the cooked and cooled pasta with the shredded vegetables.
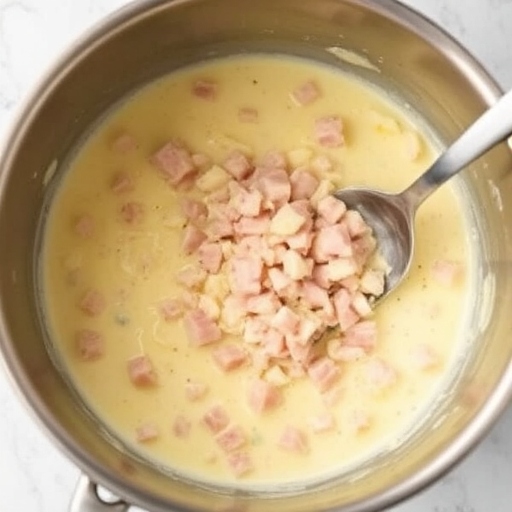
  5. Add the Dressing: Pour the dressing over the pasta and vegetable mixture. Stir until everything is well-coated.
  6. Chill: Refrigerate the macaroni coleslaw for at least 30 minutes before serving, allowing the flavors to meld together.
  7. Serve: Serve chilled as a side dish at your next gathering or barbecue.

Suggestions for Serving and Storing

  • Serving: Macaroni coleslaw is perfect as a side dish for grilled meats, such as burgers, hot dogs, or chicken. It also complements seafood dishes, like shrimp or grilled fish.
  • Storing: Store leftover macaroni coleslaw in an airtight container in the fridge for up to 3 days. The flavors improve as it sits, but the salad may become slightly wetter over time due to the moisture from the vegetables.

Chef Simon’s Tips for Macaroni Coleslaw

  • Make it Ahead: Macaroni coleslaw tastes even better when made a day ahead. The pasta and vegetables have more time to soak up the dressing.
  • Customize with Add-ins: Consider adding diced apples, raisins, or chopped celery for an extra layer of flavor and crunch.
  • Use a Tangy Vinegar: Apple cider vinegar or white vinegar adds the perfect amount of tang, balancing the sweetness of the mayonnaise.
  • Chill the Salad: Let the coleslaw chill for at least 30 minutes to allow the flavors to develop and the dressing to thicken.

Emotional and Psychological Impact of Food

Food has a powerful emotional connection, and macaroni coleslaw is no exception. This dish, often served at family gatherings, brings feelings of comfort, warmth, and nostalgia. The creamy texture and sweet-tangy flavor evoke happy memories of summer days, picnics, and special celebrations. The simple act of sharing a bowl of macaroni coleslaw can strengthen bonds and provide a sense of belonging.


Mindful Cooking Techniques

As you prepare macaroni coleslaw, take the time to appreciate the different textures and colors of the ingredients. Notice the crispness of the cabbage, the sweetness of the carrots, and the softness of the macaroni. This mindful approach to cooking helps you connect with the food you’re preparing and enhances the enjoyment of the final dish.


Tips for Keeping the Recipe Fresh Longer

  • To prevent the coleslaw from becoming too soggy, store the dressing separately and mix it in just before serving.
  • If you plan to keep the salad for a few days, consider adding a little extra cabbage and carrots to maintain freshness.

Advanced Culinary Terms and Techniques

  • Emulsifying: The process of combining the oil and vinegar-based dressing with the mayonnaise to create a smooth, cohesive sauce. This is essential for achieving the creamy texture of the coleslaw.
  • Macerating: Letting the vegetables and dressing sit together to draw out moisture and blend the flavors before serving.

Healthy Ingredient Alternatives

  • Mayonnaise: For a lighter version, use Greek yogurt or a mayo substitute like avocado.
  • Sugar: You can substitute regular sugar with honey, maple syrup, or a sugar alternative like stevia.
  • Pasta: Swap regular macaroni with whole wheat pasta or gluten-free pasta for a healthier option.
  • Add Veggies: For added nutritional value, consider adding bell peppers, cucumbers, or peas.

More Serving Ideas

  • Add a protein like grilled chicken or tofu to turn this macaroni coleslaw into a complete meal.
  • Serve it alongside other salads, such as potato salad or a simple green salad with vinaigrette, for a diverse spread at your next event.

Common Issues and Solutions

  • Too Runny: If the dressing is too thin, add more mayo or a bit of sour cream to thicken it.
  • Too Sweet or Tangy: Adjust the sugar or vinegar until the flavor balance is to your liking.
  • Wilted Veggies: To keep your vegetables crisp, don’t mix the dressing into the vegetables until just before serving.
  • Dry Pasta: Ensure the pasta is cooked al dente and properly cooled before mixing it with the vegetables and dressing to avoid soggy noodles.

Variations to Try

  • Bacon Macaroni Coleslaw: Add crispy bacon bits to the coleslaw for a savory crunch.
  • Spicy Macaroni Coleslaw: Incorporate diced jalapeños or a teaspoon of sriracha sauce for a spicy twist.
  • Asian-Inspired Macaroni Coleslaw: Replace the mayonnaise with a sesame dressing, and add soy sauce and ginger for an Asian flavor profile.

Nutritional Information and Health Benefits

Each serving of macaroni coleslaw (about 1/2 cup) provides approximately:

  • Calories: 200
  • Protein: 4g
  • Fat: 12g
  • Carbohydrates: 22g
  • Fiber: 2g
  • Sugar: 5g
  • Sodium: 200mg

Health Benefits:

  • Carbohydrates: The pasta in macaroni coleslaw provides a good source of energy from complex carbohydrates.
  • Fiber: The vegetables like cabbage and carrots offer dietary fiber, which promotes healthy digestion and helps maintain a feeling of fullness.
  • Healthy Fats: By using mayonnaise with healthy oils or alternatives like Greek yogurt or avocado, the dish can provide a healthier fat source.
  • Vitamins: The cabbage and carrots are packed with essential vitamins like Vitamin A (from carrots) and Vitamin C (from cabbage), both of which support immune health.

The Art of Pairing Macaroni Coleslaw

Macaroni coleslaw pairs wonderfully with a variety of dishes, making it a versatile addition to any meal. Some of the best pairings include:

  • Grilled Meats: Whether it’s hamburgers, hot dogs, or grilled chicken, macaroni coleslaw complements the smokiness of the meat.
  • Seafood: Serve it alongside grilled shrimp or a fish fillet for a refreshing contrast.
  • Barbecue: Macaroni coleslaw is a classic side dish for any barbecue spread, balancing the rich and smoky flavors of the grilled meats.
  • Sandwiches and Wraps: Pair it with a turkey or ham sandwich or even a wrap for a delicious, satisfying meal.
  • Vegetarian Options: It also works well with vegetarian dishes like veggie burgers or grilled portobello mushrooms, offering a satisfying crunch to complement the softer textures.

Weather and Recipe Outcome

Macaroni coleslaw is a dish that can be enjoyed year-round, whether you’re looking for a cooling side dish in the heat of summer or a hearty accompaniment to a winter meal. Its creamy, crunchy texture makes it equally appealing on a warm day as it does when served alongside a cozy, hot meal.


Other Salad Recipes to Explore

If you love macaroni coleslaw, you may also enjoy these other delicious salad options that offer similar comforting flavors and textures:

  • Potato Salad: A classic side dish made with tender potatoes, eggs, and a creamy dressing.
  • Classic Coleslaw: A tangy, crunchy salad made with shredded cabbage, carrots, and a vinegar-based dressing.
  • Greek Pasta Salad: A Mediterranean-inspired salad with olives, feta cheese, cucumber, and a zesty dressing.
  • Cucumber Salad: A refreshing and light salad made with cucumbers, dill, and a tangy vinaigrette.

Focus on Tools and Equipment

For making the perfect macaroni coleslaw, consider investing in the following kitchen tools:

  • Food Processor: To quickly shred vegetables like cabbage and carrots.
  • Large Mixing Bowl: Ensure you have a spacious bowl to mix all the ingredients thoroughly.
  • Colander: A reliable colander for draining the pasta after boiling.
  • Whisk: A tool that ensures your dressing is perfectly emulsified and smooth.

Frequently Asked Questions (with Answers)

1. Can I make macaroni coleslaw ahead of time?
Yes! In fact, macaroni coleslaw tastes even better when made a few hours or a day in advance. Just store it in an airtight container in the fridge, and let the flavors meld.

2. How do I make macaroni coleslaw less creamy?
If you want a lighter, less creamy version, reduce the amount of mayonnaise and replace it with Greek yogurt or a lower-fat option.

3. Can I use gluten-free pasta?
Absolutely! Substitute the regular pasta with gluten-free pasta to make this dish suitable for those with gluten sensitivities.

4. What can I add to macaroni coleslaw to give it a little kick?
For a spicy version, add diced jalapeños, red pepper flakes, or a bit of hot sauce to the dressing for extra heat.

5. How can I make macaroni coleslaw healthier?
You can make it healthier by using whole wheat or gluten-free pasta, substituting mayonnaise with a lighter option like Greek yogurt, and adding more vegetables like bell peppers or cucumbers.


Conclusion

Macaroni coleslaw is a versatile and easy-to-make dish that brings comfort and flavor to any meal. With its creamy dressing, crisp vegetables, and hearty pasta, it’s a crowd-pleaser that’s perfect for gatherings, picnics, or a simple family dinner. Whether you stick with the classic recipe or experiment with different add-ins and variations, this dish is sure to become a staple on your table. So, next time you’re craving a fresh, satisfying side, give macaroni coleslaw a try and enjoy the bright, tangy flavors in every bite!


Thank you for visiting SqueezyRecipes! We’re dedicated to making cooking enjoyable and accessible for everyone, regardless of your skill level. Chef Simon is always ready to share the best recipes that bring a creative touch to your daily meals. With each visit, you’ll discover new recipes and innovative ideas that cater to every occasion. Don’t miss out on exploring SqueezyRecipes for the latest delicious dishes, and feel free to leave your feedback and share your experiences with the recipes you’ve tried. Cooking together makes everything better!

Best Cauliflower Soup Recipe

Cauliflower Soup Recipe

Introduction

Cauliflower soup is a creamy, comforting dish that’s perfect for chilly days or as a light yet filling meal. With its velvety texture and delicate flavor, cauliflower soup is a great way to enjoy this versatile vegetable in a new and exciting way. Whether you’re making it for a cozy dinner or as a starter to a larger meal, this cauliflower soup is sure to satisfy your taste buds and leave you feeling nourished.


The Story Behind Cauliflower Soup

Cauliflower has been a staple in global cuisines for centuries, often celebrated for its versatility. From roasted cauliflower to cauliflower rice, this vegetable has recently gained even more popularity due to its health benefits and ability to replace traditional high-carb ingredients. Cauliflower soup has been enjoyed for generations, particularly in Europe, where the mild flavor and creamy consistency make it ideal for blending with various seasonings. In this modern version, cauliflower is cooked and pureed to create a rich, silky-smooth soup that’s simple yet indulgent.


The Benefits of Making Your Own Cauliflower Soup

  • Fresh Ingredients: Homemade cauliflower soup lets you control the quality of the ingredients, ensuring you use fresh cauliflower and wholesome ingredients.
  • Customizable Flavor: You can adjust the seasoning, add more herbs, or even incorporate different vegetables for added complexity.
  • Healthier Option: Cauliflower is packed with nutrients like fiber, vitamins, and antioxidants, and making the soup at home ensures it’s free from preservatives and unhealthy additives often found in store-bought versions.
  • Comforting and Nourishing: This soup is not only delicious but also full of nutrients that support immune health, digestive function, and overall well-being.

Essential Ingredients for the Perfect Cauliflower Soup

  • Cauliflower: The star of the dish, providing a creamy base when pureed.
  • Onion: A fragrant base flavor for the soup, adding depth to the overall taste.
  • Garlic: Adds a layer of savory warmth and complexity.
  • Vegetable Broth: A flavorful liquid that helps create a rich, savory base for the soup.
  • Olive Oil or Butter: For sautéing the vegetables and adding richness to the soup.
  • Cream or Milk: Adds creaminess and smoothness to the soup. You can use a non-dairy alternative like almond milk for a vegan version.
  • Thyme or Bay Leaves: These herbs add aromatic flavors that enhance the soup’s depth.
  • Salt and Pepper: Essential seasonings to balance the flavors.
  • Lemon Juice or Vinegar: A touch of acidity to brighten the flavors and balance the richness.

Cultural History of Ingredients

  • Cauliflower: Originating from the Mediterranean, cauliflower was cultivated as early as the 6th century and became widely popular in Europe in the 16th century.
  • Garlic: Garlic has a long history in culinary and medicinal uses, dating back to ancient Egypt. It is a key ingredient in many dishes across different cultures, offering flavor and health benefits.
  • Olive Oil: Known as the “liquid gold” of the Mediterranean, olive oil has been used in cooking for over 5,000 years. It’s rich in healthy fats and imparts a distinctive flavor to many dishes.
  • Thyme: A herb native to the Mediterranean region, thyme has been used for culinary and medicinal purposes for thousands of years. Its earthy, slightly floral flavor enhances many dishes, particularly soups.

Equipment You’ll Need

  • Large pot or Dutch oven
  • Knife and cutting board
  • Blender or immersion blender
  • Measuring spoons
  • Ladle for serving

Step-by-Step Instructions for Cauliflower Soup

  1. Prepare the Vegetables: Wash and chop the cauliflower into florets. Dice the onion and garlic.
  2. Sauté the Aromatics: Heat olive oil or butter in a large pot over medium heat. Add the diced onion and cook until translucent, about 5 minutes. Add the garlic and cook for another minute until fragrant.
  3. Cook the Cauliflower: Add the cauliflower florets to the pot, stirring to combine with the onion and garlic. Cook for 5-7 minutes, allowing the cauliflower to soften slightly.
  4. Add the Broth: Pour in the vegetable broth, ensuring that the cauliflower is submerged. Add thyme or bay leaves and bring the soup to a simmer. Let it cook for 15-20 minutes, or until the cauliflower is tender.
  5. Blend the Soup: Remove the soup from heat and discard the thyme or bay leaves. Use an immersion blender to puree the soup directly in the pot, or transfer the soup in batches to a blender. Blend until smooth and creamy.
  6. Add Cream or Milk: Stir in the cream or milk to achieve the desired creaminess. If you prefer a dairy-free version, use coconut milk or almond milk.
  7. Season the Soup: Taste and adjust the seasoning with salt, pepper, and a squeeze of lemon juice or vinegar to brighten the flavors.
  8. Serve: Ladle the soup into bowls and garnish with fresh herbs, a drizzle of olive oil, or a sprinkle of cheese, if desired. Serve warm.

Suggestions for Serving and Storing

  • Serving: Serve the soup as a starter to a meal or pair it with a slice of crusty bread, a salad, or a grilled cheese sandwich for a comforting lunch.
  • Storing: Store leftovers in an airtight container in the refrigerator for up to 3 days. You can also freeze the soup for up to 3 months. To reheat, simply warm on the stove over low heat until heated through.

Chef Simon’s Tips for Cauliflower Soup

  • For Extra Flavor: Roasting the cauliflower before adding it to the soup can deepen the flavor and give it a rich, caramelized taste.
  • Vegan Version: Use coconut milk or almond milk instead of cream, and make sure to use vegetable broth instead of chicken broth.
  • Texture Variations: For a chunkier soup, blend only half of the soup and leave the rest of the cauliflower in small pieces.
  • Add Toppings: Try adding crispy bacon, roasted nuts, or grated cheese as toppings for added texture and flavor.

Emotional and Psychological Impact of Food

Cauliflower soup offers comfort and warmth, often evoking feelings of relaxation and contentment. Its creamy texture and mild flavor create a sense of coziness, perfect for a peaceful meal at home. Soup has the power to soothe, nourish, and uplift the spirit, especially during colder months or when you’re in need of a comforting dish. The simple act of sipping on a bowl of homemade cauliflower soup can provide a sense of calm and well-being.


Mindful Cooking Techniques

As you prepare this cauliflower soup, take time to appreciate the process. Notice the transformation of the cauliflower from raw to tender, and savor the aromatic smells that fill your kitchen as you sauté the onion and garlic. Be mindful of your seasoning choices, adjusting the salt, pepper, and acidity until the flavors are perfectly balanced. Mindful cooking connects you to the food you create and enhances the experience of enjoying the final dish.


Tips for Keeping the Recipe Fresh Longer

  • Refrigeration: Store the soup in an airtight container in the fridge for up to 3 days. The soup will continue to thicken as it sits, so you may need to add a little water or broth when reheating.
  • Freezing: Cauliflower soup can be frozen for up to 3 months. When reheating from frozen, warm the soup slowly on the stove and add extra liquid if needed.

Advanced Culinary Terms and Techniques

  • Pureeing: The process of blending the soup to create a smooth and velvety texture. An immersion blender is ideal for this, as it allows you to blend the soup directly in the pot.
  • Deglazing: This technique involves adding a small amount of liquid to the pot after sautéing the vegetables to lift any flavorful browned bits from the bottom, adding richness to the soup’s flavor.

Healthy Ingredient Alternatives

  • Cream: For a lighter version, substitute the cream with coconut milk, almond milk, or cashew cream.
  • Butter: Use olive oil or avocado oil as a healthier alternative to butter.
  • Add More Veggies: For extra nutrition, you can add other vegetables, such as carrots, celery, or potatoes, to the soup.

More Serving Ideas

  • Serve with a fresh, crunchy salad, such as a mixed greens salad with a light vinaigrette.
  • Pair the soup with a sandwich, such as a classic grilled cheese or a roasted vegetable sandwich, for a hearty and satisfying meal.
  • Top with a swirl of pesto or a sprinkle of parmesan for added flavor.

Common Issues and Solutions

  • Soup Too Thick: If your soup is too thick, simply add a little more broth or water to reach your desired consistency.
  • Too Watery: If the soup is too thin, cook it for a bit longer to reduce the liquid and concentrate the flavors.
  • Flavor Needs Adjustment: If the soup tastes bland, try adding more seasoning, such as salt, pepper, or lemon juice, to brighten the flavors.

Variations to Try

  • Spicy Cauliflower Soup: Add a pinch of red pepper flakes or a diced jalapeño for a spicy kick.
  • Cheesy Cauliflower Soup: Stir in some shredded cheddar or parmesan cheese for a rich, cheesy

flavor that will melt into the creamy soup base.

  • Curried Cauliflower Soup: Add a teaspoon of curry powder or turmeric to give the soup a warm, aromatic flavor that’s both comforting and exotic.
  • Roasted Cauliflower Soup: For an extra layer of flavor, roast the cauliflower before blending it into the soup. Roasting caramelizes the natural sugars in the cauliflower, giving the soup a deeper, richer taste.

Nutritional Information and Health Benefits

Nutrition (per serving):

  • Calories: 180
  • Protein: 3g
  • Fat: 10g (from olive oil or butter)
  • Carbohydrates: 20g
  • Fiber: 4g
  • Sugar: 5g
  • Sodium: 400mg

Health Benefits:

  • Cauliflower: High in fiber and low in calories, cauliflower is a great vegetable for supporting digestive health and weight management. It’s also rich in antioxidants like Vitamin C and sulfur compounds that support the body’s detoxification processes.
  • Garlic: Known for its immune-boosting properties, garlic contains allicin, which has antibacterial and antiviral benefits.
  • Olive Oil: Rich in healthy monounsaturated fats, olive oil can help reduce inflammation and support heart health.
  • Vitamins and Minerals: This soup provides a good source of Vitamin C, Vitamin K, folate, and potassium, all of which contribute to overall health, including immune function and bone health.

The Art of Pairing Cauliflower Soup

Cauliflower soup is versatile and pairs well with a variety of dishes. Here are a few perfect pairings to complement its creamy, comforting nature:

  • Salads: A fresh mixed green salad with a tangy vinaigrette balances the richness of the soup.
  • Bread: Pair it with a crusty baguette, sourdough, or a slice of whole-grain bread to soak up the soup’s creamy base.
  • Roasted Meats: Serve with roasted chicken or turkey for a heartier meal.
  • Cheese: A side of sharp cheddar or a sprinkle of parmesan adds a savory, umami-rich contrast.
  • Herbs and Spices: Garnish the soup with fresh herbs like parsley, thyme, or chives for added flavor and a pop of color.

Weather and Recipe Outcome

Cauliflower soup is an ideal dish for cooler weather. Its creamy texture and warming flavors make it perfect for fall and winter months, bringing comfort and satisfaction to the table. On a rainy day or after a long, chilly walk, this soup can bring a sense of warmth and contentment. It’s also a great option for a cozy, light lunch during the colder months or as a starter for a more elaborate dinner.


Other Soup Recipes to Explore

If you love cauliflower soup, here are a few other delicious soup recipes you might want to try:

  • Butternut Squash Soup: A velvety, slightly sweet soup made with roasted butternut squash, onions, and warm spices.
  • Lentil Soup: A hearty and nutritious soup made with lentils, vegetables, and aromatic herbs.
  • Tomato Basil Soup: A classic soup that combines ripe tomatoes, fresh basil, and cream for a comforting meal.
  • Leek and Potato Soup: A creamy, comforting soup made with tender leeks and potatoes, perfect for a cozy evening.

Focus on Tools and Equipment

To make cauliflower soup, you’ll need the following tools and equipment:

  • Blender or Immersion Blender: A high-powered blender or an immersion blender is essential for achieving the smooth and creamy texture of the soup.
  • Large Pot or Dutch Oven: A sturdy pot for sautéing the vegetables and simmering the soup.
  • Cutting Board and Knife: A sharp knife and a large cutting board will make chopping the cauliflower and vegetables much easier.
  • Ladle: A ladle is helpful for serving the soup without making a mess.

Frequently Asked Questions (with Answers)

1. Can I make this cauliflower soup ahead of time?
Yes, this soup can be made ahead and stored in the refrigerator for up to 3 days. It can also be frozen for up to 3 months. Just reheat before serving.

2. Is cauliflower soup suitable for vegans?
Yes! To make it vegan, simply use vegetable broth instead of chicken broth and swap the cream for coconut milk or almond milk.

3. Can I use frozen cauliflower for this recipe?
Yes, frozen cauliflower works perfectly fine for this soup. Just be sure to thaw and drain it before using it in the recipe.

4. How do I make the soup spicier?
You can add a pinch of red pepper flakes, a diced jalapeño, or a dash of hot sauce to give the soup a spicy kick.

5. Can I add other vegetables to this soup?
Yes, you can easily add other vegetables like carrots, celery, or potatoes to enhance the flavor and texture of the soup.


Conclusion

Cauliflower soup is a wholesome and satisfying dish that offers both comfort and nourishment. Its creamy, velvety texture and subtle, savory flavor make it a perfect addition to your repertoire of soups. Whether you serve it as a main dish, a starter, or alongside your favorite protein, this cauliflower soup is sure to become a favorite in your household. With its simplicity, nutritional benefits, and ability to be easily customized, it’s the perfect dish for any season.


Thank you for visiting SqueezyRecipes! We’re dedicated to making cooking enjoyable and accessible for everyone, regardless of your skill level. Chef Simon is always ready to share the best recipes that bring a creative touch to your daily meals. With each visit, you’ll discover new recipes and innovative ideas that cater to every occasion. Don’t miss out on exploring SqueezyRecipes for the latest delicious dishes, and feel free to leave your feedback and share your experiences with the recipes you’ve tried. Cooking together makes everything better!

Easy Ham Chowder Recipe

Ham Chowder Recipe

Introduction

A rich, creamy, and comforting bowl of ham chowder is a perfect dish to warm you up on a chilly day. This hearty soup combines savory ham, tender potatoes, and a luscious, creamy base, all topped with fresh herbs for a satisfying meal. Whether you’re looking for a filling lunch or a comforting dinner, this ham chowder recipe has everything you need to indulge your taste buds.


The Story Behind Ham Chowder

Ham chowder has long been a beloved comfort food, particularly in regions where ham is a staple. It’s a versatile dish that allows for creativity, often made from leftover ham, making it a practical yet flavorful meal. The addition of potatoes and a creamy broth gives the chowder its hearty texture, making it a go-to choice for cozy family meals or holiday leftovers.


The Benefits of Making Your Own Ham Chowder

Making ham chowder from scratch allows you to control the quality of ingredients, ensuring a fresh and flavorful outcome. By preparing the soup at home, you can also modify the recipe to suit dietary preferences or eliminate preservatives often found in store-bought versions. Plus, homemade chowder is customizable, whether you prefer it extra creamy or with a bit more spice. Best of all, it’s a great way to repurpose leftover ham, minimizing food waste and creating a delicious, satisfying dish.


Essential Ingredients for the Perfect Ham Chowder

  • Ham: Use leftover cooked ham or diced fresh ham for a salty, savory base.
  • Potatoes: Russet potatoes are ideal due to their starchy nature, which thickens the chowder and gives it a creamy texture.
  • Onion: A finely chopped onion adds sweetness and depth to the chowder.
  • Carrots: Chopped carrots bring both color and a subtle sweetness to the dish.
  • Celery: Chopped celery provides a nice crunch and a fresh, aromatic flavor.
  • Broth: Chicken or vegetable broth forms the soup base, adding savory flavor.
  • Milk and Cream: These ingredients make the chowder creamy and rich.
  • Seasonings: Salt, pepper, thyme, and bay leaves enhance the overall flavor of the soup.
  • Corn (optional): Adds sweetness and texture to the chowder.

Cultural History of Ingredients

  • Ham: Ham has been a traditional protein in many cultures, often used in stews and soups. It’s especially common in European and American cuisines, where it was historically a preserved meat used to feed families during colder months.
  • Potatoes: Native to the Andes, potatoes have become a global food staple. They are rich in carbohydrates and serve as a hearty base in many soups, including chowders.
  • Cream: Cream has been a culinary staple in European cooking for centuries. Its rich, smooth texture enhances the flavor of many soups, including chowders.

Equipment You’ll Need

  • Large Pot or Dutch Oven: Ideal for cooking and simmering the chowder ingredients together.
  • Sharp Knife: For chopping vegetables and ham.
  • Cutting Board: To chop all your ingredients.
  • Ladle: To serve the chowder.
  • Whisk: To mix the milk and cream smoothly without clumps.

Step-by-Step Instructions for Ham Chowder

  1. Prepare Ingredients:
    Begin by dicing the ham, potatoes, carrots, celery, and onion. Set the vegetables aside.
  2. Cook the Vegetables:
    In a large pot, heat some olive oil or butter over medium heat. Add the diced onions, carrots, and celery. Cook for 5-7 minutes until softened.
  3. Add Potatoes and Broth:
    Stir in the diced potatoes and add the broth. Bring the mixture to a simmer. Allow it to cook for about 15-20 minutes until the potatoes are tender.
  4. Add Ham and Seasonings:
    Add the diced ham to the pot along with salt, pepper, thyme, and bay leaves. Continue to simmer for another 5 minutes, letting the flavors meld together.
  5. Make it Creamy:
    Stir in the milk and heavy cream. Bring the chowder back to a simmer and cook for another 5-10 minutes, allowing it to thicken. If you prefer a thicker texture, you can mash some of the potatoes with a spoon.
  6. Taste and Adjust Seasoning:
    Taste the chowder and adjust seasoning as needed, adding more salt, pepper, or thyme.
  7. Serve:
    Remove the bay leaves before serving. Ladle the chowder into bowls and garnish with fresh parsley or chives.

Suggestions for Serving and Storing

  • Serving Suggestions:
    Serve the ham chowder with warm, crusty bread or a side salad. For extra flavor, top the chowder with shredded cheese, crumbled bacon, or fresh herbs.
  • Storing:
    Leftover chowder can be stored in an airtight container in the refrigerator for up to 3 days. To reheat, gently warm the chowder over low heat. You can also freeze the chowder for up to 3 months. Just be aware that the texture may change slightly upon reheating.

Chef Simon’s Tips for Ham Chowder

  • Extra Creaminess: For an ultra-creamy chowder, add a dollop of sour cream or cream cheese along with the milk and cream.
  • Flavor Boost: A splash of Worcestershire sauce or a sprinkle of smoked paprika can add depth and smokiness to the chowder.
  • Leftover Ham: Ham chowder is the perfect way to use up leftover holiday ham. You can also swap the ham for bacon for a different twist.

Emotional and Psychological Impact of Food

Ham chowder is a dish that evokes feelings of comfort, warmth, and nostalgia. The creamy, rich texture and savory flavors are often associated with cozy gatherings and family meals. The warmth of the soup can be emotionally soothing, making it the perfect food to eat when you need to relax or find a moment of peace.


Mindful Cooking Techniques

When making ham chowder, take your time to focus on the process. Enjoy the rhythmic chopping of the vegetables, the comforting simmer of the broth, and the transformation of simple ingredients into a warm, satisfying dish. Being mindful of the cooking process allows you to appreciate the sensory experience—smell, taste, and texture—enhancing your connection to the food.


Tips for Keeping the Recipe Fresh Longer

  • Cool Properly: Let the chowder cool down before storing it in the refrigerator to prevent condensation and bacterial growth.
  • Reheat Gently: When reheating, avoid bringing the soup to a boil. Reheat slowly on low heat to maintain its creamy texture.

Advanced Culinary Terms and Techniques

  • Simmering: The process of cooking food in liquid at a low temperature, just below boiling. This technique helps develop the flavors of the ingredients without overcooking them.
  • Mirepoix: A French term referring to a mixture of diced onions, carrots, and celery, used as a flavor base for many soups and stews.
  • Velouté: A French sauce made by thickening broth with a roux (butter and flour mixture). It is the base for many creamy soups, including chowders.

Healthy Ingredient Alternatives

  • Low-Fat Milk or Almond Milk: Use these for a lighter, dairy-free version of the chowder.
  • Turkey or Chicken: Swap out the ham for turkey or chicken for a leaner option.
  • Cauliflower: Replace some of the potatoes with cauliflower for a lower-carb, veggie-packed version.

More Serving Ideas

  • Grilled Cheese Sandwich: Serve with a classic grilled cheese sandwich for a comforting meal.
  • Topped with Bacon: Crumble crispy bacon on top of the chowder for a delicious crunch.
  • Chives or Parsley Garnish: Fresh herbs like chives or parsley add color and a fresh taste to each bowl.

Common Issues and Solutions

  • Too Thin: If the chowder is too thin, simmer it for a longer period to allow the potatoes to break down and thicken the soup. Alternatively, add a small amount of cornstarch mixed with water to thicken it up.
  • Too Salty: If the soup is too salty, add a peeled potato to the soup while simmering. The potato will absorb some of the excess salt.

Variations to Try

  • Vegetarian Ham Chowder: Make a vegetarian version by substituting ham with smoked tofu or tempeh.
  • Spicy Ham Chowder: Add a chopped jalapeño or a dash of hot sauce for a spicy kick.
  • Corn and Ham Chowder: Add a cup of sweet corn for a pop of color and sweetness.

Nutritional Information and Health Benefits

Nutrition (per serving):

  • Calories: 350
  • Protein: 20g
  • Fat: 18g (from ham and cream)
  • Carbohydrates: 30g
  • Fiber: 4g
  • Sugar: 4g
  • Sodium: 900mg

Health Benefits:

  • Ham: A good source of protein and B vitamins, which support muscle growth and energy production.
  • Potatoes: Rich in potassium and fiber, potatoes help support heart health and digestion.

The Art of Pairing Ham Chowder

When it comes to pairing ham chowder, think of complementary flavors that can elevate its rich, savory profile. Here are some excellent pairings:

  • Bread: A crusty baguette or a slice of hearty sourdough bread works wonderfully to soak up the creamy chowder.
  • Cheese: Grated sharp cheddar or crumbled goat cheese adds a tangy richness that balances the creaminess of the chowder.
  • Salad: A light green salad with vinaigrette can add a fresh contrast to the creamy texture of the chowder, making the meal feel more complete.
  • Wine: A medium-bodied white wine such as Chardonnay or a light Pinot Noir works well with the dish, complementing the savory flavors of the ham.

Weather and Recipe Outcome

Weather can significantly affect the outcome of your chowder. On cold, rainy days, the rich, hearty nature of ham chowder provides ultimate comfort, with its warm, creamy texture and savory flavor. On warmer days, the soup might be less appealing, but serving it at room temperature can still provide a satisfying dish. If you’re preparing ham chowder for a large family gathering, fall and winter months are ideal for serving, as the weather naturally leans toward cozy, warming meals.


Other Ham Recipes to Explore

If you enjoy this ham chowder, consider exploring other ham-based recipes:

  • Ham and Potato Casserole: A cheesy, baked dish with ham and potatoes, perfect for leftovers.
  • Ham and Cheese Croissants: Flaky croissants stuffed with savory ham and melted cheese.
  • Ham Salad Sandwiches: A light and flavorful way to use up leftover ham with creamy dressing and fresh vegetables.

Focus on Tools and Equipment

To make the best ham chowder, having the right tools will ensure a smooth cooking process:

  • Soup Pot/Dutch Oven: A large, heavy-bottomed pot helps in evenly cooking the soup while preventing burning.
  • Sharp Knife and Cutting Board: These are essential for easily chopping your vegetables and ham.
  • Immersion Blender (optional): If you prefer a smoother consistency, an immersion blender can help blend the soup without transferring it to a regular blender.

Frequently Asked Questions (with answers)

Q: Can I make ham chowder without cream?
A: Yes! You can substitute cream with milk or even coconut milk for a lighter option. For a richer texture, try using half-and-half or a thickened vegetable broth.

Q: How can I make ham chowder spicy?
A: Add chopped jalapeños, red pepper flakes, or a dash of hot sauce for a kick of heat. Adjust to taste based on your spice preference.

Q: How do I store leftovers?
A: Allow the chowder to cool before storing it in an airtight container. It will keep in the refrigerator for up to 3 days, or you can freeze it for up to 3 months. When reheating, do so slowly to avoid curdling the cream.

Q: Can I use frozen ham for this recipe?
A: Yes, frozen ham can be used. Just make sure it is thawed completely before adding it to the soup.

Q: Can I make this dish vegetarian?
A: Yes, you can use plant-based ham or smoked tofu as a substitute for the ham to make the dish vegetarian. You can also skip the ham altogether for a vegetable chowder.


Conclusion

Ham chowder is a comforting, hearty dish that brings warmth and satisfaction to the table. With tender ham, creamy potatoes, and a medley of vegetables, it’s a meal that combines both flavor and practicality. Whether you’re looking to use up leftover ham or simply enjoy a satisfying soup, this recipe is a fantastic choice. By following the steps, tips, and variations outlined above, you’ll create a dish that’s perfect for family dinners, special gatherings, or any day when comfort food is needed. Enjoy your delicious bowl of ham chowder, and feel free to experiment with the ingredients to make it your own!


Thank you for visiting SqueezyRecipes! We’re dedicated to making cooking enjoyable and accessible for everyone, regardless of your skill level. Chef Simon is always ready to share the best recipes that bring a creative touch to your daily meals. With each visit, you’ll discover new recipes and innovative ideas that cater to every occasion. Don’t miss out on exploring SqueezyRecipes for the latest delicious dishes, and feel free to leave your feedback and share your experiences with the recipes you’ve tried. Cooking together makes everything better!

Easy Grape Salad Recipe

Grape Salad Recipe

Introduction

Grape salad is a refreshing and sweet treat that’s perfect for potlucks, picnics, or as a light dessert. This creamy salad blends the crispness of fresh grapes with a luscious cream cheese dressing, topped with crunchy brown sugar and pecans. It’s an effortless recipe that balances textures and flavors, offering a delightful experience in every bite.


The Story Behind Grape Salad

Though grape salad feels like a classic Southern dish, its origins are somewhat mysterious. Some believe it originated in the Midwest and gained popularity across the U.S. thanks to its simplicity and universal appeal. Over the years, it has become a go-to recipe for gatherings, loved for its sweet and tangy flavor profile.


The Benefits of Making Your Own Grape Salad

  • Customizable Sweetness: Adjust the sugar level to match your taste preferences.
  • Healthier Ingredients: Use low-fat cream cheese or Greek yogurt for a lighter version.
  • Crowd-Pleasing: A guaranteed hit for any event or celebration.
  • Quick Preparation: Only a few minutes to assemble, making it ideal for last-minute needs.

Essential Ingredients for the Perfect Grape Salad

  • Grapes: A mix of red and green seedless grapes for a vibrant, sweet, and tangy combo.
  • Cream Cheese: Full-fat or low-fat, softened for easy blending.
  • Sour Cream: Adds tanginess to balance the sweetness.
  • Sugar: Granulated sugar for sweetness in the dressing.
  • Vanilla Extract: A hint of warmth and depth.
  • Brown Sugar: Sprinkled on top for a caramel-like flavor.
  • Pecans: Chopped for crunch and nuttiness.

Cultural History of Ingredients

  • Grapes: Domesticated over 6,000 years ago in the Middle East, grapes are now a global fruit staple.
  • Cream Cheese: Originating in the U.S. in the 19th century, it has become a beloved ingredient for both sweet and savory dishes.
  • Pecans: Native to North America, pecans have been a symbol of Southern cooking and hospitality.

Equipment You’ll Need

  • Mixing Bowls: To prepare the dressing and toss the salad.
  • Hand Mixer: For whipping the cream cheese and sour cream to a smooth consistency.
  • Spatula: For gently folding the grapes into the dressing.
  • Serving Dish: A large bowl or casserole dish for presentation.

Step-by-Step Instructions for Grape Salad

  1. Prepare the Grapes:
    • Wash and dry the grapes thoroughly. Halve them if desired, especially for easier eating.
  2. Make the Dressing:
    • In a mixing bowl, beat softened cream cheese, sour cream, granulated sugar, and vanilla extract until smooth and creamy.
  3. Combine Grapes and Dressing:
    • Gently fold the grapes into the dressing until evenly coated.
  4. Add Toppings:
    • Transfer the mixture to a serving dish. Sprinkle brown sugar and chopped pecans on top for a sweet crunch.
  5. Chill and Serve:
    • Refrigerate for at least 1 hour before serving to let the flavors meld. Serve cold.

Suggestions for Serving and Storing

  • Serving Suggestions:
    • Pair with savory dishes like BBQ ribs or grilled chicken for a balanced meal.
    • Serve as a dessert or side dish for festive occasions.
  • Storing:
    • Store leftovers in an airtight container in the refrigerator for up to 3 days. Avoid freezing, as the texture of the grapes will change.

Chef Simon’s Tips for Grape Salad

  • Variety of Grapes: Use a mix of black, red, and green grapes for a stunning visual presentation.
  • Nut Alternatives: Swap pecans for walnuts, almonds, or even crushed pretzels for a salty twist.
  • Healthier Dressing: Substitute Greek yogurt for sour cream to add protein and reduce fat content.

Emotional and Psychological Impact of Food

The bright colors and creamy sweetness of grape salad evoke feelings of joy and nostalgia, making it a comforting addition to family meals or special gatherings. Its light yet indulgent taste is perfect for creating positive associations with shared experiences.


Mindful Cooking Techniques

  • Engage Your Senses: Notice the vibrant colors of the grapes and the smooth texture of the dressing as you prepare the salad.
  • Be Present: Take your time folding the dressing into the grapes, ensuring each one is evenly coated.

Tips for Keeping the Recipe Fresh Longer

  • Store Separately: Keep the dressing and toppings separate from the grapes if preparing ahead of time. Combine just before serving for maximum freshness.
  • Use Fresh Grapes: Ensure your grapes are firm and fresh to maintain the best texture.

Advanced Culinary Terms and Techniques

  • Folding: Gently mixing ingredients to maintain their structure, used here to avoid crushing the grapes.
  • Caramelization: The brown sugar topping lightly caramelizes over time, adding depth to the dish.

Healthy Ingredient Alternatives

  • Low-Calorie Sweetener: Replace granulated sugar with stevia or monk fruit sweetener.
  • Non-Dairy Option: Use plant-based cream cheese and coconut yogurt for a vegan version.
  • Nut-Free: Omit nuts or replace with granola for a crunch without allergens.

More Serving Ideas

  • Breakfast Parfait: Layer grape salad with granola and yogurt for a nutritious morning treat.
  • Fruit Salad Mix: Add sliced apples, strawberries, or pineapple chunks for more variety.
  • On Toast: Spread over a slice of whole-grain bread for a quick snack.

Common Issues and Solutions

  • Watery Salad: Ensure grapes are fully dried before mixing to prevent excess liquid.
  • Overly Sweet: Adjust sugar levels in the dressing to suit your taste.
  • Soggy Topping: Add the brown sugar and pecans just before serving to keep them crisp.

Variations to Try

  • Tropical Grape Salad: Add shredded coconut and a drizzle of honey for a tropical twist.
  • Savory Grape Salad: Incorporate crumbled blue cheese and a touch of balsamic glaze.
  • Berry Medley Salad: Mix grapes with blueberries, raspberries, and blackberries for added flavor and color.

Nutritional Information and Health Benefits

Per Serving (approx. 1 cup):

  • Calories: 210
  • Protein: 3g
  • Fat: 10g
  • Carbohydrates: 29g
  • Fiber: 2g

Health Benefits:

  • Grapes are rich in antioxidants and vitamin C, promoting overall health.
  • Pecans provide healthy fats and essential nutrients.
  • Yogurt-based dressing options add probiotics for gut health.

The Art of Pairing Grape Salad

  • Main Course: Serve alongside roasted turkey or ham for a harmonious blend of sweet and savory.
  • Beverage: Pair with a crisp white wine like Riesling or a sparkling cider.
  • Dessert: Follow with a light lemon sorbet for a refreshing end to the meal.

Frequently Asked Questions (with answers)

Q: Can I make grape salad ahead of time?
A: Yes, prepare it up to 24 hours in advance, but add the toppings just before serving.

Q: Can I use frozen grapes?
A: While fresh grapes are ideal, frozen grapes can work in a pinch but may alter the texture.

Q: What’s a good nut-free topping?
A: Try granola, crushed graham crackers, or sunflower seeds for crunch.


Conclusion

Grape salad is a versatile, crowd-pleasing dish that’s as easy to make as it is to enjoy. Its creamy texture, vibrant colors, and sweet-tangy flavors make it a standout addition to any table. Whether you’re hosting a potluck or craving a unique dessert, this recipe is guaranteed to impress. Give it a try and see how quickly it becomes a favorite in your home!


Thank you for visiting SqueezyRecipes! We’re dedicated to making cooking enjoyable and accessible for everyone, regardless of your skill level. Chef Simon is always ready to share the best recipes that bring a creative touch to your daily meals. With each visit, you’ll discover new recipes and innovative ideas that cater to every occasion. Don’t miss out on exploring SqueezyRecipes for the latest delicious dishes, and feel free to leave your feedback and share your experiences with the recipes you’ve tried. Cooking together makes everything better!

Creamy Cauliflower Soup Recipe: Healthy and Delicious

Cauliflower Soup Recipe

Introduction

Velvety, comforting, and wholesome, cauliflower soup is the ultimate recipe for a cozy evening or a health-conscious meal. Packed with nutrients, this creamy soup is deceptively rich without the heavy use of cream. Its versatility and simplicity make it a must-have in your recipe collection.


The Story Behind Cauliflower Soup

Cauliflower soup traces its roots to European kitchens, where it was cherished as a rustic, cost-effective dish. With cauliflower’s popularity soaring in recent years, this soup has transformed into a modern favorite, celebrated for its adaptability to various diets and cuisines.


The Benefits of Making Your Own Cauliflower Soup

  • Healthier Options: Control the salt, fat, and ingredients for a wholesome dish.
  • Customizable Flavor: Add your favorite spices or toppings to suit your palate.
  • Economical: Cauliflower is budget-friendly and widely available.
  • Diet-Friendly: Naturally low-carb, gluten-free, and easily made vegan.

Essential Ingredients for the Perfect Cauliflower Soup

Base Ingredients:

  • 1 medium head of cauliflower, chopped
  • 1 medium onion, diced
  • 2 garlic cloves, minced
  • 4 cups vegetable or chicken broth
  • 1 cup milk or heavy cream (optional for extra creaminess)

Flavor Enhancers:

  • 2 tablespoons olive oil or butter
  • ½ teaspoon ground nutmeg
  • Salt and pepper to taste

Optional Toppings:

  • Chopped parsley
  • Croutons
  • Shredded cheese
  • Crispy bacon bits

Cultural History of Ingredients

  • Cauliflower: A staple of Mediterranean diets for centuries, cauliflower became a beloved ingredient in Europe and beyond for its adaptability.
  • Garlic: Revered for its health benefits and flavor, garlic has been a cornerstone of culinary traditions worldwide.
  • Nutmeg: Originally from Indonesia, nutmeg adds a warm, subtle spice to soups and stews.

Equipment You’ll Need

  • Large Soup Pot: For sautéing and simmering.
  • Blender or Immersion Blender: To achieve the creamy texture.
  • Cutting Board and Knife: For chopping cauliflower and aromatics.

Step-by-Step Instructions for Cauliflower Soup

Step 1: Prepare the Ingredients

  1. Wash and chop the cauliflower into florets.
  2. Dice the onion and mince the garlic.

Step 2: Sauté the Aromatics

  1. Heat olive oil or butter in a large pot over medium heat.
  2. Add the onion and garlic, cooking until fragrant and translucent (about 3–4 minutes).

Step 3: Cook the Cauliflower

  1. Add the cauliflower florets to the pot and stir to combine.
  2. Pour in the broth, ensuring the cauliflower is mostly submerged.
  3. Bring to a boil, then reduce to a simmer. Cover and cook for 15–20 minutes until the cauliflower is tender.

Step 4: Blend to Perfection

  1. Remove the pot from heat. Use an immersion blender to puree the soup directly in the pot until smooth. Alternatively, transfer the mixture in batches to a blender.
  2. Stir in milk or cream if desired, and season with nutmeg, salt, and pepper.

Step 5: Serve and Garnish

  1. Ladle the soup into bowls.
  2. Top with parsley, croutons, cheese, or crispy bacon for added texture and flavor.

Suggestions for Serving and Storing

  • Serving Suggestions:
    • Pair with a side of crusty bread or a green salad.
    • Serve as a starter for a larger meal or a light main course.
  • Storing:
    • Refrigerate in an airtight container for up to 4 days.
    • Freeze for up to 3 months; reheat gently to retain creaminess.

Chef Simon’s Tips for Cauliflower Soup

  • Roast for Extra Flavor: Roast the cauliflower with olive oil and seasonings before adding it to the soup for a deeper flavor.
  • Adjust Thickness: Add more broth for a thinner soup or let it simmer longer to thicken.
  • Boost Nutrition: Add carrots, celery, or leeks for extra vegetables and flavor.

Emotional and Psychological Impact of Food

A warm bowl of cauliflower soup provides comfort, nourishment, and a sense of relaxation. Sharing it with loved ones creates an inviting atmosphere and strengthens connections.


Mindful Cooking Techniques

  • Be Present: Focus on the textures and aromas as you chop and sauté.
  • Taste as You Go: Adjust seasoning to ensure a balanced, flavorful result.

Tips for Keeping the Recipe Fresh Longer

  • Cool Before Storing: Let the soup cool completely before refrigerating to prevent condensation.
  • Reheat Gently: Warm over low heat to avoid separating the cream.

Advanced Culinary Terms and Techniques

  • Sweating Aromatics: Cooking onions and garlic gently to release their flavors without browning.
  • Pureeing: Using a blender to achieve a smooth and silky soup consistency.

Healthy Ingredient Alternatives

  • Dairy-Free Option: Replace milk or cream with coconut milk or almond milk.
  • Low-Calorie Option: Use only broth and skip the cream for a lighter version.
  • Gluten-Free Toppings: Choose gluten-free croutons or skip them entirely.

More Serving Ideas

  • Spicy Variation: Add red pepper flakes or a dash of hot sauce for heat.
  • Herb-Infused: Blend in fresh basil or thyme for added freshness.
  • Cheesy Delight: Stir in Parmesan or sharp cheddar for extra indulgence.

Common Issues and Solutions

  • Grainy Texture: Blend longer or strain the soup for a smoother consistency.
  • Too Thick: Add more broth or water to thin it out.
  • Overly Bland: Adjust with additional seasoning or a squeeze of lemon juice.

Variations to Try

  • Loaded Cauliflower Soup: Add cooked potatoes, shredded cheese, and crispy bacon for a heartier dish.
  • Curried Cauliflower Soup: Incorporate curry powder and coconut milk for an exotic twist.
  • Vegan Cauliflower Soup: Use vegetable broth and skip the cream for a plant-based option.

Nutritional Information and Health Benefits

Per Serving (1 cup):

  • Calories: 120
  • Protein: 4g
  • Fat: 5g
  • Carbohydrates: 16g
  • Fiber: 4g

Health Benefits:

  • High in vitamin C, supporting immune health.
  • Rich in fiber, promoting digestive wellness.
  • Low in calories, ideal for weight management.

The Art of Pairing Cauliflower Soup

  • Main Course: Pair with grilled chicken or roasted fish.
  • Beverage: Serve alongside a crisp white wine or sparkling water.
  • Complementary Sides: Accompany with a slice of garlic bread or a mixed greens salad.

Frequently Asked Questions (with answers)

Q: Can I use frozen cauliflower?
A: Yes, frozen cauliflower works well and doesn’t compromise the texture or flavor.

Q: How do I avoid a watery soup?
A: Simmer uncovered to let excess liquid evaporate and intensify the flavor.

Q: Can I make it ahead of time?
A: Absolutely! The flavors deepen after a day in the fridge.


Conclusion

Creamy cauliflower soup is a versatile, nutritious dish that satisfies the soul and delights the palate. Whether you’re seeking comfort food or a healthy meal, this recipe is a winner. With endless variations and toppings, it’s a recipe you’ll return to time and time again.


Thank you for visiting SqueezyRecipes! We’re dedicated to making cooking enjoyable and accessible for everyone, regardless of your skill level. Chef Simon is always ready to share the best recipes that bring a creative touch to your daily meals. With each visit, you’ll discover new recipes and innovative ideas that cater to every occasion. Don’t miss out on exploring SqueezyRecipes for the latest delicious dishes, and feel free to leave your feedback and share your experiences with the recipes you’ve tried. Cooking together makes everything better!

Bold Enchilada Casser-Ole! Recipe: Flavorful and Crowd-Pleasing

Enchilada Casser-Ole! Recipe

Introduction

A delightful twist on classic enchiladas, the Enchilada Casser-Ole! combines bold Mexican-inspired flavors in a layered casserole that’s easy to prepare and perfect for sharing. It’s hearty, cheesy, and packed with seasoned meat, beans, and vibrant spices. Whether you’re hosting a party or looking for a comforting weeknight dinner, this dish will quickly become a favorite.


The Story Behind Enchilada Casser-Ole!

Enchiladas have deep roots in Mexican cuisine, traditionally made by rolling tortillas around fillings and covering them in sauce. The casserole version simplifies the process by layering the ingredients, making it a practical yet flavorful adaptation. The playful name “Casser-Ole!” hints at its festive and comforting nature, celebrating the joy of family-style meals.


The Benefits of Making Your Own Enchilada Casser-Ole!

  • Quick and Convenient: No need to roll individual enchiladas.
  • Customizable: Adjust the spice level, proteins, or toppings to your liking.
  • Feeds a Crowd: Perfect for gatherings or meal prepping.
  • Budget-Friendly: Uses pantry staples like beans, corn, and tortillas.

Essential Ingredients for the Perfect Casser-Ole!

Base Ingredients:

  • 1 lb ground beef (or ground turkey for a lighter option)
  • 1 medium onion, diced
  • 2 cups enchilada sauce (store-bought or homemade)
  • 1 can (15 oz) black beans, rinsed and drained
  • 1 cup frozen corn, thawed
  • 1 can (10 oz) diced tomatoes with green chilies, drained
  • 1 teaspoon chili powder
  • ½ teaspoon cumin
  • ½ teaspoon garlic powder
  • Salt and pepper to taste

Casserole Layers:

  • 6 small corn tortillas, halved
  • 2 cups shredded Mexican cheese blend

Toppings (Optional):

  • Sliced black olives
  • Diced avocado
  • Chopped fresh cilantro
  • Sour cream
  • Sliced jalapeños

Cultural History of Ingredients

  • Tortillas: A staple of Mesoamerican cuisine, tortillas have been a dietary foundation for centuries.
  • Beans: Black beans are a key protein source in Mexican and Latin American diets.
  • Chilies: Used for flavor and heat, chilies are integral to traditional Mexican cooking.

Equipment You’ll Need

  • Large Skillet: For cooking the meat mixture.
  • 9×13-Inch Baking Dish: For layering the casserole.
  • Mixing Bowls: To combine ingredients.
  • Spatula or Wooden Spoon: For stirring.

Step-by-Step Instructions for Enchilada Casser-Ole!

Step 1: Prepare the Meat Mixture

  1. Preheat your oven to 375°F (190°C).
  2. In a large skillet over medium heat, cook the ground beef and diced onion until the meat is browned and fully cooked.
  3. Stir in enchilada sauce, black beans, corn, diced tomatoes with green chilies, and seasonings (chili powder, cumin, garlic powder, salt, and pepper). Simmer for 5–7 minutes, allowing the flavors to meld.

Step 2: Assemble the Casserole

  1. Grease a 9×13-inch baking dish with cooking spray.
  2. Spread a thin layer of the meat mixture on the bottom of the dish.
  3. Arrange a layer of tortilla halves to cover the meat mixture.
  4. Sprinkle a layer of shredded cheese over the tortillas.
  5. Repeat layers until all ingredients are used, finishing with a generous layer of cheese on top.

Step 3: Bake the Casserole

  1. Cover the dish with aluminum foil and bake for 20 minutes.
  2. Remove the foil and bake for an additional 10–15 minutes, or until the cheese is bubbly and golden.
  3. Let the casserole cool for 5–10 minutes before serving.

Suggestions for Serving and Storing

  • Serving Suggestions:
    • Top each portion with sour cream, sliced avocado, or chopped cilantro.
    • Pair with a simple side salad or Spanish rice for a complete meal.
  • Storing:
    • Refrigerate leftovers in an airtight container for up to 4 days.
    • Freeze for up to 3 months; reheat in the oven at 350°F until warmed through.

Chef Simon’s Tips for Enchilada Casser-Ole!

  • Add Depth: Roast your corn before adding it to the meat mixture for a smoky flavor.
  • Spice It Up: Use hot enchilada sauce or add extra jalapeños for a fiery kick.
  • Prevent Sogginess: Lightly toast tortillas before layering to keep them from getting overly soft.

Emotional and Psychological Impact of Food

This casserole brings warmth and happiness to the table. The layered flavors evoke feelings of comfort and nostalgia, making it the ultimate crowd-pleaser.


Mindful Cooking Techniques

  • Layer with Intention: Take care to evenly distribute ingredients for balanced bites.
  • Focus on Freshness: Use fresh herbs and high-quality cheese to enhance the dish.

Tips for Keeping the Recipe Fresh Longer

  • Wrap Tightly: Store leftovers in tightly sealed containers to prevent moisture loss.
  • Reheat Gently: Warm in the oven or microwave with a damp paper towel to keep layers moist.

Advanced Culinary Terms and Techniques

  • Deglaze: Use a splash of chicken stock or water to scrape up browned bits from the skillet for added flavor.
  • Emulsify: Blend the enchilada sauce with a bit of oil to create a smooth, rich texture.

Healthy Ingredient Alternatives

  • Protein Swap: Use ground chicken or turkey for a leaner option.
  • Low-Carb Version: Replace tortillas with thin slices of zucchini or eggplant.
  • Cheese Alternatives: Opt for dairy-free cheese for a vegan-friendly version.

More Serving Ideas

  • Tex-Mex Fusion: Add a drizzle of queso on top for extra creaminess.
  • Breakfast Twist: Layer with scrambled eggs for a breakfast-style casserole.
  • Extra Crunch: Top with crushed tortilla chips or fried onions before baking.

Common Issues and Solutions

  • Soggy Layers: Avoid using too much sauce between layers.
  • Uneven Cooking: Cover with foil during baking to ensure even heat distribution.
  • Overly Spicy: Balance heat by adding a dollop of sour cream or avocado slices.

Variations to Try

  • Vegetarian Version: Substitute the meat with sautéed vegetables or extra beans.
  • Green Enchilada Casserole: Use green enchilada sauce for a tangy twist.
  • Seafood Casser-Ole!: Add cooked shrimp or crab for a coastal flavor.

Nutritional Information and Health Benefits

Per Serving (1 slice):

  • Calories: 380
  • Protein: 22g
  • Fat: 18g
  • Carbohydrates: 30g
  • Fiber: 6g

Health Benefits:

  • Rich in protein from beef and beans.
  • High in fiber from beans and corn.
  • Provides essential vitamins like B12 and iron.

The Art of Pairing Enchilada Casserole

  • Sides: Serve with guacamole, salsa, or refried beans.
  • Beverages: Pair with a cold Mexican lager or a refreshing margarita.
  • Dessert: End the meal with churros or tres leches cake.

Frequently Asked Questions (with answers)

Q: Can I make this casserole ahead of time?
A: Yes, assemble the casserole, cover it tightly, and refrigerate for up to 24 hours before baking.

Q: Can I use flour tortillas instead of corn?
A: Absolutely, but corn tortillas hold up better during baking.

Q: How do I make it spicier?
A: Add diced jalapeños or use a spicier enchilada sauce.


Conclusion

The Enchilada Casser-Ole! is a delightful dish that brings people together over its comforting flavors. Easy to prepare and endlessly versatile, this recipe is a must-try for Mexican food lovers. Share it with your loved ones and let the fiesta begin!


Thank you for visiting SqueezyRecipes! We’re dedicated to making cooking enjoyable and accessible for everyone, regardless of your skill level. Chef Simon is always ready to share the best recipes that bring a creative touch to your daily meals. With each visit, you’ll discover new recipes and innovative ideas that cater to every occasion. Don’t miss out on exploring SqueezyRecipes for the latest delicious dishes, and feel free to leave your feedback and share your experiences with the recipes you’ve tried. Cooking together makes everything better