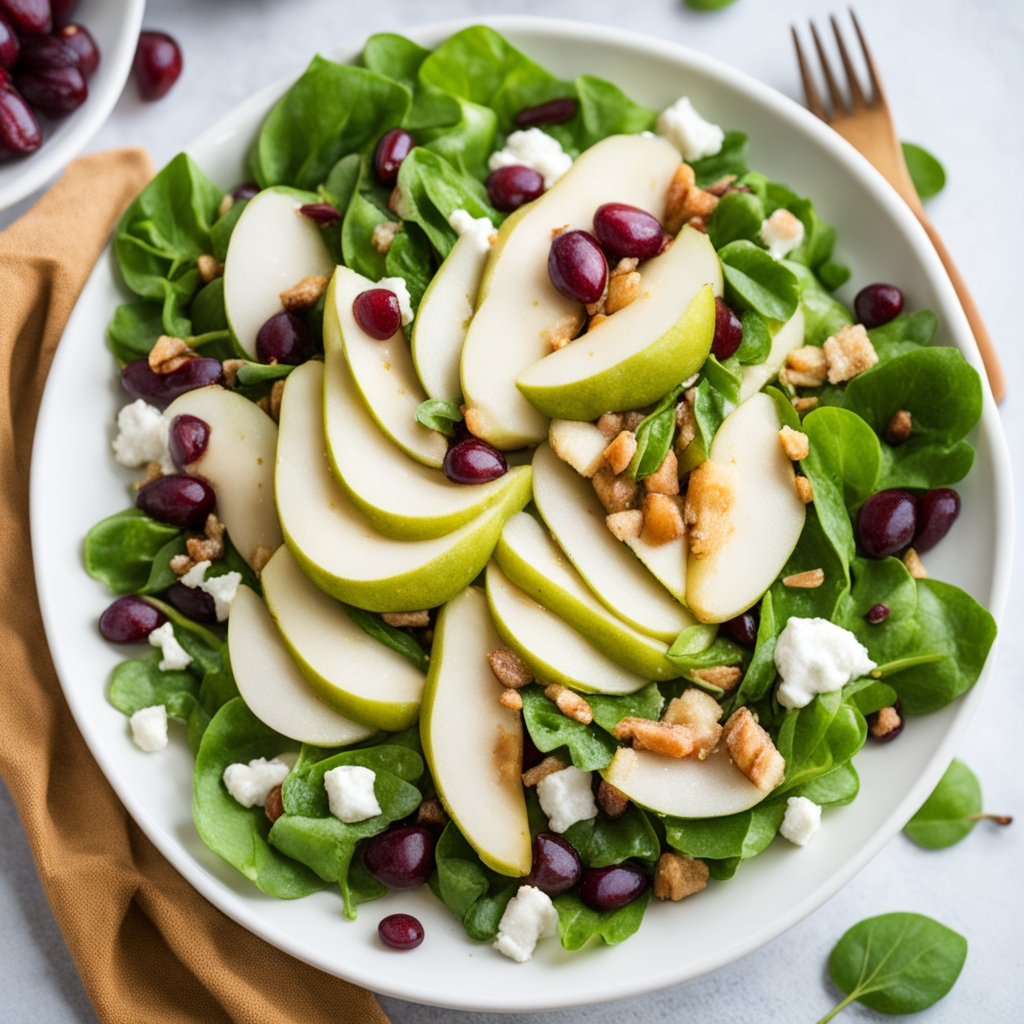
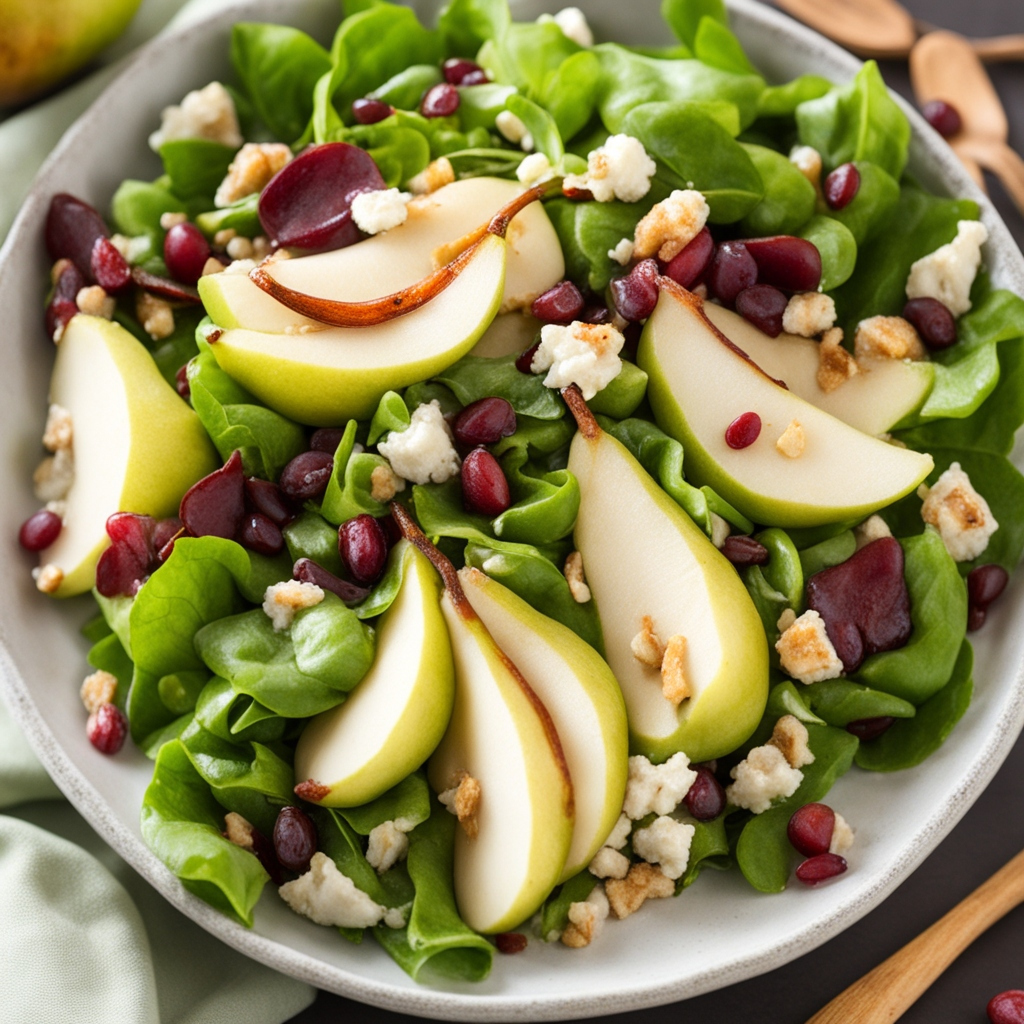
Baked Spaghetti Casserole

Baked Spaghetti Casserole

It was one of those chilly Sunday evenings where everyone seemed to linger in the kitchen a little longer, drawn in by the warmth of the oven and the promise of something comforting. I wanted a meal that could feed a crowd, make great leftovers, and fill the house with that unmistakable scent of home-cooked love.

I had spaghetti, I had cheese, and I had some leftover meat sauce from the night before—so I layered it all into a dish, popped it in the oven, and what came out was nothing short of magical. Bubbly cheese, golden edges, and saucy pasta in every bite.

That’s how this Baked Spaghetti Casserole came to be. A twist on a classic, but one that feels just a little more special—without any extra fuss.

Short Description

Baked Spaghetti Casserole is a cheesy, layered pasta bake featuring tender spaghetti, hearty meat sauce, and melty mozzarella. It’s comfort food at its finest—perfect for feeding a crowd or freezing for later.

Key Ingredients

  • 12 oz spaghetti, cooked and drained
  • 1 lb ground beef (or Italian sausage)
  • 1 small onion, diced
  • 2 cloves garlic, minced
  • 1 jar (24 oz) marinara or spaghetti sauce
  • 1 tsp Italian seasoning
  • Salt and pepper, to taste
  • 2 eggs
  • ½ cup grated Parmesan cheese
  • 1½ cups cottage cheese or ricotta
  • 2 cups shredded mozzarella cheese
  • Fresh basil or parsley for garnish (optional)

Tools Needed

  • Large skillet
  • Saucepan or pot
  • Mixing bowls
  • 9×13 inch baking dish
  • Spatula or wooden spoon
  • Foil for covering

Cooking Instructions

Step 1: Preheat and prep
Preheat your oven to 375°F (190°C). Lightly grease your 9×13 baking dish.

Step 2: Cook the meat sauce
In a large skillet over medium heat, cook the ground beef and diced onion until browned. Add garlic and cook for 1 minute. Drain any excess fat. Stir in the marinara sauce and Italian seasoning. Simmer for 10 minutes.

Step 3: Prep the spaghetti layer
In a large bowl, whisk the eggs and stir in the cooked spaghetti, Parmesan, salt, and pepper. Mix well to coat the noodles.

Step 4: Layer the casserole
Spread half of the spaghetti mixture in the baking dish. Top with all of the cottage cheese or ricotta, then half of the meat sauce. Add the remaining spaghetti, followed by the rest of the meat sauce. Finish with mozzarella cheese on top.

Step 5: Bake
Cover with foil and bake for 30 minutes. Remove foil and bake another 10–15 minutes until the cheese is golden and bubbly.

Step 6: Let rest & serve
Let the casserole rest for 10 minutes before slicing. Garnish with chopped basil or parsley, if desired.

Why You’ll Love This Recipe

  • Hearty and family-friendly
  • Feeds a crowd with ease
  • Great for meal prep or freezer meals
  • Classic flavors everyone loves
  • Customizable with your favorite cheese or protein

Mistakes to Avoid & Solutions

1. Overcooked pasta
Solution: Slightly undercook the spaghetti before baking—it finishes in the oven.

2. Dry layers
Solution: Don’t skimp on sauce, and use foil for the first half of baking to lock in moisture.

3. Cheese burn
Solution: Always remove the foil at the end for browning—don’t bake uncovered the whole time.

Serving Suggestions

  • Pair with garlic bread or breadsticks
  • Serve alongside a fresh Caesar or garden salad
  • Add roasted veggies for a full meal

For drinks: Sparkling water with lemon, iced tea, or even a glass of red wine if you’re feeling fancy.

Storage & Reheating Tips

Refrigerate: Store in an airtight container for up to 4 days.
Freeze: Wrap tightly in foil and freeze for up to 2 months.
Reheat: Microwave individual slices or reheat the whole casserole in a 350°F oven for 20 minutes (covered).

FAQs

Can I make this ahead of time?
Yes! Assemble it and refrigerate up to 24 hours before baking.

Can I use gluten-free pasta?
Absolutely—just be sure not to overcook it before baking.

Can I use other meats?
Try ground turkey, Italian sausage, or a plant-based crumble.

Can I swap the cottage cheese?
Yes! Ricotta or even cream cheese will work beautifully.

Tips & Tricks

  • Add red pepper flakes to the sauce for a little heat
  • Use a mix of cheeses (mozzarella, provolone, cheddar) for extra flavor
  • Letting it rest before slicing helps it set for clean servings
  • Sprinkle extra Parmesan on top before baking for a crispy cheese crust

Recipe Variations

1. Tex-Mex Spaghetti Bake
Add taco seasoning to the meat and layer with pepper jack cheese and a sprinkle of crushed tortilla chips.

2. Veggie Lover’s Bake
Add sautéed mushrooms, zucchini, or spinach to the sauce for a plant-powered version.

3. Chicken Alfredo Twist
Swap marinara for Alfredo sauce and use cooked, shredded chicken instead of beef.

Final Thoughts

This Baked Spaghetti Casserole is the kind of meal you make once—and then crave forever. It’s nostalgic, filling, and ridiculously satisfying. Whether you’re serving it for Sunday dinner, dropping it off for a friend, or freezing it for busy nights, it’s one of those go-to recipes that brings comfort to the table every single time.

Pinto Beans, Green Chile and Beef Soup

Pinto Beans, Green Chile and Beef Soup

It all started on a rainy Sunday—the kind where the skies are heavy and gray, and the only thing you want is something warm and comforting simmering on the stove. I had a few pantry staples, some ground beef in the fridge, and a can of green chiles I almost forgot I had. What came together was something simple, hearty, and surprisingly soul-soothing: a rustic Pinto Beans, Green Chile, and Beef Soup.

The first bite was everything. Earthy beans, a subtle kick of green chile heat, and that deep, savory flavor from seasoned ground beef. It was the kind of soup that makes you breathe deeper after every spoonful. Since then, it’s become a regular rotation—whether it’s a slow Sunday dinner or a weeknight meal that needs to come together fast.

Short Description

This Pinto Beans, Green Chile, and Beef Soup is hearty, flavorful, and packed with protein. Tender pinto beans, spiced ground beef, and mild green chiles come together in a rich broth that’s perfect for chilly nights or easy meal prep.

Key Ingredients

  • 1 lb ground beef
  • 1 tbsp olive oil
  • 1 small onion, diced
  • 3 cloves garlic, minced
  • 1 (4 oz) can diced green chiles
  • 2 cups cooked pinto beans (or 1 can, drained and rinsed)
  • 1 (14.5 oz) can diced tomatoes
  • 4 cups beef broth
  • 1 tsp cumin
  • 1 tsp chili powder
  • ½ tsp smoked paprika
  • Salt and pepper, to taste
  • Juice of ½ lime (optional)

Optional Garnishes:

  • Chopped cilantro
  • Crushed tortilla chips
  • Shredded cheddar or Monterey Jack
  • Sour cream
  • Lime wedges

Tools Needed

  • Large soup pot or Dutch oven
  • Wooden spoon or spatula
  • Ladle
  • Cutting board and knife

Cooking Instructions

Step 1: Sauté the aromatics
In a large soup pot, heat olive oil over medium heat. Add diced onion and cook until translucent, about 4–5 minutes. Stir in garlic and cook for another 30 seconds.

Step 2: Brown the beef
Add the ground beef to the pot and cook, breaking it up with a spoon, until browned and cooked through. Season with salt, pepper, cumin, chili powder, and smoked paprika.

Step 3: Add the chiles and tomatoes
Stir in the diced green chiles and canned tomatoes (with their juices). Let them simmer for a few minutes to build flavor.

Step 4: Add beans and broth
Pour in the pinto beans and beef broth. Stir well, bring to a boil, then reduce heat to low and let simmer for 20–30 minutes uncovered.

Step 5: Taste and finish
Taste and adjust seasonings as needed. Add a splash of lime juice just before serving for a fresh, zesty note.

Why You’ll Love This Recipe

  • One-pot, low-fuss, high-flavor
  • Budget-friendly and pantry-staple based
  • Comforting without being too heavy
  • High in protein and fiber
  • Meal-prep and freezer-friendly

Mistakes to Avoid & Fixes

1. Bland soup
Fix: Don’t skip the seasoning! Cumin, chili powder, and salt are key.

2. Overcooked beans
Fix: If using canned beans, add them during the last 10–15 minutes of cooking to avoid mushiness.

3. Greasy broth
Fix: Drain excess fat from the ground beef after browning, especially if using higher-fat cuts.

Serving Suggestions

  • Serve with warm cornbread, crusty bread, or over a scoop of rice
  • Add a dollop of sour cream and a sprinkle of cheese for richness
  • Pair with a light green salad or sliced avocado on the side

Storage & Reheating Tips

Refrigerate: Store in airtight containers for up to 4 days.
Freeze: Cool completely and freeze in containers for up to 3 months.
Reheat: Warm in a pot over medium heat or microwave in 1-minute intervals, stirring between.

FAQs

Can I use dried pinto beans?
Yes! Just soak and cook them ahead of time. You’ll need about 1½ cups of dried beans to equal 2 cups cooked.

What other meat can I use?
Ground turkey or shredded rotisserie chicken work great as substitutes.

Can I make it spicier?
Add diced jalapeños, a pinch of cayenne, or a splash of hot sauce for a kick.

Is this soup gluten-free?
Yes—just be sure to check that your broth and canned goods are certified gluten-free.

Tips & Tricks

  • Add a handful of frozen corn or chopped zucchini for extra veggies
  • Make it in the slow cooker by browning beef first, then combining everything and cooking on low for 6–8 hours
  • Stir in a little cream or cheese at the end for a thicker, richer finish
  • For smoky depth, add a bit of chipotle in adobo

Recipe Variations

1. Tex-Mex Style
Add black beans, corn, and a sprinkle of taco seasoning. Serve with tortilla strips.

2. Veggie Boost
Add carrots, bell peppers, or spinach to up the nutrition.

3. Southwest Chili Vibes
Thicken with a bit of masa harina and serve with avocado slices and hot sauce.

Final Thoughts

There’s something incredibly satisfying about a bowl of this Pinto Beans, Green Chile, and Beef Soup. It’s not flashy or fussy—just the kind of meal that fills your belly and warms your spirit. It’s earthy, cozy, and packed with flavor, making it perfect for cold nights, meal prep Sundays, or any time you want something that tastes like home.

It’s become one of those recipes I turn to when I want simplicity with substance—and I hope it becomes that for you, too.

Onion Ground Beef and Rice Casserole

Onion Ground Beef and Rice Casserole

It was one of those evenings where time felt a little tight, and I needed something filling, warm, and satisfying. I glanced around the kitchen—nothing fancy, just the staples: ground beef, rice, an onion, and a can or two of soup. That’s all it took to bring this comforting casserole to life.

What I love most about this Onion Ground Beef and Rice Casserole is how effortlessly it comes together. It’s not flashy, but it’s deeply comforting—one of those meals that makes you close your eyes after the first bite. Hearty ground beef, fluffy rice, and sweet caramelized onions baked in a creamy, savory sauce… it’s the definition of a weeknight hero.

Short Description

This Onion Ground Beef and Rice Casserole is a cozy one-dish wonder made with tender ground beef, fluffy rice, sweet onions, and a creamy, savory sauce—baked until golden and bubbly.

Key Ingredients

  • 1 lb ground beef
  • 1 medium yellow onion, finely chopped
  • 2 cloves garlic, minced
  • 1 cup uncooked long grain white rice
  • 1 can (10.5 oz) cream of mushroom soup
  • 1 can (10.5 oz) French onion soup
  • 1½ cups beef broth
  • 1 cup shredded cheddar cheese (optional, for topping)
  • 1 tbsp Worcestershire sauce
  • Salt and pepper, to taste
  • 1 tbsp olive oil or butter

Tools Needed

  • Large skillet
  • 9×13” baking dish
  • Mixing bowl
  • Foil
  • Oven

Cooking Instructions

Step 1: Preheat oven
Preheat oven to 375°F (190°C). Lightly grease a 9×13” baking dish.

Step 2: Cook the beef
In a large skillet, heat olive oil over medium heat. Add chopped onion and cook until soft and golden, about 5–6 minutes. Add ground beef and garlic, cooking until browned. Drain excess grease.

Step 3: Mix it all together
In a mixing bowl, stir together cream of mushroom soup, French onion soup, beef broth, Worcestershire sauce, and uncooked rice. Season with salt and pepper.

Step 4: Assemble the casserole
Spread the cooked beef and onion mixture evenly in the baking dish. Pour the rice and soup mixture over the beef. Stir gently to combine.

Step 5: Bake covered
Cover tightly with foil and bake for 45 minutes.

Step 6: Optional cheesy topping
If using cheese, uncover the casserole, sprinkle cheddar on top, and bake an additional 10–15 minutes until the cheese is melted and bubbly and rice is fully tender.

Step 7: Serve
Let the casserole rest for 5 minutes before serving. Garnish with parsley or crispy fried onions if desired.

Why You’ll Love This Recipe

– Made with affordable pantry staples
– One pan, minimal cleanup
– Super hearty and satisfying
– Great for make-ahead meals or leftovers
– Kid-approved and freezer-friendly

Mistakes to Avoid & Solutions

1. Undercooked rice
Solution: Use long grain white rice—not instant or brown—and make sure it’s fully submerged in liquid.

2. Overly greasy casserole
Solution: Drain the ground beef well after browning.

3. Bland flavor
Solution: Season generously and don’t skip the Worcestershire—it adds depth!

4. Burnt edges
Solution: Cover tightly with foil during baking to lock in moisture.

Serving and Pairing Suggestions

– Pair with steamed green beans or a simple garden salad
– Add a slice of warm cornbread or crusty rolls
– A dollop of sour cream on top adds a nice creamy touch
– For a complete meal, serve with roasted carrots or sautéed spinach

Storage and Reheating Tips

Refrigerate: Store leftovers in an airtight container for up to 4 days.
Freeze: Wrap tightly and freeze for up to 2 months. Thaw in fridge overnight before reheating.
Reheat: Warm in the oven at 350°F or in the microwave in 1-minute increments.

FAQs

1. Can I use brown rice instead of white?
It’s possible, but it takes longer and may require extra liquid. Parboil it first if you want to try!

2. Can I use ground turkey or chicken instead of beef?
Yes! Just season it well since turkey and chicken are milder in flavor.

3. Can I prep this in advance?
Absolutely—assemble it earlier in the day, cover, and refrigerate. Just add a few minutes to the baking time.

4. Is the cheese necessary?
Not at all—it adds richness but the casserole is still flavorful without it.

Tips & Tricks

– Sauté the onions until lightly caramelized for extra flavor
– Add a pinch of dried thyme or rosemary to the mix for an herby twist
– Stir in a handful of frozen peas or corn before baking to up the veggies
– Swap cheddar for Swiss or provolone for a different flavor profile
– For more texture, top with crispy fried onions just before serving

Recipe Variations

1. Tex-Mex Twist
Add taco seasoning to the beef, swap French onion soup for salsa, and top with pepper jack cheese.

2. Mushroom Lover’s Version
Add a cup of sliced mushrooms to the onions as they cook and use Swiss cheese on top.

3. Veggie Boost
Mix in spinach, zucchini, or bell peppers before baking.

4. Cheeseburger Casserole Style
Add mustard, a bit of ketchup, and diced pickles to the beef mixture for a fun twist.

Final Thoughts

Onion Ground Beef and Rice Casserole is one of those down-home dinners that tastes like it’s been passed down for generations. It’s simple, hearty, and endlessly comforting—the kind of meal you make once and then crave again and again.

So the next time you need dinner that warms you from the inside out, grab your basics and let this humble casserole do its magic. It’s proof that a few ingredients, when done right, can go a long way.

Creamy Chicken Noodle Casserole

Creamy Chicken Noodle Casserole

It was one of those drizzly afternoons when the sky stayed gray all day, and the only thing I wanted was something comforting straight from the oven. I opened the pantry and fridge, pulled out a few humble ingredients—some leftover rotisserie chicken, egg noodles, a can of soup—and within an hour, the house was filled with that nostalgic smell of creamy, home-cooked goodness.

Creamy Chicken Noodle Casserole is one of those timeless recipes. It feels like a hug in a dish. The kind of meal that brings everyone to the table, eager for seconds, maybe thirds. Whether you’re making it for a weeknight dinner, a potluck, or a neighbor who needs a little comfort, this casserole never fails to hit the spot.

Short Description

This Creamy Chicken Noodle Casserole is packed with tender chicken, egg noodles, and veggies in a creamy, cheesy sauce—all baked under a golden, buttery topping. Comfort food at its finest!

Key Ingredients

  • 12 oz egg noodles (about 6 cups cooked)
  • 2½ cups cooked chicken (shredded or diced)
  • 1 can (10.5 oz) cream of chicken soup
  • 1 can (10.5 oz) cream of mushroom soup (or use two of the same)
  • ¾ cup sour cream
  • 1 cup milk
  • 1½ cups shredded cheddar cheese
  • 1½ cups frozen peas and carrots (or mixed vegetables)
  • 1 tsp garlic powder
  • ½ tsp onion powder
  • Salt and pepper, to taste
  • 1 cup crushed Ritz crackers (or breadcrumbs)
  • 2 tbsp melted butter

Tools Needed

  • Large pot (for noodles)
  • Mixing bowl
  • 9×13” baking dish
  • Wooden spoon or spatula
  • Oven

Cooking Instructions

Step 1: Cook the noodles
Boil egg noodles according to package directions. Drain and set aside.

Step 2: Preheat and prep
Preheat oven to 375°F (190°C). Lightly grease your baking dish.

Step 3: Mix the filling
In a large bowl, stir together cream soups, sour cream, milk, garlic powder, onion powder, salt, and pepper. Add the cooked chicken, vegetables, and half the cheese. Fold in the noodles until well combined.

Step 4: Assemble the casserole
Pour the mixture into the prepared baking dish and spread evenly. Top with the remaining cheese.

Step 5: Add the topping
Mix crushed crackers with melted butter and sprinkle over the top of the casserole.

Step 6: Bake
Bake uncovered for 25–30 minutes until bubbly and the topping is golden brown.

Step 7: Serve
Let sit for 5 minutes before serving. Sprinkle with fresh parsley if you’d like a pop of color.

Why You’ll Love This Recipe

– Creamy, cheesy, and loaded with flavor
– Uses pantry and freezer staples
– Family-friendly and kid-approved
– Great for potlucks or meal trains
– Easy to make ahead or freeze

Mistakes to Avoid & Solutions

1. Mushy noodles
Solution: Cook noodles al dente since they’ll continue softening in the oven.

2. Dry casserole
Solution: Don’t skimp on the milk or sour cream—these keep it creamy!

3. Over-salty
Solution: Taste the sauce before adding extra salt—soups and cheese add saltiness.

4. Topping too soggy
Solution: Bake uncovered so the topping stays crisp.

Serving and Pairing Suggestions

– Serve with a simple green salad or steamed broccoli
– Pair with garlic bread or dinner rolls
– A light fruit salad or applesauce on the side adds freshness

Storage and Reheating Tips

Refrigerate: Store leftovers in an airtight container for up to 4 days.
Freeze: Wrap well and freeze for up to 2 months.
Reheat: Bake covered at 350°F until heated through, or microwave in 1-minute bursts.

FAQs

1. Can I use canned chicken or rotisserie?
Yes! Rotisserie chicken works beautifully and saves time.

2. Can I add other veggies?
Definitely. Try broccoli, green beans, or corn.

3. Is there a gluten-free version?
Use gluten-free noodles and GF cream soups. Skip the crackers or use GF breadcrumbs.

4. Can I use a different cheese?
Absolutely—Monterey Jack, mozzarella, or a blend work well.

Tips & Tricks

– Let the casserole rest before serving so it sets up nicely
– Use whole milk or even a splash of heavy cream for extra richness
– Add a pinch of paprika or dried herbs for extra depth
– Toast the cracker topping separately for more crunch, if desired

Recipe Variations

1. Chicken Bacon Ranch
Mix in ranch seasoning and cooked crumbled bacon, then top with mozzarella.

2. Buffalo Chicken Twist
Add buffalo sauce to the filling and blue cheese crumbles on top.

3. Mexican-Inspired
Add taco seasoning, black beans, corn, and pepper jack cheese.

4. Veggie-Loaded Version
Double the veggies and skip the chicken for a creamy vegetarian bake.

Final Thoughts

Creamy Chicken Noodle Casserole is everything we love about home cooking—warm, hearty, and endlessly comforting. It’s the kind of dish that brings people together, especially on those days when you need something familiar and soul-soothing.

Make it once, and it’ll quickly find a spot in your regular dinner rotation. Because sometimes, it’s the simple things—chicken, noodles, cheese, and love—that taste the best.

Brisket Mac and Cheese

Brisket Mac and Cheese

The first time I made this dish, it was a cold Sunday evening — the kind of night that called for something rich, indulgent, and deeply comforting. We had leftover smoked brisket from the night before, and while sandwiches were the obvious route, I wanted something that felt more like a hug in a bowl.

So I pulled out the pasta, made a velvety cheese sauce, and folded in chopped brisket. The smell alone was worth the effort — smoky, cheesy, and just plain irresistible. When we took our first bites, it was pure comfort food magic. Creamy mac and cheese, smoky tender beef, and golden baked topping… it instantly became a family favorite.

Now, every time we smoke a brisket, this is how we use the leftovers. It’s not just a meal — it’s a celebration of comfort.

Short Description

This Brisket Mac and Cheese is ultra-creamy, smoky, and cheesy — the perfect marriage of tender chopped brisket and classic mac. It’s baked with a crispy topping for the ultimate comfort food casserole.

Key Ingredients

  • 12 oz elbow macaroni or cavatappi
  • 2 tbsp butter
  • 2 tbsp all-purpose flour
  • 2 cups milk (whole or 2%)
  • 1 cup heavy cream
  • 2 cups shredded sharp cheddar
  • 1 cup shredded Monterey Jack or gouda
  • ½ tsp garlic powder
  • Salt & pepper, to taste
  • 2–3 cups cooked brisket, chopped or shredded
  • ½ cup panko breadcrumbs (optional, for topping)
  • 2 tbsp butter (melted, for topping)
  • Fresh parsley, for garnish (optional)

Tools Needed

  • Large pot for pasta
  • Medium saucepan for cheese sauce
  • Whisk
  • 9×13-inch baking dish
  • Mixing spoon or spatula
  • Knife & cutting board

Cooking Instructions

Step 1: Cook the pasta
Boil pasta in salted water until just al dente. Drain and set aside.

Step 2: Make the cheese sauce
In a saucepan, melt 2 tbsp butter over medium heat. Whisk in flour and cook for 1 minute. Slowly add milk and cream, whisking constantly until smooth. Let simmer 3–4 minutes until thickened.

Step 3: Add cheese & seasonings
Reduce heat to low. Stir in cheddar and Monterey Jack until melted. Season with garlic powder, salt, and pepper.

Step 4: Combine with pasta & brisket
In a large bowl or the same pot, mix the drained pasta with the cheese sauce and chopped brisket until evenly coated.

Step 5: Bake it
Pour mixture into a greased 9×13-inch baking dish. In a small bowl, combine panko with melted butter, then sprinkle over the top. Bake at 375°F for 20–25 minutes, until bubbly and golden.

Step 6: Serve & enjoy
Garnish with fresh parsley if desired. Serve warm!

Why You’ll Love This Recipe

– Perfect use for leftover brisket
– Creamy, cheesy, smoky, and indulgent
– A hit with kids and grown-ups
– Comfort food at its absolute best
– Freezer-friendly and great for meal prep

Mistakes to Avoid & Solutions

1. Overcooked pasta
Solution: Boil until just al dente — it will finish cooking in the oven.

2. Greasy cheese sauce
Solution: Use fresh-grated cheese and avoid pre-shredded if possible.

3. Dry casserole
Solution: Don’t skimp on the sauce — keep it extra creamy before baking.

4. Brisket too dry
Solution: Use the juiciest cuts of brisket and chop finely for better texture.

5. Burnt topping
Solution: Add the panko in the last 10 minutes if your oven runs hot.

Serving and Pairing Suggestions

– Serve with a simple side salad or roasted green beans
– Add pickled jalapeños or hot sauce for a little kick
– Pairs well with iced tea, dark beer, or red wine
– Perfect as a main dish or a rich BBQ side

Storage and Reheating Tips

Refrigerate: Store in an airtight container for up to 4 days.
Freeze: Cool completely, then wrap tightly and freeze for up to 2 months.
Reheat in oven: Cover with foil and bake at 350°F until warmed through.
Reheat in microwave: Heat in 1-minute bursts, stirring in between.

FAQs

1. Can I make this with other meats?
Absolutely! Pulled pork, smoked chicken, or chopped steak all work well.

2. What’s the best cheese combo?
Sharp cheddar + a melty cheese like Monterey Jack or gouda gives the best texture and flavor.

3. Can I skip baking and just serve stovetop?
Yes! Just mix everything and serve straight from the pot — still delicious.

4. Is there a gluten-free version?
Use GF pasta and swap flour for a GF thickener like cornstarch or GF flour blend.

5. How do I keep it creamy when reheating?
Stir in a splash of milk or cream before reheating for best results.

Tips & Tricks

– For smoky flavor without a smoker, add ¼ tsp smoked paprika to the cheese sauce
– Use leftover mac and cheese and fold in brisket for a shortcut version
– Add caramelized onions for a deeper, sweet-savory twist
– A drizzle of BBQ sauce on top adds zing and moisture
– Toast panko separately for extra crunch if preferred

Recipe Variations

1. BBQ Brisket Mac
Add ½ cup BBQ sauce to the cheese sauce and swirl more on top before baking.

2. Jalapeño Popper Mac
Stir in cream cheese, chopped jalapeños, and a touch of bacon with the brisket.

3. Buffalo Brisket Mac
Mix in hot sauce, blue cheese crumbles, and a ranch drizzle on top.

4. Tex-Mex Brisket Bake
Use pepper jack cheese and add corn, black beans, and taco seasoning.

5. Brisket Mac Cups
Spoon into muffin tins and bake for handheld mac-and-cheese bites.

Final Thoughts

This Brisket Mac and Cheese is what comfort food dreams are made of. It’s a little smoky, super cheesy, and deeply satisfying. Whether you’re using up leftovers or planning it from scratch, it’s a dish that delivers every time. It’s the kind of meal that turns a regular night into something worth remembering — one creamy, cheesy bite at a time.

Million Dollar Chicken Noodle Casserole

Million Dollar Chicken Noodle Casserole

It was one of those rainy weeknights — the kind where all you want is something warm, creamy, and guaranteed to bring smiles around the dinner table. I peeked into the fridge, spotted some leftover rotisserie chicken, a block of cream cheese, and a half-box of egg noodles. And just like that, this casserole was born.

The name? Well, it earned that the first time we took a bite.

Imagine the comfort of classic chicken noodle soup, wrapped in a creamy, cheesy, golden-baked hug. Every bite is velvety, with little surprises — buttery crackers on top, tender shredded chicken throughout, and just enough seasoning to keep you coming back for another forkful.

Whether you’re feeding a crowd, prepping ahead for busy nights, or just craving something undeniably comforting, this Million Dollar Chicken Noodle Casserole is exactly what you need.

Short Description

Million Dollar Chicken Noodle Casserole is the ultimate creamy comfort food — a blend of shredded chicken, tender noodles, and a rich, cheesy filling topped with a golden, buttery cracker crust. It’s cozy, crowd-pleasing, and always a hit at the dinner table.

Key Ingredients

  • 12 oz egg noodles
  • 2½ cups cooked, shredded chicken (rotisserie works great)
  • 1 (8 oz) block cream cheese, softened
  • 1 cup sour cream
  • 1 can cream of chicken soup
  • 1½ cups shredded mozzarella cheese
  • ½ cup grated Parmesan cheese
  • 1 tsp garlic powder
  • 1 tsp onion powder
  • Salt & pepper, to taste
  • 1 sleeve Ritz crackers (or similar), crushed
  • 3 tbsp melted butter
  • Fresh parsley, for garnish (optional)

Tools Needed

  • Large pot
  • Mixing bowls
  • 9×13-inch baking dish
  • Wooden spoon or spatula
  • Foil (for baking)

Cooking Instructions

Step 1: Cook the noodles
Boil egg noodles just until al dente according to package instructions. Drain and set aside.

Step 2: Make the creamy base
In a large bowl, mix together cream cheese, sour cream, cream of chicken soup, mozzarella, Parmesan, garlic powder, onion powder, salt, and pepper. Stir until smooth.

Step 3: Combine
Fold in the shredded chicken and cooked noodles until everything is evenly coated and creamy.

Step 4: Assemble the casserole
Preheat your oven to 350°F (175°C). Lightly grease a 9×13-inch baking dish. Spread the chicken noodle mixture evenly into the dish.

Step 5: Add the topping
In a small bowl, mix crushed Ritz crackers with melted butter. Sprinkle evenly over the top of the casserole.

Step 6: Bake
Cover loosely with foil and bake for 25 minutes. Remove foil and bake an additional 10–15 minutes until bubbly and golden on top.

Step 7: Serve and enjoy
Let the casserole rest for 5–10 minutes before serving. Garnish with chopped parsley if desired.

Why You’ll Love This Recipe

– Creamy, cheesy, golden-topped comfort in every bite
– Great way to use up leftover or rotisserie chicken
– Kid-friendly and freezer-friendly
– Quick to assemble — perfect for busy nights
– Customizable with pantry staples
– Feels indulgent but is secretly simple!

Mistakes to Avoid & Solutions

1. Mushy noodles
Solution: Boil until just al dente, since they’ll continue cooking in the oven.

2. Grainy sauce
Solution: Make sure cream cheese is softened and well-mixed for a smooth texture.

3. Soggy topping
Solution: Add cracker topping just before baking and bake uncovered at the end to crisp up.

4. Bland flavor
Solution: Season generously and consider adding a pinch of paprika or a splash of hot sauce if desired.

5. Overcooked chicken
Solution: Use pre-cooked, moist chicken like rotisserie for the best texture.

Serving and Pairing Suggestions

– Serve with a crisp green salad or roasted broccoli
– Add garlic bread or crescent rolls on the side
– Pair with a light white wine, lemonade, or sweet tea
– For a cozy vibe, serve in warm bowls with fresh cracked pepper on top

Storage and Reheating Tips

Refrigerate: Store leftovers in an airtight container for up to 4 days.
Freeze: Wrap tightly and freeze up to 2 months. Thaw overnight before reheating.
Reheat in oven: Cover with foil and bake at 350°F for 20 minutes or until hot.
Reheat in microwave: Heat in 1-minute increments until warmed through.

FAQs

1. Can I use canned chicken?
Yes, but for best flavor and texture, go with rotisserie or home-cooked shredded chicken.

2. Can I add vegetables?
Absolutely! Frozen peas, carrots, or sautéed mushrooms work well.

3. Is there a lower-fat version?
Use light cream cheese and sour cream, and opt for low-fat cheese if desired.

4. Can I make this ahead?
Yes, assemble and refrigerate (without the topping) for up to 24 hours. Add topping just before baking.

5. What other toppings can I use?
Try crushed cornflakes, panko, or French-fried onions for a different crunch.

Tips & Tricks

– Let cream cheese soften fully for easy mixing
– Use wide egg noodles for a heartier texture
– Stir in a handful of cooked bacon or diced ham for extra flavor
– Add a dash of cayenne or a splash of hot sauce for a subtle kick
– Double the recipe and freeze one for later!

Recipe Variations

1. Buffalo Chicken Style
Add buffalo sauce to the filling and top with blue cheese crumbles.

2. Veggie Boost
Stir in sautéed spinach, mushrooms, or zucchini for added nutrition.

3. Southwest Style
Add taco seasoning and mix in black beans, corn, and pepper jack cheese.

4. French Onion Twist
Caramelize onions and mix into the base. Top with Gruyère and French-fried onions.

5. Low-Carb Version
Swap noodles for cauliflower florets or zucchini noodles.

Final Thoughts

Million Dollar Chicken Noodle Casserole lives up to its name — it’s rich, creamy, and completely comforting. It’s the kind of dish that turns a simple dinner into something everyone looks forward to. Whether you’re feeding a crowd or just cooking for the week ahead, this casserole is a keeper. One bite, and you’ll see why it’s worth a million bucks.