Introduction
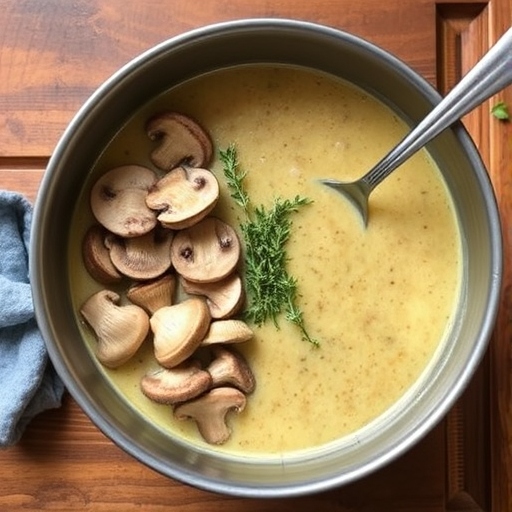
A warm bowl of soup is the perfect comfort food, and when combined with the earthy flavors of mushrooms and the aromatic touch of thyme, you have a dish that’s both satisfying and nourishing. This Mushroom and Thyme Soup is rich, velvety, and packed with depth. Whether it’s a cozy weeknight dinner or a special starter for a holiday meal, this soup is sure to please your taste buds and warm your soul.
Table of Contents
The Story Behind Mushroom and Thyme Soup
Mushrooms have been a part of culinary traditions for centuries. With a deep, umami-rich flavor, they are revered in many cuisines for their ability to add complexity to any dish. Paired with thyme, a herb known for its earthy, slightly floral aroma, this soup is a simple yet refined offering. Traditionally, mushroom soup is made with a base of cream or stock, and the addition of thyme elevates the flavor profile, making it a savory delight.
The Benefits of Making Your Own Mushroom and Thyme Soup
- Health Benefits:
Mushrooms are packed with nutrients like vitamin D, potassium, and antioxidants that support immune health. Thyme also offers anti-inflammatory properties and is rich in vitamins. - Control Over Ingredients:
Homemade soup allows you to choose fresh, organic ingredients, avoiding preservatives and artificial flavorings. - Customizable:
Whether you prefer your soup creamy or more brothy, you can adjust the consistency and seasonings to suit your personal taste.
Essential Ingredients for the Perfect Mushroom and Thyme Soup
- 1 lb fresh mushrooms (any variety, but cremini, button, or a mix work best)
- 1 medium onion, finely chopped
- 2 cloves garlic, minced
- 3 cups vegetable or chicken stock
- 1 cup heavy cream or coconut milk for a dairy-free option
- 2 tablespoons olive oil or butter
- 1 teaspoon fresh thyme leaves (or ½ teaspoon dried thyme)
- Salt and pepper, to taste
- 1 tablespoon fresh parsley, chopped (for garnish)
Cultural History of Ingredients
- Mushrooms: Known for their rich flavor and texture, mushrooms have been used in culinary traditions worldwide, from European to Asian dishes. Their earthy taste adds depth to both vegetarian and meat-based recipes.
- Thyme: This herb has been used since ancient times, known for its medicinal properties and ability to elevate savory dishes. It’s a staple in Mediterranean cuisine and is frequently paired with mushrooms, garlic, and meat.
- Cream: A traditional addition to soups, cream enriches the texture and adds a smooth mouthfeel, transforming the soup into a velvety, luxurious experience.
Equipment You’ll Need
- Large soup pot or Dutch oven
- Knife and cutting board
- Wooden spoon
- Measuring spoons and cups
- Immersion blender or regular blender (for a smooth texture)
- Ladle for serving
Step-by-Step Instructions for Mushroom and Thyme Soup
Step 1: Prepare the Mushrooms
- Clean the mushrooms with a damp cloth or paper towel to remove any dirt. Slice them thinly for even cooking.
- Set the mushrooms aside.
Step 2: Sauté Aromatics
- In a large soup pot, heat olive oil or butter over medium heat.
- Add the chopped onion and cook until softened, about 5 minutes.
- Add the garlic and fresh thyme leaves. Cook for an additional 1–2 minutes, stirring occasionally, until fragrant.
Step 3: Cook the Mushrooms
- Add the sliced mushrooms to the pot and sauté for 8–10 minutes, until they release their moisture and become tender.
- Stir occasionally to ensure even cooking.
Step 4: Add the Stock
- Pour in the vegetable or chicken stock and bring the mixture to a simmer.
- Cook for another 15–20 minutes, allowing the flavors to meld together.
Step 5: Blend the Soup
- For a smooth soup, use an immersion blender to blend the soup directly in the pot, or carefully transfer the mixture in batches to a regular blender.
- Blend until smooth, then return to the pot if using a regular blender.
Step 6: Add Cream and Season
- Stir in the heavy cream or coconut milk for a creamy texture.
- Season with salt and pepper to taste. Simmer for an additional 5 minutes.
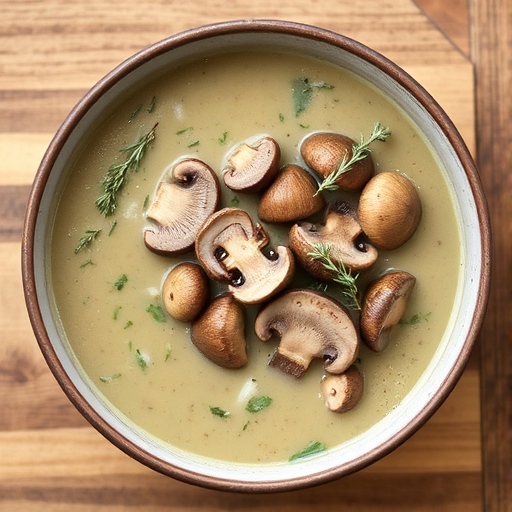
Step 7: Garnish and Serve
- Ladle the soup into bowls.
- Garnish with fresh parsley before serving.
Suggestions for Serving and Storing
- Serving Ideas:
- Serve with crusty bread or a toasted baguette for dipping.
- Pair with a light salad for a well-rounded meal.
- Storage Tips:
- Store leftovers in an airtight container in the refrigerator for up to 3 days.
- Reheat gently on the stove or in the microwave.
Chef Simon’s Tips for Mushroom and Thyme Soup
- Use a Variety of Mushrooms:
Experiment with different types of mushrooms, such as shiitake, portobello, or oyster mushrooms, for a deeper, more complex flavor. - For Extra Flavor:
Add a splash of white wine or a tablespoon of soy sauce when cooking the mushrooms to enhance the umami. - Make It Vegan:
Use coconut milk and vegetable stock to keep the soup vegan while still maintaining a creamy texture.
Emotional and Psychological Impact of Food
Food has a powerful way of affecting our emotions, and Mushroom and Thyme Soup offers warmth and comfort. The earthy flavors of mushrooms paired with the aromatic thyme have a calming and grounding effect, making this soup the perfect companion for cozy nights or moments of relaxation.
Mindful Cooking Techniques
- Focus on the Aromas:
As you sauté the onions, garlic, and thyme, take a moment to enjoy the fragrances wafting from the pan. This mindful approach can enhance your cooking experience. - Don’t Rush:
Allow the mushrooms to cook down and release their moisture slowly, building a rich base for the soup.
Tips for Keeping the Recipe Fresh Longer
- If storing leftovers, make sure the soup cools completely before refrigerating.
- Keep the cream or coconut milk separate if you plan to freeze the soup, as it may cause the texture to change upon thawing.
Advanced Culinary Terms and Techniques
- Sauté: A cooking technique where food is quickly cooked in a small amount of fat over high heat, which helps to develop rich flavors.
- Simmer: Cooking food gently at a low heat to allow flavors to develop without bringing the liquid to a full boil.
Healthy Ingredient Alternatives
- Dairy-Free Option:
Use coconut milk or almond milk as a substitute for cream for a dairy-free version. - Low-Sodium Stock:
If you’re concerned about sodium, opt for a low-sodium vegetable or chicken stock. - Additional Veggies:
Add some carrots or celery to the soup base for added nutrients and flavor.
More Serving Ideas
- Add a dollop of sour cream or a drizzle of truffle oil for an extra indulgent touch.
- Serve with grilled cheese sandwiches or a crisp green salad for a complete meal.
Common Issues and Solutions
- Too Thin:
If the soup is too thin, simmer for a longer period to reduce the liquid, or add a bit more cream to thicken it up. - Too Thick:
Add more stock or water to thin out the soup to your desired consistency. - Mushrooms Not Softening:
Make sure to cook the mushrooms long enough to release their moisture and become tender before adding the stock.
Variations to Try
- Cream of Mushroom and Thyme:
Add extra cream for a more luxurious, velvety texture. - Spicy Mushroom Soup:
Add a pinch of red pepper flakes or a chopped chili for a bit of heat. - Mushroom and Leek Soup:
Substitute some of the onions for leeks for a sweeter, milder flavor.
Nutritional Information and Health Benefits
- Calories: ~200 per serving
- Rich in Vitamins: Mushrooms provide vitamin D, B vitamins, and antioxidants.
- Low in Carbs: This soup is a low-carb option for those looking to cut down on their carb intake.
The Art of Pairing Mushroom and Thyme Soup
- With Wine:
Pair with a light white wine like Chardonnay or a dry rosé. - With Sides:
A tangy salad with vinaigrette or a warm crusty baguette complements the creamy texture of the soup beautifully.
Weather and Recipe Outcome
Mushroom and Thyme Soup is especially perfect for cold, crisp days. It’s warming and comforting, making it a perfect winter dish. For warmer weather, try serving it chilled as a refreshing, savory summer soup.
Other Soup Recipes to Explore
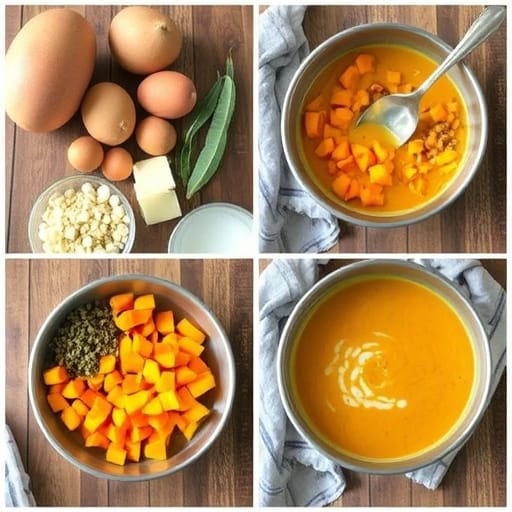
- Butternut Squash Soup
- Cream of Broccoli Soup
- Tomato Basil Soup
Focus on Tools and Equipment
- Sharp Knife:
A sharp knife ensures even slicing of the mushrooms and other vegetables, making the preparation process smoother and quicker. - Blender or Immersion Blender:
For a smooth texture, an immersion blender is convenient for blending the soup directly in the pot. If you don’t have one, a regular blender works just as well—just be sure to let the soup cool slightly before blending. - Soup Pot or Dutch Oven:
A sturdy, large soup pot or Dutch oven is ideal for cooking the soup evenly. Its heavy base helps distribute heat, preventing burning and ensuring a consistent cooking process.
Frequently Asked Questions (with answers)
- Can I use dried thyme instead of fresh thyme?
Yes, you can substitute dried thyme for fresh thyme. Use about half the amount since dried herbs are more concentrated. For this recipe, you would use 1/2 teaspoon of dried thyme instead of 1 teaspoon of fresh thyme. - Can I make this soup ahead of time?
Absolutely! In fact, this soup often tastes even better the next day as the flavors meld together. Let it cool completely before storing it in an airtight container in the fridge for up to 3 days. - Can I freeze Mushroom and Thyme Soup?
Yes, you can freeze the soup. Just make sure it has cooled completely before transferring it to an airtight container or freezer-safe bag. The soup can be frozen for up to 3 months. When reheating, be aware that the texture of the cream might change slightly, but the flavor will remain delicious. - Can I make this soup vegan?
Yes, you can easily make this soup vegan by substituting the heavy cream with coconut milk or any plant-based cream alternative and using vegetable stock instead of chicken stock. - What if I don’t have fresh mushrooms?
If you don’t have fresh mushrooms, you can use frozen mushrooms. However, the texture might be slightly different, so be sure to cook them well to release their moisture.
Conclusion
Mushroom and Thyme Soup is a timeless classic that combines simple ingredients to create something truly special. It’s a dish that can be enjoyed year-round, whether you’re seeking warmth on a chilly day or a light, comforting meal. With its rich flavor, creamy texture, and heartwarming aroma, this soup is sure to become a staple in your recipe repertoire.
By preparing it at home, you’re not only enjoying a dish that’s free from artificial additives but also embracing the joy of cooking from scratch. Whether you serve it as a starter or as the main event, this Mushroom and Thyme Soup will undoubtedly be a crowd-pleaser. So gather your ingredients, get cozy in the kitchen, and enjoy the delightful experience of making and eating this wholesome soup.