Heavenly Banana Walnut Cream Cake Recipe

Banana Walnut cream cake

Introduction

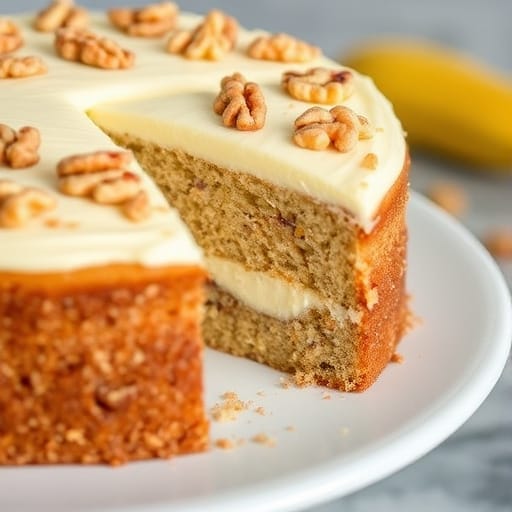
There’s something almost magical about a cake that seems like a warm hug. Well, the Heavenly Banana Walnut Cream Cake isn’t just a dessert; it is a celebration of flavors and textures. Imagine the sweetness of bananas at their ripe best mixed with the earthy, crunchy walnuts, covered by a light, velvety cream frosting. Such a cake can make ordinary days special and turn celebrations into cherished memories.

This is a perfect cake for birthdays, gatherings, or even a quiet afternoon treat. It’s a real showstopper, with moist layers and creamy topping that create an irresistible harmony. It’s also simple enough for beginners, while at the same time providing ample opportunities for more advanced bakers to make it their own.


1. The Story Behind the Recipe

Every recipe has a story, and this one is steeped in family traditions. Growing up, there was always a bowl of overripe bananas on the kitchen counter, ready to be turned into something delicious. My grandmother was an avid baker who didn’t believe in wasting anything. What’s her solution to soft bananas? To turn them into moist cakes that brought the family together.

The walnuts were her touch, adding crunch to what was otherwise a soft cake. The recipe evolved over the years to include cream frosting, which would be the finishing touches needed to balance the sweetness of the bananas and the nutty flavor of the walnuts. Today, this recipe stands as a tribute to those cherished moments in the kitchen filled with laughter, love, and the irresistible aroma of fresh-baked cake.


2. The Benefits of Making Your Own Banana Walnut Cream Cake

Why should you try this recipe at home instead of buying a pre-made dessert? Here’s why:

1. Unmatched Freshness

Store-bought cakes often lack the freshness that comes from homemade desserts. When you bake this cake, you control every ingredient, ensuring a flavor that’s pure and vibrant.

2. Creative Control

Making your own cake allows you to adjust it according to your preference. Love nuts? Throw in an extra handful. Like it a little less sweet? Have at it.

3. A Healthier Option

Homemade recipes allow you to use fresh, natural ingredients without artificial preservatives. Substitute refined sugar with honey or whole-wheat flour for a healthier twist.

4. Bonding Activity

This is the best thing to do while spending time with family or friends. Whether teaching children how to bake or just having fun with loved ones, it is a memory-maker.

5. Cost-Effective

Ingredients for this cake are common and budget-friendly, hence making it an affordable indulgence.


3. Essential Ingredients for the Perfect Cake

Each ingredient used in this cake plays an important part in the magic of making it. Active ingredients are as follows:

For the Cake Layers:

  • All-Purpose Flour: The base of the cake, providing structure.
  • Ripe Bananas: The star ingredient, offering natural sweetness and moisture.
  • Chopped Walnuts: Adds a crunchy texture and nutty flavor.
  • Buttermilk: Enhances moisture and adds a slight tang.
    Ingredients intended for this cake include:
  • Brown and White Sugar: A mix for depth and sweetness.
  • Vanilla Extract: For added warm, aromatic touch.

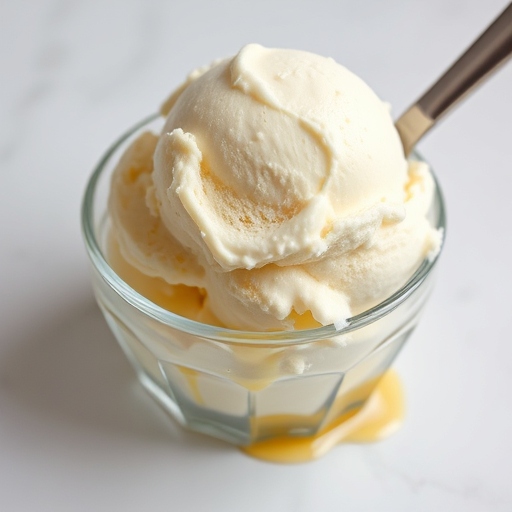
For the Cream Frosting:

  • Heavy Cream: Whips into a light, fluffy texture.
  • Cream Cheese (Optional): Adds a tangy richness.
  • Powdered Sugar: Sweetens the frosting without the grittiness.

Optional Additions:

  • Cinnamon or Nutmeg: Spiced flavor.
  • Dark Chocolate Chips: To add a hint of indulgence.

4. Cultural History of Ingredients

The following recipe is steeped in cultural history in each and every ingredient that goes into it:

  • Bananas: Originating from Southeast Asia, bananas form part of the staple ingredients for desserts all over the world. Their natural sweetness attracts their usage in cakes, pies, and breads.
  • Walnuts: Revered in ancient Persia and Rome, walnuts symbolize intelligence and fertility. They’ve been used in baked goods for centuries.
  • Cream: Often associated with European desserts, cream represents indulgence and celebration.

5. Equipment You’ll Need

To create this masterpiece, you’ll need the following tools:

  • Mixing Bowls: For combining ingredients.
  • Whisk or Electric Mixer: For combining the batter and whipping the frosting.
  • Measuring Cups and Spoons: In baking, accuracy is critical.
  • Cake Pans: The recipe works perfectly for two 9-inch pans.
  • Cooling Rack: Allows the cake to cool down even after baking.

6. Instructions Step-by-Step
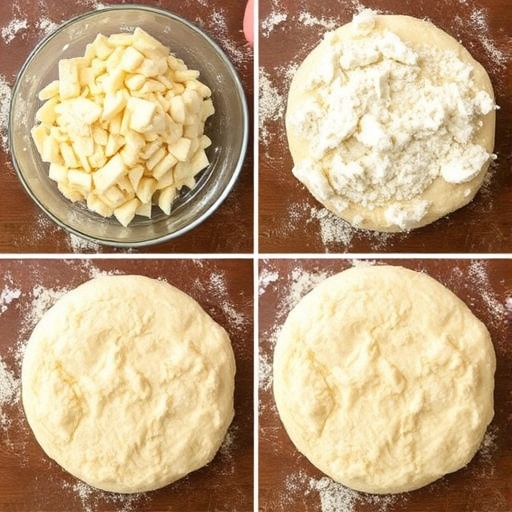
Making the Batter:

  1. Preheat the Oven: Preheat to 350°F (175°C). Prepare the cake pans by applying grease and dusting them with flour.  
  2. Combine Dry Ingredients: Mix flour, baking soda, baking powder, and salt in a bowl.  
  3. Cream the Butter and Sugars: Beat until fluffy and light in color.  
  4. Add Wet Ingredients: Add eggs one at a time, then mashed bananas, and lastly vanilla.
  5. Alternate Mixing: Progressively add the dry ingredients and buttermilk, starting and ending with the dry mix. 6. Fold in Walnuts: Gently fold them into the batter.

Baking the Cake:

  1. Divide the batter evenly between the prepared pans.
  2. Bake for 25–30 minutes or until a toothpick inserted in the center comes out clean.
  3. Cool completely before frosting.

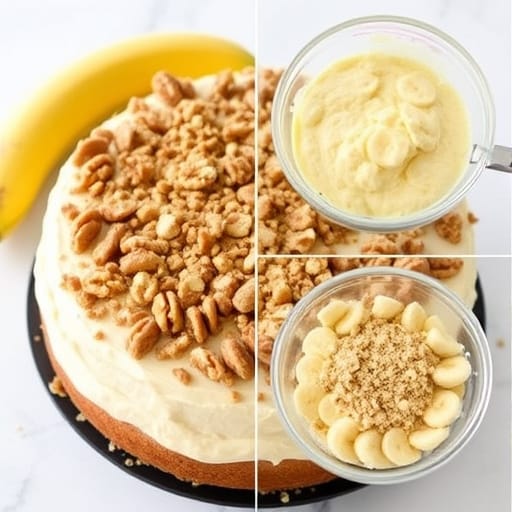
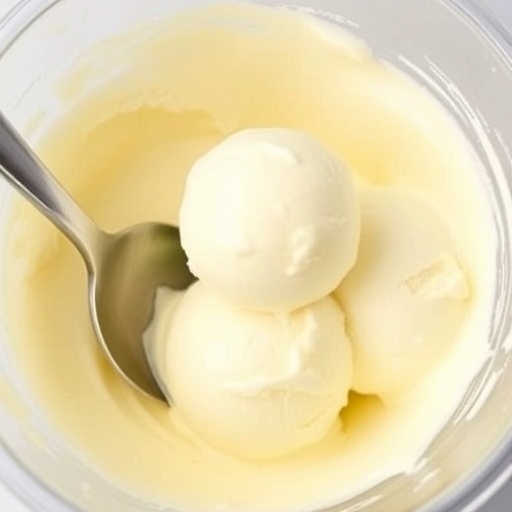
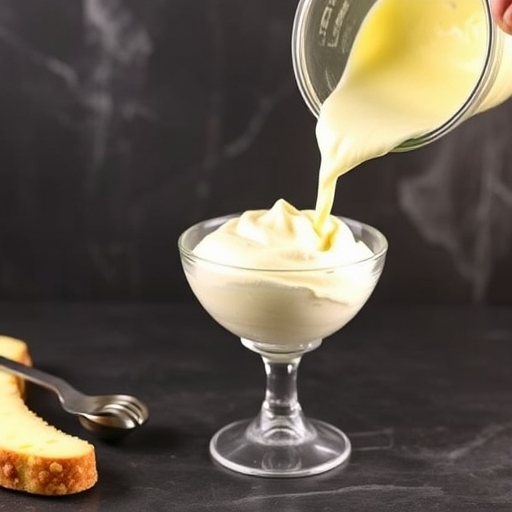
To Make the Cream Frosting:

  1. Whip the Cream: Chill a bowl and whisk and then beat heavy cream to achieve soft peaks.
  2. Add Sugar and Vanilla: Add in (grated) powdered sugar, extract of vanilla, and cont whipp to get the stiff peaks.
  3. **Cream Cheese : Add in softened cream cheese for added richness and tang in the frosting. –

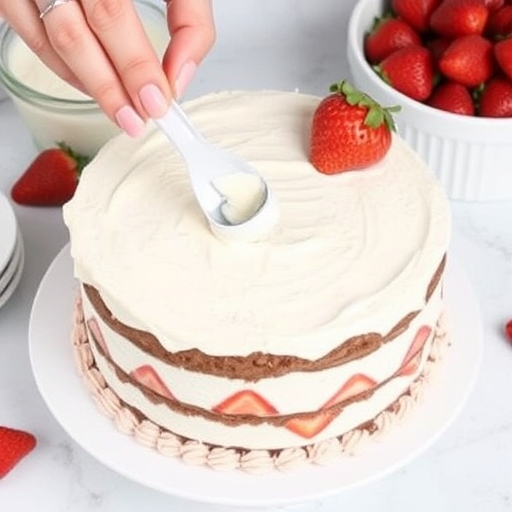
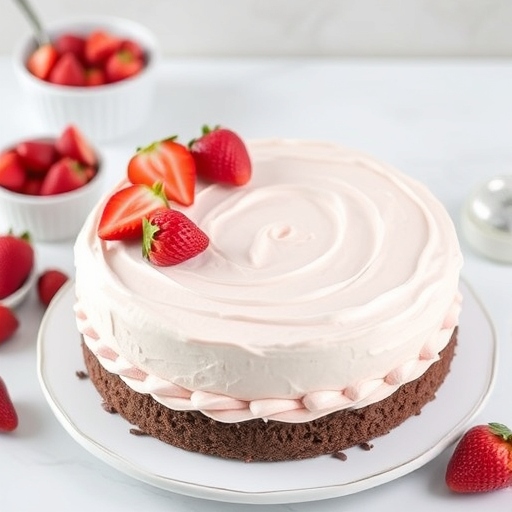
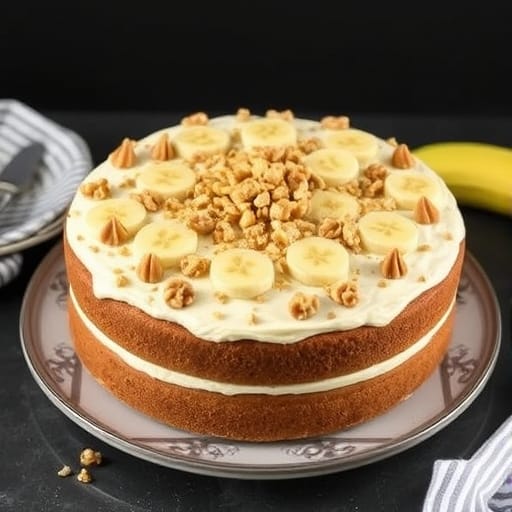
To Assemble This Cake:  

  1. Level Cakes: Trim the top of each cake if it is necessary for them to lie flat.
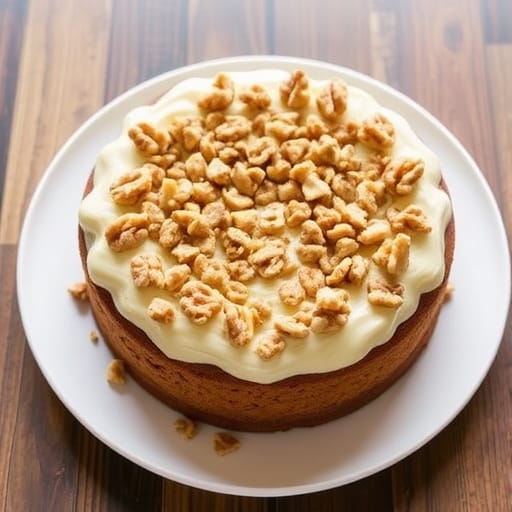
  2. **First Cake Frost: Place the first cake on a serving plate and thickly frost.
  3. Add the Second Layer: Place it on top and frost the top and sides. 4. Decorate: Use additional walnuts and banana slices for garnish.

7. Suggestions for Serving and Storing

Serving Suggestions:

  • Serve slices slightly chilled for a firmer texture or at room temperature for ultimate softness.
  • Pair with hot beverages like coffee, tea, or hot chocolate for a cozy treat.

Storing Tips:

  • Refrigerator: Store in an airtight container for up to 3 days.
  • Freezer: Wrap the unfrosted cake layers in plastic wrap and freeze for up to 2 months. Defrost overnight before frosting.

8. Chef Simon’s Tips for the Cake

  • Use Overripe Bananas: The browner the bananas, the better the flavor.
  • Toast the Walnuts: Lightly toasting them enhances their nutty aroma and taste.
  • Chill Your Whipping Cream: For the fluffiest frosting, ensure the cream is cold before whipping.

9. Emotional and Psychological Impact of Food

This cake is far beyond a dessert; it’s even comforting and nostalgic in every single bite. The bananas and walnuts bring a sense of warmth and security, while the creaminess of the frosting adds an element of indulgence. Shared among family and friends, it tightens bonds, making moments ordinary yet memorable.


10. Mindful Cooking Techniques

Baking this cake should be approached like a sensory experience.

  • Focus on the tactile process of mashing bananas.
  • Savor the aromas of the batter and toasted walnuts.
  • Take pride in each step, knowing you’re creating something special.

11. Tips for Keeping the Cake Fresh Longer

  • Wrap individual slices tightly in cling film to retain moisture.
  • Do not store the cake near foods with strong odors to retain its subtle flavors.

12. Advanced Culinary Terms and Techniques

  • Creaming Method: Beating together butter and sugar to incorporate air into it, thus making it light and fluffy.
  • Folding: Gentle mixing of ingredients so as not to eliminate the airiness in the batter.

13. Healthy Ingredient Alternatives

  • Sugar Substitutes: Use coconut sugar or maple syrup for a natural sweetener.
  • Dairy-Free Options: Replace butter with vegan margarine and buttermilk with almond milk mixed with vinegar.
  • Gluten-Free Flour: Swap all-purpose flour with a gluten-free blend for dietary restrictions.

14. More Serving Ideas

  • Top with a drizzle of caramel sauce for extra sweetness.
    Serve with a dollop of Greek yogurt for a nice tanginess.

15. Common Issues and Solutions

Problem: Cake too dense

  • Solution: Make sure bananas are very well mashed, do not overmix the batter.

Problem: Frosting too runny

  • Solution: Use cold cream and powdered sugar and whip on until stiff peaks are reached.

16. Some Variations to Try

*- Banana Chocolate Chip Cake: Fold in 1 cup of chocolate chips in the batter.

  • Tropical Twist : Mix in shredded coconut with the crushed pineapple for added tropical flavor.
  • Cinnamon Swirl : Add a swirl of cinnamon-sugar to give a spice-infused makeover.

17. Nutritional Information and Health Benefits

Considering how decadent this is, here are some hidden benefits:

  • Bananas: Rich in potassium and vitamin B6, which help in maintaining heart health.
  • Walnuts: Rich in omega-3 fatty acids and antioxidants.

18. The Art of Pairing

This cake pairs well with:

  • Beverages: A cup of chai tea, latte, or even a sweet dessert wine.
  • Other food items: A light fruit salad or a dollop of vanilla ice cream.

19. Weather and Recipe Outcome

Humidity can affect the frosting’s consistency. If you’re baking in a warm climate, work quickly to keep the cream stable. Conversely, colder weather can cause the butter in the batter to firm up, so bring it to room temperature before mixing.


20. Other Cake Recipes to Explore

  • Classic Red Velvet Cake
  • Moist Lemon Pound Cake
  • Triple Chocolate Fudge Cake

21. Focus on Tools and Equipment

Investing in quality tools can make all the difference:

  • Heavy-Duty Mixer: Speeds up creaming and whipping processes.
  • Silicone Spatulas: Perfect for scraping every bit of batter and frosting.

22. Frequently Asked Questions

Q: Can I make this cake without nuts?
Yes, simply omit the walnuts for a nut-free version.

Q: Can I use frozen bananas?
Of course! Let them thaw and then mash for best results.

Q: How can I make the frosting stiffer?
Add a tablespoon of cornstarch or cream cheese for added stability.


Conclusion

The Heavenly Banana Walnut Cream Cake is comfort and indulgence at its finest. This is much more than a dessert; this is a labor of love, the fruit of which is always joyous when it meets one’s taste buds. Be it for a family get-together or simply indulging oneself, this cake will promise smiles all around.

So grab those ripe bananas, preheat the oven, and let the magic begin. Your kitchen is going to smell like heaven!

Delicious Strawberry Chocolate Ice Cream Cake Recipe

Strawberry Chocolate Ice Cream Cake

Introduction
A Strawberry Chocolate Ice Cream Cake is the ultimate dessert, combining the rich indulgence of chocolate with the fresh sweetness of strawberries. This layered cake is perfect for celebrations, summer parties, or just as a special treat for your loved ones. With its decadent layers of chocolate cake, creamy strawberry ice cream, and a luscious chocolate fudge topping, it’s a dessert that will steal the show at any occasion. Whether you’re celebrating a birthday or just craving a refreshing, yet indulgent dessert, this cake hits all the right notes.


The Story Behind Strawberry Chocolate Ice Cream Cake

Ice cream cakes have been a popular dessert for decades, especially for birthdays and festive occasions. The combination of cake and ice cream makes for a delightful contrast in textures and temperatures. The pairing of strawberry and chocolate has been a classic one in the culinary world—both flavors are beloved by many for their perfect balance of sweetness and richness. This strawberry chocolate version elevates the traditional ice cream cake, combining the best of both worlds into one decadent, refreshing treat.


The Benefits of Making Your Own Strawberry Chocolate Ice Cream Cake

  1. Full Control Over Ingredients:
    When you make your own ice cream cake, you can use fresh, high-quality ingredients. This means you can choose a premium brand of chocolate and select the ripest strawberries, resulting in a more flavorful and satisfying dessert.
  2. Customization:
    You can tailor the cake’s layers, fillings, and toppings to suit your tastes. Want to add an extra layer of fruit or top it with more chocolate? The choice is yours!
  3. No Artificial Additives:
    Homemade cakes are free from preservatives and artificial flavors, giving you a healthier, fresher alternative to store-bought versions.

Essential Ingredients for the Perfect Strawberry Chocolate Ice Cream Cake

  • For the Cake:
    • 1 box chocolate cake mix (or homemade chocolate cake batter)
    • 2 large eggs
    • 1 cup water
    • 1/2 cup vegetable oil
  • For the Ice Cream Layer:
    • 4 cups strawberry ice cream (softened)
    • 1/2 cup crushed strawberries (fresh or frozen)
  • For the Fudge Layer:
    • 1 cup heavy cream
    • 1 cup semi-sweet chocolate chips
    • 1 tablespoon butter
  • For Garnish:
    • Fresh strawberries, halved
    • Whipped cream (optional)

Cultural History of Ingredients

  • Chocolate:
    Chocolate is one of the most beloved treats in the world. It originates from ancient Mesoamerican civilizations, where cocoa beans were used to make a bitter drink. Over time, the sweetness of chocolate evolved, and it became a staple in desserts globally. Chocolate cake and ice cream are now classic dessert choices in many cultures.
  • Strawberries:
    Strawberries have been enjoyed since ancient times. They are one of the first fruits to ripen in spring, symbolizing the start of a new season. Known for their vibrant color and sweet, slightly tangy taste, strawberries are commonly used in desserts, jams, and beverages.
  • Ice Cream:
    Ice cream’s history dates back to ancient Rome and China, where it was made from snow and flavored with fruits. Today, it’s a beloved dessert, especially during warmer months, and the perfect ingredient for layering in cakes and pies.

Equipment You’ll Need

  • 9-inch round cake pan (for baking the cake)
  • Electric mixer (optional, for smooth cake batter)
  • Spatula
  • Double boiler or microwave-safe bowl (for making the chocolate fudge)
  • Cake plate or serving dish
  • Parchment paper (optional, for lining the cake pan)
  • Knife (for slicing the cake and serving)

Step-by-Step Instructions for Strawberry Chocolate Ice Cream Cake

Step 1: Bake the Chocolate Cake

  1. Preheat your oven to 350°F (175°C).
  2. Grease a 9-inch round cake pan and line the bottom with parchment paper to prevent sticking.
  3. Prepare the chocolate cake mix according to the instructions on the box, or use your favorite homemade chocolate cake recipe.
  4. Pour the batter into the prepared pan and bake according to the package directions or until a toothpick inserted into the center comes out clean.
  5. Allow the cake to cool completely in the pan, then remove from the pan and set aside.

Step 2: Prepare the Strawberry Ice Cream Layer

  1. While the cake is cooling, soften the strawberry ice cream by leaving it at room temperature for about 10–15 minutes.
  2. Once softened, gently fold in the crushed strawberries to add extra flavor and texture.
  3. Spread the ice cream mixture evenly over the top of the cooled cake.
  4. Place the cake in the freezer for at least 2 hours to allow the ice cream to set.

Step 3: Make the Chocolate Fudge Layer

  1. In a double boiler or microwave-safe bowl, combine the heavy cream and chocolate chips.
  2. Heat over medium heat or microwave in 30-second intervals, stirring frequently, until the chocolate is melted and the mixture is smooth.
  3. Stir in the butter until fully incorporated, then allow the fudge to cool slightly before using.

Step 4: Assemble the Cake

  1. Once the ice cream layer has set, pour the cooled chocolate fudge sauce over the top of the cake.
  2. Use a spatula to spread the fudge evenly across the surface of the cake, ensuring it covers the ice cream layer.
  3. Return the cake to the freezer and freeze for at least 2 more hours to allow the fudge to harden.

Step 5: Garnish and Serve

  1. Once fully frozen, remove the cake from the freezer.
  2. Garnish with fresh strawberries and optional whipped cream on top.
  3. Slice and serve, making sure to let the cake sit for a few minutes at room temperature to make slicing easier.

Suggestions for Serving and Storing

  • Serving Tips:
    Serve the cake with a scoop of extra strawberry ice cream or a drizzle of hot fudge sauce for added indulgence.
  • Storage:
    Store any leftover cake in the freezer, covered tightly with plastic wrap or foil, for up to 1 week. If you plan to store the cake for longer, consider individually wrapping slices to prevent freezer burn.

Chef Simon’s Tips for Strawberry Chocolate Ice Cream Cake

  1. Cake Texture:
    If you’re making your own chocolate cake from scratch, make sure not to overmix the batter. Overmixing can result in a dense cake that won’t absorb the ice cream properly.
  2. Layering:
    For a cleaner look when slicing, allow the cake to freeze for a few hours after each layer is added. This will help maintain the distinct layers of cake, ice cream, and fudge.
  3. Ice Cream Variations:
    Try mixing up the flavors! If strawberry isn’t your favorite, substitute with any fruit-flavored ice cream or even chocolate or vanilla.

Emotional and Psychological Impact of Food

Food, especially something as indulgent as a Strawberry Chocolate Ice Cream Cake, often brings comfort and joy. It can remind us of celebrations, happy memories, and shared moments with loved ones. The combination of chocolate and strawberries, two flavors that are universally adored, invokes a sense of nostalgia and contentment.


Mindful Cooking Techniques

  • Enjoy the Process:
    Making this cake from scratch is not just about the end product; it’s about enjoying the process. Take your time to appreciate each step, from mixing the cake batter to creating the perfect chocolate fudge topping.
  • Visual Appeal:
    As you layer the ice cream and fudge, take a moment to admire the colors and textures. This is a dessert that’s not just delicious but also a feast for the eyes.

Tips for Keeping the Recipe Fresh Longer

  • Avoid Freezer Burn:
    Be sure to wrap the cake tightly in plastic wrap or foil when storing in the freezer. If you have any leftover fudge or ice cream, store them separately to preserve their texture and flavor.
  • Serving Freshness:
    If the cake has been stored for a while, let it sit at room temperature for 5–10 minutes before serving for a smoother texture and easier slicing.

Advanced Culinary Terms and Techniques

  • Ganache:
    A rich chocolate mixture made from melting chocolate and heavy cream. It’s often used as a topping or filling in cakes and pastries.
  • Churned Ice Cream:
    Ice cream that has been churned during the freezing process, which helps to incorporate air and create a smoother, creamier texture.

Healthy Ingredient Alternatives

  1. Low-Fat Ice Cream:
    For a lighter version, opt for low-fat or non-dairy ice cream options. Coconut milk-based ice creams can provide a similar creamy texture without the added calories.
  2. Sugar Substitutes:
    Use sugar substitutes like stevia or monk fruit for a healthier version of the cake and ice cream without sacrificing taste.

More Serving Ideas

  • Toppings:
    Serve with additional toppings like chopped nuts, caramel sauce, or a drizzle of strawberry syrup.
  • Beverages:
    Pair this cake with a chilled glass of sparkling water or a fruity iced tea to balance the richness of the dessert.

Common Issues and Solutions

  • Cake is Too Dense:
  • Solution: Ensure you don’t overmix the cake batter. Overmixing can lead to a denser texture. Mix just until the ingredients are combined for a light and fluffy cake. Additionally, check that your baking powder or soda is fresh for proper leavening.
  • Ice Cream Layer Melting Too Fast:
    Solution: If your ice cream layer starts melting too quickly, ensure the cake is fully chilled before spreading the ice cream. It’s also important to work in small batches when spreading the ice cream layer to avoid it melting prematurely.
  • Chocolate Fudge Not Setting Properly:
    Solution: Make sure the fudge mixture has cooled before pouring it onto the cake. If it’s too hot, it might melt the ice cream layer underneath. Also, ensure you give the cake enough time in the freezer after adding the fudge to allow it to set.

Variations to Try

  1. Caramel Ice Cream Layer:
    Instead of strawberry ice cream, try a caramel or butterscotch ice cream for a new twist. This variation will bring a rich, buttery flavor that pairs beautifully with chocolate cake.
  2. Fruit Toppings:
    Add a variety of fruits like raspberries, blueberries, or kiwi on top of the cake for a more refreshing, fruity dessert. The tartness of these fruits will balance out the sweetness of the cake.
  3. Nutty Add-ins:
    For a bit of crunch, try adding crushed nuts like almonds, hazelnuts, or walnuts into the ice cream layer. This adds texture and a nutty flavor that pairs wonderfully with the chocolate.

Nutritional Information and Health Benefits

While this dessert is indulgent and rich, it can be enjoyed in moderation as part of a balanced diet. Here’s an approximate breakdown of the nutritional content per serving (based on 12 servings):

  • Calories: 380–400 kcal per slice
  • Fat: 23g
  • Carbohydrates: 43g
  • Protein: 4g
  • Sugar: 30g
  • Fiber: 1g

Health Benefits:

  • Strawberries: Rich in antioxidants like vitamin C, strawberries help boost the immune system, fight free radicals, and promote skin health.
  • Dark Chocolate (in the fudge): Contains antioxidants that can benefit heart health and provide a small dose of iron and magnesium.

While this dessert isn’t low in calories or sugar, it offers a few benefits from the nutrient-rich ingredients like strawberries and dark chocolate. It’s a great way to treat yourself while enjoying a burst of antioxidants and natural goodness.


The Art of Pairing Strawberry Chocolate Ice Cream Cake

To elevate your dessert experience, pair this ice cream cake with a few complementary items:

  • Beverages:
    • Coffee: A cup of freshly brewed coffee (especially dark roast) enhances the chocolate flavors in the cake and provides a slight contrast to the sweetness.
    • Wine: A light white wine such as a Moscato or a sweet Riesling pairs beautifully with the strawberry layer, while a richer red wine like Merlot complements the chocolate.
  • Side Dishes:
    • Fresh Fruit Salad: A refreshing side of fresh berries or citrus fruits can balance out the richness of the ice cream cake.
    • Light Sorbet: Serve a scoop of lemon or raspberry sorbet to cleanse the palate between bites of the rich cake.

Weather and Recipe Outcome

The outcome of this Strawberry Chocolate Ice Cream Cake is ideal for warm weather months, especially during spring and summer. The cold, creamy layers of ice cream provide a refreshing contrast to the heat, making it a perfect treat for hot days or summer gatherings. On colder days, while still delicious, it may be more comforting to enjoy this dessert after a warm meal, as the chilled layers contrast with the coziness of the meal.


Other Ice Cream Cakes to Explore

If you’re a fan of ice cream cakes, here are a few more variations to try:

  1. Mint Chocolate Chip Ice Cream Cake: Layer chocolate cake with mint chocolate chip ice cream and top with a chocolate ganache drizzle for a refreshing twist.
  2. Cookies and Cream Ice Cream Cake: Chocolate or vanilla cake layers paired with cookies and cream ice cream and crushed Oreos make for a fun and delicious treat.
  3. Peanut Butter Cup Ice Cream Cake: A rich chocolate cake layered with peanut butter ice cream and chunks of peanut butter cups for an indulgent, satisfying dessert.

Focus on Tools and Equipment

To make the preparation of your Strawberry Chocolate Ice Cream Cake easier and more efficient, consider the following tools:

  1. Electric Mixer:
    For a smoother cake batter, using an electric mixer can speed up the process and ensure everything is thoroughly incorporated.
  2. Double Boiler or Microwave:
    A double boiler is ideal for melting chocolate without scorching it. If you don’t have one, you can also use the microwave in short bursts, stirring in between.
  3. Cake Slicing Knife:
    When it’s time to serve the cake, a serrated cake slicer or a sharp chef’s knife ensures you get clean slices without melting the ice cream.

Frequently Asked Questions (with answers)

  1. Can I use store-bought cake for this recipe?
    Yes! If you want to save time, you can use a store-bought chocolate cake or even brownies as the base for your ice cream cake. Just ensure it’s fully cooled before layering with ice cream.
  2. Can I add more than one flavor of ice cream?
    Absolutely! You can create layers with different flavors of ice cream, like vanilla, chocolate, and strawberry, for a more complex and indulgent dessert.
  3. How can I make this cake gluten-free?
    To make this cake gluten-free, simply substitute the regular chocolate cake mix with a gluten-free version. Ensure that the ice cream and chocolate fudge sauce are also gluten-free.
  4. Can I make this cake without ice cream?
    If you prefer not to use ice cream, you can replace it with a layer of whipped cream or mousse. However, this will alter the texture and flavor of the cake.

Conclusion

The Strawberry Chocolate Ice Cream Cake is a delightful, indulgent treat that combines the best of both worlds—creamy, cold ice cream and rich, moist chocolate cake. This dessert is a crowd-pleaser that will satisfy even the most discerning sweet tooth. It’s perfect for birthdays, holiday gatherings, or any special occasion. By following the steps, experimenting with flavors, and adding your personal touches, you’ll create a show-stopping dessert that everyone will love. So, gather your ingredients, enjoy the process, and treat your family and friends to this delicious and refreshing ice cream cake!

Delicious Pumpkin Cheesecake Truffles Recipe

Pumpkin Cheesecake Truffles Recipe

Introduction

Pumpkin Cheesecake Truffles are the perfect bite-sized treats that combine the cozy flavors of pumpkin spice with the creamy decadence of cheesecake. These no-bake delights are an excellent dessert for holidays, gatherings, or simply indulging in fall flavors all year round. Their rich, velvety texture paired with a hint of spice makes them irresistible, whether served as an after-dinner treat or gifted to loved ones.


1. The Story Behind Pumpkin Cheesecake Truffles

The idea for Pumpkin Cheesecake Truffles stems from the love for cheesecake desserts and the growing popularity of pumpkin-flavored treats during autumn. Inspired by traditional pumpkin pie and the elegance of truffles, this recipe delivers a balance of creaminess, spice, and sweetness in a portable form. These truffles have become a staple for modern dessert enthusiasts looking for convenience without sacrificing flavor.


2. The Benefits of Making Your Own Pumpkin Cheesecake Truffles

  • Control Over Ingredients: Avoid additives and customize sweetness and spice levels.
  • Creative Presentation: Decorate or coat them uniquely for special occasions.
  • Cost-Effective: Homemade truffles are a budget-friendly alternative to store-bought ones.
  • Perfect Portioning: Enjoy a dessert that satisfies cravings without overindulgence.

3. Essential Ingredients for the Perfect Pumpkin Cheesecake Truffles

  • Cream Cheese: 8 ounces, softened.
  • Pumpkin Puree: ½ cup, not pumpkin pie filling.
  • Powdered Sugar: 1 ½ cups, sifted.
  • Pumpkin Pie Spice: 1 teaspoon.
  • Vanilla Extract: 1 teaspoon.
  • Graham Cracker Crumbs: 1 cup, finely crushed.
  • White Chocolate Chips: 1 ½ cups, for coating.
  • Coconut Oil: 1 tablespoon, for smooth melting.
  • Optional Toppings: Crushed pecans, sprinkles, or extra graham cracker crumbs.

4. Cultural History of Ingredients

  • Pumpkin: A North American staple, pumpkins have been used in desserts since the early colonial days.
  • Cream Cheese: Popularized in 19th-century America, it adds richness to desserts globally.
  • Graham Crackers: Invented in the early 1800s, these are a classic element in cheesecakes and crusts.

5. Equipment You’ll Need

  • Mixing bowl and spatula.
  • Electric hand or stand mixer.
  • Baking sheet lined with parchment paper.
  • Microwave-safe bowl for melting chocolate.
  • Small cookie scoop or spoon for shaping truffles.

6. Step-by-Step Instructions for Pumpkin Cheesecake Truffles

  1. Prepare the Truffle Base
    • In a large bowl, beat the softened cream cheese with a hand mixer until smooth.
    • Add pumpkin puree, powdered sugar, pumpkin pie spice, and vanilla extract. Beat until fully combined.
  2. Incorporate Graham Cracker Crumbs
    • Gently fold in the crushed graham cracker crumbs until the mixture is firm enough to scoop. Chill in the refrigerator for 30 minutes.
  3. Shape the Truffles
    • Using a small cookie scoop or spoon, portion out the mixture and roll into bite-sized balls. Place them on the prepared baking sheet. Chill for another 30 minutes to set.
  4. Melt the White Chocolate
    • In a microwave-safe bowl, combine white chocolate chips and coconut oil. Heat in 30-second intervals, stirring between, until smooth.
  5. Coat the Truffles
    • Dip each truffle into the melted chocolate using a fork or dipping tool. Let the excess chocolate drip off, then place the truffle back on the parchment paper.
  6. Add Toppings and Set
    • Sprinkle with toppings like crushed pecans or graham cracker crumbs before the chocolate hardens. Refrigerate for at least 1 hour to set completely.

7. Suggestions for Serving and Storing

  • Serving: Serve chilled for the best texture and flavor. Arrange on a platter for parties or as a dessert table highlight.
  • Storing: Keep in an airtight container in the refrigerator for up to 5 days. For longer storage, freeze truffles in a single layer and thaw as needed.

8. Chef Simon’s Tips for Pumpkin Cheesecake Truffles

  • Use High-Quality Chocolate: Good-quality white chocolate ensures a smoother, more luxurious coating.
  • Add Spice Gradually: Taste as you mix to avoid overpowering the delicate balance of flavors.
  • Double-Coat for Perfection: Dip the truffles a second time in chocolate for a thicker shell.

9. Emotional and Psychological Impact of Food

Pumpkin Cheesecake Truffles evoke feelings of warmth, nostalgia, and joy. Perfect for sharing, they create memorable moments with friends and family. Their autumn-inspired flavors bring comfort, while their elegant presentation adds a touch of sophistication to any occasion.


10. Mindful Cooking Techniques

  • Focus on the aromas of the pumpkin and spices as you mix.
  • Be deliberate with your motions when shaping and coating the truffles, appreciating the artistry of the process.

11. Tips for Keeping the Recipe Fresh Longer

  • Use fresh pumpkin puree for optimal flavor.
  • Coat truffles thoroughly in chocolate to seal in freshness.

12. Advanced Culinary Terms and Techniques

  • Tempering: For a shiny, crisp coating, temper the white chocolate before dipping.
  • Chilling the Mixture: This prevents stickiness and ensures easier shaping.

13. Healthy Ingredient Alternatives

  • Replace powdered sugar with coconut sugar or stevia for a lower-sugar option.
  • Use gluten-free graham crackers to accommodate dietary restrictions.
  • Substitute white chocolate with dark chocolate for a less sweet alternative.

14. More Serving Ideas

  • Drizzle with caramel or dark chocolate for added flavor.
  • Serve alongside coffee or spiced tea for a cozy dessert pairing.

15. Common Issues and Solutions

  • Mixture Too Sticky: Add more graham cracker crumbs and chill longer.
  • Chocolate Coating Too Thick: Thin it with a touch more coconut oil.

16. Variations to Try

  • Chocolate Pumpkin Truffles: Add cocoa powder to the mixture for a richer flavor.
  • Nutty Truffles: Roll in crushed walnuts or hazelnuts for added texture.
  • Spiced Truffles: Mix in a pinch of ground ginger or cardamom for a unique twist.

17. Nutritional Information and Health Benefits

  • Calories: ~120 per truffle (depends on size).
  • Vitamin A: From pumpkin, promoting eye health.
  • Antioxidants: Found in spices and chocolate, supporting overall wellness.

18. The Art of Pairing Pumpkin Cheesecake Truffles

Pair these truffles with hot drinks like chai tea, pumpkin spice lattes, or mulled cider. For a festive touch, serve them alongside sparkling wine or a creamy dessert cocktail.


19. Weather and Recipe Outcome

  • Cool Weather: Ideal for fall and winter, as the spices and pumpkin evoke seasonal warmth.
  • Warm Weather: Enjoy chilled, as they provide a creamy and refreshing treat.

20. Other Truffle Recipes to Explore

  • Dark Chocolate Espresso Truffles
  • Coconut Almond Bliss Truffles
  • Salted Caramel Pretzel Truffles

21. Focus on Tools and Equipment

  • Invest in a good-quality dipping tool for smooth, professional-looking truffles.
  • Use parchment paper to prevent sticking and ensure easy cleanup.

22. Frequently Asked Questions (with answers)

Q: Can I make these truffles ahead of time?
A: Absolutely! They store well in the refrigerator for up to 5 days or in the freezer for a month.

Q: What if I don’t have pumpkin pie spice?
A: Make your own blend with cinnamon, nutmeg, ginger, and cloves.

Q: Can I skip the white chocolate coating?
A: Yes, roll the truffles in cocoa powder, powdered sugar, or crushed nuts instead.


Conclusion

Pumpkin Cheesecake Truffles are a delightful combination of seasonal flavors and creamy indulgence. Easy to make yet luxurious in taste, these treats are perfect for elevating any occasion. Whether enjoyed as a snack, dessert, or edible gift, they’re guaranteed to impress and satisfy every palate. Try this recipe and savor the joy of homemade gourmet truffles!

Cuisinart Vanilla Ice Cream Recipe: Creamy, Smooth, and Delicious

Vanilla ice cream

Introduction
There’s something magical about the simplicity of vanilla ice cream. Smooth, creamy, and bursting with natural flavor, it’s the ultimate comfort dessert. With a Cuisinart ice cream maker, you can skip store-bought options and whip up a batch of this timeless treat right in your kitchen. Not only is it fresher and more flavorful, but it also allows you to customize ingredients to suit your taste.


The Story Behind Vanilla Ice Cream

Vanilla ice cream traces its roots back to the royal courts of Europe, where it was served as a luxury treat for the elite. The simplicity of its ingredients—cream, sugar, and vanilla—belies its depth of flavor. Today, it’s a dessert that transcends cultures and occasions, pairing perfectly with everything from warm pie to fresh berries. Homemade vanilla ice cream brings back the nostalgia of summer days, family gatherings, and pure indulgence.


The Benefits of Making Your Own Vanilla Ice Cream

  1. Superior Flavor: Freshly churned ice cream boasts a richness unmatched by commercial brands.
  2. Control Over Ingredients: Avoid artificial additives and tailor sweetness to your preference.
  3. Customizable Base: Use it as a canvas for endless mix-ins or flavor variations.
  4. Family Activity: Making ice cream is a fun project that everyone can enjoy.

Essential Ingredients for the Perfect Vanilla Ice Cream

  • 2 cups heavy cream
  • 1 cup whole milk
  • ¾ cup granulated sugar
  • 1 tablespoon pure vanilla extract
  • Pinch of salt

Cultural History of Ingredients

  • Vanilla: Originating from the orchid plant, vanilla was first cultivated by the Totonac people of Mexico and later prized by Europeans.
  • Heavy Cream: Known for its luxurious texture, cream has been a key ingredient in desserts since ancient times.
  • Sugar: A universally loved sweetener, sugar enhances the natural flavors in ice cream.

Equipment You’ll Need

  • Cuisinart ice cream maker
  • Mixing bowl
  • Whisk
  • Measuring cups and spoons
  • Spatula

Step-by-Step Instructions for Cuisinart Vanilla Ice Cream

Step 1: Prepare the Ice Cream Base

  1. In a mixing bowl, whisk together heavy cream, whole milk, sugar, vanilla extract, and a pinch of salt until the sugar dissolves.
  2. Cover the mixture and refrigerate for 1–2 hours or until thoroughly chilled.

Step 2: Assemble Your Cuisinart Ice Cream Maker

  1. Ensure the freezer bowl has been frozen for at least 24 hours.
  2. Set up the ice cream maker according to the manufacturer’s instructions.

Step 3: Churn the Ice Cream

  1. Pour the chilled mixture into the frozen bowl of the Cuisinart ice cream maker.
  2. Turn on the machine and churn for 15–20 minutes, or until the mixture reaches a soft-serve consistency.

Step 4: Freeze for Firmer Texture

  1. For a firmer texture, transfer the churned ice cream to an airtight container.
  2. Freeze for 2–4 hours before serving.

Suggestions for Serving and Storing

  • Serving Ideas:
    • Top with fresh fruit, hot fudge, or crushed cookies.
    • Use as a filling for ice cream sandwiches.
  • Storage Tips:
    • Store in an airtight container in the freezer for up to 2 weeks.
    • Cover with plastic wrap to prevent ice crystals from forming.

Chef Simon’s Tips for Vanilla Ice Cream

  1. Chill Thoroughly: Ensure the base is well-chilled before churning for the best texture.
  2. Use Quality Vanilla: Pure vanilla extract or vanilla bean paste enhances flavor.
  3. Don’t Overfill: Avoid overloading the ice cream maker, as this affects churning efficiency.

Emotional and Psychological Impact of Food

Vanilla ice cream is often associated with comfort and joy. Its creamy texture and familiar flavor bring a sense of nostalgia and happiness, making it the perfect treat for celebrations or a simple pick-me-up.


Mindful Cooking Techniques

  • Taste the Base: Before chilling, taste the mixture to ensure it’s perfectly balanced.
  • Savor the Process: Appreciate each step, from whisking the base to watching it transform in the ice cream maker.

Tips for Keeping the Recipe Fresh Longer

  • Always use fresh cream and milk for the best flavor and texture.
  • Store in a tightly sealed container to prevent freezer burn.

Advanced Culinary Terms and Techniques

  • Churn: The process of incorporating air into the mixture while freezing to create a smooth texture.
  • Overrun: The amount of air incorporated into ice cream during churning, affecting creaminess.

Healthy Ingredient Alternatives

  1. Low-Fat Option: Use half-and-half instead of heavy cream.
  2. Sugar Substitutes: Replace sugar with honey or a low-calorie sweetener like erythritol.
  3. Dairy-Free: Swap milk and cream with coconut milk or almond milk for a vegan version.

More Serving Ideas

  • Pair with apple pie or brownies for a classic dessert.
  • Serve in waffle cones for a fun, nostalgic treat.

Common Issues and Solutions

  • Icy Texture: Ensure the base is chilled thoroughly before churning.
  • Too Soft: Freeze longer after churning for a firmer consistency.
  • Weak Flavor: Use high-quality vanilla extract or fresh vanilla beans.

Variations to Try

  1. Vanilla Bean Ice Cream: Add the seeds from one vanilla bean for an elevated flavor.
  2. Chocolate Chip Vanilla: Mix in mini chocolate chips during the last 5 minutes of churning.
  3. Caramel Swirl: Add a swirl of caramel sauce after churning.

Nutritional Information and Health Benefits

  • Calories: ~200 per ½ cup serving
  • Fats: Provides energy and enhances flavor absorption.
  • Calcium: Supports bone health.

The Art of Pairing Vanilla Ice Cream

  • With Desserts: Pairs beautifully with warm cobblers, chocolate cake, or fresh fruit.
  • With Beverages: Float a scoop in root beer or cold brew coffee for a refreshing treat.

Weather and Recipe Outcome

Warm weather can speed up the melting process, so serve immediately for the best texture. During colder months, allow the ice cream to soften slightly before scooping.


Other Ice Cream Recipes to Explore

  • Chocolate Fudge Ice Cream
  • Strawberry Basil Sorbet
  • Coffee Toffee Ice Cream

Focus on Tools and Equipment

  • Freezer Bowl: Ensure it’s fully frozen before use for optimal results.
  • Airtight Container: Essential for storing homemade ice cream to maintain freshness.

Frequently Asked Questions (with answers)

Q: Can I double the recipe?
A: It’s best to make one batch at a time, as overfilling the machine can affect consistency.

Q: How do I achieve a richer flavor?
A: Replace some of the milk with additional cream or add an extra teaspoon of vanilla extract.

Q: Can I use a different brand of ice cream maker?
A: Yes, this recipe works with most ice cream makers, but follow the manufacturer’s instructions.


Conclusion

With a Cuisinart ice cream maker, crafting homemade vanilla ice cream is a breeze. This recipe delivers the perfect balance of creaminess and sweetness, making it an ideal base for endless flavor experiments. Treat yourself and your loved ones to a bowl of this classic dessert, and savor the joy of homemade indulgence!

Dole Whip Recipe: A Tropical Bliss

Dole Whip

Introduction

When life gives you pineapples, make Dole Whip! This beloved dessert is not only refreshing but also a nostalgic treat for anyone who’s ever visited a theme park. It’s creamy, sweet, and just the right amount of tangy, offering a taste of paradise in every bite. Whether you’re a seasoned Dole Whip fan or discovering it for the first time, this recipe lets you recreate the magic at home with simple ingredients.


1. The Story Behind Dole Whip

Dole Whip was first introduced in the 1980s as a dairy-free soft-serve option for theme park visitors. It quickly gained popularity for its tropical flavor and creamy texture, becoming a signature treat. Its cult-like following has since transformed it into a symbol of fun, relaxation, and summertime joy.


2. The Benefits of Making Your Own Dole Whip

Why make Dole Whip at home?

  • Healthier Options: Customize the sweetness or opt for healthier substitutes.
  • Cost-Effective: Save money by avoiding expensive theme park prices.
  • Convenience: Enjoy it anytime, anywhere without leaving your house.
  • Creative Variations: Add flavors like mango, coconut, or even rum for a boozy twist.

3. Essential Ingredients for the Perfect Dole Whip

To nail that authentic Dole Whip flavor, you’ll need:

  • Frozen Pineapple Chunks: The star of the show.
  • Coconut Milk or Almond Milk: For a creamy, dairy-free base.
  • Sugar or Sweetener: Adjust to taste.
  • Pineapple Juice: Enhances the tanginess.

4. Cultural History of Pineapple

Pineapple has long been a symbol of hospitality and luxury, dating back to 17th-century Europe. In Hawaii, where Dole Whip originates, pineapples play a significant role in the local economy and culture. This dessert pays homage to the sweet fruit’s rich heritage.


5. Equipment You’ll Need

  • A high-powered blender or food processor
  • Measuring cups
  • A spatula
  • Piping bag (optional for soft-serve swirls)

6. Step-by-Step Instructions for Dole Whip

  1. Prepare Ingredients:
    • 2 cups of frozen pineapple chunks
    • ½ cup of coconut or almond milk
    • 2 tablespoons of sugar or honey (optional)
    • ¼ cup of pineapple juice
  2. Blend:
    • Combine all ingredients in a blender. Start on low speed and gradually increase to high.
  3. Achieve the Perfect Texture:
    • Blend until smooth and creamy. Add more liquid if needed, but keep it thick.
  4. Serve:
    • Scoop into bowls or use a piping bag for that iconic swirl.

7. Suggestions for Serving and Storing

  • Serve Immediately: Dole Whip tastes best fresh and cold.
  • Store Leftovers: Freeze in an airtight container for up to 2 days, but re-blend before serving for optimal texture.

8. Chef Simon’s Tips for Dole Whip

  • Go Dairy-Free: Stick to non-dairy milk for the authentic taste.
  • Add Zest: A dash of lime juice brightens the flavor.
  • Experiment: Mix in other tropical fruits like mango or passionfruit.

9. Emotional and Psychological Impact of Food

There’s something inherently joyful about eating a Dole Whip. Its bright flavor and sunny color evoke memories of vacations, theme parks, and carefree days.


10. Mindful Cooking Techniques

  • Focus on the textures as you blend.
  • Enjoy the vibrant scent of fresh pineapple.
  • Savor each bite mindfully, letting the tropical flavors transport you.

11. Tips for Keeping the Recipe Fresh Longer

  • Use freshly frozen pineapple for optimal flavor.
  • Keep it airtight in the freezer to avoid ice crystals.

12. Advanced Culinary Terms and Techniques

  • Emulsify: Achieve the creamy texture by blending liquid and solids evenly.
  • Aerate: Use a piping bag to create soft-serve swirls with an airy texture.

13. Healthy Ingredient Alternatives

  • Replace sugar with stevia or agave for a healthier dessert.
  • Use light coconut milk to reduce fat content.

14. More Serving Ideas

  • Top with shredded coconut, diced pineapple, or a drizzle of caramel.
  • Serve alongside a slice of pound cake for a delightful dessert.

15. Common Issues and Solutions

  • Too Thick? Add more liquid gradually.
  • Too Runny? Freeze for 15 minutes to firm up.

16. Variations to Try

  • Coconut Dole Whip: Add a splash of coconut cream.
  • Spicy Pineapple: Mix in a pinch of chili powder for a surprising kick.
  • Boozy Version: Add a shot of rum for adults.

17. Nutritional Information and Health Benefits

  • Calories: Approximately 120 per serving (without sugar).
  • Rich in Vitamin C: Pineapple boosts your immune system.
  • Hydration: Coconut milk and pineapple juice are hydrating.

18. The Art of Pairing Dole Whip

Pair with tropical drinks like piña coladas or iced tea for a perfect summer vibe.


19. Weather and Recipe Outcome

On warm days, serve immediately to prevent melting. In cooler weather, freeze slightly longer for a firmer texture.


20. Other Tropical Desserts to Explore

  • Mango Sorbet
  • Coconut Cream Pie
  • Passionfruit Parfait

21. Focus on Tools and Equipment

  • A high-powered blender is key for achieving the right texture.
  • A piping bag elevates presentation.

22. Frequently Asked Questions (with answers)

Q: Can I use canned pineapple instead of frozen?
A: Yes, but freeze it first to achieve the correct texture.

Q: Is Dole Whip vegan?
A: This recipe is vegan if you use plant-based milk.

Q: How do I make it sweeter?
A: Add more sugar or honey to taste.


Conclusion

Making Dole Whip at home is a rewarding experience that brings the tropics to your kitchen. With its simple ingredients and quick preparation, this dessert is perfect for any occasion. So, grab your blender and get ready to savor a taste of paradise!


Thank you for visiting SqueezyRecipes! We’re dedicated to making cooking enjoyable and accessible for everyone, regardless of your skill level. Chef Simon is always ready to share the best recipes that bring a creative touch to your daily meals. With each visit, you’ll discover new recipes and innovative ideas that cater to every occasion. Don’t miss out on exploring SqueezyRecipes for the latest delicious dishes, and feel free to leave your feedback and share your experiences with the recipes you’ve tried. Cooking together makes everything better!

Easy Sourdough Discard Biscuit Recipe

Sourdough Discard

Introduction

Transforming sourdough discard into soft, flaky biscuits is a perfect way to reduce waste while enjoying a delightful homemade treat. These biscuits are golden, buttery, and filled with subtle tanginess from the sourdough starter. Whether you serve them with a hearty soup, slather them with jam, or enjoy them straight from the oven with a pat of butter, they’re a versatile addition to any meal. Let’s explore the recipe in detail and unlock the secrets to making perfect sourdough discard biscuits.


1. The Story Behind Sourdough Discard Biscuits

Sourdough baking has captivated home bakers worldwide, bringing with it a constant challenge: what to do with the discard. Instead of throwing away your sourdough discard, why not turn it into something delicious? This recipe evolved as a practical solution to minimize food waste while embracing the tangy flavor of sourdough in a new way. Over the years, sourdough discard biscuits have become a favorite for their simplicity and ability to showcase the unique qualities of sourdough.


2. The Benefits of Making Your Own Sourdough Discard Biscuits

  • Waste Reduction: Making biscuits with sourdough discard helps you use every bit of your starter.
  • Healthier Option: Sourdough contains natural probiotics, which can aid digestion.
  • Freshness and Flavor: Homemade biscuits offer unmatched freshness with a delicious tangy twist.
  • Customizable: Add herbs, cheese, or even spices to adapt this recipe to your preferences.

3. Essential Ingredients for the Perfect Sourdough Discard Biscuit

  • All-purpose flour: The base ingredient for structure and softness.
  • Sourdough discard: Adds flavor and acts as part of the liquid content.
  • Butter: Creates those signature flaky layers and adds richness.
  • Buttermilk: Activates the baking powder for rise and enhances the tanginess.
  • Baking powder and baking soda: Essential for the lift and fluffy texture.
  • Salt: Balances flavors and enhances taste.

4. Cultural History of Ingredients

  • Sourdough: One of the oldest forms of leavened bread, dating back to Ancient Egypt, sourdough has a rich history of providing sustenance and flavor.
  • Butter: Revered across cultures, butter has been a symbol of luxury and essential in baking for centuries.
  • Buttermilk: A staple in Southern cooking, buttermilk has been used in biscuits for generations due to its tangy flavor and tenderizing properties.

5. Equipment You’ll Need

  • Large mixing bowl
  • Pastry cutter or fork
  • Measuring cups and spoons
  • Baking sheet
  • Rolling pin
  • Biscuit cutter (or a glass with a sharp edge)
  • Parchment paper

6. Step-by-Step Instructions for Sourdough Discard Biscuits

  1. Preheat Your Oven: Set your oven to 425°F (220°C) and line a baking sheet with parchment paper.
  2. Mix the Dry Ingredients: In a large bowl, combine 2 cups of all-purpose flour, 1 tablespoon of baking powder, 1/2 teaspoon of baking soda, and 1/2 teaspoon of salt.
  3. Cut in the Butter: Add 6 tablespoons of cold, unsalted butter (cut into cubes) to the dry ingredients. Use a pastry cutter or fork to work the butter into the flour until it resembles coarse crumbs.
  4. Incorporate the Sourdough Discard: Stir in 1 cup of sourdough discard until the mixture begins to come together.
  5. Add the Buttermilk: Gradually mix in 1/3 cup of cold buttermilk. You want the dough to just hold together without being overly sticky.
  6. Roll and Fold: Turn the dough out onto a floured surface. Gently roll it into a rectangle, fold it over itself, and roll it out again. Repeat this 2-3 times to create layers.
  7. Cut the Biscuits: Roll the dough to about 1/2-inch thickness and use a biscuit cutter to cut out rounds. Place them on the prepared baking sheet, ensuring the edges touch for a better rise.
  8. Bake: Bake for 12-15 minutes or until the tops are golden brown.
  9. Serve Warm: Enjoy immediately or let them cool on a wire rack.

7. Suggestions for Serving and Storing

  • Serving Ideas: Serve warm with butter, honey, or a dollop of fruit preserves. Pair them with gravy for a hearty breakfast or alongside soups and stews.
  • Storage Tips: Store leftover biscuits in an airtight container at room temperature for up to 2 days. To reheat, warm them in an oven at 350°F (175°C) for a few minutes. For longer storage, freeze biscuits and reheat as needed.

8. Chef Simon’s Tips for Sourdough Discard Biscuits

  • Cold is Key: Ensure your butter, sourdough discard, and buttermilk are cold to achieve the flakiest biscuits.
  • Don’t Overwork the Dough: Handle the dough gently to avoid tough biscuits.
  • Get Creative: Experiment with add-ins like shredded cheddar, fresh herbs, or garlic powder for a unique twist.

9. Emotional and Psychological Impact of Food

Homemade biscuits evoke a sense of warmth and comfort. Their rustic charm brings back memories of family meals and cozy mornings. Sharing these biscuits with loved ones can create a sense of connection and nostalgia, reminding us of the joys of simple pleasures.


10. Mindful Cooking Techniques

  • Be Present: Focus on the texture of the dough, the feel of the butter as you cut it into the flour, and the aromas filling your kitchen as they bake.
  • Savor the Process: Appreciate the transformation of humble ingredients into something magical.

11. Tips for Keeping the Recipe Fresh Longer

  • Use an airtight container or wrap biscuits individually before freezing to retain freshness.
  • Add a slice of bread to the container to absorb excess moisture and prevent biscuits from drying out.

12. Advanced Culinary Terms and Techniques

  • Docking: Poking small holes in dough (not used here but relevant to other pastries).
  • Laminating: Folding and rolling dough to create layers—a simplified version is used here to enhance flakiness.

13. Healthy Ingredient Alternatives

  • Replace butter with coconut oil for a dairy-free option.
  • Use whole wheat flour for added fiber and nutrients.

14. More Serving Ideas

  • Make mini biscuit sandwiches with eggs, cheese, and bacon.
  • Top with creamed spinach or a poached egg for an elegant brunch dish.

15. Common Issues and Solutions

  • Flat Biscuits: Ensure your baking powder and soda are fresh.
  • Dry Dough: Add a splash of buttermilk to bring the dough together.

16. Variations to Try

  • Cheddar and Chive Biscuits: Add 1 cup of shredded cheddar and 2 tablespoons of chopped chives to the dough.
  • Sweet Biscuits: Incorporate 2 tablespoons of sugar and top with cinnamon sugar before baking.

17. Nutritional Information and Health Benefits

  • Calories: ~200 per biscuit (varies by size).
  • Protein: Sourdough discard provides extra protein.
  • Vitamins: Buttermilk adds calcium and vitamin D.

18. The Art of Pairing Sourdough Discard Biscuits

  • Pair with Soup: Tomato bisque or chicken noodle soup complements these biscuits perfectly.
  • Tea or Coffee: A warm beverage enhances the biscuit’s comforting flavors.

19. Weather and Recipe Outcome

Biscuits are a year-round delight but especially satisfying on a cold, rainy day when their warmth and texture offer ultimate comfort.


20. Other Biscuit Recipes to Explore

  • Classic Southern Buttermilk Biscuits
  • Herb and Parmesan Drop Biscuits
  • Sweet Potato Biscuits

21. Focus on Tools and Equipment

  • Pastry Cutter: Ensures even distribution of butter.
  • Cooling Rack: Prevents soggy bottoms by allowing air circulation.

22. Frequently Asked Questions

Q1: Can I use active sourdough starter instead of discard?
A1: Yes, but the flavor may be slightly milder.

Q2: Can I skip the buttermilk?
A2: Substitute with milk and a splash of vinegar or lemon juice.


23. Conclusion

Sourdough discard biscuits are a delicious way to minimize waste while enjoying a versatile baked good. With their buttery layers and tangy undertones, they’re perfect for any meal or occasion. Following this detailed guide ensures biscuits that are flaky, flavorful, and utterly irresistible. Happy baking!


Thank you for visiting SqueezyRecipes! We’re dedicated to making cooking enjoyable and accessible for everyone, regardless of your skill level. Chef Simon is always ready to share the best recipes that bring a creative touch to your daily meals. With each visit, you’ll discover new recipes and innovative ideas that cater to every occasion. Don’t miss out on exploring SqueezyRecipes for the latest delicious dishes, and feel free to leave your feedback and share your experiences with the recipes you’ve tried. Cooking together makes everything better!