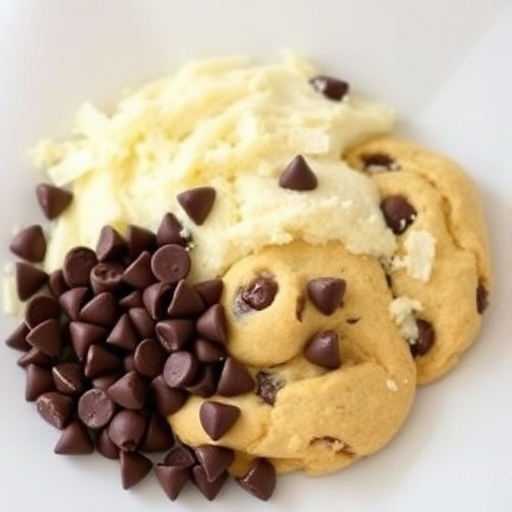
Introduction: Chocolate chip cookies are an iconic American treat loved by generations. Whether it’s a warm afternoon snack or a dessert to share with family and friends, this recipe will help you achieve the perfect chocolate chip cookies—crispy on the edges and soft and chewy in the center.
Table of Contents
1. The Story Behind the Recipe
Chocolate chip cookies have a legendary backstory. It all started in the 1930s when Ruth Wakefield, the inventor of the Toll House chocolate chip cookie, was making cookies at her Massachusetts inn. She decided to chop up a Nestlé chocolate bar and add it to her cookie dough, expecting it to melt. Instead, the chocolate held its shape, creating chunks that gave the cookie its signature texture. Since then, chocolate chip cookies have become a staple in American baking and remain a favorite for cookie lovers worldwide.
2. The Benefits of Making Your Own Chocolate Chip Cookies
Making chocolate chip cookies from scratch is not only a fun and rewarding experience but also offers several benefits:
- Freshness: Homemade cookies are fresher and can be enjoyed warm, straight from the oven.
- Customization: You have complete control over the ingredients. Whether you prefer dark chocolate chips, milk chocolate, or even a mix, you can tailor the recipe to suit your tastes.
- No Artificial Additives: When you make your cookies at home, you avoid the preservatives and artificial flavors that often come in store-bought versions.
- Great for Bonding: Baking with loved ones, especially children, is a wonderful bonding experience that creates lasting memories.
3. Essential Ingredients for the Perfect Chocolate Chip Cookies
To make classic chocolate chip cookies, you’ll need a few key ingredients:
- Butter: Softened butter is the base of the dough, providing flavor and contributing to the cookie’s chewy texture.
- Granulated Sugar: Adds sweetness and helps achieve the golden color of the cookie.
- Brown Sugar: Brown sugar adds moisture and a deeper, caramel-like flavor to the cookies.
- Eggs: Eggs bind the ingredients together and help the cookies rise.
- Vanilla Extract: Adds warmth and richness to the flavor profile.
- All-Purpose Flour: Provides the structure and base for the dough.
- Baking Soda: Helps the cookies rise and spread evenly.
- Salt: Balances the sweetness and enhances the overall flavor.
- Chocolate Chips: The star ingredient! Use semisweet, milk, or dark chocolate chips based on your preference.
4. Cultural History of Ingredients
- Butter: Butter has been used in baking for centuries, with its rich flavor making it a preferred fat in many traditional cookie recipes. It adds moisture and contributes to the crisp edges of cookies.
- Chocolate Chips: Chocolate chips were introduced by Ruth Wakefield in 1937 and have since become synonymous with American cookies. Chocolate is universally adored, and the combination of chocolate and cookies is undeniably a classic pairing.
- Brown Sugar: Brown sugar has a long history, dating back to the 19th century. The addition of molasses gives it its distinctive flavor and moisture-retaining properties, making it a staple in many baked goods.
5. Equipment You’ll Need
For this recipe, you’ll need a few simple kitchen tools:
- Mixing Bowls: For combining wet and dry ingredients.
- Electric Mixer or Hand Mixer: To cream the butter and sugar together easily.
- Baking Sheet: To spread the cookies evenly during baking.
- Parchment Paper or Silpat Mat: To prevent the cookies from sticking to the pan and for easy cleanup.
- Measuring Cups and Spoons: To ensure accurate measurements.
- Cooling Rack: For cooling the cookies once baked to prevent sogginess.
6. Step-by-Step Instructions for Chocolate Chip Cookies
- Preheat the Oven: Preheat your oven to 350°F (175°C). Line a baking sheet with parchment paper or a Silpat mat to prevent sticking.
- Mix Wet Ingredients: In a large mixing bowl, beat together 1 cup of softened butter, 1 cup of granulated sugar, and 1 cup of brown sugar until creamy. Add 2 large eggs, one at a time, followed by 2 teaspoons of vanilla extract, and continue to beat until smooth.
- Combine Dry Ingredients: In a separate bowl, whisk together 3 1/4 cups of all-purpose flour, 1 teaspoon of baking soda, and 1/2 teaspoon of salt.
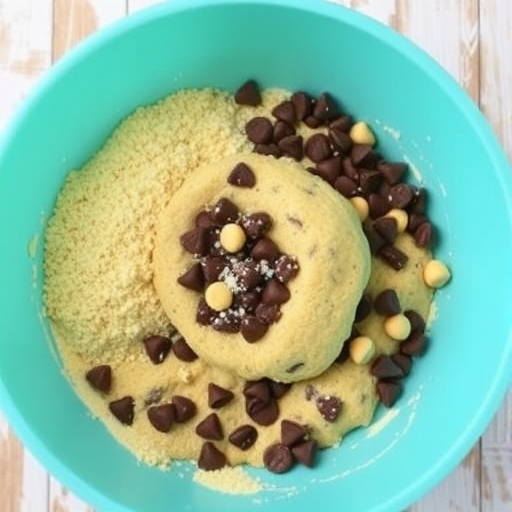
- Mix the Dough: Gradually add the dry ingredients to the wet mixture, mixing on low speed until just combined. Be careful not to overmix.
- Add the Chocolate Chips: Stir in 2 cups of chocolate chips (or more, if desired). You can use semisweet, milk, or dark chocolate chips for varying flavor profiles.
- Scoop the Dough: Using a spoon or cookie scoop, drop tablespoon-sized portions of dough onto the prepared baking sheet. Leave about 2 inches between each cookie to allow for spreading.
- Bake the Cookies: Bake in the preheated oven for 10–12 minutes or until the edges are golden and the centers are slightly soft.
- Cool the Cookies: Remove the cookies from the oven and let them cool on the baking sheet for 5 minutes before transferring them to a wire rack to cool completely.
7. Suggestions for Serving and Storing
- Serving: Serve the cookies warm, paired with a cold glass of milk or your favorite beverage.
- Storing: Store the cookies in an airtight container at room temperature for up to a week. For longer storage, you can freeze them by placing them in a single layer in a freezer-safe bag for up to 3 months.
8. Chef Simon’s Tips for Chocolate Chip Cookies
- Butter Temperature: Make sure your butter is softened but not melted. If it’s too cold, it will be harder to cream with the sugars. If it’s too melted, your cookies may spread too much.
- Chill the Dough: For thicker, chewier cookies, chill the dough for 30 minutes to an hour before baking. This will help the cookies hold their shape and prevent excessive spreading.
- Test One First: If you’re unsure about baking time, test one cookie first. If it spreads too much or is too thin, reduce the baking time or chill the dough.
9. Emotional and Psychological Impact of Food
Baking chocolate chip cookies is often associated with feelings of comfort, nostalgia, and warmth. The smell of freshly baked cookies wafting through the house can evoke positive memories and a sense of home. Eating a warm cookie can also provide a sense of satisfaction and joy, offering a temporary escape from stress.
10. Mindful Cooking Techniques
Baking chocolate chip cookies can be a great opportunity for mindful cooking. Focus on the process of measuring, mixing, and shaping the dough. Take your time and appreciate the simple act of creating something delicious with your hands. Let the experience of baking be as enjoyable as the final result.
11. Tips for Keeping the Recipe Fresh Longer
To keep your cookies fresh for longer:
- Store them in an airtight container at room temperature, ensuring they don’t dry out.
- Freeze them for longer storage, then defrost and warm them in the oven for a fresh-baked experience.
12. Advanced Culinary Terms and Techniques
- Creaming Method: This technique involves beating the butter and sugar together until light and fluffy. It incorporates air into the dough, helping to give the cookies their light texture.
- Blind Baking: Although not necessary for chocolate chip cookies, this technique is often used for pies and tarts to pre-bake the crust before filling it.
13. Healthy Ingredient Alternatives
- Flour: Substitute all-purpose flour with almond flour for a gluten-free version.
- Sugar: You can replace granulated sugar with coconut sugar or maple syrup for a more natural sweetener.
- Butter: Replace butter with coconut oil for a dairy-free alternative.
14. More Serving Ideas
Chocolate chip cookies can be enjoyed in a variety of ways:
- Ice Cream Sandwiches: Make a delicious treat by sandwiching a scoop of ice cream between two cookies.
- Cookie Crumble Topping: Crumble up some cookies and use them as a topping for milkshakes, cupcakes, or parfaits.
15. Common Issues and Solutions
- Too Thin or Spread Too Much: Ensure your butter isn’t too melted, and consider chilling the dough before baking.
- Cookies Too Hard: Overbaking can lead to hard cookies. Always check them after 10 minutes for a golden edge.
16. Variations to Try
- Nutty: Add walnuts, pecans, or almonds to the dough for extra crunch and flavor.
- Dark Chocolate: Use dark chocolate chips for a richer, more intense flavor.
17. Nutritional Information and Health Benefits
A standard serving of chocolate chip cookies (1 cookie) contains:
- Calories: Approximately 150–200 per cookie
- Carbohydrates: 22–25 grams
- Protein: 2 grams
- Fat: 8–12 grams
- Fiber: 1 gram
While chocolate chip cookies are indulgent, they provide some energy from carbohydrates and fats. To make them more nutritious, consider using whole-grain flour and adding nuts.
18. The Art of Pairing Chocolate Chip Cookies
Pairing chocolate chip cookies with complementary foods or drinks can enhance the overall experience. Here are some ideas for perfect pairings:
- Milk: The classic pairing for chocolate chip cookies. Whole milk or even plant-based options like almond or oat milk bring out the sweetness of the cookies.
- Coffee: The richness of coffee balances the sweetness of the cookies. A strong espresso or a mild latte works wonderfully.
- Ice Cream: Serve your warm cookies with a scoop of vanilla, chocolate, or even a flavor like salted caramel or mint chocolate chip for an indulgent dessert.
- Tea: A cup of black or green tea provides a subtle contrast to the rich, sweet cookies and is perfect for a lighter option.
- Wine: For a more adult twist, pair cookies with dessert wines like a late-harvest Riesling or a port. Their sweetness complements the chocolate and brings out the flavor of the cookies.
19. Weather and Recipe Outcome
The weather can influence the texture and outcome of your cookies:
- Hot, Humid Weather: On warmer days, you may notice your dough becomes too soft and sticky. If this happens, refrigerate the dough before baking. You can also reduce the amount of sugar slightly to prevent cookies from spreading too much.
- Cold, Dry Weather: In colder temperatures, your dough may firm up quicker, so be sure to allow it to soften at room temperature before working with it. Also, ensure your oven temperature is accurate by checking it with an oven thermometer.
20. Other Cookie Recipes to Explore
If you love chocolate chip cookies, you may want to try other delicious cookie recipes:
- Peanut Butter Cookies: Sweet and nutty, peanut butter cookies are another classic treat.
- Oatmeal Raisin Cookies: Hearty and wholesome, oatmeal cookies are the perfect alternative for those who enjoy a chewy texture.
- Snickerdoodles: These cinnamon-sugar cookies are a flavorful twist on the classic sugar cookie.
- Double Chocolate Cookies: For even more chocolate indulgence, these cookies are packed with cocoa powder and chocolate chips.
21. Focus on Tools and Equipment
Using the right tools and equipment ensures that your cookies bake to perfection:
- Cookie Scoop: A cookie scoop helps in portioning dough consistently, ensuring evenly sized cookies that bake uniformly.
- Silicone Baking Mats: These mats prevent cookies from sticking to the baking sheet and help with even heat distribution.
- Cooling Rack: A cooling rack allows air to circulate around the cookies, preventing them from becoming soggy.
- Stand Mixer: A stand mixer is ideal for mixing dough quickly and efficiently, especially when making large batches.
22. Frequently Asked Questions (with answers)
- Why did my cookies spread too much? If your cookies spread too much, your dough might be too soft. Try chilling the dough before baking to prevent excessive spreading. Also, make sure the butter is softened, not melted, when mixing the dough.
- How do I make my cookies chewy instead of crispy? For chewier cookies, use more brown sugar than granulated sugar and avoid overbaking them. Remove the cookies from the oven when the edges are golden but the center is still soft.
- Can I freeze the dough? Yes! You can freeze the dough by scooping it into individual balls and freezing them on a baking sheet. Once frozen, transfer the dough balls into a freezer-safe bag for up to 3 months. Bake them straight from the freezer, adding a couple of extra minutes to the baking time.
- Can I make the cookies without eggs? Yes, you can replace the eggs with flaxseed meal or chia seeds mixed with water, or use a commercial egg replacer for a vegan option.
Conclusion
Chocolate chip cookies are a timeless treat that brings joy with every bite. Whether you’re baking them for a special occasion, as a gift, or simply to enjoy at home, this classic recipe will always deliver perfect, chewy cookies with just the right amount of sweetness. By following these steps and tips, you can make the most delicious chocolate chip cookies that are sure to impress your family, friends, and even yourself. So preheat your oven, gather your ingredients, and start baking your way to cookie perfection!
Thank you for visiting SqueezyRecipes! We’re dedicated to making cooking enjoyable and accessible for everyone, regardless of your skill level. Chef Simon is always ready to share the best recipes that bring a creative touch to your daily meals. With each visit, you’ll discover new recipes and innovative ideas that cater to every occasion. Don’t miss out on exploring SqueezyRecipes for the latest delicious dishes, and feel free to leave your feedback and share your experiences with the recipes you’ve tried. Cooking together makes everything better!