Ultimate Fudge Brownies Chocolate

Fudge brownies chocolate Recipe

Introduction

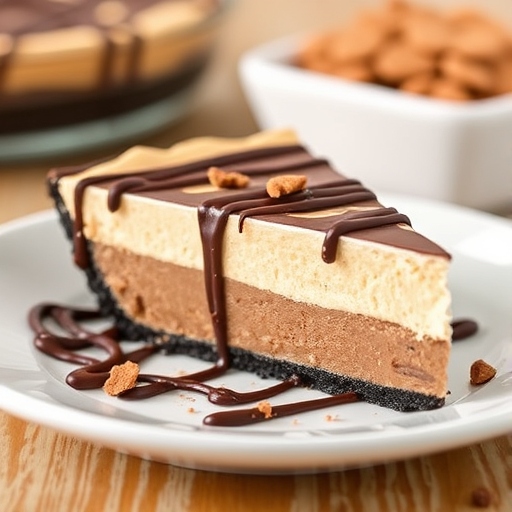
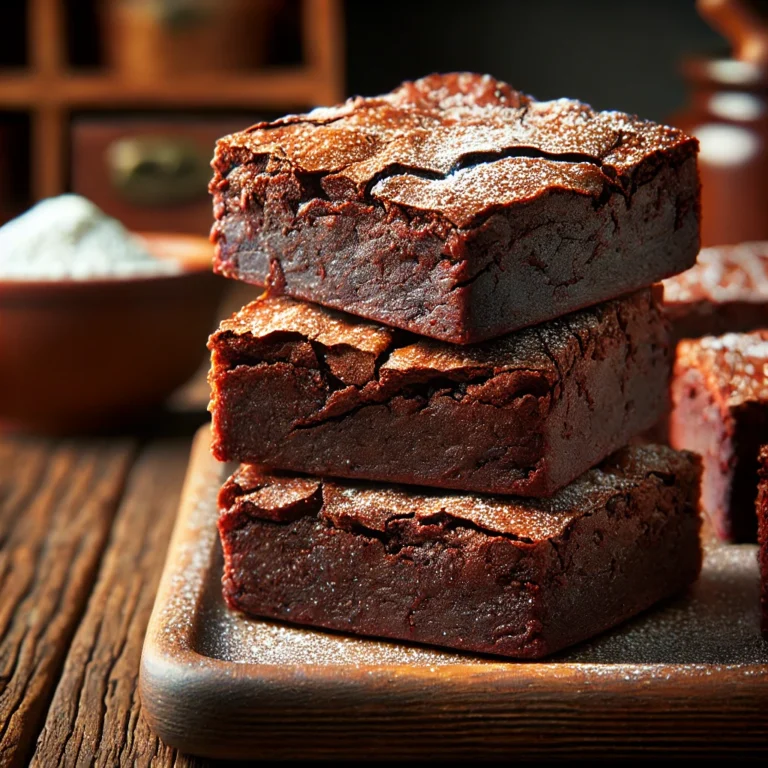
Fudge brownies are the epitome of indulgence. Rich, gooey, and full of intense chocolate flavor, they’re a treat that satisfies every sweet craving. Whether you’re baking for a party, a family gathering, or just to satisfy a chocolate urge, these brownies are guaranteed to be a hit. Perfected with a balance of fudgy texture and decadent chocolate, this recipe is your ultimate guide to brownie heaven.


1. The Story Behind Fudge Brownies

The origin of brownies is a bit of a mystery, but they are believed to have been created in the United States in the late 19th century. The name “brownie” refers to the color, derived from their rich chocolate base. Over time, variations emerged, but the fudgy version became a favorite for its moist and dense texture. This recipe stays true to the classic American-style fudge brownie, offering a melt-in-your-mouth experience.


2. The Benefits of Making Your Own Fudge Brownies

  • Control Over Ingredients: Customize sweetness, chocolate intensity, or add nuts and other mix-ins.
  • Freshness: Homemade brownies are free from preservatives and taste far superior to store-bought versions.
  • Cost-Effective: Premium-quality brownies at a fraction of the price of bakery versions.
  • Therapeutic Baking: The process of baking is both relaxing and rewarding.

3. Essential Ingredients for the Perfect Fudge Brownies

  1. Chocolate: High-quality dark or semi-sweet chocolate is essential for flavor.
  2. Butter: Adds richness and helps create the fudgy texture.
  3. Sugar: Granulated sugar for sweetness and structure.
  4. Eggs: Bind the ingredients and contribute to the soft texture.
  5. Flour: A small amount of all-purpose flour keeps the brownies dense.
  6. Cocoa Powder: Enhances the chocolate flavor.
  7. Vanilla Extract: Adds depth and aroma.
  8. Salt: Balances the sweetness and enhances chocolate flavors.
  9. Optional Additions: Chopped nuts, chocolate chips, or a swirl of caramel.

4. Cultural History of Ingredients

  • Chocolate: Once a luxury item for royalty, chocolate became widely accessible in the 19th century, leading to its use in baked goods like brownies.
  • Butter: A staple in European and American baking, butter adds flavor and richness to many traditional desserts.
  • Cocoa Powder: Introduced by the Dutch in the 19th century, cocoa revolutionized chocolate desserts.

5. Equipment You’ll Need

  • Mixing bowls
  • A whisk or hand mixer
  • A rubber spatula
  • An 8×8-inch baking pan
  • Parchment paper or non-stick spray
  • A double boiler or microwave for melting chocolate

6. Step-by-Step Instructions for Fudge Brownies

Ingredients:

  • 1 cup (225g) unsalted butter
  • 8 oz (225g) semi-sweet chocolate, chopped
  • 1 1/4 cups (250g) granulated sugar
  • 3 large eggs
  • 1 tsp vanilla extract
  • 3/4 cup (95g) all-purpose flour
  • 1/4 cup (25g) cocoa powder
  • 1/2 tsp salt

Directions:

  1. Preheat and Prepare:
    • Preheat your oven to 350°F (175°C). Line an 8×8-inch baking pan with parchment paper, leaving an overhang for easy removal.
  2. Melt Chocolate and Butter:
    • In a double boiler or microwave, melt the chopped chocolate and butter together until smooth. Stir occasionally to prevent burning.
  3. Mix Wet Ingredients:
    • In a mixing bowl, whisk the sugar, eggs, and vanilla extract until combined. Slowly pour in the melted chocolate mixture and whisk until smooth.
  4. Sift and Combine Dry Ingredients:
    • Sift together the flour, cocoa powder, and salt. Gradually fold the dry ingredients into the wet mixture using a rubber spatula. Mix just until combined to avoid overmixing.
  5. Optional Add-Ins:
    • Stir in chocolate chips, chopped nuts, or a swirl of caramel if desired.
  6. Bake:
    • Pour the batter into the prepared pan and spread evenly. Bake for 30-35 minutes or until the edges are set and a toothpick inserted in the center comes out with a few moist crumbs.
  7. Cool and Slice:
    • Allow the brownies to cool completely in the pan before lifting them out using the parchment overhang. Slice into squares or rectangles.

7. Suggestions for Serving and Storing

  • Serving Ideas: Serve warm with a scoop of vanilla ice cream, drizzle with chocolate sauce, or dust with powdered sugar.
  • Storing: Store brownies in an airtight container at room temperature for up to 4 days or freeze for up to 3 months.

8. Chef Simon’s Tips for Fudge Brownies

  • Use high-quality chocolate for the best flavor.
  • Underbake slightly for an extra fudgy texture.
  • Chill the brownies before slicing for cleaner cuts.

9. Emotional and Psychological Impact of Food

The indulgent nature of fudge brownies brings a sense of comfort and nostalgia, evoking memories of childhood treats or special celebrations. Their rich chocolate aroma can instantly uplift moods.


10. Mindful Cooking Techniques

  • Focus on the texture of the batter as you fold in the dry ingredients.
  • Savor the aroma of the chocolate as it melts and mixes.
  • Appreciate the transformation from batter to a perfectly baked brownie.

11. Tips for Keeping the Recipe Fresh Longer

  • Store brownies in a sealed container with a slice of bread to retain moisture.
  • Wrap individual brownies in plastic wrap before freezing to prevent freezer burn.

12. Advanced Culinary Terms and Techniques

  • Bain-Marie: A water bath used to gently melt chocolate.
  • Blooming Cocoa: Mixing cocoa powder with a hot liquid to enhance its flavor.

13. Healthy Ingredient Alternatives

  • Substitute butter with coconut oil for a dairy-free version.
  • Replace some sugar with applesauce or honey for a lower-calorie option.
  • Use almond flour instead of all-purpose flour for a gluten-free version.

14. More Serving Ideas

  • Add a layer of cream cheese frosting for a decadent dessert.
  • Top with crushed peppermint for a festive touch.
  • Serve crumbled over yogurt or ice cream for a fun twist.

15. Common Issues and Solutions

  • Dry Brownies: Overbaking. Solution: Remove from the oven when the center is still slightly gooey.
  • Crumbly Texture: Overmixing the batter. Solution: Mix just until combined.

16. Variations to Try

  • Nutty Brownies: Add chopped walnuts or pecans for crunch.
  • Mocha Brownies: Mix in espresso powder for a coffee-chocolate combo.
  • Salted Caramel Brownies: Swirl in caramel and sprinkle with sea salt.

17. Nutritional Information and Health Benefits

  • Calories: Approximately 200 per square
  • Rich in Antioxidants: Thanks to the dark chocolate.
  • Energy Boost: A perfect pick-me-up snack.

18. The Art of Pairing Fudge Brownies

  • Drinks: Serve with a glass of cold milk, a cup of coffee, or red wine for a sophisticated pairing.
  • Desserts: Pair with fresh berries or whipped cream for added contrast.

19. Weather and Recipe Outcome

Brownies are a perfect treat for rainy or chilly days, as their warm, gooey texture offers comfort and warmth.


20. Other Chocolate Desserts to Explore

  • Chocolate Lava Cake
  • Triple Chocolate Cookies
  • Dark Chocolate Truffles

21. Focus on Tools and Equipment

  • Use a silicone spatula for easy mixing.
  • A metal baking pan ensures even heat distribution.

22. Frequently Asked Questions (with answers)

Q: Can I make this recipe dairy-free?
A: Yes, substitute butter with coconut oil and use dairy-free chocolate.

Q: Can I double the recipe?
A: Absolutely. Use a 9×13-inch pan and adjust the baking time as needed.

Q: How do I know when the brownies are done?
A: A toothpick inserted into the center should come out with a few moist crumbs.


Conclusion

This fudge brownie recipe is everything you could ask for—rich, indulgent, and irresistibly chocolaty. Whether you’re making them for a special occasion or just because, these brownies are bound to become a staple in your baking repertoire. Dive into the world of fudgy perfection and let every bite transport you to chocolate bliss.


Thank you for visiting SqueezyRecipes! We’re dedicated to making cooking enjoyable and accessible for everyone, regardless of your skill level. Chef Simon is always ready to share the best recipes that bring a creative touch to your daily meals. With each visit, you’ll discover new recipes and innovative ideas that cater to every occasion. Don’t miss out on exploring SqueezyRecipes for the latest delicious dishes, and feel free to leave your feedback and share your experiences with the recipes you’ve tried. Cooking together makes everything better!

Ultimate Peanut Butter Pie Recipe: Creamy and Irresistible

Peanut Butter Pie

Introduction
Peanut butter pie is the perfect dessert for anyone who loves the rich, nutty flavor of peanut butter paired with a creamy, smooth filling. Whether you’re making it for a family gathering, a special celebration, or just a simple treat for yourself, this pie is bound to be a crowd-pleaser. The combination of peanut butter, cream cheese, and a decadent chocolate topping creates a mouthwatering dessert that is both indulgent and comforting. Easy to prepare, no baking required, and made with simple ingredients, this peanut butter pie will become a new favorite in your recipe collection.


1. The Story Behind Peanut Butter Pie

Peanut butter pie is a beloved dessert that has been a staple in American kitchens for many years. It likely originated in the Southern United States, where peanut butter is a common ingredient in many classic dishes. The first known recipes for peanut butter pie appeared in the mid-20th century, and since then, it has evolved into various forms, often including different crusts, fillings, and toppings. Despite its simple ingredients, peanut butter pie has remained a nostalgic dessert for many, bringing memories of family gatherings and festive occasions.

Peanut butter itself has a long history, dating back to the early 1900s when it was popularized as a nutritious food. Over the years, peanut butter pie became a way to showcase the rich, creamy texture of peanut butter while creating a smooth and indulgent dessert. Its popularity continues to grow, making it a go-to choice for dessert tables and potlucks.


2. The Benefits of Making Your Own Peanut Butter Pie

Making your own peanut butter pie offers a few key benefits:

  • Customization: When you make this pie from scratch, you have full control over the flavor and texture. You can adjust the sweetness, the level of peanut butter flavor, or add in other ingredients like crushed nuts or chocolate chunks for added texture.
  • Freshness: Homemade pies always taste fresher than store-bought options. You can use high-quality ingredients, ensuring a richer and more satisfying flavor.
  • No Baking Required: One of the best parts of this peanut butter pie recipe is that it requires no baking. Perfect for busy days or summer months when you don’t want to heat up the kitchen.
  • Family Tradition: By making this dessert yourself, you can pass down a beloved recipe, creating lasting memories and traditions for years to come.

3. Essential Ingredients for the Perfect Peanut Butter Pie

The beauty of this recipe lies in its simplicity. To make the perfect peanut butter pie, you’ll need the following ingredients:

  • Peanut Butter: Choose a creamy peanut butter (or chunky if you prefer texture) for a smooth filling.
  • Cream Cheese: Provides richness and a tangy flavor that balances the peanut butter.
  • Powdered Sugar: Adds sweetness without the graininess of granulated sugar.
  • Whipped Topping: Whipped cream or cool whip helps to lighten the filling and gives it a fluffier texture.
  • Chocolate Chips or Chocolate Sauce: A drizzle of chocolate over the top of the pie creates a delicious contrast to the rich, nutty filling.
  • Graham Cracker Crust: The traditional base for this pie, providing a sweet and crunchy contrast to the smooth filling.

4. Cultural History of Ingredients

Each ingredient in this peanut butter pie holds a place in American culinary history. Peanut butter, for instance, became a household staple in the U.S. in the early 20th century, thanks to the invention of mass production techniques. The creation of peanut butter pie is believed to be a natural progression as Americans began experimenting with incorporating peanut butter into desserts.

Cream cheese, a product made from curdled milk, was first developed in the U.S. in the 19th century and became popular in a variety of sweet and savory dishes. It serves as the perfect counterpart to the peanut butter, providing a creamy and slightly tangy base.

Graham cracker crusts have been a popular pie base since the late 1800s, originally designed for ease of use and their ability to create a perfect, stable crust. Their sweet, slightly cinnamon flavor complements the rich peanut butter filling perfectly.


5. Equipment You’ll Need

To make this peanut butter pie, you will need the following equipment:

  • 9-inch Pie Pan: A standard pie dish is ideal for this recipe. A deep-dish pie pan can also work if you want a thicker filling.
  • Mixer: An electric mixer or a stand mixer is ideal for mixing the cream cheese, peanut butter, and whipped topping. It ensures the filling is smooth and well-blended.
  • Spatula: To scrape the filling into the crust and smooth the top.
  • Measuring Cups and Spoons: Accurate measurements are key for getting the right texture and flavor.
  • Microwave Safe Bowl: For melting the chocolate if you decide to drizzle it on top.

6. Step-by-Step Instructions for Peanut Butter Pie

Here’s how to make your own decadent peanut butter pie:

Step 1: Prepare the Crust

  • If you’re using a store-bought graham cracker crust, simply remove the packaging and set it aside. If you’re making your own, crush about 10 graham crackers into crumbs and mix them with 4 tablespoons of melted butter. Press the mixture into the bottom of a 9-inch pie pan and refrigerate while you prepare the filling.

Step 2: Prepare the Filling

  • In a large mixing bowl, beat 8 ounces of softened cream cheese and 1 cup of peanut butter together until smooth and well-combined.
  • Gradually add 1 cup of powdered sugar and continue beating until smooth.
  • Gently fold in 1 ½ cups of whipped topping. This will make the filling light and fluffy.
  • Once the filling is combined, taste and adjust sweetness as needed.

Step 3: Fill the Crust

  • Spoon the peanut butter mixture into your prepared graham cracker crust and spread it evenly with a spatula.
  • Smooth the top of the filling to make it as even as possible.

Step 4: Chill the Pie

  • Refrigerate the pie for at least 4 hours, or preferably overnight, to allow the filling to set and firm up.

Step 5: Add the Topping

  • Before serving, melt ½ cup of chocolate chips in the microwave or over a double boiler. Drizzle the melted chocolate over the top of the pie for a decadent finishing touch.
  • Optionally, you can also top the pie with chopped peanuts, crushed pretzels, or additional whipped topping for texture.

7. Suggestions for Serving and Storing

  • Serving: This pie is best served chilled. Slice it into generous wedges and enjoy it with a cup of coffee or a glass of milk.
  • Storing: Store leftover pie in the refrigerator for up to 4 days. It can also be frozen for longer storage (up to 3 months). Just cover it tightly with plastic wrap and foil before freezing.

8. Chef Simon’s Tips for Peanut Butter Pie

  • For a richer, more intense peanut butter flavor, try using a natural peanut butter that has a stronger taste.
  • If you’re short on time, opt for a pre-made pie crust to simplify the process.
  • For a more indulgent topping, you can add a layer of melted caramel before the chocolate drizzle for a sweet, salty contrast.

9. Emotional and Psychological Impact of Food

Peanut butter pie is a comforting, nostalgic dessert that brings people together. Its rich and creamy texture creates a sense of indulgence, making it the perfect treat for celebrations or moments of relaxation. The sweet and salty combination evokes feelings of satisfaction and warmth, contributing to its status as a beloved dessert in many households.


10. Mindful Cooking Techniques

While making peanut butter pie, take your time and enjoy the process. Savor the moment as you mix the ingredients, carefully fill the crust, and patiently wait as the pie chills. Cooking can be a therapeutic activity, and peanut butter pie, with its comforting ingredients, offers a great opportunity to practice mindfulness in the kitchen.


11. Tips for Keeping the Recipe Fresh Longer

  • Keep the pie tightly covered in the fridge to prevent it from absorbing any odors.
  • If freezing, allow the pie to thaw in the refrigerator for several hours before serving for the best texture.

12. Advanced Culinary Terms and Techniques

While this recipe is simple, mastering it involves understanding key culinary techniques:

  • Folding: When incorporating whipped topping into the peanut butter mixture, folding is the best technique to avoid deflating the mixture.
  • Chilling: Proper chilling allows the flavors to meld and the filling to set, ensuring the pie slices beautifully.

13. Healthy Ingredient Alternatives

  • Light Cream Cheese: Use low-fat or reduced-fat cream cheese to lighten up the filling.
  • Natural Sweeteners: Swap out powdered sugar with a natural sweetener like stevia or monk fruit to make a lower-sugar version.
  • Gluten-Free Crust: If you need a gluten-free option, make your own crust using gluten-free graham crackers or a pre-made gluten-free crust.

14. More Serving Ideas

For a festive touch, top your peanut butter pie with whipped cream and a sprinkle of chopped peanuts. For extra indulgence, pair the pie with vanilla ice cream or chocolate mousse for a decadent dessert duo.


15. Common Issues and Solutions

  • Problem: The crust isn’t firm enough.
    Solution: Make sure the graham cracker crumbs are packed tightly into the pan before refrigerating. If using a homemade crust, increase the amount of butter slightly to ensure it binds together well.
  • Problem: The chocolate topping is too thick or hard.
    Solution: Melt the chocolate carefully, adding a teaspoon of vegetable oil or butter to make it more pourable. Drizzle it quickly while it’s still warm for an even coating.
  • Problem: The pie filling is too runny.
  • Solution: Ensure the pie is chilled for long enough to allow the filling to set properly. If needed , add more powdered sugar to thicken the filling slightly, but be cautious not to make it overly sweet.

16. Variations to Try

  • Chocolate Peanut Butter Pie: Add a layer of chocolate ganache on top of the peanut butter filling before chilling. This adds a rich chocolate flavor to complement the peanut butter.
  • Crunchy Peanut Butter Pie: Stir in crushed peanuts or pretzels into the peanut butter filling for a delightful crunch.
  • Reese’s Peanut Butter Pie: Incorporate chopped Reese’s peanut butter cups into the filling for extra peanut butter goodness and texture.

17. Nutritional Information and Health Benefits

This peanut butter pie is a treat and should be enjoyed in moderation, but it also offers some nutritional benefits from the ingredients used:

  • Peanut Butter: A great source of protein, healthy fats, and fiber. It also provides vitamin E and magnesium.
  • Cream Cheese: Provides calcium, protein, and vitamin A.
  • Graham Cracker Crust: Contains whole grains, which contribute to fiber intake.

Approximate Nutritional Information per Slice (based on 8 servings):

  • Calories: 400–450
  • Fat: 30g (includes healthy fats from peanut butter)
  • Carbohydrates: 35g
  • Protein: 6g

This pie is relatively rich, so while it’s not exactly a low-calorie option, it provides a satisfying dessert experience with beneficial nutrients from peanut butter and cream cheese.


18. The Art of Pairing Peanut Butter Pie

Peanut butter pie pairs beautifully with many beverages and side dishes, making it a versatile dessert:

  • Coffee or Espresso: The strong, bitter flavors of coffee or espresso complement the sweetness of the pie perfectly.
  • Milk: A classic pairing, milk helps balance the richness of the pie and cools the palate between bites.
  • Red Wine: A glass of rich red wine, such as Cabernet Sauvignon or Zinfandel, pairs surprisingly well with peanut butter’s depth.
  • Ice Cream: Vanilla, chocolate, or even coffee ice cream add a creamy texture that enhances the pie’s richness.

19. Weather and Recipe Outcome

  • Hot Weather: If you’re making this pie in hot weather, ensure that you chill it for the required time to keep the filling firm. Serve it cold for the best texture.
  • Cold Weather: This pie is an excellent treat for colder months when you’re looking for something rich and comforting. The pie can also be kept in the fridge for several days if you prefer to make it in advance.

If you love peanut butter pie, you’ll likely enjoy these cookie recipes as well:

  • Peanut Butter Blossoms: Classic peanut butter cookies topped with a Hershey’s Kiss for a delicious treat.
  • Peanut Butter Cookies: Simple, chewy peanut butter cookies that are easy to make and full of flavor.
  • No-Bake Peanut Butter Cookies: These no-bake cookies are a fast and delicious alternative that pairs perfectly with a cold glass of milk.

21. Focus on Tools and Equipment

Using the right tools makes all the difference in the outcome of your peanut butter pie:

  • Electric Mixer: To ensure a smooth, fluffy filling, an electric mixer helps blend the ingredients evenly.
  • Pie Dish: A 9-inch pie pan is ideal for this recipe. Opt for a ceramic dish for even cooling.
  • Microwave-Safe Bowl: For melting the chocolate topping, a microwave-safe bowl allows you to easily control the consistency.

22. Frequently Asked Questions (with answers)

Q: Can I make the pie ahead of time?
A: Yes! Peanut butter pie can be made a day or two ahead of time. Just keep it tightly covered in the fridge to maintain its freshness.

Q: Can I use crunchy peanut butter?
A: Absolutely! Crunchy peanut butter adds texture and extra peanut flavor to the pie. However, keep in mind that it will alter the smoothness of the filling.

Q: Can I freeze this peanut butter pie?
A: Yes, you can freeze the pie for up to 3 months. Just cover it well with plastic wrap and foil before freezing. Thaw it in the refrigerator for several hours before serving.

Q: What if I don’t like chocolate?
A: No problem! You can leave out the chocolate topping or substitute it with a caramel drizzle or even a layer of whipped cream.


Conclusion

Peanut butter pie is a dessert that offers the perfect balance of sweetness, creaminess, and a nutty depth of flavor. Whether you’re serving it for a special occasion or just because, it’s sure to be a hit. With its simple preparation, rich taste, and versatile options for customization, this recipe is sure to become a favorite in your dessert rotation. So grab your ingredients, mix up the filling, and enjoy a slice of this indulgent treat with family and friends. Happy baking!


Thank you for visiting SqueezyRecipes! We’re dedicated to making cooking enjoyable and accessible for everyone, regardless of your skill level. Chef Simon is always ready to share the best recipes that bring a creative touch to your daily meals. With each visit, you’ll discover new recipes and innovative ideas that cater to every occasion. Don’t miss out on exploring SqueezyRecipes for the latest delicious dishes, and feel free to leave your feedback and share your experiences with the recipes you’ve tried. Cooking together makes everything better!

Perfect Crustless Cranberry Pie Recipe: Simple and Irresistible

Crustless Cranberry Pie

This crustless cranberry pie is a simple yet elegant dessert that’s perfect for showcasing the tart sweetness of fresh cranberries. With its golden, slightly chewy edges and soft, moist interior, this pie is an ideal treat for the holidays or any time of year.


1. The Story Behind Crustless Cranberry Pie

Crustless cranberry pie is a unique dessert with origins in rustic home cooking. It gained popularity due to its simplicity—there’s no need to fuss with a traditional pie crust, which can be intimidating for many bakers. This recipe focuses entirely on the filling, creating a dessert that’s part pie, part cake.

It’s a family favorite during fall and winter when cranberries are at their peak. The tanginess of cranberries paired with the sweetness of the batter creates a delightful balance, perfect for after-dinner indulgence or a warm afternoon treat with coffee.


2. The Benefits of Making Your Own Crustless Cranberry Pie

  • Fresh Ingredients: Homemade pie ensures you’re using fresh, high-quality cranberries for the best flavor.
  • Customizable: You can adjust the sugar level, add spices, or mix in other fruits and nuts to suit your taste.
  • No Crust Fuss: Without the need for a traditional crust, it’s a quicker, easier recipe for beginners and experts alike.
  • Healthier Option: By skipping the buttery crust, you save on calories while still enjoying a delicious dessert.

3. Essential Ingredients for the Perfect Crustless Cranberry Pie

Here’s what you’ll need to make this pie:

  • Cranberries: Fresh or frozen, these are the stars of the show.
  • Sugar: Balances the tartness of the cranberries.
  • Eggs: Provide structure and help the pie hold together.
  • All-Purpose Flour: Creates a light, cake-like texture.
  • Butter: Adds richness and flavor.
  • Vanilla Extract: Enhances the overall sweetness and aroma.
  • Optional Additions: Chopped nuts (like pecans or walnuts) and a touch of orange zest for added depth.

4. Cultural History of Cranberries

Cranberries are native to North America and have been a staple in traditional cooking for centuries. Native Americans used cranberries in a variety of ways, from food to natural dyes. They introduced early settlers to the berry, which became a key ingredient in dishes like cranberry sauce and pies.

Today, cranberries are synonymous with fall and winter celebrations, particularly in the United States and Canada. Their vibrant red hue and tart flavor make them a favorite in both savory and sweet recipes.


5. Equipment You’ll Need

  • Mixing bowl
  • Whisk
  • Spatula
  • 9-inch pie dish or springform pan
  • Oven

6. Step-by-Step Instructions for Crustless Cranberry Pie

Ingredients:

  • 2 cups fresh cranberries (or frozen, thawed)
  • 1 cup granulated sugar
  • 1 cup all-purpose flour
  • 2 large eggs
  • 1 stick (½ cup) unsalted butter, melted and slightly cooled
  • 1 teaspoon vanilla extract
  • ½ teaspoon salt
  • Optional: ½ cup chopped nuts, 1 teaspoon orange zest

Directions:

  1. Preheat the Oven: Preheat your oven to 350°F (175°C) and grease a 9-inch pie dish.
  2. Prepare Cranberries: Spread the cranberries evenly over the bottom of the pie dish. If desired, sprinkle with orange zest and chopped nuts for added flavor.
  3. Mix the Batter: In a mixing bowl, whisk together the sugar and eggs until the mixture is pale and slightly thickened.
  4. Combine Ingredients: Add the melted butter, vanilla extract, and salt. Mix until smooth. Gradually whisk in the flour until a smooth batter forms.
  5. Pour Over Cranberries: Pour the batter evenly over the cranberries, ensuring they are well-covered.
  6. Bake: Place the pie dish in the preheated oven and bake for 40–50 minutes or until the top is golden brown and a toothpick inserted into the center comes out clean.
  7. Cool and Serve: Allow the pie to cool slightly before slicing. Serve warm with a dollop of whipped cream or a scoop of vanilla ice cream.

7. Suggestions for Serving and Storing

  • Serving: This pie is best served warm or at room temperature. Pair it with whipped cream, ice cream, or a drizzle of caramel sauce.
  • Storing: Cover and store leftovers in the refrigerator for up to 3 days. Reheat individual slices in the microwave for 15–20 seconds before serving.

8. Chef Simon’s Tips for Crustless Cranberry Pie

  • Balance Flavors: If you prefer a less tart pie, add an extra tablespoon of sugar or mix in some sweet dried cranberries.
  • Avoid Overbaking: Keep an eye on the pie as it bakes. Overbaking can dry out the batter and make the edges too firm.
  • Go Gluten-Free: Substitute the all-purpose flour with a gluten-free flour blend to make this pie suitable for gluten-sensitive guests.

9. Emotional and Psychological Impact of Food

There’s something comforting about the simplicity of this pie. Its vibrant cranberries and homey flavors evoke memories of family gatherings, holiday dinners, and cozy nights by the fire. The act of baking and sharing this pie fosters a sense of warmth, connection, and gratitude.


10. Mindful Cooking Techniques

  • Focus on the process of preparing this pie. Appreciate the vibrant colors of the cranberries and the transformation of ingredients as they combine.
  • Take your time whisking the batter and pouring it over the cranberries, enjoying the soothing motions and the aromatic hints of vanilla and butter.

11. Tips for Keeping the Recipe Fresh Longer

  • Store the pie in an airtight container in the refrigerator.
  • Freeze portions for up to 2 months, wrapping them tightly in plastic wrap and foil. Thaw in the refrigerator before reheating.

12. Advanced Culinary Terms and Techniques

  • Folding: Gently mix nuts or zest into the batter without deflating it.
  • Zesting: Use a microplane to remove the outer layer of citrus for a burst of flavor.

13. Healthy Ingredient Alternatives

  • Sugar Substitute: Use coconut sugar or a natural sweetener like honey.
  • Flour Alternative: Swap all-purpose flour with almond flour for added nuttiness.

14. More Serving Ideas

  • Add a dusting of powdered sugar before serving for a festive look.
  • Drizzle with a cranberry glaze for an extra pop of flavor and color.

15. Common Issues and Solutions

  • Problem: The pie is too tart.
    Solution: Mix the cranberries with a tablespoon of sugar before assembling the pie.
  • Problem: The batter didn’t rise.
    Solution: Ensure the eggs are fresh and whisk them thoroughly for aeration.

16. Variations to Try

  • Apple-Cranberry Pie: Add thinly sliced apples to the cranberry layer.
  • Nut-Free Pie: Skip the nuts and add a touch of cinnamon for extra warmth.

17. Nutritional Information and Health Benefits

Per serving (based on 8 servings):

  • Calories: 220
  • Fat: 8g
  • Carbohydrates: 34g
  • Fiber: 2g
  • Protein: 3g

18. The Art of Pairing Crustless Cranberry Pie

Pair this pie with drinks like hot apple cider, spiced tea, or a creamy latte.


19. Weather and Recipe Outcome

This pie shines during the colder months, as its tart cranberries and warm vanilla aroma create a cozy atmosphere.


20. Other Dessert Recipes to Explore

  • Cranberry Almond Cake
  • Apple Crisp
  • Orange Cranberry Scones

Conclusion

Crustless cranberry pie is a delightful and easy dessert that allows the vibrant flavors of cranberries to shine. It’s a perfect addition to your holiday table or a simple weeknight treat. With its no-fuss preparation and rich, satisfying flavor, this pie will quickly become a household favorite. Happy baking!


Thank you for visiting SqueezyRecipes! We’re dedicated to making cooking enjoyable and accessible for everyone, regardless of your skill level. Chef Simon is always ready to share the best recipes that bring a creative touch to your daily meals. With each visit, you’ll discover new recipes and innovative ideas that cater to every occasion. Don’t miss out on exploring SqueezyRecipes for the latest delicious dishes, and feel free to leave your feedback and share your experiences with the recipes you’ve tried. Cooking together makes everything better!

Delicious Cranberry Pistachio Biscotti Recipe: Crunchy and Flavorful

Cranberry Pistachio Biscotti Recipe

Cranberry pistachio biscotti are the perfect blend of tart cranberries and crunchy pistachios, baked into a twice-cooked Italian treat that’s ideal for pairing with coffee, tea, or hot chocolate. Their crisp texture and vibrant colors make them a delightful addition to your cookie repertoire, especially during the holiday season.


1. The Story Behind Cranberry Biscotti

Biscotti, meaning “twice-baked” in Italian, originated in the Tuscan region as a practical treat for travelers and soldiers due to its long shelf life. Adding cranberries and pistachios gives this classic cookie a modern twist, combining tart, sweet, and nutty flavors.

The festive red and green hues make cranberry pistachio biscotti a holiday favorite, but their versatility and sophisticated flavor make them perfect year-round.


2. The Benefits of Making Your Own Cranberry Pistachio Biscotti

  • Freshness Guaranteed: Homemade biscotti are fresher, more flavorful, and free from preservatives.
  • Customizable: Tailor the sweetness, add spices like cinnamon or cardamom, or use dried cherries instead of cranberries.
  • Cost-Effective: Making your biscotti at home is more economical than buying gourmet versions.
  • Versatile: Enjoy them as a snack, dessert, or breakfast treat with coffee or tea.

3. Essential Ingredients for the Perfect Cranberry Pistachio Biscotti

  • All-Purpose Flour: Provides structure to the biscotti.
  • Baking Powder: Ensures the biscotti have a light, crisp texture.
  • Granulated Sugar: Sweetens the dough.
  • Eggs: Bind the ingredients together and add moisture.
  • Vanilla and Almond Extracts: Enhance the flavor profile.
  • Dried Cranberries: Add tartness and sweetness.
  • Pistachios: Bring a nutty crunch and vibrant green color.
  • Optional Additions: Orange zest, white chocolate drizzle, or spices like nutmeg.

4. Cultural History of Ingredients

  • Cranberries: Native to North America, they’ve been used in various dishes since colonial times.
  • Pistachios: Originating in the Middle East, pistachios are a symbol of wealth and prosperity, often featured in celebratory dishes.
  • Biscotti: Rooted in Italy, biscotti have a storied history as a durable treat suitable for long journeys and festive occasions.

5. Equipment You’ll Need

  • Mixing bowls
  • Hand mixer or stand mixer
  • Baking sheet
  • Parchment paper or silicone baking mat
  • Serrated knife
  • Cooling rack

6. Step-by-Step Instructions for Cranberry Pistachio Biscotti

Ingredients:

  • 2 cups all-purpose flour
  • 1 teaspoon baking powder
  • ¾ cup granulated sugar
  • ½ teaspoon salt
  • 2 large eggs
  • 1 teaspoon vanilla extract
  • ½ teaspoon almond extract
  • ¾ cup dried cranberries
  • ¾ cup shelled pistachios
  • Optional: Zest of one orange

Directions:

  1. Preheat the Oven: Preheat your oven to 350°F (175°C) and line a baking sheet with parchment paper.
  2. Mix Dry Ingredients: In a bowl, whisk together the flour, baking powder, and salt.
  3. Combine Wet Ingredients: In a separate bowl, beat the sugar and eggs until pale and creamy. Mix in the vanilla, almond extract, and orange zest (if using).
  4. Incorporate Dry Ingredients: Gradually add the dry ingredients to the wet mixture, mixing until a dough forms.
  5. Add Cranberries and Pistachios: Fold in the dried cranberries and pistachios until evenly distributed.
  6. Shape the Dough: Divide the dough in half and shape each portion into a log about 10 inches long and 2 inches wide. Place the logs on the prepared baking sheet, leaving space between them.
  7. First Bake: Bake the logs for 25–30 minutes or until lightly golden. Remove from the oven and let them cool for 10–15 minutes.
  8. Slice: Using a serrated knife, slice the logs diagonally into ½-inch thick biscotti.
  9. Second Bake: Place the biscotti cut-side down on the baking sheet and bake for 10 minutes. Flip and bake for another 10 minutes until crisp and golden.
  10. Cool and Serve: Transfer the biscotti to a cooling rack and let them cool completely before serving or storing.

7. Suggestions for Serving and Storing

  • Serving: Serve with coffee, tea, or hot chocolate. They’re also delicious dipped in dessert wine like Vin Santo.
  • Storing: Store biscotti in an airtight container at room temperature for up to 2 weeks. For longer storage, freeze them for up to 3 months.

8. Chef Simon’s Tips for Cranberry Pistachio Biscotti

  • Even Slicing: Use a serrated knife and a gentle sawing motion to prevent the biscotti from crumbling.
  • Add Texture: Toast the pistachios lightly before adding them to the dough for a deeper nutty flavor.
  • Decorate: Drizzle the cooled biscotti with melted white or dark chocolate for a touch of elegance.

9. Emotional and Psychological Impact of Food

The bright colors and satisfying crunch of these biscotti evoke a sense of joy and indulgence. Perfect for sharing, they create moments of connection, whether at a holiday gathering or a quiet coffee break.


10. Mindful Cooking Techniques

  • Savor the process of shaping and slicing the biscotti logs.
  • Notice the aroma of the pistachios and cranberries as they bake, enhancing your connection to the recipe.

11. Tips for Keeping the Recipe Fresh Longer

  • Use fresh, high-quality cranberries and pistachios for the best flavor and longevity.
  • Keep the biscotti in an airtight container to maintain their crispness.

12. Advanced Culinary Terms and Techniques

  • Zesting: Finely grate the outer skin of citrus fruits for added aroma.
  • Blanching Pistachios: Soak pistachios in hot water to remove their skins, brightening their green color.

13. Healthy Ingredient Alternatives

  • Substitute granulated sugar with coconut sugar for a lower glycemic index.
  • Use whole wheat flour for added fiber and nutrients.

14. More Serving Ideas

  • Serve biscotti alongside a fruit compote or mascarpone for a dessert plate.
  • Crumble over yogurt or ice cream for a crunchy topping.

15. Common Issues and Solutions

  • Problem: Biscotti are too hard.
    Solution: Reduce the second baking time slightly for a softer texture.
  • Problem: Logs spread too much during baking.
    Solution: Chill the dough for 30 minutes before shaping.

16. Variations to Try

  • Chocolate Chip Biscotti: Replace cranberries with dark chocolate chips.
  • Lemon Pistachio Biscotti: Use lemon zest instead of orange for a citrusy twist.

17. Nutritional Information and Health Benefits

Per serving (1 biscotti):

  • Calories: 120
  • Fat: 4g
  • Carbohydrates: 18g
  • Protein: 2g

18. The Art of Pairing Cranberry Pistachio Biscotti

Pair these biscotti with cappuccino, herbal tea, or a glass of dessert wine for a delightful flavor experience.


19. Weather and Recipe Outcome

Dry, cool weather is ideal for baking biscotti, as it helps achieve the perfect crisp texture.


20. Other Biscotti Recipes to Explore

  • Almond Biscotti
  • Chocolate Hazelnut Biscotti
  • Orange Cardamom Biscotti

Conclusion

Cranberry pistachio biscotti are a vibrant, flavorful treat that’s as delightful to make as they are to eat. Their festive colors, crunchy texture, and balanced sweetness make them a standout addition to any cookie platter. Enjoy them during the holidays or anytime you need a moment of indulgence. Happy baking!


Thank you for visiting SqueezyRecipes! We’re dedicated to making cooking enjoyable and accessible for everyone, regardless of your skill level. Chef Simon is always ready to share the best recipes that bring a creative touch to your daily meals. With each visit, you’ll discover new recipes and innovative ideas that cater to every occasion. Don’t miss out on exploring SqueezyRecipes for the latest delicious dishes, and feel free to leave your feedback and share your experiences with the recipes you’ve tried. Cooking together makes everything better!

Classic Pecan Pie Recipe: Perfectly Sweet and Irresistible

Classic pecan pie

Introduction

A Classic Pecan Pie is a must-have dessert for any festive table, combining a rich, buttery filling with crunchy pecans and a flaky crust. This timeless recipe is an American classic, often enjoyed during Thanksgiving and other holiday gatherings. With its irresistible caramelized flavor and satisfying texture, pecan pie is a dessert that feels like a warm hug from home.


1. The Story Behind the Classic Pecan Pie

Pecan pie’s origins trace back to the Southern United States, where pecans are native. It gained widespread popularity in the 19th century and became a Thanksgiving staple. This pie is known for its unique combination of sweet and nutty flavors, creating a dessert that celebrates the simplicity and bounty of pecans.


2. The Benefits of Making Your Own Pecan Pie

  • Freshness: Homemade ensures no preservatives and top-quality ingredients.
  • Customization: Adjust sweetness, add bourbon, or mix in chocolate chips to suit your taste.
  • Cost-effective: Store-bought pecan pies can be expensive—making it at home saves money.
  • Tradition: Baking your own pie creates cherished memories and traditions with loved ones.

3. Essential Ingredients for the Perfect Pecan Pie

For the Crust

  • 1 1/4 cups all-purpose flour
  • 1/2 cup unsalted butter, cold and cubed
  • 1/4 tsp salt
  • 3-4 tbsp ice water

For the Filling

  • 1 cup light corn syrup
  • 1 cup packed brown sugar
  • 3 large eggs
  • 1/3 cup unsalted butter, melted
  • 1 tsp pure vanilla extract
  • 1/4 tsp salt
  • 1 1/2 cups pecan halves

4. Cultural History of Ingredients

Pecans are native to North America and have been used in cooking by Native Americans for centuries. Corn syrup, a common ingredient in pecan pie, became widely used in the 20th century, making this pie an accessible dessert for home bakers.


5. Equipment You’ll Need

  • Rolling pin for the crust
  • 9-inch pie dish
  • Mixing bowls
  • Whisk
  • Parchment paper and pie weights (or dried beans)

6. Step-by-Step Instructions for Classic Pecan Pie

Step 1: Prepare the Crust

  1. In a mixing bowl, combine flour and salt.
  2. Add cold butter and use a pastry cutter or fork to blend until crumbly.
  3. Gradually add ice water, 1 tablespoon at a time, until the dough comes together.
  4. Shape into a disc, wrap in plastic, and refrigerate for at least 30 minutes.

Step 2: Prebake the Crust

  1. Roll out the chilled dough on a floured surface into a 12-inch circle.
  2. Transfer to a 9-inch pie dish and trim excess edges.
  3. Line the crust with parchment paper and fill with pie weights.
  4. Bake at 375°F (190°C) for 15 minutes. Remove weights and bake for another 5 minutes.

Step 3: Make the Filling

  1. In a large bowl, whisk together corn syrup, brown sugar, eggs, melted butter, vanilla extract, and salt until smooth.
  2. Stir in the pecan halves, ensuring they are evenly coated.

Step 4: Assemble the Pie

  1. Pour the filling into the prebaked crust. Arrange additional pecan halves on top for decoration if desired.
  2. Bake at 350°F (175°C) for 50-55 minutes or until the filling is set and slightly puffed.

Step 5: Cool and Serve

  1. Let the pie cool completely before slicing to allow the filling to set.
  2. Serve with whipped cream or a scoop of vanilla ice cream.

7. Suggestions for Serving and Storing

  • Serving: Best served warm or at room temperature. Pair with coffee or a dessert wine.
  • Storing: Cover and refrigerate for up to 4 days.
  • Freezing: Wrap tightly and freeze for up to 3 months. Thaw overnight in the fridge before serving.

8. Chef Simon’s Tips for the Perfect Pecan Pie

  • Toast the pecans lightly before adding them to the filling to enhance their flavor.
  • Avoid overmixing the filling; gentle whisking prevents a grainy texture.
  • Use a pie shield or foil to prevent the crust edges from overbrowning.

9. Emotional and Psychological Impact of Food

Pecan pie evokes a sense of warmth and nostalgia, connecting families during holiday feasts. Its comforting flavors and textures create moments of joy and togetherness, making every bite special.


10. Mindful Cooking Techniques

  • Take your time rolling out the dough; enjoy the meditative process of creating something by hand.
  • Focus on the aroma of toasting pecans and caramelizing sugar for a sensory cooking experience.

11. Tips for Keeping the Recipe Fresh Longer

  • Store leftovers in an airtight container in the fridge to prevent the filling from drying out.
  • Brush the crust with a light egg wash to keep it crisp and flavorful.

12. Advanced Culinary Terms and Techniques

  • Blind Baking: Prebaking the crust prevents it from becoming soggy.
  • Docking: Poking small holes in the crust with a fork to allow steam to escape.
  • Caramelization: The browning of sugar during baking adds depth to the pie’s flavor.

13. Healthy Ingredient Alternatives

  • Replace corn syrup with pure maple syrup or honey for a natural sweetener.
  • Use whole-wheat flour for a more nutritious crust.
  • Substitute coconut oil for butter in the filling for a dairy-free option.

14. More Serving Ideas

  • Drizzle with caramel sauce for added decadence.
  • Add a dollop of cinnamon-spiced whipped cream for a festive touch.
  • Sprinkle sea salt flakes on top for a sweet-salty contrast.

15. Common Issues and Solutions

  • Runny Filling: Ensure the pie cools completely before slicing; this allows the filling to set properly.
  • Burnt Crust: Use a pie shield to protect the edges during baking.
  • Too Sweet: Balance sweetness by serving with unsweetened whipped cream.

16. Variations to Try

  • Chocolate Pecan Pie: Add 1/2 cup of melted dark chocolate to the filling.
  • Bourbon Pecan Pie: Stir in 2 tablespoons of bourbon for a Southern twist.
  • Maple Pecan Pie: Replace corn syrup with pure maple syrup for a richer flavor.

17. Nutritional Information and Health Benefits

Pecans are rich in healthy fats, fiber, and antioxidants. While pecan pie is indulgent, moderation allows you to enjoy its deliciousness as part of a balanced diet.


18. The Art of Pairing Pecan Pie

Pair with a robust coffee, a glass of dessert wine like port, or a spiced chai latte for a comforting combination.


19. Weather and Recipe Outcome

Pecan pie is a versatile dessert that shines in cooler weather. Its warm, rich flavors are especially comforting on crisp autumn or winter days.


20. Other Pie Recipes to Explore

  • Classic Apple Pie
  • Chocolate Silk Pie
  • Sweet Potato Pie

21. Focus on Tools and Equipment

  • Use a high-quality pie dish for even baking.
  • Invest in a sturdy pastry cutter for effortless dough preparation.

22. Frequently Asked Questions (with answers)

Q: Can I make pecan pie ahead of time?

A: Yes, pecan pie can be made up to 2 days in advance and stored in the refrigerator.

Q: Can I use a store-bought crust?

A: Absolutely! A store-bought crust saves time, but a homemade crust adds a special touch.

Q: Why is my pie filling grainy?

A: Overmixing the eggs can cause the filling to curdle. Whisk gently for a smooth texture.


Conclusion

The Classic Pecan Pie is a dessert that embodies tradition, warmth, and indulgence. Perfect for holidays or special occasions, its rich flavors and satisfying crunch make it a beloved favorite across generations. With this detailed recipe, you’re sure to create a pie that impresses and delights every time.


Thank you for visiting SqueezyRecipes! We’re dedicated to making cooking enjoyable and accessible for everyone, regardless of your skill level. Chef Simon is always ready to share the best recipes that bring a creative touch to your daily meals. With each visit, you’ll discover new recipes and innovative ideas that cater to every occasion. Don’t miss out on exploring SqueezyRecipes for the latest delicious dishes, and feel free to leave your feedback and share your experiences with the recipes you’ve tried. Cooking together makes everything better!

Irresistible Pickled Walnut and Cheese Rolls: A Savory Delight

Pickled Walnut and Cheese Rolls Recipe

Introduction

Pickled Walnut and Cheese Rolls offer an irresistible blend of tangy, savory, and creamy flavors, wrapped in a delicate pastry. This sophisticated yet simple appetizer or snack combines the earthy complexity of pickled walnuts with the smooth richness of cheese, creating a unique dish perfect for special occasions or everyday indulgence.


1. The Story Behind Pickled Walnut and Cheese Rolls

Pickled walnuts, a traditional British delicacy dating back to the 18th century, bring an earthy, tangy depth to many dishes. When paired with cheese, they create an extraordinary harmony of flavors. These rolls are inspired by classic English tea-time snacks, offering a modern twist on a timeless pairing.


2. The Benefits of Making Your Own Pickled Walnut and Cheese Rolls

  • Customization: Choose your favorite cheese to complement the walnuts.
  • Freshness: Homemade rolls ensure premium-quality ingredients.
  • Creativity: Experiment with shapes, fillings, and presentations.
  • Cost-Effective: Prepare this gourmet treat at home for a fraction of the cost.

3. Essential Ingredients for the Perfect Pickled Walnut and Cheese Rolls

For the Dough

  • 2 1/2 cups all-purpose flour
  • 1 tsp salt
  • 1/2 cup unsalted butter, cold and cubed
  • 1/3 cup cold water

For the Filling

  • 1/2 cup pickled walnuts, finely chopped
  • 1 cup shredded aged cheddar cheese (or Gruyère for a nuttier flavor)
  • 1/4 cup cream cheese, softened
  • 1 tsp Dijon mustard (optional)
  • 1/4 tsp black pepper

For Assembly

  • 1 egg, beaten (for egg wash)
  • Fresh thyme leaves (optional garnish)

4. Cultural History of Ingredients

Pickled walnuts are a staple in English cuisine, traditionally served with meats and cheeses. The use of aged cheese and buttery pastry evokes classic European culinary traditions, showcasing the richness of these timeless ingredients.


5. Equipment You’ll Need

  • Mixing bowls
  • Rolling pin
  • Baking sheet lined with parchment paper
  • Pastry brush
  • Sharp knife or pizza cutter

6. Step-by-Step Instructions for Pickled Walnut and Cheese Rolls

Step 1: Prepare the Dough

  1. In a large mixing bowl, combine flour and salt.
  2. Add cold butter and work it into the flour using a pastry cutter or your fingers until the mixture resembles coarse crumbs.
  3. Gradually add cold water, mixing until the dough comes together. Shape into a disc, wrap in plastic, and refrigerate for at least 30 minutes.

Step 2: Make the Filling

  1. In a medium bowl, mix shredded cheese, cream cheese, chopped pickled walnuts, Dijon mustard (if using), and black pepper until well combined.

Step 3: Roll and Assemble

  1. Preheat the oven to 375°F (190°C).
  2. Roll out the chilled dough on a floured surface into a rectangle, approximately 1/8-inch thick.
  3. Spread the filling evenly over the dough, leaving a 1-inch border on one long side.
  4. Starting from the opposite long edge, roll the dough tightly into a log. Seal the edge by pinching the dough together.
  5. Slice the log into 1-inch pieces and place them cut-side up on the prepared baking sheet.

Step 4: Bake

  1. Brush the rolls with the beaten egg and sprinkle with fresh thyme leaves, if desired.
  2. Bake for 20-25 minutes, or until golden brown and crisp.

7. Suggestions for Serving and Storing

  • Serving: Serve warm or at room temperature as an appetizer, snack, or alongside a charcuterie board.
  • Storing: Store in an airtight container in the refrigerator for up to 3 days.
  • Reheating: Warm in a 350°F (175°C) oven for 5-7 minutes to restore crispness.

8. Chef Simon’s Tips for Pickled Walnut and Cheese Rolls

  • Use high-quality pickled walnuts for the best flavor.
  • Experiment with cheeses like blue cheese or goat cheese for a different flavor profile.
  • For extra crunch, sprinkle chopped nuts or seeds over the rolls before baking.

9. Emotional and Psychological Impact of Food

The rich, tangy, and nutty flavors of these rolls evoke comfort and sophistication. They’re perfect for sharing, bringing people together to create lasting memories around the table.


10. Mindful Cooking Techniques

  • Enjoy the tactile process of making the dough, focusing on its texture and transformation.
  • Savor the aromas of baking pastry and melting cheese for a sensory experience.

11. Tips for Keeping the Recipe Fresh Longer

  • Store leftovers in the fridge and reheat only the portions you plan to eat.
  • Wrap unbaked rolls in plastic and freeze for up to 1 month. Bake directly from frozen, adding a few extra minutes to the baking time.

12. Advanced Culinary Terms and Techniques

  • Lamination: Rolling out and folding butter into dough creates flakiness.
  • Blind Baking: Partially baking the dough before adding filling prevents sogginess.
  • Chiffonade: Thinly slicing herbs like thyme can enhance the garnish presentation.

13. Healthy Ingredient Alternatives

  • Substitute whole-wheat flour for a nuttier, fiber-rich pastry.
  • Use low-fat cream cheese and reduced-fat cheddar for a lighter version.
  • Replace butter with a plant-based alternative for a vegan-friendly dough.

14. More Serving Ideas

  • Pair with a side of fig jam or cranberry sauce for a sweet contrast.
  • Serve alongside a light salad with vinaigrette to balance the richness.
  • Use as a topping for creamy soups for added texture and flavor.

15. Common Issues and Solutions

  • Dough Tears: Patch with a small piece of dough and smooth with your fingers.
  • Overbaked Rolls: Reduce oven temperature slightly or check for doneness earlier.
  • Runny Filling: Ensure the cream cheese is not overly softened before mixing.

16. Variations to Try

  • Spicy Rolls: Add chili flakes or smoked paprika to the filling for heat.
  • Sweet Rolls: Swap pickled walnuts for candied nuts and add a touch of honey.
  • Mediterranean Twist: Use feta cheese and olives instead of pickled walnuts.

17. Nutritional Information and Health Benefits

Pickled walnuts are rich in antioxidants, while cheese provides protein and calcium. Moderation allows you to enjoy this treat as part of a balanced diet.


18. The Art of Pairing Pickled Walnut and Cheese Rolls

  • Pair with a crisp white wine, such as Sauvignon Blanc.
  • Enjoy with a robust ale or porter for a classic British-inspired meal.

19. Weather and Recipe Outcome

These rolls are ideal for cool, breezy weather when warm, savory snacks are especially comforting.


20. Other Appetizer Recipes to Explore

  • Spinach and Feta Phyllo Rolls
  • Sundried Tomato and Olive Palmiers
  • Cheese-Stuffed Pretzel Bites

21. Focus on Tools and Equipment

  • A sharp knife ensures clean, even slices of the rolled dough.
  • A silicone baking mat prevents sticking and promotes even browning.

22. Frequently Asked Questions (with answers)

Q: Can I use store-bought pastry dough?

A: Yes, puff pastry or pre-made pie crust works well for convenience.

Q: Can I make these rolls ahead of time?

A: Absolutely! Prepare the rolls and refrigerate unbaked for up to 24 hours.

Q: What’s a substitute for pickled walnuts?

A: Use finely chopped caramelized onions or sun-dried tomatoes for a similar tangy depth.


Conclusion

Pickled Walnut and Cheese Rolls are a gourmet delight that showcase the magic of combining bold flavors and flaky pastry. Perfect for any occasion, this recipe promises to impress and delight, turning a few simple ingredients into a culinary masterpiece.


Thank you for visiting SqueezyRecipes! We’re dedicated to making cooking enjoyable and accessible for everyone, regardless of your skill level. Chef Simon is always ready to share the best recipes that bring a creative touch to your daily meals. With each visit, you’ll discover new recipes and innovative ideas that cater to every occasion. Don’t miss out on exploring SqueezyRecipes for the latest delicious dishes, and feel free to leave your feedback and share your experiences with the recipes you’ve tried. Cooking together makes everything better!