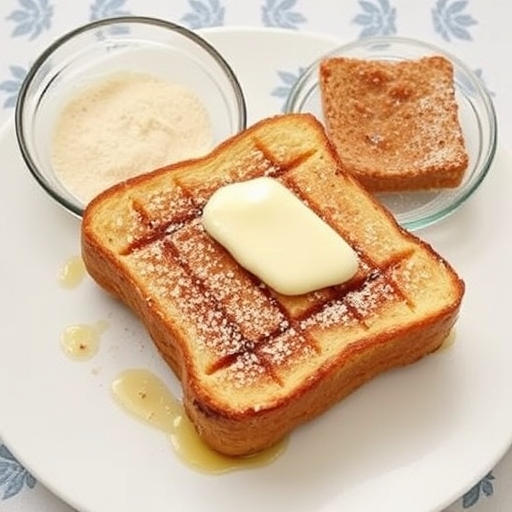
Ever crave something soft, fluffy, and guilt-free? Imagine biting into a delicate, pillowy slice that melts in your mouth—without the carbs. This recipe transforms simple ingredients into a light, airy delight perfect for any meal.
Whether you’re following a keto lifestyle, avoiding gluten, or just want a healthier option, this dish delivers. With just 10 minutes of prep and a quick bake, you’ll have a versatile base for sandwiches, snacks, or even a quick breakfast.
Each serving packs 9g of protein and only 65 calories, making it a smart choice for fitness lovers. Plus, its subtle flavor pairs well with sweet or savory toppings. Ready to bake something effortlessly delicious?
Key Takeaways
- Light, fluffy texture ideal for low-carb diets
- Quick prep (10 minutes) and bake time (25-30 minutes)
- High-protein (9g per serving) and only 65 calories
- Perfect for sandwiches, snacks, or standalone meals
- Keto-friendly and gluten-free
What Is Cottage Cheese Cloud Bread?
This airy, protein-packed creation is a game-changer for health-conscious eaters. It’s crafted by folding whipped egg whites into a creamy blend, resulting in a light, airy texture that’s both satisfying and guilt-free. With just 1g net carb per serving, it’s a smart swap for traditional grains.
The Science Behind the Fluff
Whipping egg whites traps air bubbles, giving structure to the mixture. When gently combined with blended dairy, it bakes into a delicate, pillow-like finish. Unlike older recipes, this version has a milder taste—no overpowering egginess.
“Separating eggs and whipping the whites is the secret to that bakery-style rise without flour.”
Dietary Flexibility
Ideal for keto and gluten-free diets, this recipe skips grains, sugar, and gluten entirely. Lactose-sensitive? Opt for lactose-free dairy brands like Green Valley or Lactaid.
- Storage: Keeps fresh for 3 days refrigerated or 2 months frozen.
- Versatility: Works with sweet or savory toppings.
- Nutrition: Packed with protein (9g per serving) and only 65 calories.
Why You’ll Love This Cottage Cheese Cloud Bread
Looking for a guilt-free way to enjoy your favorite meals? This fluffy creation delivers 9g of protein per slice with just 1g net carb. It’s a powerhouse for fitness goals and fits keto, gluten-free, or low-calorie diets.
Fuel Your Body Right
Each serving packs only 67 calories, 3g fat, and 1g carb—ideal for macros tracking. Add whey protein powder for extra muscle-building benefits. Unlike store-bought keto options, it’s preservative-free and costs pennies per slice.
Endless Flavor Possibilities
Top it with almond butter for breakfast or smoked salmon for lunch. Craving dessert? Drizzle honey and cinnamon for a sweet treat. Its neutral taste adapts to savory herbs or melted cheese effortlessly.
- Meal prep hero: Use as toast, sandwich buns, or a dessert base.
- Better than store-bought: Cheaper, fresher, and free of additives.
- Diet-friendly: Fits keto, gluten-free, and high-protein plans.
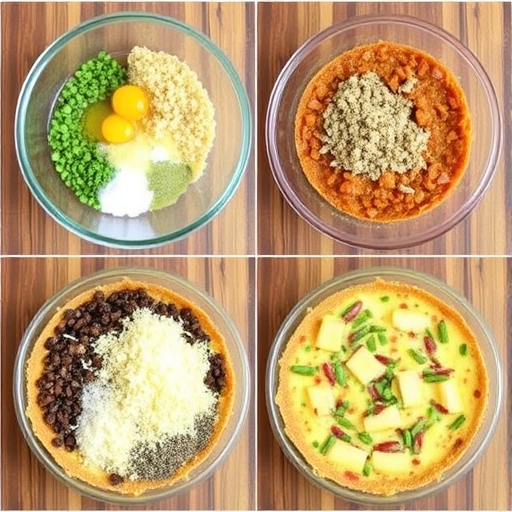
Ingredients You’ll Need
Quality ingredients make all the difference in achieving that airy texture. Fresh, room-temperature items ensure maximum volume and a flawless rise. Here’s what to grab:
Essential Ingredients for Fluffy Texture
Large eggs (3 total) are the backbone—separate yolks and whites carefully. Use cottage cheese (½ cup, full-fat) for creaminess; fat-free versions lack richness. A pinch of cream tartar stabilizes whipped whites for a pillowy finish.
Pro Tip: Room-temperature egg whites whip faster and hold peaks better. For extra structure, add 1 tsp cornstarch or arrowroot powder.
Optional Add-Ins for Extra Flavor
Customize with these mix-ins:
- Savory: Garlic powder, grated Parmesan, or rosemary.
- Sweet: Vanilla stevia drops or cinnamon.
No cottage cheese? Swap in ricotta or Greek yogurt. For a nutty crunch, fold in sesame seeds or rolled oats.
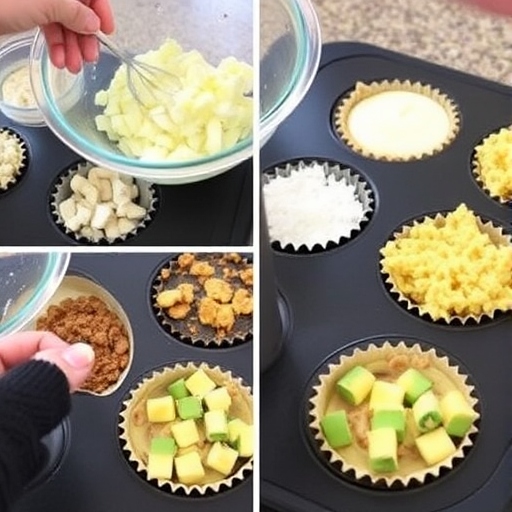
Step-by-Step Instructions
Mastering this recipe comes down to technique—here’s how to nail each step. Focus on gentle folding and precise baking to achieve that dreamy, airy texture.
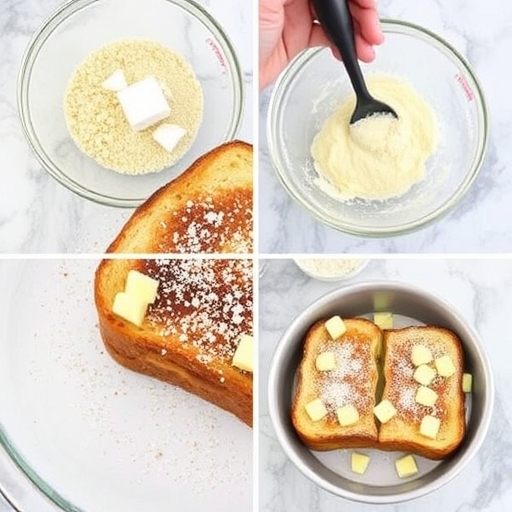
Preparing the Egg Whites and Yolks
Start by separating egg whites and yolks into clean bowls. Even a speck of grease can prevent whites from forming stiff peaks. Add ¼ tsp cream of tartar to stabilize the whites as you whip them.
Beat the whites on medium-high until glossy peaks form. This takes 3–4 minutes. Meanwhile, blend the yolks with dairy until smooth. Set both aside.
Folding the Mixture for Perfect Fluffiness
Gently fold the whipped egg whites into the yolk mixture in three parts. Use a spatula and scoop from the bottom to preserve air bubbles. Overmixing deflates the batter, so stop when just combined.
“Fold like you’re turning pages—slow and deliberate.”
Baking to Golden Brown Perfection
Line a tray with parchment paper or a silicone mat. Spoon the batter into mounds, leaving space to spread. Bake at 300°F for 25–30 minutes until tops are golden brown and springy.
- Don’t peek: Keep the oven closed to prevent collapse.
- Test doneness: Tap the center—it should bounce back.
Cool on a rack for 10 minutes before serving. The result? A light, protein-packed base ready for toppings.
Tips for the Best Cottage Cheese Cloud Bread
Small tweaks can transform your results from good to exceptional. Focus on technique and ingredient prep to nail the light, airy texture every time.
Why Temperature Matters
Cold ingredients sabotage fluffiness. Use room-temperature eggs and dairy—they blend smoothly and trap more air. Pro tip: Leave eggs out for 30 minutes before baking.
Blend dairy until silky to avoid lumps. A grainy mix deflates whipped whites, resulting in dense slices.
Steer Clear of These Errors
Overmixing crushes air bubbles. Fold whipped whites gently—stop when streaks disappear. Metal bowls can hinder peaks; opt for glass or plastic.
| Issue | Fix |
|---|---|
| Soggy center | Extend baking by 5 minutes |
| Collapsed top | Cool on a wire rack |
| High-altitude bake | Add 3–5 minutes to oven time |
“Whisk whites to glossy peaks—they should hold their shape when lifted.”
Delicious Variations to Try
Transform your basic recipe into exciting flavors with these creative twists. Whether you crave something sweet or savory, these upgrades keep things fresh and fun.
Sweet Version with Honey and Cinnamon
For a touch of natural sweetness, mix 1 tbsp honey and 1 tsp cinnamon into the batter. Pro tip: Add blueberries for bursts of flavor. Skip refined sugar—liquid stevia works too.
Want more protein? Blend in 1 scoop unflavored whey powder. This boosts muscle fuel without altering texture.
Savory Twist with Herbs and Cheese
Fold ¼ cup shredded cheddar cheese and ¼ tsp garlic powder into the mix. Rosemary or thyme adds earthy notes. Crave crunch? Sprinkle “Everything Bagel” seasoning before baking.
Dairy-free? Swap in mayo for richness. Sunflower seed butter mimics nutty depth if allergies are a concern.
- Mini bagels: Use silicone molds for bite-sized portions.
- Protein-packed: Whey powder adds 5g extra per serving.
- Nut-free: Sunflower seed meal replaces almond flour.
“Customizing flavors keeps meals exciting—rotate sweet and savory weekly.”
How to Store and Reheat
Want your fluffy creation to stay fresh for days? Proper storage makes all the difference. Follow these methods to lock in texture and flavor, whether you’re saving leftovers or meal prepping for the week.
Keeping It Fresh in the Fridge
For short-term use, place slices in an airtight container with wax paper between layers. This prevents sticking and absorbs excess moisture. Refrigerate for up to 3 days—any longer risks sogginess.
Freezing for Long-Term Storage
Stack slices with parchment paper separators in a freezer-safe bag or container. They’ll keep for 2 months. Label with the date to track freshness. Thaw overnight in the fridge before reheating.
| Issue | Solution |
|---|---|
| Dry texture | Wrap in a damp paper towel before reheating |
| Freezer burn | Use double-layer parchment |
| Slow thawing | Microwave at 10% power for 30-second intervals |
- Reheating: 10 seconds in the microwave or 3 minutes in a toaster oven at 300°F.
- Avoid: Room-temperature storage—bacteria thrive at 40–140°F.
“Labeling frozen batches ensures you use them at peak quality—don’t rely on memory.”
Serving Suggestions
Ready to turn your light, airy creation into a meal? Its neutral flavor and sturdy texture make it perfect for everything from quick snacks to elegant appetizers. Here’s how to maximize its versatility.
Perfect for Sandwiches and Snacks
Swap traditional bread with this protein-packed alternative. It holds fillings without crumbling—ideal for lunchboxes or on-the-go meals. Try these combos:
- Turkey-avocado: Layer sliced turkey, mashed avocado, and sprouts.
- PB&J upgrade: Spread almond butter and sugar-free jam for a keto-friendly treat.
- Breakfast sandwich: Top with scrambled eggs and a slice of cheddar.
Pairing with Dips and Spreads
Cut into strips or rounds for dipping. Its slight chewiness complements creamy or zesty flavors. Crowd-pleasers include:
- Spinach-artichoke dip: A classic pairing for parties.
- Buffalo chicken: Add shredded chicken and hot sauce for a spicy kick.
- Smoked salmon + dill cream cheese: A gourmet appetizer in minutes.
“Shape it into muffin tins for bite-sized sliders—perfect for game day or kids’ lunches.”
For dessert, layer with whipped cream and strawberries for a low-carb shortcake. The options are endless!
Conclusion
Your journey to better meals starts with this versatile staple. Packing 9g of protein and just 1g net carb per serving, it’s a smart pick for low-carb lifestyles. Experiment with herbs, spices, or sweeteners—each tweak makes it uniquely yours.
Skip pricey store-bought options. This recipe costs pennies and tastes fresher. Share your creations online with #CloudBreadCreations to inspire others.
Pro tip: Double the batch and freeze extras for effortless meal prep. Ready to redefine healthy eating?