Start your day off right with our delicious breakfast recipes! From fluffy pancakes and savory omelets to wholesome smoothies and hearty oatmeal, our collection has something for everyone. Whether you’re looking for a quick bite on busy mornings or a leisurely brunch idea, you’ll find simple and satisfying options to fuel your day.
Texas Kolaches are a beloved pastry that bridges the gap between breakfast and dessert. Traditionally of Czech origin, these fluffy, slightly sweet rolls filled with jam and cream cheese have become a Texas staple. Perfect for a family breakfast, brunch with friends, or a snack with coffee, they’re versatile, comforting, and surprisingly easy to make. Let’s dive into the process of creating these delightful treats at home.
Kolaches were introduced to Texas by Czech immigrants in the 19th century, where they quickly became a cherished part of local cuisine. The traditional recipe often included fruit or cheese fillings, but over time, Texans added their flair, introducing ingredients like sausage and savory fillings. This version combines a classic cream cheese filling with the tangy sweetness of jam, creating a perfect blend of textures and flavors.
2. The Benefits of Making Your Own Kolaches
Freshness Guaranteed: Homemade kolaches are free of preservatives and taste better than store-bought versions.
Creative Freedom: Customize fillings to suit your taste, from apricot jam to raspberry or even Nutella.
Cost-Effective: Making a batch at home is more economical than purchasing them from a bakery.
Therapeutic Baking: The process of kneading dough and crafting these pastries is a rewarding, stress-relieving experience.
3. Essential Ingredients for the Perfect Kolaches
For the Dough:
2 ¼ tsp active dry yeast
1 cup warm milk (about 110°F)
¼ cup sugar
3 cups all-purpose flour
1 tsp salt
2 large eggs
¼ cup unsalted butter, melted
For the Filling:
8 oz cream cheese, softened
¼ cup sugar
1 tsp vanilla extract
½ cup jam (flavor of your choice)
For the Topping:
¼ cup melted butter
2 tbsp sugar
4. Cultural History of Ingredients
Yeast: Essential in bread-making, yeast has been a staple ingredient in baking for centuries, symbolizing growth and life.
Cream Cheese: First made in the United States in the 1800s, cream cheese lends a creamy texture and tangy flavor to dishes.
Jam: A preserve with a history dating back to the Middle Ages, jam has been used to sweeten baked goods and desserts for centuries.
5. Equipment You’ll Need
Mixing bowls
Whisk and spatula
Stand mixer with a dough hook (optional)
Baking sheet
Parchment paper
Rolling pin
Measuring cups and spoons
6. Step-by-Step Instructions for Jam and Cream Cheese Texas Kolaches
Preparing the Dough
Activate the Yeast: In a small bowl, mix the warm milk, sugar, and yeast. Let it sit for 5-10 minutes until frothy.
Mix Wet Ingredients: In a large bowl, whisk the eggs and melted butter together. Add the yeast mixture.
Combine Dry Ingredients: Gradually mix in flour and salt. Knead the dough until smooth and elastic (about 10 minutes by hand or 5 minutes using a stand mixer).
Let it Rise: Cover the dough with a damp cloth and let it rise in a warm place for about 1 hour or until doubled in size.
Making the Filling
In a medium bowl, beat the cream cheese, sugar, and vanilla extract until smooth. Set aside.
Shaping and Filling the Kolaches
Divide the Dough: Punch down the risen dough and divide it into 12 equal portions. Roll each into a ball.
Shape the Kolaches: Flatten each ball into a disc and place it on a parchment-lined baking sheet.
Add the Filling: Make a small indentation in the center of each disc using your fingers or the back of a spoon. Fill with 1 tablespoon of cream cheese mixture and 1 teaspoon of jam.
Baking
Final Rise: Cover the kolaches and let them rise for 20-30 minutes.
Bake: Preheat the oven to 350°F (175°C). Bake for 18-20 minutes or until golden brown.
Finish: Brush the warm kolaches with melted butter and sprinkle with sugar for a shiny, sweet finish.
7. Suggestions for Serving and Storing
Serve warm for the best texture and flavor.
Pair with coffee or tea for a delightful breakfast or snack.
Store in an airtight container at room temperature for up to 2 days or refrigerate for up to a week.
8. Chef Simon’s Tips for Kolaches
For a richer dough, substitute whole milk with half-and-half.
Experiment with different jams—apricot and raspberry are classic choices.
Use a piping bag for precise filling distribution.
9. Emotional and Psychological Impact of Food
Kolaches evoke a sense of comfort and nostalgia. Sharing these warm, homemade treats with loved ones fosters connection and creates lasting memories.
10. Mindful Cooking Techniques
Focus on the process: enjoy the feel of the dough as you knead, the aroma of baking, and the satisfaction of creating something from scratch.
11. Tips for Keeping the Recipe Fresh Longer
Wrap each kolache individually in plastic wrap and store in the freezer for up to 2 months.
Reheat in the oven at 300°F for 10 minutes before serving.
12. Advanced Culinary Terms and Techniques
Proofing: Allowing the dough to rise in a warm environment to develop flavor and texture.
Creaming: Mixing cream cheese with sugar until light and fluffy, a technique used for the filling.
13. Healthy Ingredient Alternatives
Use low-fat cream cheese for a lighter option.
Swap sugar for honey or maple syrup.
Use whole wheat flour for added fiber.
14. More Serving Ideas
Add a drizzle of melted chocolate for a decadent twist.
Top with fresh fruits like sliced strawberries or blueberries.
15. Common Issues and Solutions
Dough Too Sticky: Add a tablespoon of flour at a time until manageable.
Filling Spills Over: Ensure the indentations are deep enough to hold the filling.
16. Variations to Try
Savory Kolaches: Replace jam with diced ham or cooked sausage and cream cheese with shredded cheddar.
Nutella and Banana Kolaches: Swap the jam for Nutella and add a slice of banana.
17. Nutritional Information and Health Benefits
Approx. 220 calories per kolache
Good source of carbohydrates for energy
Provides calcium and protein from cream cheese
18. The Art of Pairing Kolaches
Pair sweet kolaches with black coffee for a balanced flavor.
Serve savory kolaches with tomato soup for a comforting meal.
19. Weather and Recipe Outcome
Humidity can affect the dough’s rising time. On humid days, expect faster proofing.
20. Other Pastry Recipes to Explore
Classic Cinnamon Rolls
Danish Pastries with Fruit Filling
Cream Puffs
21. Focus on Tools and Equipment
Invest in a sturdy baking sheet and a quality stand mixer to streamline the process.
22. Frequently Asked Questions (with answers)
Q: Can I make the dough ahead of time? A: Yes, refrigerate the dough overnight and let it come to room temperature before shaping.
Q: Can I use pre-made dough? A: While possible, homemade dough provides superior flavor and texture.
Q: What’s the best way to reheat kolaches? A: Warm them in the oven at 300°F for 10 minutes.
Conclusion
Making Jam and Cream Cheese Texas Kolaches at home is more than just baking—it’s about preserving a tradition, experimenting with flavors, and sharing joy through food. These pastries are a testament to the beauty of blending cultural heritage with modern creativity. Whether for breakfast, dessert, or a special occasion, kolaches are bound to delight and impress.
Thank you for visiting SqueezyRecipes! We’re dedicated to making cooking enjoyable and accessible for everyone, regardless of your skill level. Chef Simon is always ready to share the best recipes that bring a creative touch to your daily meals. With each visit, you’ll discover new recipes and innovative ideas that cater to every occasion. Don’t miss out on exploring SqueezyRecipes for the latest delicious dishes, and feel free to leave your feedback and share your experiences with the recipes you’ve tried. Cooking together makes everything better!
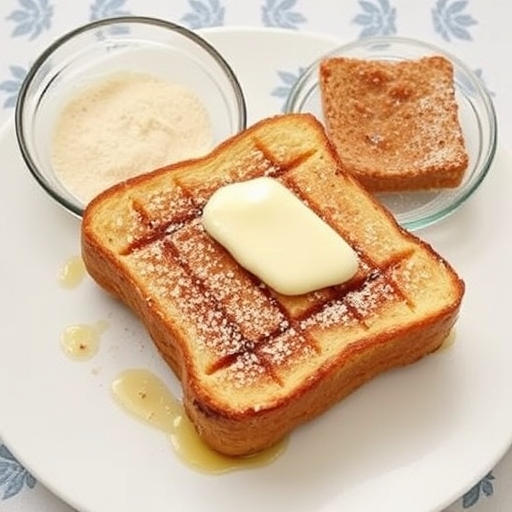
French toast is a timeless breakfast favorite, celebrated for its versatility, simplicity, and satisfying flavors. Whether you like it sweet, savory, or somewhere in between, French toast has the ability to transform even the most ordinary bread into a delightful morning treat. This recipe is the perfect balance of crispy golden edges, a soft, custard-like center, and endless topping possibilities. It’s a dish that appeals to people of all ages and can be customized to suit various dietary preferences, making it a great choice for brunch or breakfast.
Today, we’ll guide you through the process of making this delicious treat from scratch, offering tips, tricks, and serving suggestions that will take your French toast to the next level.
French toast, known by various names around the world such as “eggy bread,” “Arme Ritter” in Germany, and “pain perdu” in France, is a dish that has been enjoyed for centuries. The origins of French toast date back to ancient Rome, where a similar recipe called pan dulcis was made by soaking bread in a mixture of milk and eggs before frying it. This early form of French toast was a way to reuse stale bread, making it more palatable while conserving food.
The dish evolved over time and made its way through Europe, each culture adding its unique twist. The name “French toast” became popular in the United States in the 17th century, likely because French cuisine was highly regarded during this period. Though the dish itself is not uniquely French, the name stuck. In essence, French toast is a simple, resourceful dish that transforms humble ingredients into something extraordinary.
2. The Benefits of Making Your Own French Toast:
Making French toast at home offers numerous benefits, especially when it comes to controlling the quality of ingredients and personalizing the flavor profile. Here are a few reasons why homemade French toast stands out:
Customization: You can adjust the sweetness, spice level, and toppings to match your personal preferences.
Healthier Ingredients: When you make French toast yourself, you can choose healthier options like whole grain or gluten-free bread, organic eggs, or a dairy-free milk substitute.
Cost-Effective: Homemade French toast is an affordable breakfast option, especially if you already have the necessary ingredients on hand.
Freshness: The aroma of freshly made French toast, hot off the pan, is incomparable. Making it yourself ensures that it’s fresh and tailored to your tastes.
3. Essential Ingredients for the Perfect French Toast:
To make perfect French toast, you don’t need much—just a few simple ingredients that come together to create a crispy, custardy breakfast delight:
Bread: The bread is the base of your French toast. Thick slices of sturdy bread, such as brioche, challah, or sourdough, work best for soaking up the egg mixture while still holding their shape. Avoid using too-soft bread, as it may fall apart when you cook it.
Eggs: Eggs are the heart of the custard base, helping to bind the bread and create that creamy interior. Fresh, large eggs are ideal for this recipe.
Milk or Cream: Milk (whole or skim) adds creaminess, but you can also use heavy cream for a richer result. Alternatively, dairy-free options like almond milk or oat milk work well for those with dietary restrictions.
Sugar: A small amount of sugar sweetens the custard, but the sweetness can also come from the toppings you choose.
Vanilla Extract: Vanilla extract adds a warm, aromatic flavor that enhances the overall taste of the French toast.
Cinnamon: Ground cinnamon is a must for that signature, comforting flavor.
Salt: A pinch of salt balances out the sweetness and enhances the flavors.
4. Cultural History of Ingredients:
The ingredients used in French toast have rich histories of their own. Bread, as a staple food, has been around for millennia and was used by ancient civilizations. Eggs, too, have been a part of human diets for thousands of years, symbolizing fertility and abundance in many cultures.
Vanilla, native to Mexico, was first cultivated by the Totonac people before it spread to Europe in the 16th century, where it became a popular flavoring in desserts. Cinnamon, with its warm, sweet-spicy flavor, has been prized in cooking for over 4,000 years, often used in ancient Egypt for both culinary and medicinal purposes.
Together, these ingredients come together in French toast, a dish that has evolved over centuries to become a favorite breakfast around the world.
5. Equipment You’ll Need:
To make French toast, you’ll need only a few basic pieces of equipment:
Frying Pan or Skillet: A non-stick skillet or cast-iron pan is ideal for making French toast. These pans provide even heat distribution and help achieve that perfect crispy golden crust.
Whisk or Fork: To beat the eggs and blend the custard mixture, a whisk or a fork works well.
Measuring Cups and Spoons: Accurate measurements ensure the right balance of ingredients, leading to the perfect French toast.
Spatula: A spatula will help flip the French toast without breaking it, ensuring even cooking on both sides.
6. Step-by-Step Instructions for French Toast:
Now, let’s dive into the process of making delicious French toast!
Ingredients:
4 slices of thick bread (such as brioche or challah)
2 large eggs
½ cup milk or heavy cream
1 tbsp sugar
1 tsp vanilla extract
½ tsp ground cinnamon
Pinch of salt
2 tbsp butter or oil for frying
Instructions:
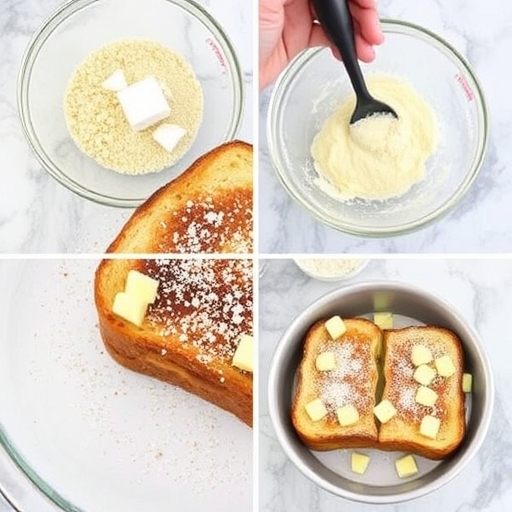
Prepare the Custard Mixture: In a large bowl, whisk together the eggs, milk, sugar, vanilla extract, cinnamon, and salt until smooth and well combined. Make sure the mixture is thoroughly mixed, with no egg streaks visible.
Preheat the Pan: Heat a skillet or frying pan over medium heat. Add 1 tablespoon of butter or oil to the pan and allow it to melt, ensuring the surface is evenly coated.
Soak the Bread: Dip each slice of bread into the custard mixture, making sure both sides are evenly soaked. Avoid soaking for too long to prevent the bread from becoming too soggy.
Cook the French Toast: Place the soaked bread slices into the heated skillet. Cook each slice for 2-3 minutes on one side, until it turns golden brown and crispy. Flip the bread and cook for another 2-3 minutes on the other side. You can add more butter or oil between batches if necessary.
Serve and Enjoy: Remove the French toast from the pan and place it on a plate. Serve immediately with your favorite toppings, such as maple syrup, fresh fruit, powdered sugar, or whipped cream.
7. Suggestions for Serving and Storing:
French toast is versatile when it comes to toppings and serving ideas. Here are some options:
Classic Toppings: Serve with a drizzle of maple syrup, a dusting of powdered sugar, and a handful of fresh berries.
Savory Toppings: Top with crispy bacon, scrambled eggs, or sautéed mushrooms for a savory twist.
Sweet Toppings: Try adding whipped cream, Nutella, or fresh fruit such as bananas, strawberries, or blueberries.
Storing: French toast is best served fresh, but you can store leftovers in an airtight container in the fridge for up to 2 days. Reheat in a toaster or oven for best results.
8. Chef Simon’s Tips for Perfect French Toast:
Use Day-Old Bread: Slightly stale bread soaks up the custard mixture better and helps maintain the bread’s structure while cooking.
Don’t Over-soak: Briefly dip the bread into the custard to avoid soggy French toast.
Adjust Heat: If your French toast is browning too quickly, reduce the heat slightly. The goal is a crispy exterior and soft interior.
Add Flavor Variations: Experiment with different spices like nutmeg or allspice for added flavor.
9. Emotional and Psychological Impact of Food:
Food is not just about nutrition; it’s about experience. French toast, in particular, has a comforting, nostalgic quality for many people. The act of making French toast from scratch can bring back memories of childhood, family breakfasts, or cozy mornings. The aroma of cinnamon and vanilla filling the kitchen creates a sense of warmth and relaxation, contributing to the overall emotional experience of eating.
10.Mindful Cooking Techniques
When preparing French toast, take a moment to connect with the ingredients and the process. Pay attention to the texture of the bread as it soaks in the custard and the sound of it sizzling in the pan. Cooking with mindfulness can enhance the enjoyment of the meal, and the slow, intentional process can elevate the experience from a routine task to a moment of joy.
11. Tips for Keeping the Recipe Fresh Longer
French toast is best enjoyed immediately after cooking, but if you need to store it, here are some tips to keep it fresh:
Cool Completely Before Storing: Allow the French toast to cool to room temperature before wrapping it in plastic wrap or aluminum foil. This helps prevent condensation, which can make the toast soggy.
Store in an Airtight Container: To preserve freshness, store leftovers in an airtight container or wrap each slice individually. This will help keep the texture intact for a longer period.
Reheat Properly: When reheating, avoid microwaving it directly, as it may result in soggy French toast. Instead, reheat it on a griddle or in the oven to restore its crispy exterior. If you’re reheating in the oven, set it to 350°F (175°C) and bake for about 5–10 minutes, depending on the thickness of the slices.
12. Advanced Culinary Terms and Techniques
While French toast is a relatively simple dish, there are a few advanced culinary techniques and terms that can elevate your cooking:
Custard: A mixture of eggs, milk or cream, and flavorings like vanilla and cinnamon that forms the base of the dish. It’s the key to giving French toast its creamy interior and golden-brown exterior.
Browning: This refers to the process of cooking French toast on medium heat until it turns golden and crispy. It’s important to achieve the perfect level of browning to avoid a soggy or overcooked texture.
Maillard Reaction: A chemical reaction that occurs when heat is applied to proteins and sugars in food, resulting in a browned and flavorful crust. This is essential for achieving the crispy texture of French toast.
13. Healthy Ingredient Alternatives
If you’re looking to make a healthier version of French toast, here are some ingredient substitutions that won’t compromise on flavor:
Bread: Choose whole-grain or sprouted wheat bread instead of white bread to add more fiber and nutrients.
Eggs: You can use egg substitutes like flax eggs or aquafaba (the liquid from a can of chickpeas) for a plant-based version.
Milk: Swap whole milk for almond milk, oat milk, or soy milk to make the dish dairy-free.
Sugar: Use natural sweeteners like honey, maple syrup, or coconut sugar instead of refined white sugar.
These substitutions allow you to enjoy French toast with fewer calories and more nutrients, while still maintaining a rich flavor and texture.
14. More Serving Ideas
French toast is incredibly versatile, and here are some creative ways to serve it:
Savory French Toast: Add toppings like poached eggs, avocado, smoked salmon, or sautéed mushrooms for a savory breakfast option.
Fruit-Filled French Toast: Layer your French toast with fresh fruit or even make stuffed French toast by adding a cream cheese filling, fruit preserves, or Nutella.
French Toast Casserole: For a crowd-pleasing breakfast, bake your French toast in a casserole dish with a custard mixture and your favorite toppings. This makes for an easy-to-serve dish that’s perfect for gatherings.
15. Common Issues and Solutions
While making French toast is relatively straightforward, there are a few common issues you might encounter. Here’s how to solve them:
Soggy French Toast: If your French toast turns out soggy, try using thicker slices of bread, and avoid soaking them too long. Day-old bread also works better because it’s drier and absorbs the custard mixture more evenly.
Burnt or Undercooked French Toast: If your French toast burns on the outside but remains uncooked inside, reduce the heat slightly and cook it longer on a lower setting. This will allow the inside to cook without burning the outside.
Not Crispy Enough: For extra crispiness, make sure your pan is preheated before adding the bread, and use enough butter or oil to coat the pan. You can also finish cooking the French toast in the oven for a few minutes to ensure it’s crispy all over.
16. Variations to Try
French toast is a wonderfully adaptable dish. Here are a few variations to experiment with:
Cinnamon Swirl French Toast: Use cinnamon swirl bread for a flavorful twist on the classic recipe. The sweet swirls of cinnamon will infuse every bite with extra warmth and spice.
Banana Bread French Toast: Use slices of banana bread for a sweet, moist base that pairs perfectly with a maple syrup drizzle and sliced bananas.
Stuffed French Toast: Create a filling with cream cheese, Nutella, or even peanut butter, and stuff the bread slices before dipping them in the custard mixture. This adds a creamy, indulgent center.
17. Nutritional Information and Health Benefits
While French toast is often considered a comfort food, there are ways to make it more nutritious. Here’s a breakdown of what you can expect in terms of nutritional information for a typical French toast serving (using whole-grain bread, egg, milk, and a light drizzle of maple syrup):
Calories: Approximately 250–300 calories per serving.
Carbohydrates: 30–40 grams (depending on the type of bread used).
Protein: 8–10 grams (from the eggs and milk).
Fat: 10–15 grams (mostly from butter or oil used for frying).
Fiber: 2–5 grams (with whole-grain bread).
French toast offers a balanced mix of carbohydrates, protein, and healthy fats when made with wholesome ingredients. By swapping out refined sugars for natural sweeteners, using whole-grain bread, and opting for plant-based milks, you can make French toast even healthier while still keeping it delicious.
18. The Art of Pairing French Toast
French toast pairs beautifully with a wide range of sides and beverages. Here are some ideas to complement the dish:
Beverages: Pair French toast with fresh coffee, orange juice, or a berry smoothie for a refreshing contrast to the sweetness of the toast.
Fruit: Fresh fruit like strawberries, bananas, blueberries, or even grilled peaches can add a fresh, tangy balance to the richness of the French toast.
Sides: Bacon, sausage, or scrambled eggs are classic savory sides that work well with French toast, providing a satisfying balance of flavors.
19. Weather and Recipe Outcome
The weather can have a subtle impact on how your French toast turns out. On hot, humid days, you might find that the bread absorbs the custard mixture more quickly, so be sure not to over-soak the bread. On colder days, the bread may soak up more of the custard, resulting in a richer, denser texture. Additionally, in colder weather, cooking your French toast on a higher heat may be helpful to achieve that crisp exterior, while maintaining the soft interior.
20. Other Recipes to Explore
If you love French toast, you might also enjoy these related recipes:
Cinnamon Rolls: Sweet, soft rolls with a spiced filling, perfect for breakfast or brunch.
Waffles: Light, crisp waffles with endless topping possibilities.
Pancakes: Fluffy pancakes served with butter and syrup, another classic breakfast option.
Eggs Benedict: A savory breakfast dish with poached eggs, English muffins, Canadian bacon, and hollandaise sauce.
21. Focus on Tools and Equipment
The right tools can make the process of making French toast easier and more enjoyable:
Non-stick skillet or griddle: Ensures that the toast won’t stick and helps in achieving a crisp exterior.
Whisk: Helps you combine the egg mixture thoroughly, ensuring a smooth custard.
Spatula or tongs: Essential for flipping the French toast without breaking it.
22. Frequently Asked Questions (with Answers)
Q: Can I make French toast without eggs? A: Yes, you can substitute eggs with a mixture of plant-based ingredients like flax meal and water, or use silken tofu for a creamy custard.
Q: Can I make French toast ahead of time? A: Yes, you can prepare French toast ahead of time and store it in the fridge or freezer. Reheat it on the stovetop or in the oven for the best results.
Q: Can I make French toast with gluten-free bread? A: Absolutely! Gluten-free bread works just as well for French toast. Just be sure to select a sturdy, thicker bread to ensure the texture holds up.
Conclusion
French toast is more than just a breakfast dish; it’s a comforting and customizable creation that brings joy to the table. Whether you prefer it sweet or savory, simple or decadent, French toast offers endless possibilities for creativity. By following this detailed guide, you can master the art of French toast and enjoy a delicious, satisfying meal that will become a beloved staple in your kitchen.
Now, go ahead and try this recipe — enjoy the warmth, the crunch, and the satisfaction of a perfect French toast breakfast. Happy cooking!
Thank you for visiting SqueezyRecipes! We’re dedicated to making cooking enjoyable and accessible for everyone, regardless of your skill level. Chef Simon is always ready to share the best recipes that bring a creative touch to your daily meals. With each visit, you’ll discover new recipes and innovative ideas that cater to every occasion. Don’t miss out on exploring SqueezyRecipes for the latest delicious dishes, and feel free to leave your feedback and share your experiences with the recipes you’ve tried. Cooking together makes everything better!
Huevos Rancheros is a classic Mexican dish that features sunny-side-up eggs served on corn tortillas, topped with a flavorful tomato-based sauce. This hearty, flavorful breakfast is often served with beans, avocado, and a sprinkle of fresh cilantro. It’s the perfect dish for brunch or any meal when you’re craving bold flavors and satisfying comfort food.
Huevos Rancheros, or “ranch-style eggs,” is a traditional Mexican breakfast dish originating from rural Mexico. Farmers and ranchers, who worked early in the morning, needed a hearty meal to sustain them through their laborious day. The dish is a celebration of fresh, simple ingredients—eggs, tortillas, tomatoes, and chilies—which were easy to find on the farms.
Over time, Huevos Rancheros became a popular dish across Mexico, and it is now enjoyed worldwide. The dish has regional variations, and some versions include additional ingredients such as cheese, refried beans, and avocado. It is often served with a side of rice and beans, making it a fulfilling and balanced meal.
2. The Benefits of Making Your Own Huevos Rancheros
Making Huevos Rancheros from scratch allows you to control the ingredients and adjust the flavors to your liking. By preparing the sauce and tortillas yourself, you can skip the preservatives and unhealthy additives often found in store-bought alternatives. Fresh, homemade Huevos Rancheros is an excellent source of protein from the eggs, fiber from the tortillas and beans, and vitamins from the tomatoes and chilies.
Moreover, preparing this dish at home gives you the opportunity to experiment with variations, such as adding different types of chilies for heat or customizing the toppings. Plus, it’s a fun dish to make with family or friends for a weekend brunch.
3. Essential Ingredients for the Perfect Huevos Rancheros
Corn tortillas: These serve as the base for the dish, providing a delicious, crisp texture that pairs perfectly with the soft eggs.
Eggs: Fresh, large eggs are the star of this dish. The runny yolk adds richness and depth of flavor.
Tomatoes: Fresh or canned tomatoes form the base of the ranchero sauce.
Chilies: Commonly used chilies include serrano, jalapeño, or poblano, providing a balance of heat and flavor.
Onion and garlic: These aromatics enhance the flavor of the sauce and add a savory depth.
Cilantro: Fresh cilantro adds a bright, herby finish to the dish.
Beans: Refried or black beans are often served on the side or under the eggs, offering a hearty addition.
Cheese: Crumbled queso fresco or a sprinkle of Cotija cheese adds a creamy, salty element to the dish.
Avocado: Sliced avocado is a common topping, bringing a creamy, cooling contrast to the spicy sauce.
4. Cultural History of Ingredients
The key ingredients in Huevos Rancheros reflect the flavors and traditions of Mexican cuisine, which has been shaped by centuries of indigenous and Spanish influences. Corn tortillas, for example, are a staple in Mexican cuisine and are a traditional food for indigenous peoples. Tomatoes, chilies, and beans are also foundational ingredients in Mexican cooking, with each adding unique flavors and nutrients.
The use of fresh herbs like cilantro and toppings such as cheese and avocado also adds depth and texture to the dish. These ingredients represent the rich diversity of Mexican cooking, which balances fresh, vibrant flavors with hearty, comforting staples.
5. Equipment You’ll Need
Skillet or frying pan: For frying the eggs and sautéing the sauce ingredients.
Blender or food processor: To blend the tomatoes and chilies for the ranchero sauce.
Ladle: For serving the ranchero sauce over the tortillas and eggs.
Tongs or spatula: To flip the tortillas and eggs gently without breaking them.
Serving plates: To assemble and present the dish in an appealing way.
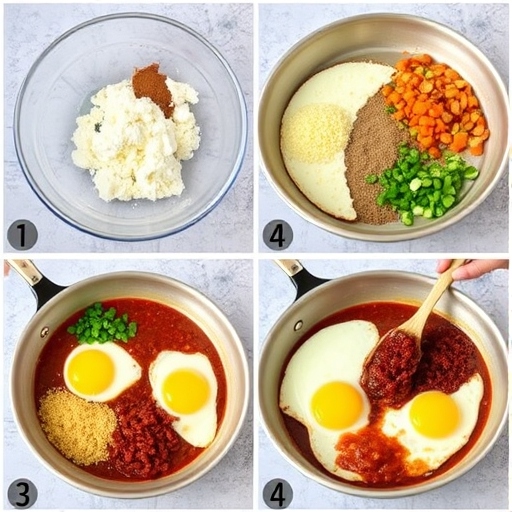
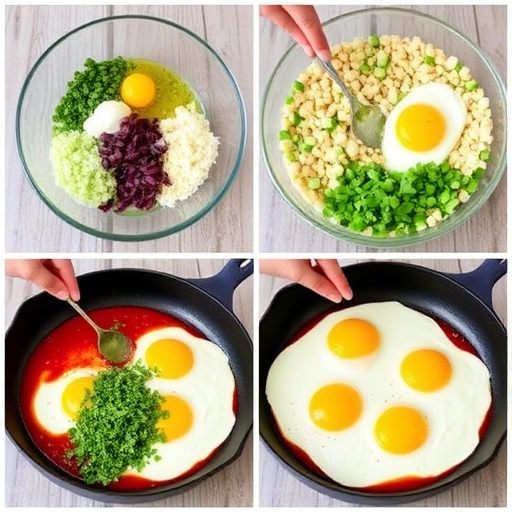
Prepare the sauce: Heat a tablespoon of oil in a skillet over medium heat. Add the chopped onion and garlic, sautéing for 2-3 minutes until softened.
Add the tomatoes and chilies: Add chopped tomatoes (fresh or canned) and chopped chilies (serrano, jalapeño, or poblano). Simmer for 5-7 minutes until the tomatoes soften.
Blend the sauce: Transfer the tomato and chili mixture to a blender or food processor and blend until smooth. Season with salt, pepper, and a pinch of cumin or oregano if desired. Set the sauce aside.
For the Huevos Rancheros:
Prepare the tortillas: Heat a small amount of oil in a separate skillet. Fry the corn tortillas until they’re slightly crispy on the edges but still soft in the center, about 1-2 minutes on each side. Set them aside on a paper towel to drain excess oil.
Fry the eggs: In the same skillet, cook your eggs sunny-side-up (or to your preference). Make sure the yolks remain intact.
Assemble the dish: Place a tortilla on each plate. Spoon some ranchero sauce over the tortilla, followed by a fried egg on top.
Garnish and serve: Top with fresh cilantro, crumbled cheese, avocado slices, and a side of beans. Serve immediately.
7. Suggestions for Serving and Storing
Huevos Rancheros is traditionally served with refried or black beans, avocado slices, and a sprinkle of cheese. You can also serve it with a side of rice for a complete meal.
To store leftovers, keep the sauce and eggs separate. The sauce can be stored in an airtight container in the refrigerator for up to 3 days. Reheat the sauce in a skillet before serving. Leftover eggs should be stored in a separate container and reheated gently on low heat to avoid overcooking.
8. Chef Simon’s Tips for Huevos Rancheros
Crispy tortillas: Make sure to fry the tortillas just enough to get them crispy but not too hard. They should still be pliable.
Don’t overcook the eggs: The runny yolk adds richness to the dish, so be careful not to overcook the eggs. Sunny-side-up eggs work best.
Adjust the heat: You can adjust the spiciness of the dish by using milder or hotter chilies depending on your preference.
Fresh toppings: Always use fresh cilantro and ripe avocado for the best flavor.
9. Emotional and Psychological Impact of Food
Huevos Rancheros evokes a sense of comfort and satisfaction, combining rich, flavorful ingredients that are both indulgent and nourishing. The act of making the dish, especially with loved ones, can bring joy and create lasting memories. It’s the kind of dish that warms the soul and provides a sense of connection to Mexican culinary traditions.
10. Mindful Cooking Techniques
As you prepare Huevos Rancheros, take the time to appreciate the fresh ingredients, the flavors, and the process. Mindful cooking can help you connect more deeply with the food you’re making, leading to a greater appreciation for the dish. Pay attention to each step, whether it’s blending the sauce or frying the eggs, and focus on the sensory experience—the sizzle of the oil, the colors of the ingredients, and the aromas that fill the kitchen.
11. Tips for Keeping the Recipe Fresh Longer
To keep the components of Huevos Rancheros fresh longer, store the sauce in an airtight container in the refrigerator for up to 3 days. Eggs should be eaten immediately after cooking, but you can prepare the tortillas in advance and reheat them before serving.
12. Advanced Culinary Terms and Techniques
Sautéing: Cooking ingredients quickly in a small amount of oil or butter over high heat.
Simmering: Cooking food gently at a low heat, just below the boiling point, to allow the flavors to meld.
Poaching: Gently cooking eggs in water or broth to achieve a soft, runny yolk.
13. Healthy Ingredient Alternatives
Tortillas: Use whole wheat or gluten-free tortillas for a healthier alternative.
Eggs: Opt for egg whites or a plant-based egg substitute if you’re looking to reduce cholesterol or calories.
Cheese: Use a lower-fat cheese, or omit it entirely for a dairy-free version.
Avocado: For a lighter version, you can replace avocado with a dollop of plain Greek yogurt.
14. More Serving Ideas
If you’re looking to serve Huevos Rancheros with more variety, try pairing it with:
Grilled vegetables: Add a side of grilled peppers, zucchini, or corn for a smoky flavor.
Fruit salsa: A fresh fruit salsa made with mango or pineapple can add a sweet contrast to the savory dish.
Hot sauce: For extra heat, serve with a variety of hot sauces on the side.
15. Common Issues and Solutions
The eggs are overcooked: To avoid overcooking, cook the eggs on medium-low heat, and don’t let them sit in the pan too long.
Tortillas are too crispy: If your tortillas get too crispy, they may break easily when you top them. Fry them for just a minute or so, making sure they’re still soft enough to hold the sauce and egg.
16. Variations to Try
Huevos Rancheros is a versatile dish, and you can experiment with different ingredients and flavors to make it your own. Here are some variations you might enjoy:
Huevos a la Mexicana: Add chopped onions, tomatoes, and chilies to scrambled eggs for a quick, flavorful breakfast.
Huevos Rancheros with Chorizo: Add spicy Mexican chorizo to the ranchero sauce or serve it on the side for added flavor and protein.
Huevos Rancheros with Salsa Verde: Replace the red tomato-based sauce with a tangy green salsa made with tomatillos and cilantro for a fresh twist.
Vegan Huevos Rancheros: Skip the eggs and use tofu or chickpea flour scrambled “eggs” for a plant-based version of this dish.
17. Nutritional Information and Health Benefits
Huevos Rancheros offers a balanced mix of macronutrients:
Calories: A typical serving of Huevos Rancheros provides approximately 400-500 calories, depending on the portion size and specific ingredients.
Protein: Eggs are a great source of high-quality protein, and the beans add extra protein and fiber.
Vitamins and minerals: Tomatoes and chilies provide an abundance of vitamin C, while avocado is rich in healthy fats and potassium.
Fiber: The corn tortillas and beans contribute a good amount of dietary fiber, promoting healthy digestion.
Although it’s a hearty meal, Huevos Rancheros can be made even healthier by using whole wheat tortillas, reducing the amount of cheese, or adding more vegetables.
18. The Art of Pairing Huevos Rancheros
Huevos Rancheros pairs beautifully with:
Fresh fruit: The acidity of citrus fruits like oranges or the sweetness of pineapple complements the spicy richness of the dish.
Light greens: A side of sautéed spinach or mixed greens with a simple vinaigrette can balance the richness of the eggs and sauce.
Beverages: Serve with a refreshing cold beverage like iced horchata or a glass of fresh orange juice. For a twist, try pairing it with a spicy bloody mary for a savory brunch.
19. Weather and Recipe Outcome
The weather can influence the preparation of Huevos Rancheros. On a warm, sunny day, the fresh, vibrant flavors of the dish are especially satisfying. On cooler days, the hearty and spicy nature of the dish provides comfort and warmth. If you’re making this dish during a hot summer, consider serving the eggs and sauce slightly chilled for a refreshing variation.
Table of Contents
20. Other Mexican Recipes to Explore
If you love Huevos Rancheros, you might also enjoy these other Mexican favorites:
Chilaquiles: Fried tortilla chips smothered in salsa and topped with eggs, cheese, and sour cream.
Molletes: Open-faced sandwiches with bolillo rolls, refried beans, melted cheese, and salsa.
Tamales: Corn dough filled with a variety of ingredients like meats, cheese, or chilies, and wrapped in corn husks.
These dishes offer similar rich, bold flavors and are perfect for a Mexican-themed breakfast or brunch.
21. Focus on Tools and Equipment
While the ingredients for Huevos Rancheros are simple, using the right tools will help you make the dish more efficiently and with better results:
Cast-iron skillet: Ideal for frying the eggs and tortillas evenly and ensuring that they develop a nice crispiness.
Blender or food processor: These are essential for making the smooth ranchero sauce that complements the eggs and tortillas.
Ladle or spoon: Use this to pour the sauce over the eggs without disturbing the yolk.
Spatula or tongs: To carefully flip the tortillas and eggs without breaking them.
Using quality tools makes the process smoother and more enjoyable, helping you achieve the perfect Huevos Rancheros every time.
22. Frequently Asked Questions (with answers)
Q: Can I make the ranchero sauce in advance? A: Yes! You can make the ranchero sauce a day ahead of time and store it in an airtight container in the fridge. Just reheat it gently on the stove before serving.
Q: Can I use flour tortillas instead of corn tortillas? A: While corn tortillas are traditional and add a unique flavor, you can use flour tortillas if you prefer a softer base for the dish. However, the texture and flavor will be different.
Q: Can I make this dish vegetarian? A: Yes, Huevos Rancheros is naturally vegetarian. If you want to make it vegan, simply replace the eggs with a tofu scramble or chickpea flour scramble for a plant-based alternative.
Q: Can I make Huevos Rancheros without the cheese? A: Absolutely! While cheese adds a delicious creamy element, you can skip it for a lighter dish or use a dairy-free cheese substitute.
Conclusion
Huevos Rancheros is a flavorful, satisfying dish that combines the richness of eggs, the smokiness of the ranchero sauce, and the heartiness of corn tortillas. Whether you’re enjoying it for breakfast, brunch, or any time of the day, this dish is sure to impress. With its simple ingredients, bold flavors, and numerous variations, Huevos Rancheros is a versatile and delicious way to celebrate Mexican cuisine. Enjoy the process of making this dish from scratch and savor every bite as you experience the flavors of Mexico.
Thank you for visiting SqueezyRecipes! We’re dedicated to making cooking enjoyable and accessible for everyone, regardless of your skill level. Chef Simon is always ready to share the best recipes that bring a creative touch to your daily meals. With each visit, you’ll discover new recipes and innovative ideas that cater to every occasion. Don’t miss out on exploring SqueezyRecipes for the latest delicious dishes, and feel free to leave your feedback and share your experiences with the recipes you’ve tried. Cooking together makes everything better!
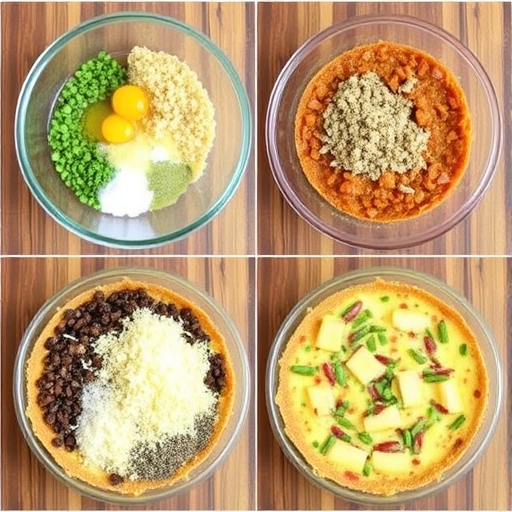
Introduction Hash Brown Quiche Cups are a delightful breakfast or brunch option, combining the crispy texture of hash browns with the creamy richness of quiche filling. These individual servings are perfect for meal prep, family gatherings, or a grab-and-go breakfast. Their versatility allows you to customize the fillings to your preferences, ensuring they’re always a hit.
The concept of combining hash browns and quiche likely stems from a love for hearty breakfasts. Traditionally, quiches are baked in pastry crusts, but swapping the crust for hash browns brings a comforting, gluten-free twist. These cups are a modern solution for busy mornings, providing a wholesome meal in a convenient, portable form.
The Benefits of Making Your Own Hash Brown Quiche Cups
Customizable: Tailor the ingredients to your taste, including vegetarian or meat options.
Healthy: A lighter alternative to traditional pastry crusts, especially if baked with minimal oil.
Portable: Perfect for busy mornings or packed lunches.
Economical: Use everyday pantry ingredients to create an impressive dish.
3 cups shredded hash browns (fresh or frozen, thawed)
2 tablespoons olive oil or melted butter
½ teaspoon salt
¼ teaspoon black pepper
6 large eggs
½ cup milk or cream
1 cup shredded cheese (cheddar, mozzarella, or a mix)
½ cup diced vegetables (bell peppers, onions, spinach, etc.)
¼ cup cooked bacon or sausage, crumbled (optional)
Cultural History of Ingredients
Hash Browns: A staple in American breakfasts since the late 19th century, loved for their crispy texture.
Eggs: Universally celebrated as a symbol of nourishment and versatility.
Cheese: Adds richness and has been a popular quiche ingredient since the French popularized the dish in the 1800s.
Equipment You’ll Need
Muffin tin
Mixing bowls
Whisk
Non-stick spray or liners
Grater (for fresh potatoes or cheese)
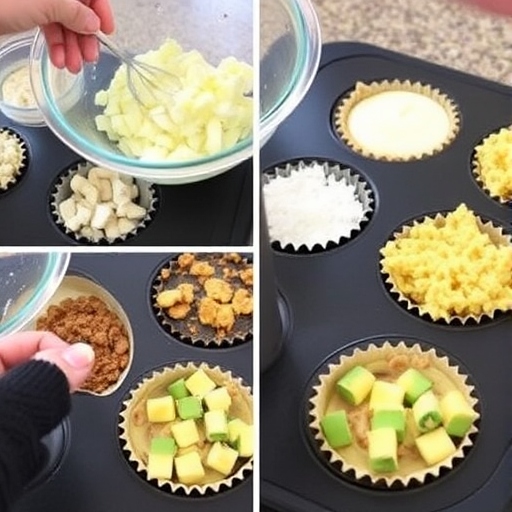
Step-by-Step Instructions for Hash Brown Quiche Cups
Step 1: Prepare the Hash Brown Crust
Preheat your oven to 400°F (200°C).
In a mixing bowl, combine shredded hash browns, olive oil, salt, and pepper.
Press the mixture firmly into the bottom and sides of a greased muffin tin to form a crust.
Step 2: Bake the Crust
Bake the hash brown crusts for 15–20 minutes or until golden and crispy.
Remove from the oven and set aside to cool slightly.
Step 3: Prepare the Filling
In a bowl, whisk together eggs, milk, and a pinch of salt and pepper.
Stir in shredded cheese, diced vegetables, and any optional meat.
Step 4: Assemble the Quiche Cups
Pour the egg mixture into the hash brown crusts, filling each cup about ¾ full.
Top with a sprinkle of cheese or extra vegetables for garnish.
Step 5: Bake
Reduce oven temperature to 375°F (190°C).
Bake the quiche cups for 15–20 minutes or until the eggs are set and slightly golden.
Step 6: Cool and Serve
Allow the cups to cool for 5 minutes before gently removing them from the tin.
Serve warm or store for later use.
Suggestions for Serving and Storing
Serving Ideas:
Pair with fresh fruit or a side salad for a complete meal.
Serve with salsa, avocado, or sour cream for added flavor.
Storage Tips:
Store in an airtight container in the fridge for up to 3 days.
Reheat in the microwave or oven for a fresh-from-the-oven taste.
Chef Simon’s Tips for Hash Brown Quiche Cups
Drain Excess Moisture: If using fresh potatoes, squeeze out as much water as possible for a crispy crust.
Use Pre-Cooked Fillings: To avoid excess liquid, sauté vegetables or pre-cook meats before adding them.
Experiment with Flavors: Try adding herbs like parsley, dill, or chives for a flavor boost.
Emotional and Psychological Impact of Food
Hash Brown Quiche Cups evoke comfort and joy, blending the familiarity of breakfast staples with a creative twist. Preparing them at home can be a bonding activity, offering a sense of accomplishment as you craft a meal that delights everyone at the table.
Mindful Cooking Techniques
Focus on Texture: Ensure the hash browns are evenly crispy for the perfect base.
Be Present: Enjoy the process of layering and creating each quiche cup.
Tips for Keeping the Recipe Fresh Longer
Refrigerate leftovers promptly to retain flavor and texture.
Freeze quiche cups individually for up to 1 month, reheating directly from frozen.
Advanced Culinary Terms and Techniques
Blind Baking: The process of baking the hash brown crust before adding the filling to ensure a crispy base.
Tempering: If adding warm ingredients to the egg mixture, temper them slowly to avoid curdling.
Healthy Ingredient Alternatives
Low-Calorie Option: Use egg whites instead of whole eggs.
Vegetarian: Skip the meat and add more veggies or plant-based proteins.
Dairy-Free: Substitute almond milk and skip the cheese or use dairy-free alternatives.
More Serving Ideas
Add smoked salmon and dill for a sophisticated brunch twist.
Incorporate jalapeños and pepper jack cheese for a spicy version.
Create mini dessert versions using sweet potato crusts and a custard filling.
Common Issues and Solutions
Soggy Crust: Ensure the hash browns are baked until golden before adding the filling.
Runny Filling: Avoid overloading with vegetables that release water during cooking.
Sticking to the Pan: Use a non-stick muffin tin or parchment liners.
Variations to Try
Mediterranean: Feta, olives, and sun-dried tomatoes.
Tex-Mex: Black beans, salsa, and cheddar cheese.
Spinach & Mushroom: Sautéed spinach, mushrooms, and Swiss cheese.
Nutritional Information and Health Benefits
Calories: ~150 per cup (varies with ingredients)
Protein: High in protein, thanks to the eggs and optional meats.
Fiber: Vegetables and hash browns add fiber to this dish.
The Art of Pairing Hash Brown Quiche Cups
With Beverages: Pair with freshly squeezed orange juice or a cup of black coffee.
With Sides: Complement with roasted vegetables or a fruit parfait.
Weather and Recipe Outcome
These quiche cups are versatile, suitable for a warm summer brunch or a cozy winter breakfast. Their portability makes them a year-round favorite.
Other Breakfast Recipes to Explore
Classic French Omelet
Blueberry Pancakes
Sweet Potato Hash
Focus on Tools and Equipment
Muffin Tin: Ensures uniform portions and presentation.
Non-Stick Spray: Helps prevent sticking for easy removal.
Grater: Essential for fresh hash browns and cheese.
Frequently Asked Questions (with answers)
Q: Can I make these ahead of time? A: Yes, they store well in the fridge or freezer, making them perfect for meal prep.
Q: What’s the best way to reheat them? A: Warm them in the oven at 350°F for 10 minutes or microwave for 1–2 minutes.
Q: Can I use frozen hash browns? A: Absolutely! Just thaw and drain them before use to remove excess moisture.
Conclusion
Hash Brown Quiche Cups are a fun, delicious, and practical way to start your day. With their crispy base and customizable filling, they’re bound to become a favorite in your breakfast rotation. Whip up a batch today and enjoy the perfect combination of flavor, nutrition, and convenience!
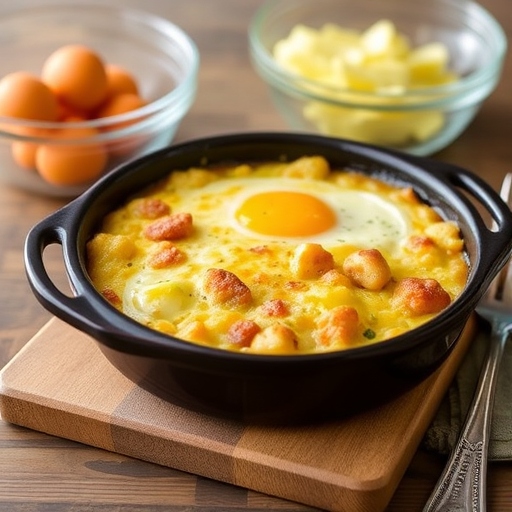
Looking for a hearty and satisfying breakfast that will keep you full for hours? The Amish Breakfast Casserole is a perfect choice. Known for its comforting blend of eggs, sausage, cheese, and potatoes, this dish is both filling and flavorful. It has been a beloved recipe in Amish communities for generations, passed down as a favorite morning meal. Whether you’re preparing it for a family gathering, a special brunch, or just to enjoy a comforting start to your day, this casserole offers warmth and satisfaction with every bite.
Table of Contents
1. The Story Behind Amish Breakfast Casserole
Amish breakfast casserole, like many Amish recipes, is built on the principles of simplicity and using locally sourced, hearty ingredients. The Amish community is known for its love of simple yet satisfying foods, often made with minimal ingredients but maximum flavor. The casserole became a popular breakfast dish because it’s not only easy to make, but also a great way to feed a crowd. It’s typically prepared the night before, allowing for a stress-free morning while you enjoy the aroma of a warm, homemade breakfast.
Making this casserole from scratch allows you to control the quality of ingredients, ensuring that you’re using fresh, wholesome products. This is especially important for those looking to avoid preservatives or processed foods. Additionally, this dish is extremely versatile. You can tailor it to your tastes by adjusting the level of spice, adding vegetables, or swapping out ingredients for healthier alternatives. Plus, homemade casseroles often taste better than store-bought varieties and can be made in larger quantities, making them perfect for family gatherings or meal prep.
To make an authentic Amish breakfast casserole, you’ll need the following ingredients:
Sausage: Breakfast sausage, whether mild or spicy, is the key meat in this dish. You can also use turkey sausage or a plant-based sausage for a healthier or vegetarian alternative.
Eggs: Fresh eggs form the base of the casserole, binding all the ingredients together. The eggs give the casserole its rich, creamy texture.
Potatoes: Hash browns or cubed potatoes are commonly used. They add a satisfying starchy element to the casserole, making it filling and hearty.
Cheese: Cheddar cheese is the traditional choice for this recipe. It melts beautifully, adding richness and flavor. You can also mix it with other cheeses like mozzarella or Monterey Jack for a unique twist.
Onions: A small amount of diced onions adds flavor and depth to the dish. They caramelize slightly during cooking, enhancing the overall taste.
Bell peppers: Adding bell peppers (green, red, or yellow) gives the casserole a bit of sweetness and color, making it visually appealing.
Milk or Cream: Milk is typically used to give the casserole a creamy texture. You can substitute heavy cream for a richer dish or use a dairy-free alternative like almond milk.
Seasonings: Salt, pepper, and garlic powder are essential, though you can add additional spices like paprika or cayenne for a little extra kick.
4. Cultural History of Ingredients
Sausage: Sausage has been a staple in Amish kitchens for generations, often made from pork raised on family farms. In Amish culture, sausage is a common feature in breakfasts and other meals, providing a rich source of protein and flavor.
Eggs: Fresh eggs are abundant in Amish communities, where many families keep their own chickens. Eggs are used in a variety of dishes and are an essential part of a balanced breakfast.
Potatoes: Potatoes are a hardy crop that thrive in colder climates, making them a reliable and accessible ingredient in Amish cooking. Potatoes are used in many dishes, both as a base and as a side.
Cheese: Amish-made cheeses are highly regarded for their quality and flavor. Amish farmers often make their own cheeses, and it is common for families to incorporate this homemade cheese into their casseroles and baked goods.
5. Equipment You’ll Need
To make this Amish breakfast casserole, you’ll need the following tools and equipment:
Large mixing bowl: To combine the ingredients before baking.
Frying pan/skillet: For browning the sausage and sautéing any vegetables like onions and peppers.
9×13-inch casserole dish: The traditional size for this dish. You can use a glass or ceramic dish for even cooking and better presentation.
Wooden spoon or spatula: For stirring the ingredients together.
Grater: If you’re grating your own cheese, a box grater or food processor will make it easier.
Aluminum foil or lid: If you’re preparing the casserole the night before, you’ll need foil or a lid to cover it while it bakes.
6. Step-by-Step Instructions for Amish Breakfast Casserole
Step 1: Preheat your oven to 350°F (175°C). Grease a 9×13-inch casserole dish with butter or non-stick spray.
Step 2: In a large skillet, cook the breakfast sausage over medium heat until browned, breaking it apart into crumbles with a spatula. Drain excess fat if necessary.
Step 3: Add the diced onions and bell peppers to the skillet with the sausage and sauté until softened, about 5-7 minutes. Remove from heat and set aside.
Step 4: In a large mixing bowl, whisk together the eggs, milk, salt, pepper, and garlic powder.
Step 5: Add the frozen hash browns (or cubed potatoes) into the mixing bowl, followed by the cooked sausage and vegetable mixture. Stir to combine.
Step 6: Pour the entire mixture into the prepared casserole dish. Sprinkle the shredded cheddar cheese evenly over the top.
Step 7: Cover the dish with aluminum foil and bake in the preheated oven for 40 minutes.
Step 8: After 40 minutes, remove the foil and continue baking for an additional 15-20 minutes, or until the eggs are fully set and the cheese is melted and bubbly.
Step 9: Remove from the oven and let cool for a few minutes before serving.
7. Suggestions for Serving and Storing
Serve the Amish breakfast casserole with fresh fruit, toast, or a side of bacon or sausage. For a refreshing touch, consider adding a green salad or a simple yogurt parfait on the side.
To store leftovers, allow the casserole to cool completely before refrigerating it in an airtight container. It will keep for 3-4 days in the fridge. You can also freeze portions for up to 3 months. Simply reheat in the microwave or oven before serving.
8. Chef Simon’s Tips for Amish Breakfast Casserole
Make-Ahead Option: This casserole can be assembled the night before. Simply cover it with plastic wrap and refrigerate overnight. In the morning, bake as directed, adding a few extra minutes to the cooking time if needed.
Customize the Vegetables: Feel free to add or swap out vegetables according to your preferences. Mushrooms, spinach, or even tomatoes would be great additions.
Top with Fresh Herbs: Garnish the casserole with freshly chopped herbs like parsley, chives, or cilantro for a burst of color and freshness.
9. Emotional and Psychological Impact of Food
Food has a powerful emotional impact. Meals like the Amish breakfast casserole are more than just sustenance—they are a way to connect with loved ones and create lasting memories. This casserole evokes feelings of comfort and warmth, making it the perfect meal for family gatherings, special occasions, or a lazy weekend breakfast.
10. Mindful Cooking Techniques
When preparing this dish, take your time to focus on each step. Mindful cooking allows you to fully appreciate the ingredients, and it encourages you to enjoy the process rather than rush through it. Engaging all of your senses in the kitchen, from the smell of sizzling sausage to the sight of melted cheese, can make the cooking experience more fulfilling.
11. Tips for Keeping the Recipe Fresh Longer
Freezing: If you’ve made extra, freezing leftovers in individual portions will make for a quick and easy breakfast later.
Refrigeration: Store leftover casserole in an airtight container to prevent it from drying out in the fridge.
12. Advanced Culinary Terms and Techniques
Sautéing: This technique involves cooking food quickly in a small amount of fat over medium-high heat. It’s used here for browning the sausage and softening the vegetables.
Casserole Method: This is a technique where ingredients are layered or mixed together and then baked, often resulting in a dish that’s both hearty and satisfying.
13. Healthy Ingredient Alternatives
For a healthier version of this recipe, use turkey sausage or plant-based sausage, and swap regular potatoes for sweet potatoes. You can also use low-fat cheese or omit cheese altogether for a lighter dish.
14. More Serving Ideas
Serve this dish with a side of roasted vegetables or a light salad for a more balanced meal. It also pairs well with a cold glass of freshly squeezed orange juice or a hot cup of coffee.
15. Common Issues and Solutions
Soggy casserole: If your casserole turns out too soggy, it could be because the potatoes released too much moisture. Be sure to thaw frozen hash browns thoroughly or pat them dry before adding them to the dish.
16. Variations to Try
Southwest-style casserole: Add black beans, corn, and diced tomatoes for a Southwestern twist.
Vegetarian Option: Replace the sausage with sautéed mushrooms, spinach, or other vegetables. You can also use a plant-based sausage substitute to retain the savory flavors without the meat. This will create a lighter and more plant-forward version of the casserole.
Spicy Southwestern Casserole: Add some chopped jalapeños or a sprinkle of chili powder and cumin to the casserole to give it a zesty, spicy kick. You can also top it with a handful of tortilla chips and melted cheese to bring in some Mexican flair.
Bacon Lover’s Casserole: If you’re a fan of bacon, add crumbled cooked bacon in place of or alongside the sausage. The smoky flavor will add a delicious depth to the casserole.
Cheese Lovers: While cheddar is the classic choice, experimenting with different cheeses can elevate the dish. Try adding Monterey Jack, Gouda, or even a blend of cheeses to bring a more complex flavor profile.
17. Nutritional Information and Health Benefits
Amish breakfast casserole is a hearty and calorie-dense dish, but it can be adapted for a healthier approach depending on your ingredient choices. Here’s a breakdown of some common ingredients and their nutritional benefits:
Eggs: A great source of protein, vitamins A, B12, and D, eggs are an essential ingredient in this casserole. They also provide healthy fats, particularly in the yolk, and help bind the casserole together.
Sausage: While sausage is high in protein, it’s also rich in fat and sodium. For a healthier alternative, use lean turkey sausage or a plant-based option.
Potatoes: Potatoes are an excellent source of carbohydrates and potassium. They provide a feeling of fullness and are an important source of energy, especially in the morning.
Cheese: Cheese is high in calcium, protein, and fat. It adds creaminess to the dish, but it can be replaced with a lower-fat version to reduce calories while still providing flavor.
Vegetables: Bell peppers, onions, and other veggies in the casserole contribute essential vitamins and fiber. These vegetables also add color and texture, making the casserole not only more nutritious but also visually appealing.
18. The Art of Pairing Amish Breakfast Casserole
Pairing this casserole with the right foods can enhance the overall dining experience. Here are some ideas:
Fresh Fruits: Serve the casserole with fresh fruit to add a refreshing contrast to the rich and hearty dish. Consider seasonal fruits like oranges, strawberries, or a mixed fruit salad.
Toast or Biscuits: A slice of buttered toast or warm homemade biscuits complements the casserole perfectly. It helps balance the richness with something light and airy.
Beverages: Pair your breakfast casserole with a hot beverage such as freshly brewed coffee, a cappuccino, or hot tea. If you prefer something cold, a glass of orange juice or iced tea will also work well.
Salads: For a more substantial meal, pair it with a light green salad, such as a spinach salad with a vinaigrette dressing. The acidity from the dressing will help balance the richness of the casserole.
19. Weather and Recipe Outcome
The weather can affect the preparation of any recipe, and the Amish Breakfast Casserole is no exception. Here’s how:
Cold Weather: During chilly mornings, the warm and hearty casserole can be the perfect breakfast to help you start the day on a comforting note. It’s also a great dish to serve when hosting a winter brunch, as it’s sure to keep everyone full and satisfied.
Hot Weather: While this casserole is typically more suitable for cold weather, it can still be enjoyed during the warmer months. Just ensure it’s served at room temperature or slightly chilled, and consider adding a refreshing salad on the side to balance the richness.
20. Other Breakfast Recipes to Explore
If you love the Amish Breakfast Casserole, here are a few other breakfast recipes to try:
Breakfast Burritos: A quick and customizable breakfast filled with scrambled eggs, sausage, cheese, and your favorite toppings, all wrapped in a soft tortilla.
Shakshuka: A Middle Eastern dish consisting of poached eggs in a flavorful tomato sauce, often served with crusty bread for dipping.
Vegetarian Breakfast Tacos: Scrambled eggs with avocado, salsa, and a sprinkle of cheese, all wrapped up in a soft tortilla.
Classic Pancakes: A staple breakfast choice made from scratch, these pancakes are light, fluffy, and perfect with syrup or fresh berries.
Egg and Cheese Muffins: A simple yet tasty recipe where eggs and cheese are baked inside a muffin cup, making for a portable, easy-to-eat breakfast.
21. Focus on Tools and Equipment
When making Amish Breakfast Casserole, using the right tools and equipment ensures that the dish turns out perfectly every time. Here’s a rundown of the most important items:
Skillet: A heavy-bottomed skillet is ideal for cooking the sausage and vegetables. A cast-iron skillet works wonderfully, as it evenly distributes heat and helps develop a rich flavor in the ingredients.
Mixing Bowl: A large mixing bowl is needed to combine all of the casserole ingredients. A glass or stainless steel bowl will prevent any reaction with the acidic ingredients (like tomatoes or vinegar) in the dish.
Casserole Dish: A 9×13-inch baking dish is standard for this recipe. Choose a high-quality glass or ceramic dish for even cooking and better presentation.
Grater: Grating your own cheese can make a big difference in the flavor and texture of the dish. A box grater or food processor can make this task easier.
Oven Thermometer: If you’re unsure whether your oven’s temperature is accurate, an oven thermometer can help you ensure your casserole bakes at the right temperature for optimal results.
22. Frequently Asked Questions (with Answers)
Q: Can I use frozen hash browns instead of fresh potatoes? A: Yes, frozen hash browns work perfectly in this recipe. Just make sure to thaw them completely and drain any excess moisture before adding them to the casserole.
Q: Can I make this casserole ahead of time? A: Absolutely! You can assemble the casserole the night before, cover it with plastic wrap, and refrigerate it overnight. In the morning, just pop it in the oven and bake as directed.
Q: Can I use a different type of cheese? A: Yes, feel free to experiment with other types of cheese, such as Monterey Jack, mozzarella, or Gouda. Mixing different cheeses can add a unique flavor to the casserole.
Q: How do I store leftovers? A: Leftovers should be stored in an airtight container in the refrigerator for up to 3-4 days. You can also freeze the casserole for longer storage. Just portion it out and wrap it tightly in plastic wrap or aluminum foil before freezing.
Q: Can I make this casserole vegetarian? A: Yes, simply substitute the sausage with vegetables like mushrooms, spinach, or bell peppers, or use a plant-based sausage substitute for a vegetarian version.
Conclusion
The Amish Breakfast Casserole is a timeless dish that offers comfort, flavor, and versatility. Whether you’re preparing it for a busy weekday breakfast or a special weekend brunch, this casserole is sure to please a crowd. With its rich combination of eggs, sausage, cheese, and potatoes, it’s the kind of dish that satisfies both the body and the soul. Plus, with its many variations and make-ahead options, it’s a recipe that you can adapt to your own tastes and needs. Don’t forget to share it with family and friends to create lasting memories over a delicious meal.
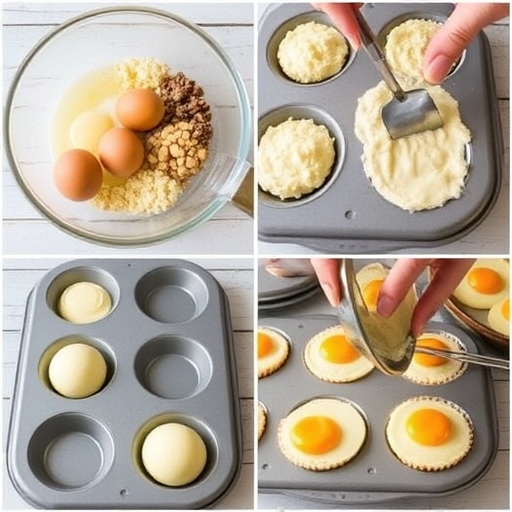
Introduction Egg muffins are a versatile and convenient breakfast or snack option that’s packed with protein and flavor. Perfect for busy mornings, these little handheld delights can be customized to suit your taste preferences. Whether you’re in the mood for a savory option with veggies, cheese, or even a touch of bacon, or you want to keep things lighter and more vegetable-focused, egg muffins offer endless possibilities. They are simple to prepare, easy to store, and can even be reheated, making them an ideal choice for meal prepping. This recipe provides a detailed guide to creating the best egg muffins at home, ensuring they turn out perfectly every time.
Table of Contents
1. The Story Behind Egg Muffins
Egg muffins may not have a deep-rooted historical tale like some dishes, but they have quickly become a modern breakfast favorite. They gained popularity with the rise of meal prep culture, where people started making them in batches to simplify their mornings. These muffins were embraced because of their balance of protein, vegetables, and convenience, offering an easy, healthy alternative to traditional fast breakfasts. The bite-sized nature of egg muffins makes them ideal for on-the-go consumption, and they fit seamlessly into many popular eating trends like keto, paleo, and low-carb diets. Their adaptability to various flavors and ingredients ensures they remain a timeless choice in kitchens around the world.
2. The Benefits of Making Your Own Egg Muffins
Making your own egg muffins at home comes with several key benefits:
Control Over Ingredients: When you make your own egg muffins, you have full control over what goes into them. You can choose organic, fresh, and high-quality ingredients to ensure a healthier outcome.
Customization: Whether you prefer them loaded with veggies, packed with cheese, or topped with a sprinkle of herbs, homemade egg muffins can be tailored to suit your taste and dietary restrictions.
Batch Cooking for Convenience: Preparing a batch of egg muffins at once means you can have a week’s worth of breakfasts or snacks ready to go. They’re easy to store, and you can even freeze them for later use, making your busy mornings a breeze.
Healthier Option: When you make egg muffins at home, you avoid the preservatives and excess sodium often found in store-bought varieties. Plus, you can add nutrient-dense ingredients like spinach, tomatoes, and lean meats to boost the health factor.
3. Essential Ingredients for the Perfect Egg Muffins
To make delicious egg muffins, you’ll need the following ingredients:
Eggs: The base of the muffin, providing the protein and richness that holds everything together.
Milk or Cream: To add a creamy texture and fluffiness to the eggs. Use full-fat cream for a richer flavor or opt for almond milk or oat milk for a dairy-free version.
Cheese: Grated cheese, such as cheddar, mozzarella, or feta, adds flavor and creaminess. Choose your favorite or mix different cheeses for more depth.
Vegetables: You can add finely chopped vegetables like spinach, bell peppers, onions, mushrooms, or tomatoes for extra flavor and nutrition.
Meat: If you want to add a bit more protein, you can include cooked bacon, sausage, or ham. Make sure to chop them into small pieces for even distribution.
Herbs and Spices: Fresh or dried herbs like parsley, basil, or thyme can elevate the flavor. You may also want to add salt, pepper, garlic powder, or onion powder to taste.
4. Cultural History of Ingredients
The core ingredients for egg muffins are simple but have deep cultural roots:
Eggs: Eggs have been a staple in many cultures for centuries. They are a symbol of fertility and rebirth in various cultures, often appearing in religious and festive traditions.
Cheese: Cheese is a product that dates back thousands of years, with evidence of its production in ancient Mesopotamia and Egypt. Over time, different cultures around the world have developed a wide variety of cheeses, each with its own distinct flavor and texture.
Vegetables: Vegetables like spinach, peppers, and onions have been central to human diets for millennia. They were originally cultivated in ancient civilizations like Egypt and Greece, and they’ve remained integral to dishes across cultures ever since.
Meats: Bacon, sausage, and ham have been part of many traditional cuisines, especially in European and American cooking. These meats were originally preserved through methods like curing and smoking, which also imparted unique flavors.
5. Equipment You’ll Need
Here’s what you’ll need to make your egg muffins:
Muffin Tin: A standard 12-cup muffin tin is perfect for making egg muffins. You can also use mini muffin tins for smaller portions.
Mixing Bowls: To whisk the eggs and combine your ingredients.
Whisk or Fork: To whisk the eggs and ensure they are light and fluffy.
Measuring Cups and Spoons: To measure out your ingredients precisely.
Non-Stick Cooking Spray or Muffin Liners: To prevent sticking and make cleanup easier.
6. Step-by-Step Instructions for Egg Muffins
Making egg muffins is simple and straightforward. Follow these easy steps to get a batch of perfect egg muffins:
Preheat the Oven: Preheat your oven to 350°F (175°C) and spray the muffin tin with non-stick spray or line it with muffin liners.
Prepare the Fillings: Chop your vegetables, meats, and herbs. If you’re using bacon or sausage, cook them beforehand and chop into small pieces.
Whisk the Eggs: In a large bowl, crack the eggs and whisk them well. Add milk or cream and whisk again until the mixture is smooth. Season with salt, pepper, and any other spices you like.
Assemble the Muffins: Evenly distribute your chopped veggies, meat, and cheese into the muffin tin cups. Pour the egg mixture over the fillings, filling each cup about ¾ of the way full.
Bake: Place the muffin tin in the oven and bake for 18-20 minutes, or until the egg muffins are set and lightly golden on top.
Cool and Serve: Let the egg muffins cool slightly before removing them from the tin. Serve warm, or store for later.
7. Suggestions for Serving and Storing
Egg muffins can be served as a grab-and-go breakfast, a snack, or even as a lunch side dish. For serving, you can pair them with fresh fruit, a light salad, or even toast.
Storage: Store any leftover egg muffins in an airtight container in the fridge for up to 4 days. Reheat them in the microwave for 30-45 seconds or in the oven at 350°F for about 10 minutes.
Freezing: To freeze, let the muffins cool completely and place them in a freezer-safe bag or container. They can be stored in the freezer for up to 3 months. Reheat in the microwave or oven when ready to eat.
Don’t Overfill: If you fill the muffin tin too high with the egg mixture, the muffins may overflow during baking. Keep the fill level to about ¾ full.
Mix-ins: Be sure to sauté any vegetables that release a lot of moisture (like mushrooms or tomatoes) to avoid sogginess in the egg muffins.
Keep It Fresh: Fresh herbs like parsley or chives can brighten up the flavor of your egg muffins. Add them as a garnish after baking for a burst of color and flavor.
Make Them Extra Fluffy: For extra fluffy egg muffins, add a splash of baking powder to the egg mixture. It will help the muffins rise.
9. Emotional and Psychological Impact of Food
Food, especially something as comforting as egg muffins, has a deep emotional impact. The act of preparing and eating homemade food can evoke feelings of warmth, security, and satisfaction. It’s not just about filling your stomach; it’s about nurturing your body and mind. The customizable nature of egg muffins means that you can make them to suit your personal preferences, whether that’s adding your favorite cheese or including nostalgic flavors from your childhood.
10. Mindful Cooking Techniques
Mindful cooking involves paying attention to every step of the process. Take your time to chop the vegetables carefully, whisk the eggs with intention, and savor the aroma of the muffin tin as they bake. This mindfulness can enhance the overall experience of preparing the meal, helping you feel more connected to your food.
11. Tips for Keeping the Recipe Fresh Longer
To keep egg muffins fresh for several days, store them in an airtight container in the fridge. If freezing, make sure the muffins are fully cooled before freezing to prevent moisture buildup. When reheating, allow the muffins to warm through completely to retain their texture.
12. Advanced Culinary Terms and Techniques
Mise en Place: This French culinary term means “everything in its place.” It refers to the practice of prepping all your ingredients before you start cooking, which is especially useful for recipes like egg muffins.
Sautéing: A technique used for cooking vegetables, meats, and other ingredients in a small amount of fat or oil, often over medium-high heat. This method brings out the natural flavors and adds a depth of flavor to the muffins.
13. Healthy Ingredient Alternatives
If you’re looking to make your egg muffins healthier, consider these alternatives:
Egg Whites: Replace whole eggs with egg whites to reduce cholesterol and fat content. This will still give you a fluffy texture and ample protein, but with fewer calories.
Dairy-Free Milk: Use almond milk, oat milk, or coconut milk instead of regular dairy milk for a lactose-free option. These alternatives can also add subtle flavor to your muffins.
Lean Meats: If you’re adding meat, consider using leaner cuts like turkey sausage or chicken sausage instead of bacon or pork sausage to reduce the fat content.
Vegetable Substitutes: You can add a variety of vegetables to your egg muffins for extra vitamins and nutrients. Try swapping regular cheese for a lower-fat cheese like part-skim mozzarella, or incorporate veggies like kale, zucchini, or cauliflower.
14. More Serving Ideas
Egg muffins can be paired with a variety of side dishes to make a more filling meal. Here are some ideas:
Fresh Fruit: Pair egg muffins with sliced avocado, fresh berries, or citrus fruits like oranges or grapefruit for a light and refreshing contrast.
Toast or Whole-Grain Crackers: A slice of whole-grain toast or crunchy crackers can provide added texture and fiber to your meal.
Smoothies: For a complete breakfast, serve your egg muffins with a nutrient-packed smoothie made with spinach, banana, and almond milk.
Sautéed Greens: Pair your egg muffins with sautéed spinach, kale, or arugula for an extra dose of vitamins and minerals.
15. Common Issues and Solutions
Soggy Muffins: If your muffins turn out too wet, it’s likely due to using too many watery vegetables like tomatoes or spinach. Be sure to sauté these ingredients beforehand to release excess moisture.
Muffins Overflowing: If your egg muffins overflow in the oven, it could be because the egg mixture was too full in each muffin cup. Be sure to fill each cup to about ¾ full to avoid spillage.
Underbaked Muffins: If the muffins are undercooked, bake them for a little longer. You can test for doneness by inserting a toothpick into the center of a muffin. If it comes out clean, they’re ready.
16. Variations to Try
Egg muffins are highly versatile, and you can experiment with different combinations of ingredients. Here are some variations to try:
Mediterranean Egg Muffins: Add feta cheese, olives, spinach, and sun-dried tomatoes for a Mediterranean-inspired muffin.
Tex-Mex Egg Muffins: Add chopped bell peppers, onions, black beans, and a sprinkle of cheddar cheese for a Tex-Mex twist.
Mushroom and Swiss Egg Muffins: Use sautéed mushrooms, Swiss cheese, and fresh herbs for a rich, earthy flavor.
Bacon and Cheddar: A classic combination, add crispy bacon bits and sharp cheddar cheese for a crowd-pleasing muffin.
Vegan Egg Muffins: For a plant-based version, replace eggs with tofu and use dairy-free cheese and veggies for a savory, egg-free muffin.
17. Nutritional Information and Health Benefits
Egg muffins are a highly nutritious breakfast option, especially when made with healthy ingredients. Here’s a general breakdown of the nutritional content for one muffin (based on a standard recipe with eggs, vegetables, and cheese):
Calories: 120-200 (depending on the ingredients used)
Protein: 8-12 grams (mainly from eggs and cheese)
Fat: 8-12 grams (mostly from the eggs and cheese)
Carbohydrates: 3-5 grams (from vegetables and any added ingredients like whole-grain flour)
Fiber: 1-2 grams (mainly from vegetables)
Vitamins and Minerals: Egg muffins are rich in vitamins A, D, and B12, as well as minerals like iron and calcium, especially if you include dairy products and leafy greens.
These muffins are an excellent source of high-quality protein, essential fats, and micronutrients, making them a well-rounded meal that will fuel your day. By including vegetables, you also add a variety of vitamins, minerals, and antioxidants to your diet.
18. The Art of Pairing Egg Muffins
Pairing egg muffins with other foods can enhance the overall meal experience. Here are a few pairing ideas:
Coffee: A rich, bold coffee or espresso pairs wonderfully with the savory flavors of egg muffins, especially if you enjoy them for breakfast.
Fresh Juices: A glass of freshly squeezed orange juice, carrot juice, or a green smoothie complements the lightness of the muffins while providing a refreshing contrast.
Herbal Teas: For a lighter pairing, try a calming herbal tea like chamomile or peppermint to go with your egg muffins.
Cheese Plate: For a more luxurious brunch, serve your egg muffins with a selection of cheeses, such as Brie, cheddar, and goat cheese, along with nuts and fruits.
19. Weather and Recipe Outcome
Egg muffins can be a year-round dish, but the type of ingredients you include may vary depending on the weather:
Warm Weather: In the summer, you might prefer lighter, fresher ingredients like tomatoes, spinach, or zucchini. These vegetables are abundant during warm months and can make your muffins feel light and refreshing.
Cold Weather: In the colder months, you might prefer heartier ingredients like sausage, bacon, and roasted potatoes. These ingredients provide a warming comfort during chilly mornings and pair well with a cup of hot coffee.
20. Other Egg Recipes to Explore
If you love egg muffins, here are some other delicious egg-based recipes to explore:
Frittata: A versatile Italian dish similar to an omelet, frittata is made with eggs, vegetables, cheese, and meat, all cooked together in a single pan.
Egg Salad: A classic lunch or sandwich filling made with boiled eggs, mayonnaise, mustard, and a variety of seasonings and vegetables.
Shakshuka: A Middle Eastern dish of poached eggs in a flavorful tomato, pepper, and onion sauce. It’s often spiced with cumin, paprika, and chili.
Omelette: A classic breakfast dish made by whisking eggs and filling them with a variety of ingredients such as cheese, herbs, and vegetables.
21. Focus on Tools and Equipment
To make your egg muffins, here are some essential tools:
Muffin Tin: A non-stick muffin tin ensures your muffins pop out easily without sticking. You can also use silicone muffin pans for even easier removal.
Mixing Bowl: A large bowl to whisk the eggs and combine all the ingredients.
Whisk or Fork: To properly whisk the eggs and get a smooth, airy texture.
Measuring Spoons and Cups: Accurate measurements are important for ensuring the right balance of ingredients.
Spatula or Spoon: For filling the muffin tin evenly and scraping the sides of the mixing bowl.
22. Frequently Asked Questions (with Answers)
Q1: Can I make egg muffins without cheese? Yes! Egg muffins can easily be made without cheese. You can substitute it with extra vegetables or herbs for flavor, or add a little more seasoning to compensate for the missing cheese.
Q2: Can I make egg muffins in advance? Absolutely! Egg muffins can be prepared ahead of time. You can store them in the fridge for up to 4 days or freeze them for up to 3 months. Simply reheat them when you’re ready to enjoy.
Q3: How do I prevent egg muffins from sticking to the pan? Make sure to grease your muffin tin well with non-stick spray or use muffin liners to prevent sticking. Silicone muffin pans are another great option for easy removal.
Q4: Can I use egg substitutes for egg muffins? Yes, you can use egg substitutes like tofu or flaxseed meal for a vegan version. Just be sure to adjust the quantities accordingly, as these substitutes may behave differently than eggs.
Conclusion
Egg muffins are a nutritious, customizable, and convenient breakfast or snack option. By following the steps outlined here, you can create delicious muffins that are packed with flavor and nutrients. Whether you’re meal prepping for the week, making a quick breakfast on the go, or looking for a tasty snack, egg muffins are a versatile and satisfying choice. With endless variations and the ability to tailor them to your taste preferences, these egg muffins are sure to become a staple in your kitchen.