When it comes to trendy wellness hacks, the pink salt trick recipe has taken the internet by storm—lighting up TikTok, Pinterest, and wellness blogs with promises of flatter stomachs, better sleep, and fast detox results. But is this just another fleeting fad or a natural remedy with staying power?
In this article, we break down the origins, ingredients, benefits, and science behind the viral Himalayan pink salt detox drink. From how to make it correctly to when and why to drink it, this comprehensive guide will help you decide whether this mineral-rich concoction belongs in your daily routine.
Looking for inspiration? Try our Natural Mounjaro 4 Ingredients guide for a powerful combo that pairs perfectly with the pink salt detox.
What Is the Pink Salt Trick Recipe?
Origin and Popularity of the Pink Salt Trick
The pink salt trick isn’t new—it just got a 21st-century makeover. This ancient remedy has long roots in holistic wellness practices, but social media has recently catapulted it into modern fame. Influencers and holistic health bloggers promote the trick as a natural detox drink that can:
- Reduce bloating overnight
- Hydrate at a cellular level
- Balance electrolytes
- Improve digestion and sleep quality
Most of its virality stems from before-and-after videos, where users show flatter stomachs and improved energy after just a few nights. The pink salt trick became particularly popular during the intermittent fasting and “gut health” boom, often promoted as part of a bedtime or morning cleanse.
The simplicity of the method—using common kitchen ingredients—adds to its appeal. You don’t need a supplement subscription or pricey powders. Just salt, lemon, ACV, and water.
Why Pink Himalayan Salt Is Chosen Over Regular Salt
The key ingredient in this detox drink is Himalayan pink salt, not your everyday table salt. But why?
Here’s the deal: pink salt is mined from ancient sea beds in the Himalayan mountains and contains over 80 trace minerals, including:
| Mineral | Benefit |
|---|---|
| Magnesium | Helps with sleep and muscle recovery |
| Potassium | Regulates blood pressure and hydration |
| Calcium | Supports metabolism and bone health |
| Iron | Essential for energy and oxygen transport |
Compared to refined table salt, which is stripped of nutrients and often loaded with anti-caking agents, Himalayan salt is unprocessed and rich in natural minerals. This makes it especially effective in electrolyte rebalancing, which is crucial for hydration, metabolism, and detox.
It’s also gentler on the stomach and supports alkaline balance, making it ideal for morning gut resets or nighttime relaxation routines.
By choosing pink salt over regular salt, you’re essentially giving your body a trace-mineral boost—something many people lack due to processed diets and poor hydration.
Ingredients Breakdown – The 4-Ingredient Pink Salt Trick
The Classic 4 Ingredients and Their Benefits
At the core of the pink salt trick recipe lies a simple combination of four powerful ingredients. This mix isn’t just popular because it’s easy—it’s popular because each ingredient has a specific role in improving hydration, digestion, and metabolism.
Here’s a breakdown of what goes into the 4-ingredient pink salt drink and why it matters:
- Himalayan Pink Salt
- Purpose: Supplies over 80 trace minerals, including magnesium, calcium, and potassium
- Benefit: Helps balance electrolytes, reduce water retention, and support hydration
- LSI Keywords: pink salt detox, electrolyte drink homemade
- Fresh Lemon Juice
- Purpose: Rich in vitamin C and citric acid
- Benefit: Stimulates digestion, alkalizes the body, supports liver function
- LSI Keywords: lemon salt water, morning metabolism booster
- Apple Cider Vinegar (with the “Mother”)
- Purpose: Contains acetic acid and probiotics
- Benefit: Supports gut health, stabilizes blood sugar, boosts metabolism
- LSI Keywords: apple cider vinegar detox, fat-burning drink
- Warm Water
- Purpose: Acts as the delivery system for all the above
- Benefit: Enhances absorption, hydrates cells, soothes the digestive tract
- LSI Keywords: detox drink, DIY wellness drink
Together, this drink forms a powerful, low-cost detox elixir that’s easy to add to your routine. Some people refer to it as “sole water,” while others call it the “salt water weight loss trick.”
Here’s a quick visual summary:
| Ingredient | Function | Primary Benefit |
|---|---|---|
| Pink Himalayan Salt | Electrolyte balance | Reduces bloat, boosts hydration |
| Lemon Juice | Natural detox & alkalizer | Improves digestion & vitamin C boost |
| Apple Cider Vinegar | Metabolism enhancer | Curbs appetite, supports fat burning |
| Warm Water | Carrier & absorption aid | Enhances mineral delivery |
Optional Additions and Their Purposes
Want to take your pink salt trick recipe to the next level? These optional ingredients can enhance the benefits or improve the taste:
- Raw Honey: Adds a touch of sweetness and antibacterial properties
- Cayenne Pepper: Stimulates metabolism and fat burning
- Ginger Powder: Offers anti-inflammatory and digestion-boosting effects
- Mint Leaves: Adds flavor and aids in digestion
Many users customize their pink salt drink to match their specific health goals. For example, cayenne is great for morning fat-burning, while honey and ginger are soothing before bed.
Here’s a bonus variation recipe worth trying:
Cayenne-Lemon Pink Salt Water (Fat-Burning Morning Shot)
- 8 oz warm water
- ¼ tsp Himalayan pink salt
- 1 tbsp ACV
- Juice of ½ lemon
- Dash of cayenne pepper
Drink this first thing in the morning and feel your metabolism fire up.
Check out our Prime Biome Gummies review for a great probiotic add-on to this drink—it works synergistically to support digestion and reduce bloating.
Check Out Our Pinterest.
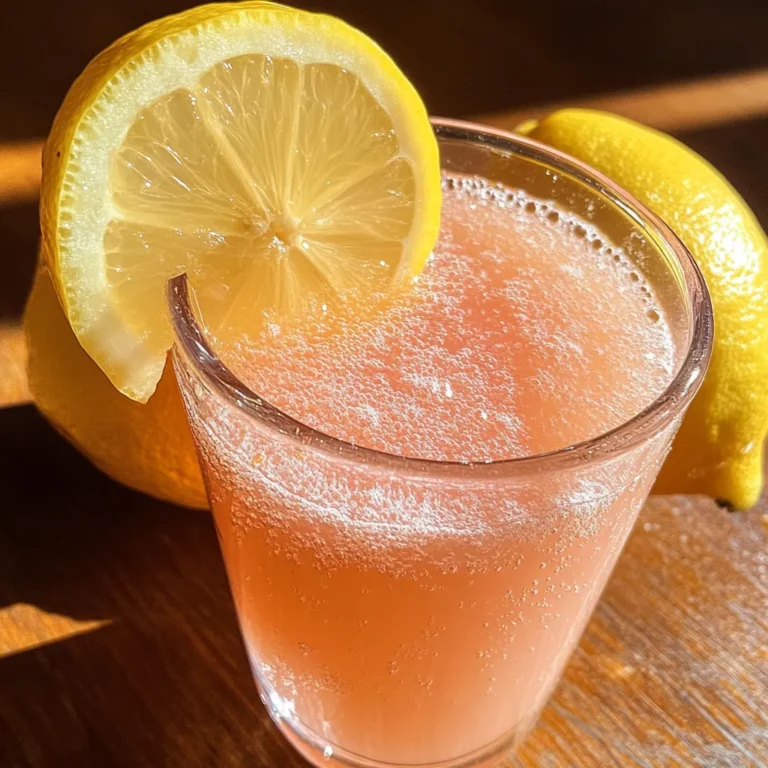
How to Make the Pink Salt Trick Recipe at Home
Step-by-Step Pink Salt Drink Recipe Guide
Now that you know the powerful ingredients behind the pink salt trick recipe, it’s time to learn how to make it the right way. While the formula is simple, the timing, temperature, and mixing all play a role in maximizing the drink’s benefits.
Here’s how to make the classic pink salt detox drink:
Ingredients:
- 8 to 12 oz of warm (not boiling) filtered water
- ¼ to ½ teaspoon of Himalayan pink salt
- Juice of ½ fresh lemon
- 1 tablespoon of raw, unfiltered apple cider vinegar (with the “mother”)
- (Optional) 1 teaspoon of raw honey or dash of cayenne pepper or ginger powder
Instructions:
- Warm your water to just above room temperature—not hot enough to destroy nutrients.
- Add Himalayan salt and stir until completely dissolved.
- Squeeze in fresh lemon juice.
- Add apple cider vinegar and stir again.
- (Optional) Mix in honey or cayenne for flavor and added health perks.
- Drink slowly on an empty stomach, either:
- First thing in the morning (for metabolism and digestion), or
- 30 minutes before bed (to support sleep and overnight hydration)
Pro Tip: Always use a straw when consuming acidic drinks like this. It helps protect your tooth enamel from lemon and vinegar.
Want to pair this with a nourishing snack for better gut support? Don’t miss our How to Make Pistachio Butter guide —a perfect post-detox treat that’s rich in healthy fats and prebiotics.
Tips for Taste, Safety, and Proper Use
✅ For Taste:
- Use organic lemons and raw apple cider vinegar for better flavor and nutritional content.
- Add a tiny bit of raw honey if the taste is too sour or salty.
- Try infusing the water with mint leaves or a cinnamon stick overnight.
⚠️ For Safety:
- Stick to no more than ½ teaspoon of pink salt per drink.
- Limit consumption to once per day. Overdoing it can lead to high sodium intake or digestive discomfort.
- People with high blood pressure, kidney issues, or on certain medications should consult a doctor before use.
📆 Frequency Guide:
| Goal | Ideal Frequency |
|---|---|
| Light daily detox | 3–4x per week |
| Weight loss support | 5x per week |
| Bloating or water retention | After heavy meals or late nights |
| Better sleep | 2–3 nights per week |
This isn’t just about flushing toxins—it’s about building a gentle, sustainable wellness routine. Used wisely, this recipe can support digestion, hydration, metabolism, and even better sleep.
Looking for a full body reset? Check out our Morning Detox Routine for ideas that go hand-in-hand with the pink salt trick.
How Much Pink Himalayan Salt Should You Add?
Dosage Guidelines Based on Body Type
One of the most common questions people ask about the pink salt trick recipe is, “How much pink Himalayan salt should I use?” Getting the amount right is crucial—not just for results, but also for safety.
Here’s a general guideline based on body type and sensitivity:
| Body Weight / Sensitivity | Recommended Pink Salt Dose |
|---|---|
| Under 130 lbs / salt-sensitive | ¼ teaspoon |
| 130–180 lbs | ¼–½ teaspoon |
| Over 180 lbs / active lifestyle | ½ teaspoon |
Important: Never exceed ½ tsp per 8–12 oz of water per serving. While Himalayan pink salt is rich in minerals, it still contains sodium, and excess intake may stress the kidneys or raise blood pressure.
Pro Tip: If you’re just starting, stick with ¼ teaspoon, especially if you’re drinking this in the evening.
Morning vs. Night Consumption: What Works Best
There’s a lot of debate around when to drink the pink salt mix. Should it be in the morning to jumpstart your system or at night for rest and recovery?
Let’s break it down:
🕓 Morning Use (5:30 AM – 8:00 AM)
Best For:
- Boosting metabolism
- Rehydrating after sleep
- Supporting intermittent fasting
Why it works: After hours without fluids, your body is naturally dehydrated. A warm pink salt drink replenishes electrolytes and kickstarts digestion without spiking blood sugar.
Stack it with: Natural Mounjaro 4 Ingredients for even more blood sugar and metabolism support.
🌙 Night Use (30 min before bed)
Best For:
- Promoting deep sleep
- Relaxing the nervous system
- Reducing cortisol (stress hormone)
Why it works: Magnesium and sodium in pink salt support the adrenal glands and may help stabilize overnight hydration. This can reduce midnight cortisol spikes that disrupt sleep and slow down fat-burning.
Stack it with: A low-sugar, calming routine—like herbal tea or gentle stretching.
| Time of Day | Primary Benefit | Recommended Use |
|---|---|---|
| Morning | Rehydration & metabolism boost | Empty stomach, 7 AM |
| Night | Sleep & cortisol regulation | 30 min before bed, 9 PM |
Want to make your bedtime routine more effective? Discover great ideas like our Prime Biome Gummies review to complement the drink with gut-healing support while you sleep.
Cautionary Note:
Always listen to your body. If you feel dizzy, overly thirsty, or bloated after drinking the pink salt solution, cut back your dosage or stop completely. Detox should support you, not stress your system.
What Drinking Pink Salt Does to Your Body
Electrolyte Rebalancing and Hydration Effects
When you drink a properly mixed pink salt trick recipe, the first thing your body benefits from is electrolyte balance. Unlike plain water, which hydrates but doesn’t replace minerals, this pink salt mix delivers a quick dose of natural electrolytes:
- Sodium helps your cells absorb water more efficiently
- Potassium balances fluids and reduces water retention
- Magnesium supports nerve function and muscle relaxation
This combination is especially useful after sleep, during fasting, or after a high-sodium meal when your electrolyte levels may be off. The result? You feel less bloated, less foggy, and more refreshed.
| Mineral in Pink Salt | Function | Wellness Benefit |
|---|---|---|
| Magnesium | Nerve & muscle function | Better sleep, reduced anxiety |
| Potassium | Fluid balance, metabolism | Reduced puffiness, steady energy |
| Calcium | Bone & metabolic health | Supports digestion & fat burn |
| Iron | Oxygen transport | Combats fatigue, improves focus |
Discover great ideas like our Natural Mounjaro 4 Ingredients guide to stack with your pink salt drink for blood sugar and metabolism support.
Gut Health, Digestion, and Detox Impacts
Let’s get real: digestion plays a massive role in how you feel, look, and perform every day. That’s where the pink salt detox drink steps in.
Each ingredient is designed to help your gut work smarter, not harder:
- Pink salt can gently stimulate the gut lining, helping trigger more efficient digestion.
- Lemon juice increases stomach acid and encourages bile production, which improves the breakdown of food.
- Apple cider vinegar introduces acetic acid and natural probiotics, promoting a balanced microbiome and easing constipation.
Together, these benefits help to:
- Reduce bloating
- Support regular bowel movements
- Clear out mild toxins and undigested waste
- Improve nutrient absorption
This is why many people say they feel “lighter,” “less puffy,” and “more regular” within just a few days of starting the drink.
Looking for a clean snack that supports digestion too? Don’t miss our How to Make Pistachio Butter guide — rich in prebiotics and healthy fats.
Extra Benefits Reported by Real Users
You’ll often see pink salt drinkers report benefits beyond digestion and hydration. These include:
- Increased energy (from better hydration and mineral intake)
- Sharper focus (electrolytes support brain function)
- Improved sleep (thanks to magnesium and sodium balance)
- Fewer cravings (especially late-night sugar cravings)
Many also claim to feel more in control of their health routines—because this drink gives noticeable results without complicated dieting or expensive supplements.
But let’s be clear: this isn’t magic. It’s a support tool, not a miracle fix.
Caution: Overuse or incorrect ratios of pink salt and acidic ingredients (like lemon or vinegar) can cause:
- Stomach irritation
- Dehydration
- Kidney strain
That’s why following proper preparation and limiting to once daily is essential.
Check out our Prime Biome Gummies review for a gut-healing partner to pair with your salt routine—especially if you struggle with regularity or skin issues.
Is the Pink Salt Trick Good for Weight Loss?
Scientific Claims vs. Real-World Results
Let’s get one thing straight: the pink salt trick recipe is not a magic fat-burning potion. But that doesn’t mean it’s useless in a weight loss journey.
Instead of promising instant fat loss, this trick works by supporting the systems that make sustainable weight control possible—namely digestion, hydration, metabolism, and cravings management.
Here’s how the ingredients may contribute to a fat-burning environment in your body:
- Apple cider vinegar has been shown in small studies to support fat oxidation, regulate blood sugar, and help you feel fuller for longer.
- Lemon juice may improve bile flow and digestion, helping your body better absorb fat-soluble nutrients and remove waste.
- Pink Himalayan salt improves hydration and electrolyte balance, which is essential for cellular energy production and reducing water retention.
- Warm water kickstarts your digestion in the morning and may help flush out waste before you eat.
Result? A lighter, less bloated feeling—and more metabolic support when paired with proper nutrition.
Here’s a look at the science:
| Ingredient | Weight Loss Support | Research/Effect |
|---|---|---|
| ACV (Acetic Acid) | Reduces blood sugar & appetite | Linked to modest fat loss in 12+ weeks |
| Pink Salt | Improves hydration, reduces water weight | Electrolytes may enhance energy & output |
| Lemon | Boosts liver detox & gut motility | Improves digestion efficiency |
| Cayenne (Optional) | Thermogenic (increases body temp) | Helps stimulate fat-burning response |
Bottom line: The pink salt trick to lose weight works best as a support tool, not a substitute for calorie control or exercise.
How It Supports Bloating, Water Retention & Metabolism
Many of the “overnight results” people report from the pink salt drink are actually due to reductions in bloating and water retention—not immediate fat loss.
That said, these benefits are still important. Why?
- Less water retention = a visibly flatter stomach
- Improved digestion = more regular bowel movements, less bloating
- Balanced minerals = fewer cravings and mood swings
- Better hydration = enhanced metabolism
The pink salt trick may also help reduce cortisol spikes (especially when consumed before bed), which is important because elevated cortisol has been linked to increased belly fat.
Here’s a sample user timeline:
| Timeframe | Common User Experience |
|---|---|
| 1–3 days | Reduced bloating, more regular digestion |
| 4–7 days | Flatter midsection, better sleep |
| 2–3 weeks | Slight fat loss (when paired with clean diet) |
| 1 month+ | Increased energy, consistent morning routine |
Looking for a natural way to further regulate blood sugar and reduce cravings? Don’t miss our Natural Mounjaro 4 Ingredients guide—an ideal combo with your salt drink for metabolic health.
Important Reminder:
- This trick won’t work if you’re eating highly processed or salty foods.
- Avoid using it more than once a day.
- Combine with whole foods, fiber, sleep, and gentle movement for real results.
For a complete reset routine, check out our Morning Detox Routine — it stacks beautifully with your pink salt detox drink to promote real weight management.
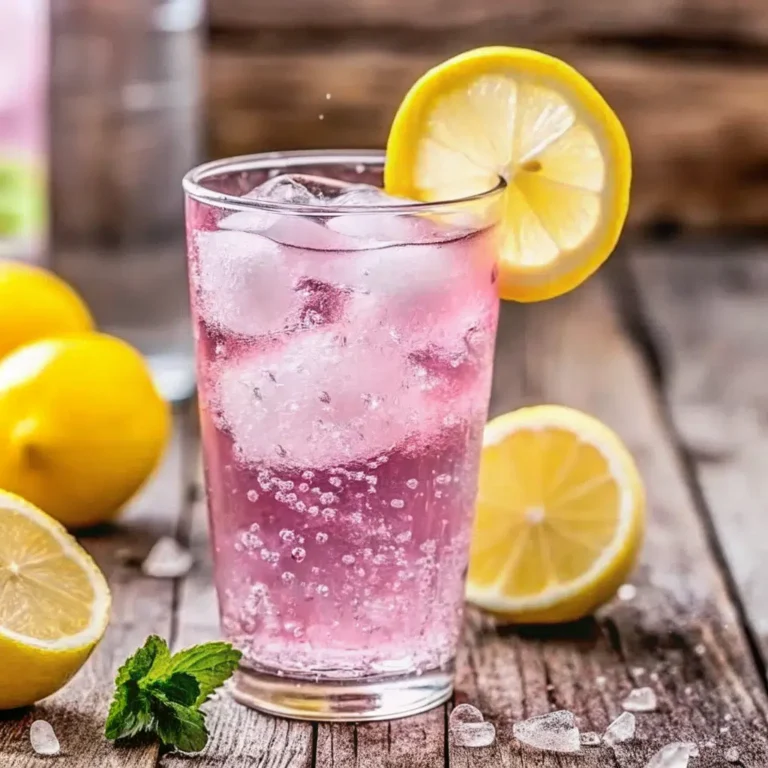
Variations of the Pink Salt Trick Recipe
The Natural Mounjaro 4-Ingredient Version
One of the most buzzed-about variations of the pink salt trick recipe is the Natural Mounjaro 4-Ingredients combo. This version focuses on balancing blood sugar, improving digestion, and reducing cravings—making it especially effective for those looking to support fat loss without crash dieting.
Here’s how this version is made:
Ingredients:
- 1 tbsp apple cider vinegar
- ½ tsp Ceylon cinnamon
- Juice of ½ lemon
- 8 oz warm filtered water
Optional Add-on:
- ¼ tsp pink Himalayan salt (to retain electrolytes and hydration)
Why it works:
- Cinnamon helps regulate insulin and blood sugar
- ACV supports metabolism and gut health
- Lemon boosts digestion and alkalizes the body
- Water activates the ingredients for better absorption
People who use this combo often say it curbs late-night cravings and helps them stay in fat-burning mode longer—especially when paired with intermittent fasting or clean, low-sugar eating.
Check out our Natural Mounjaro 4 Ingredients guide to get the full breakdown and pro tips on how to use this combo for best results.
Lemon-Ginger-Cayenne Variation for Fat Burn
This next variation is the go-to for people looking to increase fat burning and energy levels—especially first thing in the morning.
Ingredients:
- 8 oz warm water
- Juice of ½ lemon
- ¼ tsp pink Himalayan salt
- Dash of cayenne pepper
- ½ tsp ginger powder (or a small slice of fresh ginger)
Why cayenne & ginger?
- Cayenne increases thermogenesis (your body’s calorie-burning process)
- Ginger supports digestion and reduces inflammation
This spicy combo helps stimulate digestive fire, making it a great pre-breakfast detox shot. Many people claim it helps them feel lighter and more focused throughout the day.
Pro Tip: Use a straw to sip this version and rinse your mouth with water afterward to protect your enamel.
Looking for a gut-friendly snack to pair with this fiery detox? Try our Pistachio Butter recipe—it’s rich in healthy fats and prebiotics, making it a great complement to your salt routine.
Taste-Friendly Pink Salt Trick for Beginners
Not a fan of strong vinegar or spice? Here’s a milder version that still delivers benefits:
Ingredients:
- 8 oz warm water
- ¼ tsp pink salt
- ½ lemon (juiced)
- 1 tsp raw honey (optional but great for soothing taste)
Benefits:
- Gentle on the stomach
- Good for first-timers
- Safe for evening use
This version is often used before bed to support deep sleep, hydration, and overnight detoxing—without the acidity or spice of the other formulas.
Don’t miss our Prime Biome Gummies review—a gut-health product that stacks perfectly with the bedtime version of this drink.
Reminder:
Choose the version that fits your goal:
- Morning fat burn → Cayenne & ginger
- Blood sugar & cravings → Natural Mounjaro mix
- Sleep & hydration → Classic with honey
Risks, Side Effects, and Who Should Avoid It
When Too Much Salt Becomes Harmful
Yes, the pink salt trick recipe uses natural ingredients—but natural doesn’t always mean risk-free. Himalayan pink salt, though mineral-rich, is still salt. And like anything else, too much of it can cause trouble.
Here are common side effects from overuse or improper mixing:
| Side Effect | Cause |
|---|---|
| Headaches or dizziness | Electrolyte imbalance or dehydration |
| Bloating or water retention | Too much salt or insufficient water |
| Acid reflux or stomach upset | Overuse of ACV or lemon juice |
| Raised blood pressure | Sodium overload, especially in sensitive individuals |
| Tooth enamel erosion | Long-term exposure to acidic ingredients |
How to avoid this:
- Use no more than ½ teaspoon of pink salt per 12 oz drink
- Drink once daily (morning or night—not both)
- Always rinse your mouth or use a straw if lemon or vinegar is involved
- Use filtered warm water—not cold or boiling
Check out our Morning Detox Routine for safer daily habits to layer with your pink salt routine.
Conditions and Medications That Interact With Salt Detox
The pink salt drink is not suitable for everyone. If you fall into one of these groups, consult your healthcare provider before trying it:
| Who Should Avoid It | Reason |
|---|---|
| People with high blood pressure | Sodium can cause dangerous spikes |
| Those with kidney disease | Salt may stress impaired kidney function |
| Individuals on diuretics or heart meds | Can interfere with fluid balance and electrolyte levels |
| People with GERD or acid reflux | ACV and lemon may irritate the stomach lining |
| Pregnant or nursing women | Mineral shifts may not be suitable for all stages |
| Children under 12 | Electrolyte needs differ and should be professionally managed |
Even healthy individuals should start slow, observe how their body reacts, and adjust accordingly.
Looking for a gut-friendly alternative with zero salt and full benefits? Explore our Prime Biome Gummies review—a great daily probiotic support for those with sensitivities.
Safe Usage Summary: Best Practices
| Tip | Why It Matters |
|---|---|
| Start with ¼ tsp pink salt | Eases body into new mineral intake |
| Use a straw and rinse mouth | Protects enamel from lemon and ACV acidity |
| Drink it slowly on an empty stomach | Aids absorption without shocking your system |
| Limit use to once a day | Prevents electrolyte and sodium overload |
| Take a 1–2 day break weekly | Gives your system time to reset naturally |
Remember, this is a supportive wellness drink, not a long-term treatment or daily cure. Balance and consistency matter far more than quantity.
Real-Life Success Stories and Social Proof
TikTok Trends, Pinterest Pins, and YouTube Testimonials
The pink salt trick recipe didn’t rise to fame because of celebrity endorsements or fancy marketing. It exploded because of results. Regular people began sharing dramatic before-and-after videos, recipe demos, and wellness routines—especially on platforms like TikTok, Instagram, Pinterest, and YouTube.
Here’s what fueled the viral fire:
- TikTok: The “flat belly in the morning” trend made this drink a must-try. Hashtags like
#pinksalttrickand#saltwaterdetoxhave racked up millions of views. - Instagram: Fitness influencers and moms alike posted “what I drink before bed” Reels showing the salt drink as part of a clean evening ritual.
- Pinterest: Search volumes for “pink salt detox water” and “how to make pink salt water for weight loss” have surged, with pins linking to DIY recipes and weight loss boards.
- YouTube: Wellness vloggers post multi-week challenges showing their results and giving honest reviews of the drink’s effects on sleep, skin, bloating, and energy.
This viral attention created a powerful cycle: more visibility, more users, more testimonials.
Looking for real-life recipes that fit your detox lifestyle? Don’t miss our How to Make Pistachio Butter guide—a perfect, prebiotic-rich spread to support your gut and energy post-detox.
Summary of Most Reported User Results
Let’s be clear: the pink salt trick doesn’t work the same for everyone. But consistent user feedback shows several recurring benefits after just a few uses.
| Timeframe | Reported Benefit |
|---|---|
| First 1–3 Days | Reduced bloating, improved regularity |
| 1 Week | Flatter stomach, better digestion |
| 2–3 Weeks | Less water retention, improved sleep quality |
| 1 Month+ | More energy, fewer cravings, better skin tone |
Here are actual user statements pulled from testimonials:
- “I woke up less puffy after the first night!”
- “By day 3, I was using the bathroom regularly without coffee.”
- “Didn’t expect my skin to clear up, but it did.”
- “I sleep better now—I used to wake up tired and bloated.”
Check out our Prime Biome Gummies review to see how users are pairing probiotics with the pink salt drink for even deeper gut and skin results.
Why It Keeps Going Viral
It’s not just the physical effects that keep the pink salt trick trending. It’s the simplicity and shareability:
- Low barrier to entry: 4 kitchen ingredients, 2 minutes of prep.
- Visual impact: People love sharing “morning after” selfies and belly updates.
- Belonging: Doing the trick makes users feel part of a bigger wellness movement.
- Immediate wins: Feeling less bloated or more regular after 2 days encourages consistency.
This drink has become more than a detox—it’s a ritual, a lifestyle anchor, and a confidence booster for thousands of people.
FAQs
What is the 4 ingredient pink salt trick?
What is the 4 ingredient pink salt trick?
The 4 ingredient pink salt trick is a simple detox drink made from:
Pink Himalayan salt
Lemon juice
Apple cider vinegar
Warm water
This combo is designed to hydrate your body, balance electrolytes, and support digestion. Many people drink it in the morning to reduce bloating or before bed to promote deep sleep and overnight detoxification.
How much pink Himalayan salt do I add to a glass of water?
Start with ¼ teaspoon of pink Himalayan salt per 8–12 oz of warm water. If you’re over 180 pounds or more active, you can go up to ½ teaspoon, but never exceed that. Too much salt—even natural pink salt—can lead to dehydration, high blood pressure, or stomach discomfort.
What does drinking pink salt do to your body?
Drinking pink salt mixed with water can:
Replenish electrolytes
Improve hydration at the cellular level
Stimulate digestion
Support muscle and nerve function
Enhance sleep by calming your nervous system
It’s not a miracle cure, but when used properly, it can help you feel lighter, more regular, and more energized.
What are the ingredients in the salt trick?
The classic pink salt trick recipe includes:
¼–½ tsp Himalayan pink salt
Juice of ½ lemon
1 tbsp apple cider vinegar
8–12 oz warm filtered water
Optional boosters: cayenne pepper (for metabolism), raw honey (for taste), or ginger powder (for anti-inflammatory effects).
What’s the pink salt trick to lose weight?
The pink salt trick supports weight loss indirectly. It may help:
Reduce bloating and water retention
Improve digestion and regularity
Curb sugar cravings
Support better sleep and hormone balance
While it won’t melt fat on its own, it helps create the right conditions in your body for sustainable fat loss—especially when paired with clean eating and light exercise.
What are the three ingredients to lose weight?
If you’re simplifying the drink, the three most important ingredients for weight support are:
Apple cider vinegar – supports fat oxidation and gut health
Lemon juice – boosts digestion and liver detox
Pink Himalayan salt – restores minerals and reduces water weight
Together, they hydrate, reduce puffiness, and improve gut function—all crucial for losing fat over time.
Looking for a smarter way to lose fat without extreme diets? Learn more about our Natural Mounjaro 4 Ingredients guide—a blood-sugar-friendly pairing to the salt trick.
Conclusion: Should You Try the Pink Salt Trick Recipe?
The pink salt trick recipe may have started as a viral trend—but behind the social media buzz lies a wellness ritual rooted in science and simplicity. With just a few kitchen ingredients, you can support your body’s natural processes for:
- Hydration
- Digestion
- Electrolyte balance
- Sleep support
- Weight management
It’s not a miracle drink. But when used 3–5 times per week as part of a clean routine, it can help you feel lighter, clearer, and more in control of your health.
So who should try it?
✅ If you struggle with bloating, irregular digestion, poor sleep, or sugar cravings…
✅ If you want a natural detox habit that actually fits your lifestyle…
✅ If you prefer simple, low-cost solutions over pricey supplements…
Then the pink salt trick is definitely worth trying.
Just remember:
- Use no more than ½ tsp salt per serving
- Don’t overdo it—once daily is enough
- Stack it with good sleep, real food, and hydration
Looking for long-term gut support to enhance this routine? Don’t miss our Prime Biome Gummies review—a gentle, gut-friendly add-on that many users pair with this drink for improved results.